extraction: keeping strands of hair while getting rid of the background (original) (raw)
I found some time for another little tutorial.
In this one, we’ll learn how to get rid of a background without losing stray strands of hair. You might find this useful if you’re making icons or graphics with curly-haired people, or when people have wind-blown hair.
Note #1: This tutorial is for Photoshop CS. I don’t know if earlier versions provide the required features. Nor do I know if this tutorial is translatable.
I’m very sorry.
Note #2: those who are comfortable with keyboard shortcuts will find them in the round brackets.
[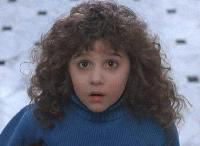 ] I chose Curly Sue, though I have to admit this image isn’t quite adequate. It’s very small and the quality is not all too good. It works all the same, though.
Open your image in Photoshop. If your image is indexed, you’ll have to convert it to RGB color first, so you can manipulate it: image – mode – RGB color.
Your image should now be a regular background image. Now you can duplicate your base. Select the layer you’d like to duplicate [in this case, your background], then: layer – new – layer via copy (ctrl + j)
Deselect your background image/base and make it invisible by clicking on this icon [ ], select your copied layer, then go to filter – extract (alt + ctrl + x)
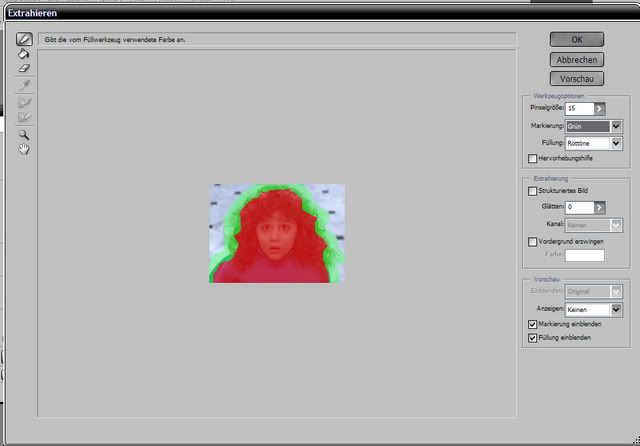
A new window should open.
Now. By default a highlighting-tool should already be selected. You’ll see a list of tools on the left-hand side of the window. On the right-hand side, you’ll be able to adjust the settings of your tools.
The bigger the person in your image is, the bigger the size of your tool ought to be. The colors you choose for your marking and filling tools don’t really matter.
For this example I chose a marking-tool size between 7 and 15.
What you should do now is select the marking-tool - the one all the way at the top left - choose a size and color, and then carefully mark the wispy hair. Continue to mark until you have a frame drawn all around the person in your image.
Note: When you select, be careful to select only as much as is absolutely necessary! Try not to select too much clothing and hair that isn’t wispy. If you do, you might extract more than you actually want to, and you’ll end up with a semi-translucent shoulder or face… or head.
Once you’ve got everything outlined, select the fill-out-tool (g) – the one that looks like a bucket – and fill out the parts you have just outlined. If you’d like to make sure everything is properly selected, you can press the preview button.
[ ]
]
If you’re certain everything is as close to the result you intend to get, press enter or ok.
The complete background of your image should now be entirely gone.
Maybe, despite the fact that you were careful, some parts of your image could be transparent.
To fix this, you can either undo the exclusion for some parts of you image with the history tool (y), with which you recreate the images you’d like recreated (then erasing the parts that appeared which you didn’t want to appear), or you can make your background image visible again [] and erase everything except those parts that were extracted in your top layer.
If you do things that way, you can simply merge your layers together: layer – merge visible (ctrl + shift + e) and consider your new image as good as done.
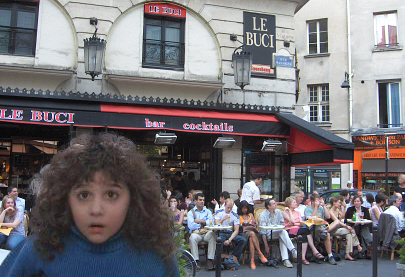
Choose a new background and drag your image on top of that by dragging it there [select it from your layer window at the bottom right of your screen, hold, and drag] or by selecting your layer (ctrl + a), cutting it from the canvas (ctrl + x) and inserting it into a new canvas (ctrl + v).
I dumped Curly Sue into the streets of Paris.
[ ]
]
Edited after a comment by  bucue in
  icon_tutorial
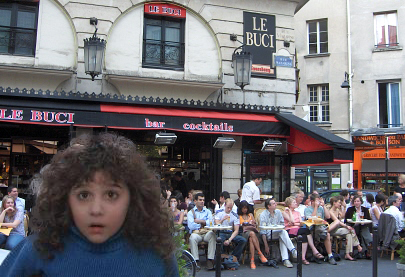
It can happen that the new layer looks quite fake on the new background. It could help to adjust the layer [after merging them together].
In order to do so, go to image – adjust – levels (ctrl + l).
Here, you can either play with the settings till the colors are so that you like them, or you can hit “auto” and then click ok or hit enter.
In my case, the before-and-after effect is quite minimal. This can vary in degree, depending on the images you chose.
[ ]
]
I hope you find this tutorial helpful.
Should some things be unclear, please feel free to ask questions.
I’d be happy to see your results and to know what you think.
Thanks for watching and have fun!
Check out my last post if you’d like to submit a tutorial-request.