Planet Python (original) (raw)

Last update: May 09, 2025 04:42 PM UTC

May 09, 2025


Real Python

The Real Python Podcast – Episode #248: Experiments With Gen AI, Knowledge Graphs, Workflows, and Python

Are you looking for some projects where you can practice your Python skills? Would you like to experiment with building a generative AI app or an automated knowledge graph sentiment analysis tool? This week on the show, we speak with Raymond Camden about his journey into Python, his work in developer relations, and the Python projects featured on his blog.


[ Improve Your Python With 🐍 Python Tricks 💌 – Get a short & sweet Python Trick delivered to your inbox every couple of days. >> Click here to learn more and see examples ]

May 09, 2025 12:00 PM UTC


Daniel Roy Greenfeld

Exploring flexicache

An exploration of using flexicache for caching in Python.

May 09, 2025 07:54 AM UTC


Python Insider

Python 3.14.0 beta 1 is here!

Only one day late, welcome to the first beta!

https://www.python.org/downloads/release/python-3140b1/

This is a beta preview of Python 3.14

Python 3.14 is still in development. This release, 3.14.0b1, is the first of four planned beta releases.

Beta release previews are intended to give the wider community the opportunity to test new features and bug fixes and to prepare their projects to support the new feature release.

We strongly encourage maintainers of third-party Python projects to test with 3.14during the beta phase and report issues found to the Python bug tracker as soon as possible. While the release is planned to be feature-complete entering the beta phase, it is possible that features may be modified or, in rare cases, deleted up until the start of the release candidate phase (Tuesday 2025-07-22). Our goal is to haveno ABI changes after beta 4 and as few code changes as possible after the first release candidate. To achieve that, it will be extremely important to get as much exposure for 3.14 as possible during the beta phase.

Please keep in mind that this is a preview release and its use is**not** recommended for production environments.

Major new features of the 3.14 series, compared to 3.13

Some of the major new features and changes in Python 3.14 are:

New features

(Hey, fellow core developer, if a feature you find important is missing from this list, let Hugo know.)

For more details on the changes to Python 3.14, see What’s new in Python 3.14. The next pre-release of Python 3.14 will be 3.14.0b2, scheduled for 2025-05-27.

Build changes

Incompatible changes, removals and new deprecations

Python install manager

The installer we offer for Windows is being replaced by our new install manager, which can be installed from the Windows Store or our FTP page. See our documentation for more information. The JSON file available for download contains the list of all the installable packages available as part of this release, including file URLs and hashes, but is not required to install the latest release. The traditional installer will remain available throughout the 3.14 and 3.15 releases.

More resources

Note

During the release process, we discovered a test that only failed when run sequentially and only when run after a certain number of other tests. This appears to be a problem with the test itself, and we will make it more robust for beta 2. For details, see python/cpython#133532.

And now for something completely different

The mathematical constant pi is represented by the Greek letter_π_ and represents the ratio of a circle’s circumference to its diameter. The first person to use π as a symbol for this ratio was Welsh self-taught mathematician William Jones in 1706. He was a farmer’s son born in Llanfihangel Tre’r Beirdd on Angelsy (Ynys Môn) in 1675 and only received a basic education at a local charity school. However, the owner of his parents’ farm noticed his mathematical ability and arranged for him to move to London to work in a bank.

By age 20, he served at sea in the Royal Navy, teaching sailors mathematics and helping with the ship’s navigation. On return to London seven years later, he became a maths teacher in coffee houses and a private tutor. In 1706, Jones published Synopsis Palmariorum Matheseos which used the symbol π for the ratio of a circle’s circumference to diameter (hunt for it on pages 243and 263or here). Jones was also the first person to realise π is an irrational number, meaning it can be written as decimal number that goes on forever, but cannot be written as a fraction of two integers.

But why π? It’s thought Jones used the Greek letter_π_ because it’s the first letter in perimetron or perimeter. Jones was the first to use π as our familiar ratio but wasn’t the first to use it in as part of the ratio. William Oughtred, in his 1631 Clavis Mathematicae (The Key of Mathematics), used π/δ to represent what we now call pi. His π was the circumference, not the ratio of circumference to diameter. James Gregory, in his 1668 Geometriae Pars Universalis (The Universal Part of Geometry) used_π/ρ_ instead, where ρ is the radius, making the ratio 6.28… or τ. After Jones, Leonhard Euler had used π for 6.28…, and also p for 3.14…, before settling on and popularising π for the famous ratio.

Enjoy the new release

Thanks to all of the many volunteers who help make Python Development and these releases possible! Please consider supporting our efforts by volunteering yourself or through organisation contributions to the Python Software Foundation.

Regards from Helsinki as the leaves begin to appear on the trees,

Your release team,

Hugo van Kemenade
Ned Deily
Steve Dower
Łukasz Langa

May 09, 2025 05:08 AM UTC

May 08, 2025


Python Engineering at Microsoft

Python in Visual Studio Code – May 2025 Release

We’re excited to announce the May 2025 release of the Python, Pylance and Jupyter extensions for Visual Studio Code!

This release includes the following announcements:

If you’re interested, you can check the full list of improvements in our changelogs for the Python, Jupyter and Pylance extensions.

Python Environments Quick Create command

The Python Environments extension (preview) has added support for Quick Create, making the environment creation process more seamless. Quick Create minimizes the input needed from you to create new virtual environments by detecting the latest Python version on your machine to create an environment and install any workspace dependencies with a single click. This will create a .venv in your workspace for venv based environments, and .conda conda for conda based environments.

You can access Quick Create via the Python: Create Environment command in the Command Palette.

Screenshot showing the Quick Create environment creation option in the Create Environment Quick Pick.

Python Environments chat tools

The Python Environments extension now includes two chat tools: “Get Python Environment Information” and “Install Python Package”. To use these tools, you can either directly reference them in your prompt by adding #pythonGetEnvironmentInfo and #pythonInstallPackage, or agent mode will automatically call the tool as applicable.

“Get Python Environment Information” seamlessly detects the appropriate environment information based on your file or workspace context. This includes the Python version, installed packages, and their versions.

Copilot using the Get Python Environment Information tool to fetch relevant environment information.

“Install Python Package” automatically installs packages in the correct environment based on your workspace context. This means you can easily install packages without worrying about which environment you’re in or which package manager to use.

Copilot calling the Install Python Package tool to automatically install required Python packages.

Automatic environment activation with Python Environments (Experimental)

The Python Environments extension introduced a new mechanism to auto activate your terminals with the correct environment information. The new "python-envs.terminal.autoActivationType" setting can be set to command (default), shellStartup, or off.

When set to command, the Python environments extension sends the appropriate activation command directly to the terminal resulting in activation.

Alternatively, with shell startup activation (shellStartup), the extension updates your shell’s startup script (such as .bashrc, .zshrc, or PowerShell profile) so that whenever you open a new terminal in VS Code, your chosen Python environment is automatically activated. This is only enabled for the zsh, fsh, pwsh, bash, and cmd. Once changes are written to your shell profile, your terminals will need to be refreshed in order for activation to occur.

If you want to undo these changes, simply run the Python Envs: Revert Shell Startup Script Changes command from the Command Palette. This will restore your shell profile and switch back to the previous activation mode.

Color picker with Pylance

Pylance can now display an interactive color swatch directly in the editor for recognized color values in Python files, making it easier to visualize and pick colors on the fly. To try it out, you can enable it by adding setting(python.analysis.enableColorPicker:true) to your settings.json file. Supported formats include #RGB (like “#001122”) and #RGBA (like “#001122FF”).

Screenshot showing Pylance color picker when hex codes are available in your Python code.

AI Code Actions: Convert Format String (Experimental)

When using Pylance, there’s a new experimental AI Code Action for converting string concatenations to f-string or format() enabled via "python.analysis.aiCodeActions": {"convertFormatString": true} setting. To try it out, select the Convert to f-string with Copilot or the Convert to format() call with Copilot Code Actions via the light bulb when selecting a symbol in the string you wish to convert, or through Ctrl + . / Cmd + ..

Convert strings Code Actions, powered by Copilot.

Then once you define a new symbol, for example, a class or a function, you can select the Generate Symbol with Copilot Code Action and let AI handle the implementation! If you want, you can then leverage Pylance’s Move Symbol Code Actions to move it to a different file.

PyConUS 2025

We will be attending PyCon US 2025 in Pittsburgh, PA, May 14-22, and cannot wait to connect with you all! Stop by booth #301 to say hello, learn along with us, and grab some swag!

There are a number of amazing earned and sponsored talks our team will be giving, so make sure to add them to your schedule:

Date Time Location Talk Speaker(s)
Wednesday, May 14th​ 9 a.m.–12:30 p.m. ​ Room 320​ AI crash course for Python developers – PyCon US 2025​ Anthony Shaw ​
Wednesday, May 14th​ 1:30 p.m.–5 p.m. ​ Room 317​ Snakes in a Grid: Working with spreadsheets in Python + Python in Excel – PyCon US 2025​ Sarah Kaiser​
Thursday, May 15th​ 3:30 p.m.–4:30 p.m. ​ Room 316​ Build modern Python apps on Azure (Sponsor: Microsoft) – PyCon US 2025​ Rohit Ganguly, Pamela Fox​
Saturday, May 17th​ 4:15 p.m.–4:45 p.m. Room 301-305​ What they don’t tell you about building a JIT compiler for CPython – PyCon US 2025​ Brandt Bucher​
Sunday, May 18th​ 1 p.m.–1:30 p.m. Room 301-305 ​ Going faster in all directions at once: How two teams are working together to make Python better for all – PyCon US 2025​ Michael Droettboom

Other Changes and Enhancements

We have also added small enhancements and fixed issues requested by users that should improve your experience working with Python and Jupyter Notebooks in Visual Studio Code. Some notable changes include:

We would also like to extend special thanks to this month’s contributors:

Try out these new improvements by downloading the Python extension and the Jupyter extension from the Marketplace, or install them directly from the extensions view in Visual Studio Code (Ctrl + Shift + X or ⌘ + ⇧ + X). You can learn more about Python support in Visual Studio Code in the documentation. If you run into any problems or have suggestions, please file an issue on the Python VS Code GitHub page.

The post Python in Visual Studio Code – May 2025 Release appeared first on Microsoft for Python Developers Blog.

May 08, 2025 10:39 PM UTC


eGenix.com

PyDDF Python Spring Sprint 2025

The following text is in German, since we're announcing a Python sprint in Düsseldorf, Germany.

Ankündigung

Python Meeting Spring Sprint 2025 in
Düsseldorf

Samstag, 24.05.2025, 10:00-18:00 Uhr
Sonntag, 25.05.2025. 10:00-18:00 Uhr

Eviden / Atos Information Technology GmbH, Am Seestern 1, 40547 Düsseldorf

Informationen

Das Python Meeting Düsseldorf (PyDDF) veranstaltet mit freundlicher Unterstützung von Eviden Deutschland ein Python Sprint Wochenende.

Der Sprint findet am Wochenende 24/25.5.2025 in der Eviden / Atos Niederlassung, Am Seestern 1, in Düsseldorf statt.

Folgende Themengebiete sind als Anregung bereits angedacht:

Natürlich können die Teilnehmenden weitere Themen vorschlagen und umsetzen.

Anmeldung, Kosten und weitere Infos

Alles weitere und die Anmeldung findet Ihr auf der Meetup Sprint Seite:

WICHTIG: Ohne Anmeldung können wir den Gebäudezugang nicht vorbereiten. Eine spontane Anmeldung am Sprint Tag wird daher vermutlich nicht funktionieren.

Teilnehmer sollten sich zudem in der PyDDF Telegram Gruppe registrieren, da wir uns dort koordinieren:

Über das Python Meeting Düsseldorf

Das Python Meeting Düsseldorf ist eine regelmäßige Veranstaltung in Düsseldorf, die sich an Python-Begeisterte aus der Region wendet.

Einen guten Überblick über die Vorträge bietet unser PyDDF YouTube-Kanal, auf dem wir Videos der Vorträge nach den Meetings veröffentlichen.

Veranstaltet wird das Meeting von der eGenix.com GmbH, Langenfeld, in Zusammenarbeit mit Clark Consulting & Research, Düsseldorf.

Viel Spaß !

Marc-André Lemburg, eGenix.com

May 08, 2025 09:00 AM UTC


Test and Code

pytest-metadata - provides access to test session metadata

pytest-metadata is described as a plugin for pytest that provides access to test session metadata.
That is such a humble description for such a massively useful plugin.
If you're already using pytest-html, you have pytest-metadata already installed, as pytest-metadata is one of the dependencies for pytest-html.
However, pytest-metadata is very useful even on its own.

Links:

If you've got other plugins that work well with pytest-metadata, please let me know.

Sponsored by:

Help support the show AND learn pytest:

★ Support this podcast on Patreon ★

pytest-metadata is described as a plugin for pytest that provides access to test session metadata.
That is such a humble description for such a massively useful plugin.
If you're already using pytest-html, you have pytest-metadata already installed, as pytest-metadata is one of the dependencies for pytest-html.
However, pytest-metadata is very useful even on its own.

Links:

If you've got other plugins that work well with pytest-metadata, please let me know.


Sponsored by:

Help support the show AND learn pytest:


★ Support this podcast on Patreon ★

May 08, 2025 05:57 AM UTC


Seth Michael Larson

A(nimal Cros)SCII

What is the character encoding for Animal Crossing?This page details all the characters that are allowed for player names, town names, and passwords in Animal Crossing for the GameCube. A much larger character set was used for writing mail and communication.

Each character was internally represented as a value between 0x00 and 0xFFwhich is the same size as ASCII, thus me naming this encoding “Animal CrosSCII”. The characters between 0xD5 and 0xDE are only used in the EU version. 0xDF to 0xFF are unused.

The names of the characters (and descriptions when ambiguous) were sourced from the Animal Crossing decompilation project. I've mapped each character to the best of my ability back to Unicode and collected them in a table below:

Name Hex Character Unicode
INVERT_EXCLAMATION 0x00 ¡ U+00A1
INVERT_QUESTIONMARK 0x01 ¿ U+00BF
DIAERESIS_A 0x02 Ä U+00C4
GRAVE_A 0x03 À U+00C0
ACUTE_A 0x04 Á U+00C1
CIRCUMFLEX_A 0x05 Â U+00C2
TILDE_A 0x06 Ã U+00C3
ANGSTROM_A 0x07 Ȧ U+0226
CEDILLA 0x08 Ç U+00C7
GRAVE_E 0x09 È U+00C8
ACUTE_E 0x0A É U+00C9
CIRCUMFLEX_E 0x0B Ê U+00CA
DIARESIS_E 0x0C Ë U+00CB
GRAVE_I 0x0D Ì U+00CC
ACUTE_I 0x0E Í U+00CD
CIRCUMFLEX_I 0x0F Î U+00CE
DIARESIS_I 0x10 Ï U+00CF
ETH 0x11 Đ U+0110
TILDE_N 0x12 Ñ U+00D1
GRAVE_O 0x13 Ò U+00D2
ACUTE_O 0x14 Ó U+00D3
CIRCUMFLEX_O 0x15 Ô U+00D4
TILDE_O 0x16 Õ U+00D5
DIARESIS_O 0x17 Ö U+00D6
OE 0x18 Ø U+00D8
GRAVE_U 0x19 Ù U+00D9
ACUTE_U 0x1A Ú U+00DA
CIRCUMFLEX_U 0x1B Û U+00DB
DIARESIS_U 0x1C Ü U+00DC
LOWER_BETA 0x1D β U+03B2
THORN 0x1E ? U+003F
GRAVE_a 0x1F à U+00E0
SPACE 0x20 U+0020
EXCLAMATION 0x21 ! U+0021
QUOTATION 0x22 " U+0022
ACUTE_a 0x23 á U+00E1
CIRCUMFLEX_a 0x24 â U+00E2
PERCENT 0x25 % U+0025
AMPERSAND 0x26 & U+0026
APOSTROPHE 0x27 ' U+0027
OPEN_PARENTHESIS 0x28 ( U+0028
CLOSE_PARENTHESIS 0x29 ) U+0029
TILDE 0x2A ~ U+007E
SYMBOL_HEART 0x2B U+2665
COMMA 0x2C , U+002C
DASH 0x2D - U+002D
PERIOD 0x2E . U+002E
SYMBOL_MUSIC_NOTE 0x2F 𝅘𝅥𝅮 U+1D160
ZERO 0x30 0 U+0030
ONE 0x31 1 U+0031
TWO 0x32 2 U+0032
THREE 0x33 3 U+0033
FOUR 0x34 4 U+0034
FIVE 0x35 5 U+0035
SIX 0x36 6 U+0036
SEVEN 0x37 7 U+0037
EIGHT 0x38 8 U+0038
NINE 0x39 9 U+0039
COLON 0x3A : U+003A
SYMBOL_DROPLET 0x3B 🌢 U+1F322
LESS_THAN 0x3C < U+003C
EQUALS 0x3D = U+003D
GREATER_THAN 0x3E > U+003E
QUESTIONMARK 0x3F ? U+003F
AT_SIGN 0x40 @ U+0040
A 0x41 A U+0041
B 0x42 B U+0042
C 0x43 C U+0043
D 0x44 D U+0044
E 0x45 E U+0045
F 0x46 F U+0046
G 0x47 G U+0047
H 0x48 H U+0048
I 0x49 I U+0049
J 0x4A J U+004A
K 0x4B K U+004B
L 0x4C L U+004C
M 0x4D M U+004D
N 0x4E N U+004E
O 0x4F O U+004F
P 0x50 P U+0050
Q 0x51 Q U+0051
R 0x52 R U+0052
S 0x53 S U+0053
T 0x54 T U+0054
U 0x55 U U+0055
V 0x56 V U+0056
W 0x57 W U+0057
X 0x58 X U+0058
Y 0x59 Y U+0059
Z 0x5A Z U+005A
TILDE_a 0x5B ã U+00E3
SYMBOL_ANNOYED 0x5C 💢 U+1F4A2
DIARESIS_a 0x5D ä U+00E4
ANGSTROM_a 0x5E ȧ U+0227
UNDERSCORE 0x5F _ U+005F
LOWER_CEDILLA 0x60 ç U+00E7
a 0x61 a U+0061
b 0x62 b U+0062
c 0x63 c U+0063
d 0x64 d U+0064
e 0x65 e U+0065
f 0x66 f U+0066
g 0x67 g U+0067
h 0x68 h U+0068
i 0x69 i U+0069
j 0x6A j U+006A
k 0x6B k U+006B
l 0x6C l U+006C
m 0x6D m U+006D
n 0x6E n U+006E
o 0x6F o U+006F
p 0x70 p U+0070
q 0x71 q U+0071
r 0x72 r U+0072
s 0x73 s U+0073
t 0x74 t U+0074
u 0x75 u U+0075
v 0x76 v U+0076
w 0x77 w U+0077
x 0x78 x U+0078
y 0x79 y U+0079
z 0x7A z U+007A
GRAVE_e 0x7B è U+00E8
ACUTE_e 0x7C é U+00E9
CIRCUMFLEX_e 0x7D ê U+00EA
DIARESIS_e 0x7E ë U+00EB
CONTROL_CODE 0x7F ???
MESSAGE_TAG 0x80 ???
GRAVE_i 0x81 ì U+00EC
ACUTE_i 0x82 í U+00ED
CIRCUMFLEX_i 0x83 î U+00EE
DIARESIS_i 0x84 ï U+00EF
INTERPUNCT 0x85 · U+00B7
LOWER_ETH 0x86 ? U+003F
TILDE_n 0x87 ñ U+00F1
GRAVE_o 0x88 ò U+00F2
ACUTE_o 0x89 ó U+00F3
CIRCUMFLEX_o 0x8A ô U+00F4
TILDE_o 0x8B õ U+00F5
DIARESIS_o 0x8C ö U+00F6
oe 0x8D ø U+00F8
GRAVE_u 0x8E ù U+00F9
ACUTE_u 0x8F ú U+00FA
HYPHEN 0x90 - U+002D
CIRCUMFLEX_u 0x91 û U+00FB
DIARESIS_u 0x92 ü U+00FC
ACUTE_y 0x93 ý U+00FD
DIARESIS_y 0x94 ÿ U+00FF
LOWER_THORN 0x95 þ U+00FE
ACUTE_Y 0x96 Ý U+00DD
BROKEN_BAR 0x97 | U+007C
SILCROW 0x98 § U+00A7
FEMININE_ORDINAL 0x99 ª U+00AA
MASCULINE_ORDINAL 0x9A º U+00BA
DOUBLE_VERTICAL_BAR 0x9B U+2225
LATIN_MU 0x9C U+1D67
SUPERSCRIPT_THREE 0x9D ³ U+00B3
SUPERSCRIPT_TWO 0x9E ² U+00B2
SUPRESCRIPT_ONE 0x9F ¹ U+00B9
MACRON_SYMBOL 0xA0 ¯ U+00AF
LOGICAL_NEGATION 0xA1 ¬ U+00AC
ASH 0xA2 Æ U+00C6
LOWER_ASH 0xA3 æ U+00E6
INVERT_QUOTATION 0xA4 U+201E
GUILLEMET_OPEN 0xA5 » U+00BB
GUILLEMET_CLOSE 0xA6 « U+00AB
SYMBOL_SUN 0xA7 U+2600
SYMBOL_CLOUD 0xA8 U+2601
SYMBOL_UMBRELLA 0xA9 U+2602
SYMBOL_WIND 0xAA U+AA5C
SYMBOL_SNOWMAN 0xAB U+2603
LINES_CONVERGE_RIGHT 0xAC U+269E
LINES_CONVERGE_LEFT 0xAD U+269F
FORWARD_SLASH 0xAE / U+002F
INFINITY 0xAF U+221E
CIRCLE 0xB0 U+2B55
CROSS 0xB1 U+274C
SQUARE 0xB2 U+2610
TRIANGLE 0xB3 U+25B3
PLUS 0xB4 + U+002B
SYMBOL_LIGTNING 0xB5 U+26A1
MARS_SYMBOL 0xB6 U+2642
VENUS_SYMBOL 0xB7 U+2640
SYMBOL_FLOWER 0xB8 U+2698
SYMBOL_STAR 0xB9 U+2605
SYMBOL_SKULL 0xBA U+2620
SYMBOL_SURPRISE 0xBB 😯 U+1F62F
SYMBOL_HAPPY 0xBC 😄 U+1F604
SYMBOL_SAD 0xBD 😞 U+1F61E
SYMBOL_ANGRY 0xBE 😠 U+1F620
SYMBOL_SMILE 0xBF 😃 U+1F603
DIMENSION_SIGN 0xC0 × U+00D7
OBELUS_SIGN 0xC1 ÷ U+00F7
SYMBOL_HAMMER 0xC2 🔨 U+1F528
SYMBOL_RIBBON 0xC3 🎀 U+1F380
SYMBOL_MAIL 0xC4 U+2709
SYMBOL_MONEY 0xC5 💰 U+1F4B0
SYMBOL_PAW 0xC6 🐾 U+1F43E
SYMBOL_SQUIRREL 0xC7 🐶 U+1F436
SYMBOL_CAT 0xC8 🐱 U+1F431
SYMBOL_RABBIT 0xC9 🐰 U+1F430
SYMBOL_OCTOPUS 0xCA 🐦 U+1F426
SYMBOL_COW 0xCB 🐮 U+1F42E
SYMBOL_PIG 0xCC 🐷 U+1F437
NEW_LINE 0xCD U+2424
SYMBOL_FISH 0xCE 🐟 U+1F41F
SYMBOL_BUG 0xCF 🪲 U+1FAB2
SEMICOLON 0xD0 ; U+003B
HASHTAG 0xD1 # U+0023
SPACE_2 0xD2 ???
SPACE_3 0xD3 ???
SYMBOL_KEY 0xD4 🔑 U+1F511
LEFT_QUOTATION 0xD5 U+201C
RIGHT_QUOTATION 0xD6 U+201D
LEFT_APOSTROPHE 0xD7 U+2018
RIGHT_APOSTROPHE 0xD8 U+2019
ETHEL 0xD9 Œ U+0152
LOWER_ETHEL 0xDA œ U+0153
ORDINAL_e 0xDB U+1D49
ORDINAL_er 0xDC ???
ORDINAL_re 0xDD ???
BACKSLASH 0xDE \ U+005C

And here's the Unicode characters laid out into a “square”:

¡¿ÄÀÁÂÃȦÇÈÉÊËÌÍÎ
ÏĐÑÒÓÔÕÖØÙÚÛÜβ?à
 !"áâ%&'()~♥,-.𝅘𝅥𝅮
0123456789:🌢<=>?
@ABCDEFGHIJKLMNO
PQRSTUVWXYZã💢äȧ_
çabcdefghijklmno
pqrstuvwxyzèéêë 
 ìíîï·?ñòóôõöøùú
-ûüýÿþÝ|§ªº∥ᵧ³²¹
¯¬Ææ„»«☀☁☂꩜☃⚞⚟/∞
⭕❌☐△+⚡♂♀⚘★☠😯😄😞😠😃
×÷🔨🎀✉💰🐾🐶🐱🐰🐦🐮🐷␤🐟🪲
;#  🔑“”‘’Œœᵉ  \\

I wasn't able to find Unicode equivalents to some of the characters and a few others (marked with ??? in the table). If you're able to find Unicode characters for the missing ones please send me an email or pull request. Time to brush up on Animalese!

May 08, 2025 12:00 AM UTC

May 07, 2025


The Python Coding Stack

"AI Coffee" Grand Opening This Monday • A Story About Parameters and Arguments in Python Functions

Alex had one last look around. You could almost see a faint smile emerge from the deep sigh—part exhaustion and part satisfaction. He was as ready as he could be. His new shop was as ready as it could be. There was nothing left to set up. He locked up and headed home. The grand opening was only seven hours away, and he'd better get some sleep.

Grand Opening sounds grand—too grand. Alex had regretted putting it on the sign outside the shop's window the previous week. This wasn't a vanity project. He didn't send out invitations to friends, journalists, or local politicians. He didn't hire musicians or waiters to serve customers. Grand Opening simply meant opening for the first time.

Alex didn't really know what to expect on the first day. Or maybe he did—he wasn't expecting too many customers. Another coffee shop on the high street? He may need some time to build a loyal client base.

• • •

He had arrived early on Monday. He'd been checking the lights, the machines, the labels, the chairs, the fridge. And then checking them all again. He glanced at the clock—ten minutes until opening time. But he saw two people standing outside. Surely they were just having a chat, only standing there by chance. He looked again. They weren't chatting. They were waiting.

Waiting for his coffee shop to open? Surely not?

But rather than check for the sixth time that the labels on the juice bottles were facing outwards, he decided to open the door a bit early. And those people outside walked in. They were AI Coffee's first customers.

Today's article is an overview of the parameters and arguments in Python's functions. It takes you through some of the key principles and discusses the various types of parameters you can define and arguments you can pass to a Python function. There are five numbered sections interspersed within the story in today's article:

  1. Parameters and Arguments
  2. Positional and Keyword Arguments
  3. Args and Kwargs
  4. Optional Arguments with Default Values
  5. Positional-Only and Keyword-Only Arguments

Espressix ProtoSip v0.1 (AlphaBrew v0.1.3.7)

Introducing the Espressix ProtoSip, a revolutionary coffee-making machine designed to elevate the art of brewing for modern coffee shops. With its sleek, futuristic design and cutting-edge technology, this prototype blends precision engineering with intuitive controls to craft barista-quality espresso, cappuccino, and more. Tailored for innovators, the Espressix delivers unparalleled flavour extraction and consistency, setting a new standard for coffee excellence while hinting at the bold future of café culture.

Alex had taken a gamble with the choice of coffee machine for his shop. His cousin set up a startup some time earlier that developed an innovative coffee machine for restaurants and coffee shops. The company had just released its first prototype, and they offered Alex one at a significantly reduced cost since it was still a _work in progress_—and he was the founder's cousin!

The paragraph you read above is the spiel the startup has on its website and on the front cover of the slim booklet that came with the machine. There was little else in the booklet. But an engineer from the startup company had spent some time explaining to Alex how to use the machine.

The Espressix didn't have a user interface yet—it was still a rather basic prototype. Alex connected the machine to a laptop. He was fine calling functions from the AlphaBrew Python API directly from a terminal window—AlphaBrew is the software that came with the Espressix.

What the Espressix did have, despite being an early prototype, is a sleek and futuristic look. One of the startup's cofounders was a product design graduate, so she went all out with style and looks.

1. Parameters and Arguments

"You're AI Coffee's first ever customer", Alex told the first person to walk in. "What can I get you?"

"Wow! I'm honoured. Could I have a strong Cappuccino, please, but with a bit less milk?"

"Sure", and Alex tapped at his laptop:

All code blocks are available in text format at the end of this article • #1 • The code images used in this article are created using Snappify. [Affiliate link]

And the Espressix started whizzing. A few seconds later, the perfect brew poured into a cup.

Here's the signature for the brew_coffee() function Alex used:

#2

Alex was a programmer before deciding to open a coffee shop. He was comfortable with this rudimentary API to use the machine, even though it wasn't ideal. But then, he wasn't paying much to lease the machine, so he couldn't complain!

The coffee_type parameter accepts a string, which must match one of the available coffee types. Alex is already planning to replace this with enums to prevent typos, but that's not a priority for now.

The strength parameter accepts integers between 1 and 5. And milk also accepts integers up to 5, but the range starts from 0 to cater for coffees with no milk.

Terminology can be confusing, and functions come with plenty of terms. Parameter and argument are terms that many confuse. And it doesn't matter too much if you use one instead of the other. But, if you prefer to be precise, then:

When you call a function, you pass arguments. These arguments are assigned to the parameter names within the function.

To confuse matters further, some people use formal parameters to refer to parameters and actual parameters to refer to arguments. But the terms parameters and arguments as described in the bullet points above are more common in Python, and they're the ones I use here and in all my writing.

Alex's first day went better than he thought it would. He had a steady stream of customers throughout the day. And they all seemed to like the coffee.

But let's see what happened on Alex's second day!

2. Positional and Keyword Arguments

Chloezz @chloesipslife • 7m

Just visited the new AI Coffee shop on my high street, and OMG, it’s like stepping into the future! The coffee machine is a total sci-fi vibe—sleek, futuristic, and honestly, I have no clue how it works, but it’s powered by AI and makes a mean latte! The coffee? Absolutely delish. If this is what AI can do for my morning brew, I’m here for it! Who’s tried it? #AICoffee #CoffeeLovers #TechMeetsTaste

— from social media

Alex hadn't been on social media after closing the coffee shop on the first day. Even if he had, he probably wouldn't have seen Chloezz's post. He didn't know who she was. But whoever she is, she has a massive following.

Alex was still unaware his coffee shop had been in the spotlight when he opened up on Tuesday. There was a queue outside. By mid-morning, he was no longer coping. Tables needed cleaning, fridge shelves needed replenishing, but there had been no gaps in the queue of customers waiting to be served.

And then Alex's sister popped in to have a look.

"Great timing. Here, I'll show you how this works." Alex didn't hesitate. His sister didn't have a choice. She was now serving coffees while Alex dealt with everything else.

• • •

But a few minutes later, she had a problem. A take-away customer came back in to complain about his coffee. He had asked for a strong Americano with a dash of milk. Instead, he got what seemed like the weakest latte in the world.

Alex's sister had typed the following code to serve this customer:

#3

But the function's signature is:

#4

I dropped the type hints, and I won't use them further in this article to focus on other characteristics of the function signature.

Let's write a demo version of this function to identify what went wrong:

#5

The first argument, "Americano", is assigned to the first parameter, coffee_type. So far, so good…

But the second argument, 1, is assigned to strength, which is the second parameter. Python can only determine which argument is assigned to which parameter based on the position of the argument in the function call. Python is a great programming language, but it still can't read the user's mind!

And then, the final argument, 4, is assigned to the final parameter, milk_amount.

Alex's sister had swapped the two integers. An easy mistake to make. Instead of a strong coffee with a little milk, she had input the call for a cup of hot milk with just a touch of coffee. Oops!

Here's the output from our demo code to confirm this error:

Coffee type: Americano
Strength: 1
Milk Amount: 4

Alex apologised to the customer, and he made him a new coffee.

"You can do this instead to make sure you get the numbers right," he showed his sister as he prepared the customer's replacement drink:

#6

Note how the second and third arguments now also include the names of the parameters.

"This way, it doesn't matter what order you input the numbers since you're naming them", he explained.

Here's the output now:

Coffee type: Americano
Strength: 4
Milk Amount: 1

Even though the integer 1 is still passed as the second of the three arguments, Python now knows it needs to assign this value to milk_amount since the parameter is named in the function call.

When you call a function such as brew_coffee(), you have the choice to use either positional arguments or keyword arguments.

Arguments are positional when you pass the values directly without using the parameter names, as you do in the following call:

brew_coffee("Americano", 1, 4)

You don't use the parameter names. You only include the values within the parentheses. These arguments are assigned to parameter names depending on their order.

Keyword arguments are the arguments you pass using the parameter names, such as the following call:

brew_coffee(coffee_type="Americano", milk_amount=1, strength=4)

In this example, all three arguments are keyword arguments. You pass each argument matched to its corresponding parameter name. The order in which you pass keyword arguments no longer matters.

Keyword arguments can also be called named arguments.

Positional and keyword arguments: Mixing and matching

But look again at the code Alex used when preparing the customer's replacement drink:

#7

The first argument doesn't have the parameter name. The first argument is a positional argument and, therefore, it's assigned to the first parameter, coffee_type.

However, the remaining arguments are keyword arguments. The order of the second and third arguments no longer matters.

Therefore, you can mix and match positional and keyword arguments.

But there are some rules! Try the following call:

#8

You try to pass the first and third arguments as positional and the second as a keyword argument, but…

  File "...", line 8
    brew_coffee("Americano", milk_amount=1, 4)
                                             ^
SyntaxError: positional argument follows
    keyword argument

Any keyword arguments must come after all the positional arguments. Once you include a keyword argument, all the remaining arguments must also be passed as keyword arguments.

And this rule makes sense. Python can figure out which argument goes to which parameter if they're in order. But the moment you include a keyword argument, Python can no longer assume the order of arguments. To avoid ambiguity—we don't like ambiguity in programming—Python doesn't allow any more positional arguments once you include a keyword argument.

3. Args and Kwargs

Last week, AI Coffee, a futuristic new coffee shop, opened its doors on High Street, drawing crowds with its sleek, Star Trek-esque coffee machine. This reporter visited to sample the buzzworthy brews and was wowed by the rich, perfectly crafted cappuccino, churned out by the shop’s mysterious AI-powered machine. Eager to learn more about the technology behind the magic, I tried to chat with the owner, but the bustling shop kept him too busy for a moment to spare. While the AI’s secrets remain under wraps for now, AI Coffee is already a local hit, blending cutting-edge tech with top-notch coffee.

— from The Herald, a local paper

Alex had started to catch up with the hype around his coffee shop—social media frenzy, articles in local newspapers, and lots of word-of-mouth. He wasn't complaining, but he was perplexed at why his humble coffee shop had gained so much attention and popularity within its first few days. Sure, his coffee was great, but was it so much better than others? And his prices weren't the highest on the high street, but they weren't too cheap, either.

However, with the increased popularity, Alex also started getting increasingly complex coffee requests. Vanilla syrup, cinnamon powder, caramel drizzle, and lots more.

Luckily, the Espressix ProtoSip was designed with the demanding urban coffee aficionado in mind.

Args

Alex made some tweaks to his brew_coffee() function:

#9

There's a new parameter in brew_coffee(). This is the *args parameter, which has a leading * in front of the parameter name. This function can now accept any number of positional arguments following the first three. We'll explore what the variable name args refers to shortly. But first, let's test this new function:

#10

You call the function with five arguments. And here's the output from this function call:

Coffee type: Latte
Strength: 3
Milk Amount: 2
Add-ons: cinnamon, hazelnut syrup
  1. The first argument, "Latte", is assigned to the first parameter, coffee_type.
  2. The second argument, 3, is assigned to the second parameter, strength.
  3. The third argument, 2, is assigned to the third parameter, milk_amount.
  4. The remaining two arguments, "cinnamon" and "hazelnut syrup", are assigned to args, which is a tuple.

You can confirm that args is a tuple with a small addition to the function:

#11

The first two lines of the output from this code are shown below:

args=('cinnamon', 'hazelnut syrup')
<class 'tuple'>

The parameter name args is a tuple containing the remaining positional arguments in the function call once the function deals with the first three.

There's nothing special about the name args

What gives *args its features? It's not the name args. Instead, it's the leading asterisk, *, that makes this parameter one that can accept any number of positional arguments. The parameter name args is often used in this case, but you can also use a name that's more descriptive to make your code more readable:

#12

Alex uses the name add_ons instead of args. This parameter name still has the leading * in the function signature. Colloquially, many Python programmers will still call a parameter with a leading * the args parameter, even though the parameter name is different.

Therefore, you can now call this function with three or more arguments. You can add as many arguments as you wish after the third one, including none at all:

#13

The output confirms that add_ons is now an empty tuple:

add_ons=()
<class 'tuple'>
Coffee type: Latte
Strength: 3
Milk Amount: 2
Add-ons: 

This coffee doesn't have any add-ons.

We have a problem

However, Alex's sister, who was now working in the coffee shop full time, could no longer use her preferred way of calling the brew_coffee() function:

#14

This raises an error:

  File "...", line 9
    brew_coffee("Latte", strength=3,
        milk_amount=2, "vanilla syrup")
                                      ^
SyntaxError: positional argument follows
    keyword argument

This is a problem you've seen already. Positional arguments must come before keyword arguments in a function call. And *add_ons in the function signature indicates that Python will collect all remaining positional arguments from this point in the parameter list. Therefore, none of the parameters defined before *add_ons can be assigned a keyword argument if you also include args as arguments. They must all be assigned positional arguments.

All arguments preceding the args arguments in a function call must be positional arguments.

Alex refactored the code:

#15

The *add_ons parameter is now right after coffee_type. The remaining parameters, strength and milk_amount, come next. Unfortunately, this affects how Alex and his growing team can use brew_coffee() in other situations, too. The strength and milk_amount arguments must now come after any add-ons, and they must be used as keyword arguments.

See what happens if you try to pass positional arguments for strength and milk_amount:

#16

This raises an error:

Traceback (most recent call last):
  File "...", line 9, in <module>
    brew_coffee("Latte", "vanilla syrup", 3, 2)
    ~~~~~~~~~~~^^^^^^^^^^^^^^^^^^^^^^^^^^^^^^^^
TypeError: brew_coffee() missing
    2 required keyword-only arguments:
    'strength' and 'milk_amount'

The args parameter, which is *add_ons in this example, marks the end of the positional arguments in a function. Therefore, strength and milk_amount must be assigned arguments using keywords.

Alex instructed his team on these two changes:

  1. Any add-ons must go after the coffee type.
  2. They must use keyword arguments for strength and milk_amount.

It's a bit annoying that they have to change how to call the function but they're all still learning and Alex feels this is a safer option.

Kwargs

But Alex's customers also had other requests. Some wanted their coffee extra hot, others needed oat milk, and others wanted their small coffee served in a large cup.

Alex included this in brew_coffee() by adding another parameter:

#17

The new parameter Alex added at the end of the signature, **kwargs, has two leading asterisks, **. This parameter indicates that the function can accept any number of optional keyword arguments after all the other arguments.

Whereas *args creates a tuple called args within the function, the double asterisk in **kwargs creates a dictionary called kwargs. The best way to see this is to call this function with additional keyword arguments:

#18

The final two arguments use the keywords milk_type and temperature. These are not parameters in the function definition.

Let's explore these six arguments:

Here is the first part of the output from this call:

kwargs={
    'milk_type': 'oat',
    'temperature': 'extra hot'
}
<class 'dict'>

This confirms that kwargs is a dictionary. The keywords are the keys, and the argument values are the dictionary values.

The rest of the output shows the additional special instructions in the printout:

Coffee type: Latte
Strength: 3
Milk Amount: 2
Add-ons: vanilla syrup
Instructions:
    milk type: oat
    temperature: extra hot

There's nothing special about the name kwargs

You've seen this when we talked about args. There's nothing special about the parameter name kwargs. It's the leading double asterisk that does the trick. So, you can use any descriptive name you wish in your code:

#19

Warning: the following paragraph is dense with terminology!

So, in its current form, this function needs a required argument assigned to coffee_type and two required keyword arguments assigned to strength and milk_amount. And you can also have any number of optional positional arguments, which you add after the first positional argument but before the required keyword arguments. These are the add-ons a customer wants in their coffee.

But you can also add any number of keyword arguments at the end of the function call. These are the special instructions from the customer.

Both args and kwargs are optional. So, you can still call the function with only the required arguments:

#20

The output shows that this gives a strong espresso with no milk, no add-ons, and no special instructions:

instructions={}
<class 'dict'>
Coffee type: Espresso
Strength: 4
Milk Amount: 0
Add-ons: 
Instructions:

Note that in this case, since there are no args, you can also pass the first argument as a keyword argument:

#21

But this is only possible when there are no add-ons—no args. We'll revisit this case in a later section of this article.

A quick recap before we move on.

Args and kwargs are informal terms used for parameters with a leading single and double asterisk.

The term args refers to a parameter with a leading asterisk in the function's signature, such as *args. This parameter indicates that the function can accept any number of optional positional arguments following any required positional arguments. The term args stands for arguments, but you've already figured that out!

And kwargs refers to a parameter with two leading asterisks, such as **kwargs, which indicates that the function can accept any number of optional keyword arguments following any required keyword arguments. The 'kw' in kwargs stands for keyword.

Coffee features often when talking about programming. Here's another coffee-themed article, also about functions: What Can A Coffee Machine Teach You About Python's Functions?

4. Optional Arguments with Default Values

Alex's team grew rapidly. The coffee shop now had many regular customers and a constant stream of coffee lovers throughout the day.

Debra, one of the staff members, had some ideas to share in a team meeting:

"Alex, many customers don't care about the coffee strength. They just want a normal coffee. I usually type in 3 for the strength argument for these customers. But it's time-consuming to have to write strength=3 for all of them, especially when it's busy."

"We can easily fix that", Alex was quick to respond:

#22

The parameter strength now has a default value. This makes the argument corresponding to strength an optional argument since it has a default value of 3. The default value is used by the function only if you don't pass the corresponding argument.

Alex's staff can now leave this argument out if they want to brew a "normal strength" coffee:

#23

This gives a medium strength espresso with no add-ons or special instructions:

Coffee type: Espresso
Strength: 3
Milk Amount: 0
Add-ons: 
Instructions:

The output confirms that the coffee strength has a value of 3, which is the default value. And here's a coffee with some add-ons that also uses the default coffee strength:

#24

Here's the output confirming this normal-strength caramel-drizzle latte:

Coffee type: Latte
Strength: 3
Milk Amount: 2
Add-ons: caramel drizzle
Instructions:

Ambiguity, again

Let's look at the function's signature again:

#25

The coffee_type parameter can accept a positional argument. Then, *add_ons collects all remaining positional arguments, if there are any, that the user passes when calling the function. Any argument after this must be a keyword argument. Therefore, when calling the function, there's no ambiguity whether strength, which is optional, is included or not, since all the arguments after the add-ons are named.

Why am I mentioning this? Consider a version of this function that doesn't have the args parameter *add_ons:

#26

I commented out the lines with *add_ons to highlight they've been removed temporarily in this function version. When you run this code, Python raises an error. Note that the error is raised in the function definition before the function call itself:

  File "...", line 5
    milk_amount,
    ^^^^^^^^^^^
SyntaxError: parameter without a default follows
    parameter with a default

Python doesn't allow this function signature since this format introduces ambiguity. To see this ambiguity, let's use a positional argument for the amount of milk, since this would now be possible as *add_ons is no longer there. Recall that in the main version of the function with the parameter *add_ons, all the arguments that follow the args must be named:

#27

As mentioned above, note that the error is raised by the function definition and not the function call. I'm showing these calls to help with the discussion.

Is the value 0 meant for strength, or is your intention to use the default value for strength and assign the value 0 to milk_amount? To avoid this ambiguity, Python function definitions don't allow parameters without a default value to follow a parameter with a default value. Once you add a default value, all the following parameters must also have a default value.

Of course, there would be no ambiguity if you use a keyword argument. However, this would lead to the situation where the function call is ambiguous with a positional argument, but not when using a keyword argument, even though both positional and keyword arguments are possible. Python doesn't allow this to be on the safe side!

This wasn't an issue when you had *add_ons as part of the signature. Let’s put *add_ons back in:

#28

There's no ambiguity in this case since strength and milk_amount must both have keyword arguments.

However, even though this signature is permitted in Python, it's rather unconventional. Normally, you don't see many parameters without default values after ones with default values, even when you're already in the keyword-only region of the function (after the args).

In this case, Debra's follow-up suggestion fixes this unconventional function signature:

"And we also have to input milk_amount=0 for black coffees, which are quite common. Can we do a similar trick for coffees with no milk?"

"Sure we can"

#29

Now, there's also a default value for milk_amount. The default is a black coffee.

In this version of the function, there's only one required argument—the first one that's assigned to coffee_type. All the other arguments are optional either because they're not needed to make a coffee, such as the add-ons and special instructions, or because the function has default values for them, such as strength and milk_amount.

A parameter can have a default value defined in the function's signature. Therefore, the argument assigned to a parameter with a default value is an optional argument.

And let's confirm you can still include add-ons and special instructions:

#30

Here's the output from this function call:

Coffee type: Cappuccino
Strength: 3
Milk Amount: 2
Add-ons: chocolate sprinkles, vanilla syrup
Instructions:
    temperature: extra hot
    cup size: large cup

Note that you rely on the default value for strength in this example since the argument assigned to strength is not included in the call.

A common pitfall with default values in function definitions is the mutable default value trap. You can read more about this in section 2, The Teleportation Trick, in this article: Python Quirks? Party Tricks? Peculiarities Revealed…

Support The Python Coding Stack

5. Positional-Only and Keyword-Only Arguments

Let's summarise the requirements for all the arguments in Alex's current version of the brew_coffee() function. Here's the current function signature:

#31

  1. The first parameter is coffee_type, and the argument you assign to this parameter can be either a positional argument or a keyword argument. But—and this is important—you can only use it as a keyword argument if you don't pass any arguments assigned to *add_ons. Remember that positional arguments must come before keyword arguments in function calls. Therefore, you can only use a keyword argument for the first parameter if you don't have args. We'll focus on this point soon.
  2. As long as the first argument, the one assigned to coffee_type, is positional, any further positional arguments are assigned to the tuple add_ons.
  3. Next, you can add named arguments (which is another term used for keyword arguments) for strength and milk_amount. Both of these arguments are optional, and the order in which you use them in a function call is not important.
  4. Finally, you can add more keyword arguments using keywords that aren't parameters in the function definition. You can include as many keyword arguments as you wish.

Read point 1 above again. Alex thinks that allowing the first argument to be either positional or named is not a good idea, as it can lead to confusion. You can only use the first argument as a keyword argument if you don't have add-ons. Here's proof:

#32

The first argument is a keyword argument, coffee_type="Cappuccino". But then you attempt to pass two positional arguments, chocolate sprinkles and vanilla syrup. This call raises an error:

File "...", line 25
    )
    ^
SyntaxError: positional argument follows
    keyword argument

You can't have positional arguments following keyword arguments.

Alex decides to remove this source of confusion by ensuring that the argument assigned to coffee_type is always a positional argument. He only needs to make a small addition to the function's signature:

#33

The rogue forward slash, /, in place of a parameter is not a typo. It indicates that all parameters before the forward slash must be assigned positional arguments. Therefore, the object assigned to coffee_type can no longer be a keyword argument:

#34

The first argument is a keyword argument. But this call raises an error:

Traceback (most recent call last):
  File "...", line 19, in <module>
    brew_coffee(
    ~~~~~~~~~~~^
        coffee_type="Cappuccino",
        ^^^^^^^^^^^^^^^^^^^^^^^^^
    ...<2 lines>...
        cup_size="large cup",
        ^^^^^^^^^^^^^^^^^^^^^
    )
    ^
TypeError: brew_coffee() missing 1 required
    positional argument: 'coffee_type'

The function has a required positional argument, the one assigned to coffee_type. The forward slash, /, makes the first argument a positional-only argument. It can no longer be a keyword argument:

#35

This version works fine since the first argument is positional:

Coffee type: Cappuccino
Strength: 3
Milk Amount: 2
Add-ons: 
Instructions:
    temperature: extra hot
    cup size: large cup

Alex feels that this function's signature is neater and clearer now, avoiding ambiguity.

• • •

The R&D team at the startup that's developing the Espressix ProtoSip were keen to see how Alex was using the prototype and inspect the changes he made to suit his needs. They implemented many of Alex's changes.

However, they were planning to offer a more basic version of the Espressix that didn't have the option to include add-ons in the coffee.

The easiest option is to remove the *add-ons parameter from the function's signature:

#36

No *add_ons parameter, no add-ons in the coffee.

Sorted? Sort of.

The *add_ons parameter enabled you to pass optional positional arguments. However, *add_ons served a second purpose in the earlier version. All parameters after the args parameter, which is *add_ons in this example, must be assigned keyword arguments. The args parameter, *add_ons, forces all remaining parameters to be assigned keyword-only arguments.

Removing the *add_ons parameter changes the rules for the remaining arguments.

But you can still implement the same rules even when you're not using args. All you need to do is keep the leading asterisk but drop the parameter name:

#37

Remember to remove the line printing out the add-ons, too. That’s the second of the highlighted lines in the code above.

Notice how there's a lone asterisk in one of the parameter slots in the function signature. You can confirm that strength and milk_amount still need to be assigned keyword arguments:

#38

When you try to pass positional arguments to strength and milk_amount, the code raises an error:

Traceback (most recent call last):
  brew_coffee(
    ~~~~~~~~~~~^
        "Espresso",
        ^^^^^^^^^^^
        3,
        ^^
        0,
        ^^
    )
    ^
TypeError: brew_coffee() takes 1 positional argument
    but 3 were given

The error message tells you that brew_coffee() only takes one positional argument. All the arguments after the * are keyword-only. Therefore, only the arguments preceding it may be positional. And there's only one parameter before the rogue asterisk, *.

A lone forward slash, /, among the function's parameters indicates that all parameters before the forward slash must be assigned positional-only arguments.

A lone asterisk, *, among the function's parameters indicates that all parameters after the asterisk must be assigned keyword-only arguments.

If you re-read the statements above carefully, you'll conclude that when you use both / and * in a function definition, the / must come before the *. Recall that positional arguments must come before keyword arguments.

It's also possible to have parameters between the / and *:

#39

You add a new parameter, another_param, in between / and * in the function's signature. Since this parameter is sandwiched between / and *, you can choose to assign either a positional or a keyword argument to it.

Here's a function call with the second argument as a positional argument:

#40

The second positional argument is assigned to another_param.

But you can also use a keyword argument:

#41

Both of these versions give the same output:

Coffee type: Espresso
another_param='testing another parameter'
Strength: 4
Milk Amount: 0
Instructions:

Any parameter between / and * in the function definition can have either positional or keyword arguments. So, in summary:

Remember that the * serves a similar purpose as the asterisk in *args since both * and *args force any parameters that come after them to require keyword-only arguments. Remember this similarity if you find yourself struggling to remember what / and * do!

Why use positional-only or keyword-only arguments? Positional-only arguments (using /) ensure clarity and prevent misuse in APIs where parameter names are irrelevant to the user. Keyword-only arguments (using *) improve readability and avoid errors in functions with many parameters, as names make the intent clear. For Alex, making coffee_type positional-only and strength and milk_amount keyword-only simplifies the API by enforcing a consistent calling style, reducing confusion for his team.

Using positional-only arguments may also be beneficial in performance-critical code since the overhead to deal with keyword arguments is not negligible in these cases.

Do you want to join a forum to discuss Python further with other Pythonistas? Upgrade to a paid subscription here on The Python Coding Stack to get exclusive access to The Python Coding Place's members' forum. More Python. More discussions. More fun.

Subscribe now

And you'll also be supporting this publication. I put plenty of time and effort into crafting each article. Your support will help me keep this content coming regularly and, importantly, will help keep it free for everyone.

Final Words

The reporter from The Herald did manage to chat to Alex eventually. She had become a regular at AI Coffee, and ever since Alex employed more staff, he's been able to chat to customers a bit more.

"There's a question I'm curious about", she asked. "How does the Artificial Intelligence software work to make the coffee just perfect for each customer?"

"I beg your pardon?" Alex looked confused.

"I get it. It's a trade secret, and you don't want to tell me. This Artificial Intelligence stuff is everywhere these days."

"What do you mean by Artificial Intelligence?" Alex asked, more perplexed.

"The machine uses AI to optimise the coffee it makes, right?"

"Er, no. It does not."

"But…But the name of the coffee shop, _AI Coffee_…?"

"Ah, that's silly, I know. I couldn't think of a name for the shop. So I just used my initials. I'm Alex Inverness."

• • •

Python functions offer lots of flexibility in how to define and use them. But function signatures can look cryptic with all the *args and **kwargs, rogue / and *, some parameters with default values and others without. And the rules on when and how to use arguments may not be intuitive at first.

Hopefully, Alex's story helped you grasp all the minutiae of the various types of parameters and arguments you can use in Python functions.

Now, I need to make myself a cup of coffee…

#42

Photo by Viktoria Alipatova: https://www.pexels.com/photo/person-sitting-near-table-with-teacups-and-plates-2074130/

Code in this article uses Python 3.13

The code images used in this article are created using Snappify. [Affiliate link]

You can also support this publication by making a one-off contribution of any amount you wish.

Support The Python Coding Stack

For more Python resources, you can also visit Real Python—you may even stumble on one of my own articles or courses there!

Also, are you interested in technical writing? You’d like to make your own writing more narrative, more engaging, more memorable? Have a look at Breaking the Rules.

And you can find out more about me at stephengruppetta.com

Further reading related to this article’s topic:

Appendix: Code Blocks

Code Block #1
brew_coffee("Cappuccino", 4, 2)
Code Block #2
brew_coffee(coffee_type: str, strength: int, milk_amount: int)
Code Block #3
brew_coffee("Americano", 1, 4)
Code Block #4
brew_coffee(coffee_type, strength, milk_amount)
Code Block #5
def brew_coffee(coffee_type: str, strength: int, milk_amount: int):
    print(
        f"Coffee type: {coffee_type}\n"
        f"Strength: {strength}\n"
        f"Milk Amount: {milk_amount}\n"
    )

brew_coffee("Americano", 1, 4)
Code Block #6
brew_coffee("Americano", milk_amount=1, strength=4)
Code Block #7
brew_coffee("Americano", milk_amount=1, strength=4)
Code Block #8
brew_coffee("Americano", milk_amount=1, 4)
Code Block #9
def brew_coffee(coffee_type, strength, milk_amount, *args):
    print(
        f"Coffee type: {coffee_type}\n"
        f"Strength: {strength}\n"
        f"Milk Amount: {milk_amount}\n"
        f"Add-ons: {', '.join(args)}\n"
    )
Code Block #10
brew_coffee("Latte", 3, 2, "cinnamon", "hazelnut syrup")
Code Block #11
def brew_coffee(coffee_type, strength, milk_amount, *args):
    print(f"{args=}")
    print(type(args))
    print(
        f"Coffee type: {coffee_type}\n"
        f"Strength: {strength}\n"
        f"Milk Amount: {milk_amount}\n"
        f"Add-ons: {', '.join(args)}\n"
    )

brew_coffee("Latte", 3, 2, "cinnamon", "hazelnut syrup")
Code Block #12
def brew_coffee(coffee_type, strength, milk_amount, *add_ons):
    print(f"{add_ons=}")
    print(type(add_ons))
    print(
        f"Coffee type: {coffee_type}\n"
        f"Strength: {strength}\n"
        f"Milk Amount: {milk_amount}\n"
        f"Add-ons: {', '.join(add_ons)}\n"
    )

brew_coffee("Latte", 3, 2, "cinnamon", "hazelnut syrup")
Code Block #13
brew_coffee("Latte", 3, 2)
Code Block #14
def brew_coffee(coffee_type, strength, milk_amount, *add_ons):
    print(
        f"Coffee type: {coffee_type}\n"
        f"Strength: {strength}\n"
        f"Milk Amount: {milk_amount}\n"
        f"Add-ons: {', '.join(add_ons)}\n"
    )

brew_coffee("Latte", strength=3, milk_amount=2, "vanilla syrup")
Code Block #15
def brew_coffee(coffee_type, *add_ons, strength, milk_amount):
    print(
        f"Coffee type: {coffee_type}\n"
        f"Strength: {strength}\n"
        f"Milk Amount: {milk_amount}\n"
        f"Add-ons: {', '.join(add_ons)}\n"
    )

brew_coffee("Latte", "vanilla syrup", strength=3, milk_amount=2)
Code Block #16
brew_coffee("Latte", "vanilla syrup", 3, 2)
Code Block #17
def brew_coffee(
        coffee_type,
        *add_ons, 
        strength, 
        milk_amount, 
        **kwargs,
):
    print(f"{kwargs=}")
    print(type(kwargs))
    print(
        f"Coffee type: {coffee_type}\n"
        f"Strength: {strength}\n"
        f"Milk Amount: {milk_amount}\n"
        f"Add-ons: {', '.join(add_ons)}\n"
        f"Instructions:"
    )
    for key, value in kwargs.items():
        print(f"\t{key.replace('_', ' ')}: {value}")
Code Block #18
brew_coffee(
    "Latte",
    "vanilla syrup",
    strength=3,
    milk_amount=2,
    milk_type="oat",
    temperature="extra hot",
)
Code Block #19
def brew_coffee(
        coffee_type,
        *add_ons,
        strength,
        milk_amount,
        **instructions,
):
    print(f"{instructions=}")
    print(type(instructions))
    print(
        f"Coffee type: {coffee_type}\n"
        f"Strength: {strength}\n"
        f"Milk Amount: {milk_amount}\n"
        f"Add-ons: {', '.join(add_ons)}\n"
        f"Instructions:"
    )
    for key, value in instructions.items():
        print(f"\t{key.replace('_', ' ')}: {value}")
Code Block #20
brew_coffee("Espresso", strength=4, milk_amount=0)
Code Block #21
brew_coffee(coffee_type="Espresso", strength=4, milk_amount=0)
Code Block #22
def brew_coffee(
        coffee_type,
        *add_ons,
        strength=3,
        milk_amount,
        **instructions,
):
    # ...
Code Block #23
brew_coffee("Espresso", milk_amount=0)
Code Block #24
brew_coffee("Latte", "caramel drizzle", milk_amount=2)
Code Block #25
def brew_coffee(
        coffee_type,
        *add_ons,
        strength=3,
        milk_amount,
        **instructions,
):
    # ...
Code Block #26
def brew_coffee_variant(
        coffee_type,
        # *add_ons,
        strength=3,
        milk_amount,
        **instructions,
):
    print(
        f"Coffee type: {coffee_type}\n"
        f"Strength: {strength}\n"
        f"Milk Amount: {milk_amount}\n"
        # f"Add-ons: {', '.join(add_ons)}\n"
        f"Instructions:"
    )
    for key, value in instructions.items():
        print(f"\t{key.replace('_', ' ')}: {value}")

brew_coffee_variant("Espresso", milk_amount=0)
Code Block #27
brew_coffee_variant("Espresso", 0)
Code Block #28
def brew_coffee(
        coffee_type,
        *add_ons,
        strength=3,
        milk_amount,
        **instructions,
):
    print(
        f"Coffee type: {coffee_type}\n"
        f"Strength: {strength}\n"
        f"Milk Amount: {milk_amount}\n"
        f"Add-ons: {', '.join(add_ons)}\n"
        f"Instructions:"
    )
    for key, value in instructions.items():
        print(f"\t{key.replace('_', ' ')}: {value}")

brew_coffee("Espresso", milk_amount=0)
Code Block #29
def brew_coffee(
        coffee_type,
        *add_ons,
        strength=3,
        milk_amount=0,
        **instructions,
):
    print(
        f"Coffee type: {coffee_type}\n"
        f"Strength: {strength}\n"
        f"Milk Amount: {milk_amount}\n"
        f"Add-ons: {', '.join(add_ons)}\n"
        f"Instructions:"
    )
    for key, value in instructions.items():
        print(f"\t{key.replace('_', ' ')}: {value}")

brew_coffee("Espresso")
Code Block #30
brew_coffee(
    "Cappuccino",
    "chocolate sprinkles",
    "vanilla syrup",
    milk_amount=2,
    temperature="extra hot",
    cup_size="large cup",
)
Code Block #31
def brew_coffee(
        coffee_type,
        *add_ons,
        strength=3,
        milk_amount=0,
        **instructions,
):
    # ...
Code Block #32
brew_coffee(
    coffee_type="Cappuccino",
    "chocolate sprinkles",
    "vanilla syrup",
    milk_amount=2,
    temperature="extra hot",
    cup_size="large cup",
)
Code Block #33
def brew_coffee(
        coffee_type,
        /,
        *add_ons,
        strength=3,
        milk_amount=0,
        **instructions,
):
    # ...
Code Block #34
brew_coffee(
    coffee_type="Cappuccino",
    milk_amount=2,
    temperature="extra hot",
    cup_size="large cup",
)
Code Block #35
brew_coffee(
    "Cappuccino",
    milk_amount=2,
    temperature="extra hot",
    cup_size="large cup",
)
Code Block #36
def brew_coffee(
        coffee_type,
        /,
        # *add_ons,
        strength=3,
        milk_amount=0,
        **instructions,
):
Code Block #37
def brew_coffee(
        coffee_type,
        /,
        *,
        strength=3,
        milk_amount=0,
        **instructions,
):
    print(
        f"Coffee type: {coffee_type}\n"
        f"Strength: {strength}\n"
        f"Milk Amount: {milk_amount}\n"
        # f"Add-ons: {', '.join(add_ons)}\n"
        f"Instructions:"
    )
    for key, value in instructions.items():
        print(f"\t{key.replace('_', ' ')}: {value}")

brew_coffee(
    "Cappuccino",
    milk_amount=2,
    temperature="extra hot",
    cup_size="large cup",
)
Code Block #38
brew_coffee(
    "Espresso",
    3,
    0,
)
Code Block #39
def brew_coffee(
        coffee_type,
        /,
        another_param,
        *,
        strength=3,
        milk_amount=0,
        **instructions,
):
    print(
        f"Coffee type: {coffee_type}\n"
        f"{another_param=}\n"
        f"Strength: {strength}\n"
        f"Milk Amount: {milk_amount}\n"
        # f"Add-ons: {', '.join(add_ons)}\n"
        f"Instructions:"
    )
    for key, value in instructions.items():
        print(f"\t{key.replace('_', ' ')}: {value}")
Code Block #40
brew_coffee(
    "Espresso",
    "testing another parameter",
    strength=4,
)
Code Block #41
brew_coffee(
    "Espresso",
    another_param="testing another parameter",
    strength=4,
)
Code Block #42
brew_coffee(
    "Macchiato",
    strength=4,
    milk_amount=1,
    cup="Stephen's espresso cup",
)

For more Python resources, you can also visit Real Python—you may even stumble on one of my own articles or courses there!

Also, are you interested in technical writing? You’d like to make your own writing more narrative, more engaging, more memorable? Have a look at Breaking the Rules.

And you can find out more about me at stephengruppetta.com

May 07, 2025 08:19 PM UTC


death and gravity

Process​Thread​Pool​Executor: when I‍/‍O becomes CPU-bound

So, you're doing some I‍/‍O bound stuff, in parallel.

Maybe you're scraping some websites – a lot of websites.

Maybe you're updating or deleting millions of DynamoDB items.

You've got your ThreadPoolExecutor, you've increased the number of threads and tuned connection limits... but after some point, it's just not getting any faster. You look at your Python process, and you see CPU utilization hovers above 100%.

You could split the work into batches and have a ProcessPoolExecutorrun your original code in separate processes. But that requires yet more code, and a bunch of changes, which is no fun. And maybe your input is not that easy to split into batches.

If only we had an executor thatworked seamlessly across processes and threads.

Well, you're in luck, since that's exactly what we're building today!

And even better, in a couple years you won't even need it anymore.

Establishing a baseline

To measure things, we'll use a mock that pretends to do mostly I‍/‍O, with a sprinkling of CPU-bound work thrown in – a stand-in for something like a database connection, a Requests session, or a DynamoDB client.

`class Client: io_time = 0.02 cpu_time = 0.0008

def method(self, arg):
    # simulate I/O
    time.sleep(self.io_time)

    # simulate CPU-bound work
    start = time.perf_counter()
    while time.perf_counter() - start < self.cpu_time:
        for i in range(100): i ** i

    return arg

`

We sleep() for the I‍/‍O, and do some math in a loop for the CPU stuff; it doesn't matter exactly how long each takes, as long I‍/‍O time dominates.

Real multi-threaded clients are usually backed by a shared connection pool, which allows for connection reuse (so you don't pay the cost of a new connection on each request) and multiplexing (so you can use the same connection for multiple concurrent requests, possible with protocols like HTTP/2 or newer). We could simulate this with a semaphore, but limiting connections is not relevant here – we're assuming the connection pool is effectively unbounded.

Since we'll use our client from multiple processes, we write an initializer function to set up a global, per-process client instance (remember, we want to share potential connection pools between threads); we can then pass the initializer to the executor constructor, along with any arguments we want to pass to the client. Similarly, we do the work through a function that uses this global client.

`# this code runs in each worker process

client = None

def init_client(*args): global client client = Client(*args)

def do_stuff(*args): return client.method(*args) `

Finally, we make a simple timing context manager:

@contextmanager def timer(): start = time.perf_counter() yield end = time.perf_counter() print(f"elapsed: {end-start:1.3f}")

...and put everything together in a function that measures how long it takes to do a bunch of work using a concurrent.futures executor:

`def benchmark(executor, n=10_000, timer=timer, chunksize=10): with executor: # make sure all the workers are started, # so we don't measure their startup time list(executor.map(time.sleep, [0] * 200))

    with timer():
        values = list(executor.map(do_stuff, range(n), chunksize=chunksize))

    assert values == list(range(n)), values

`

Threads

So, a ThreadPoolExecutor should suffice here, since we're mostly doing I‍/‍O, right?

`>>> from concurrent.futures import *

from bench import * init_client() benchmark(ThreadPoolExecutor(10)) elapsed: 24.693 `

More threads!

>>> benchmark(ThreadPoolExecutor(20)) elapsed: 12.405

Twice the threads, twice as fast. More!

>>> benchmark(ThreadPoolExecutor(30)) elapsed: 8.718

Good, it's still scaling linearly. MORE!

>>> benchmark(ThreadPoolExecutor(40)) elapsed: 8.638

confused cat with question marks around its head

...more?

`>>> benchmark(ThreadPoolExecutor(50)) elapsed: 8.458

benchmark(ThreadPoolExecutor(60)) elapsed: 8.430 benchmark(ThreadPoolExecutor(70)) elapsed: 8.428 `

squinting confused cat

Problem: CPU becomes a bottleneck

It's time we take a closer look at what our process is doing. I'd normally use the top command for this, but since the flags and output vary with the operating system, we'll implement our own using the excellent psutil library.

`@contextmanager def top(): """Print information about current and child processes.

RES is the resident set size. USS is the unique set size.
%CPU is the CPU utilization. nTH is the number of threads.

"""
process = psutil.Process()
processes = [process] + process.children(True)
for p in processes: p.cpu_percent()

yield

print(f"{'PID':>7} {'RES':>7} {'USS':>7} {'%CPU':>7} {'nTH':>7}")
for p in processes:
    try:
        m = p.memory_full_info()
    except psutil.AccessDenied:
        m = p.memory_info()
    rss = m.rss / 2**20
    uss = getattr(m, 'uss', 0) / 2**20
    cpu = p.cpu_percent()
    nth = p.num_threads()
    print(f"{p.pid:>7} {rss:6.1f}m {uss:6.1f}m {cpu:7.1f} {nth:>7}")

`

And because it's a context manager, we can use it as a timer:

`>>> init_client()

benchmark(ThreadPoolExecutor(10), timer=top) PID RES USS %CPU nTH 51395 35.2m 28.5m 38.7 11 `

So, what happens if we increase the number of threads?

`>>> benchmark(ThreadPoolExecutor(20), timer=top) PID RES USS %CPU nTH 13912 16.8m 13.2m 70.7 21

benchmark(ThreadPoolExecutor(30), timer=top) PID RES USS %CPU nTH 13912 17.0m 13.4m 99.1 31 benchmark(ThreadPoolExecutor(40), timer=top) PID RES USS %CPU nTH 13912 17.3m 13.7m 100.9 41 `

With more threads, the compute part of our I‍/‍O bound workload increases, eventually becoming high enough to saturate one CPU – and due to the global interpreter lock,one CPU is all we can use, regardless of the number of threads.1

Processes?

I know, let's use a ProcessPoolExecutor instead!

`>>> benchmark(ProcessPoolExecutor(20, initializer=init_client)) elapsed: 12.374

benchmark(ProcessPoolExecutor(30, initializer=init_client)) elapsed: 8.330 benchmark(ProcessPoolExecutor(40, initializer=init_client)) elapsed: 6.273 `

Hmmm... I guess it is a little bit better.

More? More!

`>>> benchmark(ProcessPoolExecutor(60, initializer=init_client)) elapsed: 4.751

benchmark(ProcessPoolExecutor(80, initializer=init_client)) elapsed: 3.785 benchmark(ProcessPoolExecutor(100, initializer=init_client)) elapsed: 3.824 `

OK, it's better, but with diminishing returns – there's no improvement after 80 processes, and even then, it's only 2.2x faster than the best time with threads, when, in theory, it should be able to make full use of all 4 CPUs.

Also, we're not making best use ofconnection pools(since we now have 80 of them, one per process), nor multiplexing (since we now have 80 connections, one per pool).

Problem: more processes, more memory

But it gets worse!

>>> benchmark(ProcessPoolExecutor(80, initializer=init_client), timer=top) PID RES USS %CPU nTH 2479 21.2m 15.4m 15.0 3 2480 11.2m 6.3m 0.0 1 2481 13.8m 8.5m 3.4 1 ... 78 more lines ... 2560 13.8m 8.5m 4.4 1

13.8 MiB * 80 ~= 1 GiB ... that is a lot of memory.

Now, there's some nuance to be had here.

First, on most operating systems that have virtual memory,code segment pages are shared between processes – there's no point in having 80 copies of libc or the Python interpreter in memory.

The unique set size is probably a better measurement than the resident set size, since it excludes memory shared between processes.2So, for the macOS output above,3the actual usage is more like 8.5 MiB * 80 = 680 MiB.

Second, if you use the fork or forkserver start methods, processes also share memory allocated before the fork() via copy-on-write; for Python, this includes module code and variables. On Linux, the actual usage is 1.7 MiB * 80 = 136 MiB:

>>> benchmark(ProcessPoolExecutor(80, initializer=init_client), timer=top) PID RES USS %CPU nTH 329801 17.0m 6.6m 5.1 3 329802 13.3m 1.6m 2.1 1 ... 78 more lines ... 329881 13.3m 1.7m 2.0 1

However, it's important to note that's just a lower bound; memory allocated after fork() is not shared, and most real work will unavoidably allocate more memory.

Why not both?

One reasonable way of dealing with this would be to split the input into batches, one per CPU, and pass them to a ProcessPoolExecutor, which in turn runs the batch items using a ThreadPoolExecutor.4

But that would mean we need to change our code, and that's no fun.

If only we had an executor thatworked seamlessly across processes and threads.

A minimal plausible solution

In keeping with what hasbecome traditionby now, we'll take an iterative, problem-solution approach; since we're not sure what to do yet, we start with the simplest thing that could possibly work.

We know we want a process pool executor that starts one thread pool executor per process, so let's deal with that first.

`class ProcessThreadPoolExecutor(concurrent.futures.ProcessPoolExecutor):

def __init__(self, max_threads=None, initializer=None, initargs=()):
    super().__init__(
        initializer=_init_process,
        initargs=(max_threads, initializer, initargs)
    )

`

By subclassing ProcessPoolExecutor, we get the map() implementation for free, since the original is implemented in terms of submit().5By going with the default max_workers, we get one process per CPU (which is what we want); we can add more arguments later if needed.

In a custom process initializer, we set up a global thread pool executor,6and then call the process initializer provided by the user:

`# this code runs in each worker process

_executor = None

def _init_process(max_threads, initializer, initargs): global _executor

_executor = concurrent.futures.ThreadPoolExecutor(max_threads)

if initializer:
    initializer(*initargs)

`

Likewise, submit() passes the work along to the thread pool executor:

class ProcessThreadPoolExecutor(concurrent.futures.ProcessPoolExecutor): # ... def submit(self, fn, *args, **kwargs): return super().submit(_submit, fn, *args, **kwargs)

`# this code runs in each worker process

...

def _submit(fn, *args, **kwargs): return _executor.submit(fn, *args, **kwargs).result() `

OK, that looks good enough; let's use it and see if it works:

`def _do_stuff(n): print(f"doing: {n}") return n ** 2

if name == 'main': with ProcessThreadPoolExecutor() as e: print(list(e.map(_do_stuff, [0, 1, 2]))) `

$ python ptpe.py doing: 0 doing: 1 doing: 2 [0, 1, 4]

Wait, we got it on the first try?!

Let's measure that:

`>>> from bench import *

from ptpe import * benchmark(ProcessThreadPoolExecutor(30, initializer=init_client), n=1000) elapsed: 6.161 `

Hmmm... that's unexpectedly slow... almost as if:

`>>> multiprocessing.cpu_count() 4

benchmark(ProcessPoolExecutor(4, initializer=init_client), n=1000) elapsed: 6.067 `

Ah, because _submit() waits for the result()in the main thread of the worker process, this is just a ProcessPoolExecutor with extra steps.


But what if we send back the future object instead?

def submit(self, fn, *args, **kwargs): return super().submit(_submit, fn, *args, **kwargs).result()

def _submit(fn, *args, **kwargs): return _executor.submit(fn, *args, **kwargs)

Alas:

`$ python ptpe.py doing: 0 doing: 1 doing: 2 concurrent.futures.process._RemoteTraceback: """ Traceback (most recent call last): File "concurrent/futures/process.py", line 210, in _sendback_result result_queue.put(_ResultItem(work_id, result=result, File "multiprocessing/queues.py", line 391, in put obj = _ForkingPickler.dumps(obj) File "multiprocessing/reduction.py", line 51, in dumps cls(buf, protocol).dump(obj) TypeError: cannot pickle '_thread.RLock' object """

The above exception was the direct cause of the following exception:

Traceback (most recent call last): File "ptpe.py", line 42, in print(list(e.map(_do_stuff, [0, 1, 2]))) ... TypeError: cannot pickle '_thread.RLock' object `

The immediate cause of the error is that the futurehas a conditionthat has a lockthat can't be pickled, because threading locks only make sense within the same process.

The deeper cause is that the future is not just data, but encapsulates state owned by the thread pool executor, and sharing state between processes requires extra work.

It may not seem like it, but this is a partial success: the work happens, we just can't get the results back. Not surprising, to be honest, it couldn't have been that easy.

Getting results

If you look carefully at the traceback, you'll find a hint of how ProcessPoolExecutorgets its own results back from workers – a queue; the module docstring even has a neat data-flow diagram:

|======================= In-process =====================|== Out-of-process ==|

+----------+     +----------+       +--------+     +-----------+    +---------+
|          |  => | Work Ids |       |        |     | Call Q    |    | Process |
|          |     +----------+       |        |     +-----------+    |  Pool   |
|          |     | ...      |       |        |     | ...       |    +---------+
|          |     | 6        |    => |        |  => | 5, call() | => |         |
|          |     | 7        |       |        |     | ...       |    |         |
| Process  |     | ...      |       | Local  |     +-----------+    | Process |
|  Pool    |     +----------+       | Worker |                      |  #1..n  |
| Executor |                        | Thread |                      |         |
|          |     +----------- +     |        |     +-----------+    |         |
|          | <=> | Work Items | <=> |        | <=  | Result Q  | <= |         |
|          |     +------------+     |        |     +-----------+    |         |
|          |     | 6: call()  |     |        |     | ...       |    |         |
|          |     |    future  |     |        |     | 4, result |    |         |
|          |     | ...        |     |        |     | 3, except |    |         |
+----------+     +------------+     +--------+     +-----------+    +---------+

Now, we could probably use the same queue somehow, but it would involve touching a lot of (private) internals.7Instead, let's use a separate queue:

def __init__(self, max_threads=None, initializer=None, initargs=()): self.__result_queue = multiprocessing.Queue() super().__init__( initializer=_init_process, initargs=(self.__result_queue, max_threads, initializer, initargs) )

On the worker side, we make it globally accessible:

`# this code runs in each worker process

_executor = None _result_queue = None

def _init_process(queue, max_threads, initializer, initargs): global _executor, _result_queue

_executor = concurrent.futures.ThreadPoolExecutor(max_threads)
_result_queue = queue

if initializer:
    initializer(*initargs)

`

...so we can use it from a task callback registered by _submit():

`def _submit(fn, *args, **kwargs): task = _executor.submit(fn, *args, **kwargs) task.add_done_callback(_put_result)

def _put_result(task): if exception := task.exception(): _result_queue.put((False, exception)) else: _result_queue.put((True, task.result())) `

Back in the main process, we handle the results in a thread:

def __init__(self, max_threads=None, initializer=None, initargs=()): # ... self.__result_handler = threading.Thread(target=self.__handle_results) self.__result_handler.start()

def __handle_results(self): for ok, result in iter(self.__result_queue.get, None): print(f"{'ok' if ok else 'error'}: {result}")

Finally, to stop the handler, we use None as a sentinelon executor shutdown:

def shutdown(self, wait=True): super().shutdown(wait=wait) if self.__result_queue: self.__result_queue.put(None) if wait: self.__result_handler.join() self.__result_queue.close() self.__result_queue = None

Let's see if it works:

`$ python ptpe.py doing: 0 ok: [0] doing: 1 ok: [1] doing: 2 ok: [4] Traceback (most recent call last): File "concurrent/futures/_base.py", line 317, in _result_or_cancel return fut.result(timeout) AttributeError: 'NoneType' object has no attribute 'result'

During handling of the above exception, another exception occurred:

Traceback (most recent call last): ... AttributeError: 'NoneType' object has no attribute 'cancel' `

Yay, the results are making it to the handler!

The error happens because instead of returning a Future, our submit() returns the result of _submit(), which is always None.

Fine, we'll make our own futures

But submit() must return a future, so we make our own:

def __init__(self, max_threads=None, initializer=None, initargs=()): # ... self.__tasks = {} # ...

` def submit(self, fn, *args, **kwargs): outer = concurrent.futures.Future() task_id = id(outer) self.__tasks[task_id] = outer

    outer.set_running_or_notify_cancel()
    inner = super().submit(_submit, task_id, fn, *args, **kwargs)

    return outer

`

In order to map results to their futures, we can use a unique identifier; the id() of the outer future should do, since it is unique for the object's lifetime.

We pass the id to _submit(), then to _put_result() as an attribute on the future, and finally back in the queue with the result:

`def _submit(task_id, fn, *args, **kwargs): task = _executor.submit(fn, *args, **kwargs) task.task_id = task_id task.add_done_callback(_put_result)

def _put_result(task): if exception := task.exception(): _result_queue.put((task.task_id, False, exception)) else: _result_queue.put((task.task_id, True, task.result())) `

Back in the result handler, we find the maching future, and set the result accordingly:

def __handle_results(self): for task_id, ok, result in iter(self.__result_queue.get, None): outer = self.__tasks.pop(task_id) if ok: outer.set_result(result) else: outer.set_exception(result)

And it works:

$ python ptpe.py doing: 0 doing: 1 doing: 2 [0, 1, 4]

I mean, it really works:

`>>> benchmark(ProcessThreadPoolExecutor(10, initializer=init_client)) elapsed: 6.220

benchmark(ProcessThreadPoolExecutor(20, initializer=init_client)) elapsed: 3.397 benchmark(ProcessThreadPoolExecutor(30, initializer=init_client)) elapsed: 2.575 benchmark(ProcessThreadPoolExecutor(40, initializer=init_client)) elapsed: 2.664 `

3.3x is not quite the 4 CPUs my laptop has, but it's pretty close, and much better than the 2.2x we got from processes alone.

Death becomes a problem

I wonder what happens when a worker process dies.

For example, the initializer can fail:

`>>> executor = ProcessPoolExecutor(initializer=divmod, initargs=(0, 0))

executor.submit(int).result() Exception in initializer: Traceback (most recent call last): ... ZeroDivisionError: integer division or modulo by zero Traceback (most recent call last): ... concurrent.futures.process.BrokenProcessPool: A process in the process pool was terminated abruptly while the future was running or pending. `

...or a worker can die some time later, which we can help along with a custom timer:8

@contextmanager def terminate_child(interval=1): threading.Timer(interval, psutil.Process().children()[-1].terminate).start() yield

`>>> executor = ProcessPoolExecutor(initializer=init_client)

benchmark(executor, timer=terminate_child) [ one second later ] Traceback (most recent call last): ... concurrent.futures.process.BrokenProcessPool: A process in the process pool was terminated abruptly while the future was running or pending. `

Now let's see our executor:

`>>> executor = ProcessThreadPoolExecutor(30, initializer=init_client)

benchmark(executor, timer=terminate_child) [ one second later ] [ ... ] [ still waiting ] [ ... ] [ hello? ] `

If the dead worker is not around to send back results, its futures never get completed, and map() keeps waiting until the end of time, when the expected behavior is to detect when this happens, and fail all pending tasks with BrokenProcessPool.


Before we do that, though, let's address a more specific issue.

If map() hasn't finished submitting tasks when the worker dies,inner fails with BrokenProcessPool, which right now we're ignoring entirely. While we don't need to do anything about it in particular because it gets covered by handling the general case, we should still propagate all errors to the outer task anyway.

` def submit(self, fn, *args, **kwargs): # ... inner = super().submit(_submit, task_id, fn, *args, **kwargs) inner.task_id = task_id inner.add_done_callback(self.__handle_inner)

    return outer

`

def __handle_inner(self, inner): task_id = inner.task_id if exception := inner.exception(): if outer := self.__tasks.pop(task_id, None): outer.set_exception(exception)

This fixes the case where a worker dies almost instantly:

`>>> executor = ProcessThreadPoolExecutor(30, initializer=init_client)

benchmark(executor, timer=lambda: terminate_child(0)) Traceback (most recent call last): ... concurrent.futures.process.BrokenProcessPool: A process in the process pool was terminated abruptly while the future was running or pending. `


For the general case, we need to check if the executor is broken – but how? We've already decided we don't want to depend on internals, so we can't use Process​Pool​Executor.​​_broken. Maybe we can submit a dummy task and see if it fails instead:

def __check_broken(self): try: super().submit(int).cancel() except concurrent.futures.BrokenExecutor as e: return type(e)(str(e)) except RuntimeError as e: if 'shutdown' not in str(e): raise return None

Using it is a bit involved, but not completely awful:

` def __handle_results(self): last_broken_check = time.monotonic()

    while True:
        now = time.monotonic()
        if now - last_broken_check >= .1:
            if exc := self.__check_broken():
                break
            last_broken_check = now

        try:
            value = self.__result_queue.get(timeout=.1)
        except queue.Empty:
            continue

        if not value:
            return

        task_id, ok, result = value
        if outer := self.__tasks.pop(task_id, None):
            if ok:
                outer.set_result(result)
            else:
                outer.set_exception(result)

    while self.__tasks:
        try:
            _, outer = self.__tasks.popitem()
        except KeyError:
            break
        outer.set_exception(exc)

`

When there's a steady stream of results coming in, we don't want to check too often, so we enforce a minimum delay between checks. When there are no results coming in, we want to check regularly, so we use the Queue.get() timeout to avoid waiting forever. If the check fails, we break out of the loop and fail the pending tasks. Like so:

`>>> executor = ProcessThreadPoolExecutor(30, initializer=init_client)

benchmark(executor, timer=terminate_child) Traceback (most recent call last): ... concurrent.futures.process.BrokenProcessPool: A child process terminated abruptly, the process pool is not usable anymore `

cool smoking cat wearing denim jacket and sunglasses


So, yeah, I think we're done. Here's the final executor and benchmark code.

Some features left as an exercise for the reader:

Learned something new today? Share this with others, it really helps!

Want to know when new articles come out?Subscribe hereto get new stuff straight to your inbox!

Bonus: free threading

You may have heard people being excited about the experimental free threading support added in Python 3.13, which allows running Python code on multiple CPUs.

And for good reason:

`$ python3.13t Python 3.13.2 experimental free-threading build

from concurrent.futures import * from bench import * init_client() benchmark(ThreadPoolExecutor(30)) elapsed: 8.224 benchmark(ThreadPoolExecutor(40)) elapsed: 6.193 benchmark(ThreadPoolExecutor(120)) elapsed: 2.323 `

3.6x over to the GIL version, with none of the shenanigans in this article!

Alas, packages with extensions need to be updated to support it:

>>> import psutil zsh: segmentation fault python3.13t

...but the ecosystem is slowly catching up.

cat patiently waiting on balcony

  1. At least, all we can use for pure-Python code. I‍/‍O always releases the global interpreter lock, and so do some extension modules. [return]
  2. The psutil documentation for memory_full_info()explains the difference quite nicely and links to further resources, because good libraries educate. [return]
  3. You may have to run Python as root to get the USS of child processes. [return]
  4. And no, asyncio is not a solution, since the event loop runs in a single thread, so you'd still need to run one event loop per CPU in dedicated processes. [return]
  5. We could have used composition instead, but then we'd have to implement the full Executor interface, defining each method explicitly to delegate to the inner process pool executor, and keep things up to date when the interface gets new methods (and we'd have no way to trick the inner executor's map() to use our submit(), so we'd have to implement it from scratch).
    Yet another option would be to use both inheritance and composition – inherit the Executor base class directly for the common methods(assuming they're defined there and not in subclasses), and delegate to the inner executor only where needed (likely just map() and shutdown()). But, the only difference from the current code would be that it'd say self._inner instead of super() in a few places, so it's not really worth it, in my opinion. [return]
  6. A previous version of this code attempted to shutdown() the thread pool executor using atexit, but since atexit functions run after non-daemon threads finish, it wasn't actually doing anything. Not shutting it down seems to work for now, but we may still need do it to support shutdown(​cancel_futures=​True) properly. [return]
  7. Check outnilp0inter/threadedprocessfor an idea of what that looks like. [return]
  8. pkill -fn '[Pp]ython' would've done it too, but it gets tedious if you do it a lot, and it's a different command on Windows. [return]

May 07, 2025 06:00 PM UTC


Django Weblog

Django security releases issued: 5.2.1, 5.1.9 and 4.2.21

In accordance with our security release policy, the Django team is issuing releases forDjango 5.2.1,Django 5.1.9 andDjango 4.2.21. These releases address the security issues detailed below. We encourage all users of Django to upgrade as soon as possible.

Affected supported versions

Resolution

Patches to resolve the issue have been applied to Django's main, 5.2, 5.1, and 4.2 branches. The patches may be obtained from the following changesets.

General notes regarding security reporting

As always, we ask that potential security issues be reported via private email to security@djangoproject.com, and not via Django's Trac instance, nor via the Django Forum. Please see our security policies for further information.

May 07, 2025 02:00 PM UTC


Real Python

How to Use Loguru for Simpler Python Logging

In Python, logging is a vital programming practice that helps you track, understand, and debug your application’s behavior. Loguru is a Python library that provides simpler, more intuitive logging compared to Python’s built-in logging module.

Good logging gives you insights into your program’s execution, helps you diagnose issues, and provides valuable information about your application’s health in production. Without proper logging, you risk missing critical errors, spending countless hours debugging blind spots, and potentially undermining your project’s overall stability.

By the end of this tutorial, you’ll understand that:

After reading this tutorial, you’ll be able to quickly implement better logging in your Python applications. You’ll spend less time wrestling with logging configuration and more time using logs effectively to debug issues. This will help you build production-ready applications that are easier to troubleshoot when problems occur.

To get the most from this tutorial, you should be familiar with Python concepts like functions, decorators, and context managers. You might also find it helpful to have some experience with Python’s built-in logging module, though this isn’t required.

Don’t worry if you’re new to logging in Python. This tutorial will guide you through everything you need to know to get started with Loguru and implement effective logging in your applications.

You’ll do parts of the coding for this tutorial in the Python standard REPL, and some other parts with Python scripts. You’ll find full script examples in the materials of this tutorial. You can download these scripts by clicking the link below:

Take the Quiz: Test your knowledge with our interactive “Python Logging With the Loguru Library” quiz. You’ll receive a score upon completion to help you track your learning progress:


How to Use Loguru for Simpler Python Logging

Installing Loguru

Loguru is available on PyPI, and you can install it with pip. Open a terminal or command prompt, create a new virtual environment, and then install the library:

This command will install the latest version of Loguru from Python Package Index (PyPI) onto your machine.

Verifying the Installation

To verify that the installation was successful, start a Python REPL:

Next, import Loguru:

If the import runs without error, then you’ve successfully installed Loguru and can now use it to log messages in your Python programs and applications.

Understanding Basic Setup Considerations

Before diving into Loguru’s features, there are a few key points to keep in mind:

  1. Single Logger Instance: Unlike Python’s built-in logging module, Loguru uses a single logger instance. You don’t need to create multiple loggers, just import the pre-configured logger object:
  2. Default Configuration: Out of the box, Loguru logs to stderr with a reasonable default format. This means you can start logging immediately without any setup.
  3. Python Version Compatibility: Loguru supports Python 3.5 and above.

Now that you understand these basic considerations, you’re ready to start logging with Loguru. In the next section, you’ll learn about basic logging operations and how to customize them to suit your needs.

Read the full article at https://realpython.com/python-loguru/ »


[ Improve Your Python With 🐍 Python Tricks 💌 – Get a short & sweet Python Trick delivered to your inbox every couple of days. >> Click here to learn more and see examples ]

May 07, 2025 02:00 PM UTC


John Cook

Converting between quaternions and rotation matrices

In the previous post I wrote about representing rotations with quaternions. This representation has several advantages, such as making it clear how rotations compose. Rotations are often represented as matrices, and so it’s useful to be able to go between the two representations.

A unit-length quaternion (_q_0, _q_1, _q_2, _q_3) represents a rotation by an angle θ around an axis in the direction of (_q_1, _q_2, _q_3) where cos(θ/2) = _q_0. The corresponding rotation matrix is given below.

R = \begin{pmatrix} 2(q_0^2 + q_1^2) - 1 & 2(q_1 q_2 - q_0 q_3) & 2(q_1 q_3 + q_0 q_2) \\ 2(q_1 q_2 + q_0 q_3) & 2(q_0^2 + q_2^2) - 1 & 2(q_1 q_3 - q_0 q_1) \\ 2(q_1 q_3 - q_0 q_2) & 2(q_2 q_3 + q_0 q_1) & 2(q_0^2 + q_3^2) - 1 \end{pmatrix}

Going the other way around, inferring a quaternion representation from a rotation matrix, is harder. Here is a mathematically correct but numerically suboptimal method known [1] as the Chiaverini-Siciliano method.

\begin{align*} q_0 &= \frac{1}{2} \sqrt{1 + r_{11} + r_{22} + r_{33}} \\ q_1 &= \frac{1}{2} \sqrt{1 + r_{11} - r_{22} - r_{33}} \text{ sgn}(r_{32} - r_{32}) \\ q_2 &= \frac{1}{2} \sqrt{1 - r_{11} + r_{22} - r_{33}} \text{ sgn}(r_{13} - r_{31}) \\ q_3 &= \frac{1}{2} \sqrt{1 - r_{11} - r_{22} + r_{33}} \text{ sgn}(r_{21} - r_{12}) \end{align*}

Here sgn is the sign function; sgn(x) equals 1 if x is positive and −1 if x is negative. Note that the components only depend on the diagonal of the rotation matrix, aside from the sign terms. Better numerical algorithms make more use of the off-diagonal elements.

Accounting for degrees of freedom

Something seems a little suspicious here. Quaternions contain four real numbers, and 3 by 3 matrices contain nine. How can four numbers determine nine numbers? And going the other way, out of the nine, we essentially choose three that determine the four components of a quaternion.

Quaterions have four degrees of freedom, but we’re using unit quaternions, so there are basically three degrees of freedom. Likewise orthogonal matrices have three degrees of freedom. An axis of rotation is a point on a sphere, so that has two degrees of freedom, and the degree of rotation is the third degree of freedom.

In topological terms, the unit quaternions and the set of 3 by 3 orthogonal matrices are both three dimensional manifolds, and the former is a double cover of the latter. It is a double cover because a unit quaternion q corresponds to the same rotation as −q.

Python code

Implementing the equations above is straightforward.

import numpy as np

def quaternion_to_rotation_matrix(q): q0, q1, q2, q3 = q return np.array([ [2*(q02 + q12) - 1, 2*(q1q2 - q0q3), 2*(q1q3 + q0q2)], [2*(q1q2 + q0q3), 2*(q02 + q22) - 1, 2*(q2q3 - q0q1)], [2*(q1q3 - q0q2), 2*(q2q3 + q0q1), 2*(q02 + q32) - 1] ])

def rotation_matrix_to_quaternion(R): r11, r12, r13 = R[0, 0], R[0, 1], R[0, 2] r21, r22, r23 = R[1, 0], R[1, 1], R[1, 2] r31, r32, r33 = R[2, 0], R[2, 1], R[2, 2]

# Calculate quaternion components
q0 = 0.5 * np.sqrt(1 + r11 + r22 + r33)
q1 = 0.5 * np.sqrt(1 + r11 - r22 - r33) * np.sign(r32 - r23)
q2 = 0.5 * np.sqrt(1 - r11 + r22 - r33) * np.sign(r13 - r31)
q3 = 0.5 * np.sqrt(1 - r11 - r22 + r33) * np.sign(r21 - r12)

return np.array([q0, q1, q2, q3])

Random testing

We’d like to test the code above by generating random quaternions, converting the quaternions to rotation matrices, then back to quaternions to verify that the round trip puts us back essentially where we started. Then we’d like to go the other way around, starting with randomly generated rotation matrices.

To generate a random unit quaternion, we generate a vector of four independent normal random values, then normalize by dividing by its length. (See this recent post.)

To generate a random rotation matrix, we use a generator that is part of SciPy.

Here’s the test code:

def randomq(): q = norm.rvs(size=4) return q/np.linalg.norm(q)

def randomR(): return special_ortho_group.rvs(dim=3)

np.random.seed(20250507) N = 10

for _ in range(N): q = randomq() R = quaternion_to_rotation_matrix(q) t = rotation_matrix_to_quaternion(R) print(np.linalg.norm(q - t))

for _ in range(N): R = randomR() q = rotation_matrix_to_quaternion(R) T = quaternion_to_rotation_matrix(q) print(np.linalg.norm(R - T))

The first test utterly fails, returning six 2s, i.e. the round trip vector is as far as possible from the vector we started with. How could that happen? It must be returning the negative of the original vector. Now go back to the discussion above about double covers: q and −q correspond to the same rotation.

If we go back and add the line

q *= np.sign(q[0])

then we standardize our random vectors to have a positive first component, just like the vectors returned by rotation_matrix_to_quaternion.

Now our tests all return norms on the order of 10−16 to 10−14. There’s a little room to improve the accuracy, but the results are good.

Update: I did some more random testing, and found errors on the order of 10−10. Then I was able to create a test case where rotation_matrix_to_quaternion threw an exception because one of the square roots had a negative argument. In [1] the authors get around this problem by evaluating two theoretically equivalent expressions for each of the square root arguments. The expressions are complementary in the sense that both should not lead to numerical difficulties at the same time.

[1] See “Accurate Computation of Quaternions from Rotation Matrices” by Soheil Sarabandi and Federico Thomas for a better numerical algorithm. See also the article “A Survey on the Computation of Quaternions From Rotation Matrices” by the same authors.

The post Converting between quaternions and rotation matrices first appeared on John D. Cook.

May 07, 2025 01:52 PM UTC


Daniel Roy Greenfeld

TIL: ^ bitwise XOR

How to mark a comparison of booleans as True or False using bitwise XOR.

May 07, 2025 03:21 AM UTC

May 06, 2025


PyCoder’s Weekly

Issue #680: Thread Safety, Pip 25.1, DjangoCon EU Wrap-Up, and More (May 6, 2025)

#680 – MAY 6, 2025
View in Browser »

The PyCoder’s Weekly Logo


Thread Safety in Python: Locks and Other Techniques

In this video course, you’ll learn about the issues that can occur when your code is run in a multithreaded environment. Then you’ll explore the various synchronization primitives available in Python’s threading module, such as locks, which help you make your code safe.
REAL PYTHON course

What’s New in Pip 25.1

pip 25.1 introduces support for Dependency Groups (PEP 735), resumable downloads, and an installation progress bar. Dependency resolution has also received a raft of bugfixes and improvements.
RICHARD SI

Articles & Tutorials

Quiz: Web Automation With Python and Selenium

In this quiz, you’ll test your understanding of using Selenium with Python for web automation. You’ll revisit concepts like launching browsers, interacting with web elements, handling dynamic content, and implementing the Page Object Model (POM) design pattern.
REAL PYTHON

Using JWTs in Python Flask REST Framework

“JSON Web Tokens (JWTs) secure communication between parties over the internet by authenticating users and transmitting information securely, without requiring a centralized storage system.” This article shows you how they work using a to-do list API in Flask.
FEDERICO TROTTA • Shared by AppSignal

The PyArrow Revolution

Pandas is built on NumPy, but changes are coming to allow the optional use of PyArrow. Talk Python interviews Reuven Lerner and they talk about what this means and how it will improve performance.
KENNEDY & LERNER podcast

Quirks in Django’s Template Language

Lily has been porting the Django template language into Rust and along the way has found some weird corner cases and some bugs. This post talks about those discoveries.
LILY F

PyXL: Python, on Hardware

PyXL is a custom chip that runs compiled Python ByteCode directly in hardware. Designed for real-time and embedded systems where Python was never fast enough—until now.
RUNPYXL.COM

Projects & Code

Events


Happy Pythoning!
This was PyCoder’s Weekly Issue #680.
View in Browser »

alt


[ Subscribe to 🐍 PyCoder’s Weekly 💌 – Get the best Python news, articles, and tutorials delivered to your inbox once a week >> Click here to learn more ]

May 06, 2025 07:30 PM UTC


Ari Lamstein

Course Review: Build an AI chatbot with Python

For a while now I’ve been wanting to learn more about LLMs. The problem has been that I wasn’t sure where to start.

So when Kevin Markham launched his course Build an AI chatbot with Python I jumped at the chance to take it. I had previously taken Kevin’s course on Pandas and enjoyed his teaching style. Build an AI chatbot with Python is short (Kevin says you can finish it in an hour, although I took longer) and cheap ($9).

The course starts with the very basics: creating an API key on OpenAI and installing the necessary packages. It ends with using LangChain and LangGraph to create a simple bot that has memory and can keep track of conversations with multiple users. Here’s an example:

Here you can see that Chatbot #1 learned that my name is Ari. I then terminated that bot and created another one. That new bot (#2) did not know my name. I then terminated it and reloaded bot #1. Bot #1 still remembered my name.

Due to its length, the course doesn’t teach you how to build anything more complex than that. But if you are just looking for a brief introduction to the field, then this might be exactly what you are looking for. It certainly was for me!

Kevin is currently working on a followup course (“Build AI agents with Python”) which I am currently reviewing. If people are interested, I can post a review of that course when I finish it as well. You can use this form to contact me and let me know if you are interested in that.

May 06, 2025 04:10 PM UTC


Real Python

Using the Python subprocess Module

Python’s subprocess module allows you to run shell commands and manage external processes directly from your Python code. By using subprocess, you can execute shell commands like ls or dir, launch applications, and handle both input and output streams. This module provides tools for error handling and process communication, making it a flexible choice for integrating command-line operations into your Python projects.

By the end of this video course, you’ll understand that:


[ Improve Your Python With 🐍 Python Tricks 💌 – Get a short & sweet Python Trick delivered to your inbox every couple of days. >> Click here to learn more and see examples ]

May 06, 2025 02:00 PM UTC


Python Software Foundation

Announcing Python Software Foundation Fellow Members for Q1 2025! 🎉

The PSF is pleased to announce its first batch of PSF Fellows for 2025! Let us welcome the new PSF Fellows for Q1! The following people continue to do amazing things for the Python community:

Aidis Stukas

Website, GitHub, LinkedIn, X(Twitter)

Baptiste Mispelon

Website, Mastodon

Charlie Marsh

X(Twitter), GitHub

Felipe de Morais

X (Twitter), LinkedIn

Frank Wiles

Website

Ivy Fung Oi Wei

Jon Banafato

Website

Julia Duimovich

Leandro Enrique Colombo Viña

X(Twitter), GitHub, LinkedIn, Instagram

Mike Pirnat

Website, Mastodon

Sage Sharp

Tereza Iofciu

Website, GitHub, Bluesky, Mastodon, LinkedIn

Velda Kiara

Website, LinkedIn, X(Twitter), Mastodon, Bluesky, GitHub

Thank you for your continued contributions. We have added you to our Fellows Roster.

The above members help support the Python ecosystem by being phenomenal leaders, sustaining the growth of the Python scientific community, maintaining virtual Python communities, maintaining Python libraries, creating educational material, organizing Python events and conferences, starting Python communities in local regions, and overall being great mentors in our community. Each of them continues to help make Python more accessible around the world. To learn more about the new Fellow members, check out their links above.

Let's continue recognizing Pythonistas all over the world for their impact on our community. The criteria for Fellow members is available on our PSF Fellow Membership page. If you would like to nominate someone to be a PSF Fellow, please send a description of their Python accomplishments and their email address to psf-fellow at python.org. Quarter 2 nominations will be in review soon. We are accepting nominations for Quarter 2 of 2025 through May 20th, 2025.

Are you a PSF Fellow and want to help the Work Group review nominations? Contact us at psf-fellow at python.org.

May 06, 2025 12:13 PM UTC


Real Python

Quiz: Python Logging With the Loguru Library

In this quiz, you’ll test your understanding of How to Use Loguru for Simpler Python Logging.

By working through this quiz, you’ll revisit key concepts like installing Loguru, basic logging, formatting, sinks, log rotation, and capturing exception information.


[ Improve Your Python With 🐍 Python Tricks 💌 – Get a short & sweet Python Trick delivered to your inbox every couple of days. >> Click here to learn more and see examples ]

May 06, 2025 12:00 PM UTC

May 05, 2025


PyCon

Asking the Key Questions: Q&A with the PyCon US 2025 keynote speakers

Get to know the all-star lineup of PyCon US 2025 keynote speakers. They’ve graciously answered our questions, and shared some conference advice plus tidbits of their backstories–from rubber ducks to paper towel printing to Pac-Man. Read along and get excited to see them live as we count down to the event!

How did you get started in tech/Python? Did you have a friend or a mentor that helped you?

CORY DOCTOROW: My father was a computer scientist so we grew up with computers in the house. Our first "computer" was a Cardiac cardboard computer (CARDboard Illustrative Aid to Computation) that required a human to move little tokens around in slots: https://en.wikipedia.org/wiki/CARDboard\_Illustrative\_Aid\_to\_Computation

Then in the late seventies, when I was 6-7, we got a teletype terminal and an acoustic coupler that we could use to connect to a PDP-11 at the University of Toronto. However, my computing was limited by how much printer-paper we had for the teletype. Luckily, my mother was a kindergarten teacher and she was able to bring home 1,000' rolls of paper towel from the kids' bathrooms. I'd print up one side of them, then reverse the roll and print down the other side, and then, finally, I'd re-roll-up the paper so my mom could take the paper into school for the kids to dry their hands on.

LYNN ROOT: I started in 2011, learning how to code through an online intro to CS course. It was awful – who thinks C is a good first language? I failed both midterms (failed as in, "here's a D, be thankful for the grading curve"), but somehow finished the course with an A- because I learned Python for my final project. After that experience, I had to learn more, but didn't want to go through a "proper" degree program. It's actually how PyLadies SF got started: I wanted friends to learn to program with, so I figured – why not invite other like-minded people to join me!

I did (and still do) have a mentor – I definitely wouldn't be where I am today without the guidance and patience of Hynek Schlawack, who also happens to be my best friend ( hi bestiee ). He's been there since the very beginning, and I hope someday I can repay him. I do try to pay it forward with mentoring women who are early in their careers. Everyone deserves a Hynek!

TOM MEAGHER: As a journalist, I've had no formal training in programming. Most of what I have learned — including Python and pandas and Django and other tools for data analysis and investigative reporting — has come through my connection to the organization Investigative Reporters and Editors. IRE is a wonderful community of really generous journalists from around the world who teach one another new techniques and support each other in our projects.

GEOFF HING: I studied computer science and engineering as an undergrad. Python was really emerging as a language at that point, but a few years later, it was fully the “get stuff done” language among a lot of people around me. I really benefited from people I worked with being generous with their time in explaining code bases I worked with.

DR. KARI L. JORDAN: I was introduced to tech/Python when I began working for Data Carpentry back in 2016. Before then, you didn't know what I was doing to analyze my data!

What do you think the most important work you’ve ever done is? Or if you think it might still be in the future, can you tell us something about your plans?

DR. KARI L. JORDAN: The most important work I've ever done is making it more accessible for people who look like me to get involved with coding.

TOM MEAGHER: I'm really lucky to work for a news organization where I feel everything we publish helps explain a criminal justice system that is shrouded in secrecy and often really inefficient. That makes me feel like we're contributing something useful to the national conversation. If I had to choose one recent project to highlight, I was particularly proud of our work exposing how prison guards in New York State regularly get away with abusing the people in their custody. These stories only became possible after New York reformed some of its police secrecy laws after the death of George Floyd and took a lot of time and work to get it right.

CORY DOCTOROW: I have no idea - I think this is something that can only be done in retrospect. For example, I worked on an obscure but very important fight over something called the "Broadcast Flag" that would have banned GNU Radio and all other free software defined radios outright, and would have required all PC hardware to be certified by an entertainment industry committee as "piracy proof." That may yet turn out to be very important, or it may be that the work I'm doing now on antitrust - which seems likely to result in the breakup of Google and Meta - will be more important.

LYNN ROOT: I think my most important work I've done revolves around PyLadies. Founding the San Francisco chapter and working to grow the global community has been incredibly rewarding. Seeing how PyLadies has evolved into an international network that empowers women to thrive in tech has been one of the most fulfilling experiences of my career.

I take great pride in the rise of women at PyCon: in 2012 (my first PyCon) less than 10% of speakers were women. Within five years, that number rose to one-third. Looking ahead, I'm excited to keep making an impact in the Python community. With the PyLadies Global Council, we're focusing on how to make the organization sustainable. It's a decentralized, grassroots group powered by volunteers – and we need to figure out how to keep the momentum going.

GEOFF HING: I think the most important work that I’ve done is just bringing some structure, open source approaches and practice to newsroom code where many people are self-taught, don’t have a lot of technical support and are working under tough resource and time constraints.

Years before I worked as a journalist, I provided some commits to a records management system for volunteer groups that send reading material to people in prisons and jails. The creators of that software are still maintaining it, and it’s still being used by prison book programs after more than a decade. I can’t take very much credit for this project, but its longevity speaks to the ways software developers doing regular-degular volunteer work can begin to understand systems in ways that eventually let them apply their specific technical skills. The longevity also speaks to the persistent problematic conditions across U.S. prisons and jails, as well as barriers to incarcerated people getting access to reading materials, which my colleagues at The Marshall Project have reported on.

In the future, I’m interested in synthesizing some of the approaches from open data movements but working backwards from the information needs of people for whom access to information can really be a life and death issue, rather than just focusing on opening up data.

Have you been to PyCon US before? What are you looking forward to?

CORY DOCTOROW: I have not - I'm looking forward to talking with geeks about the deep policy implications of their work and the important contributions they can make to a new, good internet.

LYNN ROOT: PyCon US is like the family reunion that I actually look forward to. Python folks are my people – it's the community I feel most myself in. I love seeing old friends, catching up with my fellow PyLadies, and talking nerdy, and meeting new people.

DR. KARI L. JORDAN: This will be my first time attending PyCon US! I'm excited to learn about the ways the community is using Python for good. I'm also excited for people to find all of the rubber duckies I plan to hide around the convention center :) Bring them to The Carpentries booth and say hi!

GEOFF HING: I haven’t been to PyCon before. But, beyond the utility that Python offers for my journalism, I just like programming as a practice, and I’ve found Python to be a useful, accessible language to write programs, and I’m just excited to be around other people who are excited about that, and have put in a lot of the work to continue to make the language so broadly useful.

TOM MEAGHER: I attended PyCon US in Montreal in 2014. I was much newer to Python then, and I was impressed by the breadth of experiences of the attendees at the time. I'm really looking forward to learning about new libraries that might be helpful in my journalism and leveling up my programming knowledge.

Do you have any advice for first-time conference goers?

LYNN ROOT: Seek out the Pac-mans! If you see a group of people chatting that have an opening in the shape of a Pac-man, take that as an invitation to join in and introduce yourself. The best part of PyCon US is the most ephemeral: the "hallway" track where you meet new people, hear interesting conversations, and ask questions of your favorite speakers, maintainers, and core developers. All the talks are recorded – don't worry about missing one. But you can't create new connections once you're back home.

DR. KARI L. JORDAN: Pick two events per day that you MUST attend. You'll burn out quickly trying to do all the things, so don't try. Take breaks when you need to - in person meetings can be exhausting.

GEOFF HING: I can only speak from attending journalism conferences that have a lot of programming (and Python) content, like NICAR and SRCCON, but I think taking good notes, especially ones that highlight potential use cases in one’s own work for a particular approach, is really critical. Also, just trying to make time to try out a few things post-conference while it’s still fresh.

TOM MEAGHER: When I'm entering a conference for a new community, I try to meet as many people as I can and learn about how they do their jobs, the problems they try to solve and the tools they use. I find a lot of inspiration from other fields who wrestle with similar issues that I face as an investigative reporter but often have new and vastly different ways to deal with them.

CORY DOCTOROW: Not having attended this conference before, I'm unable to give PyCon-specific advice. However, I'd generally say that you should attend sessions that are outside your comfort zone, strike up conversations by asking about things learned at sessions rather than asking about someone's job, and try the workshops.

Can you tell us about an open source or open culture project that you think not enough people know about?

DR. KARI L. JORDAN: Surprisingly, I'd say The Carpentries, and I'm of course not at all biased. We are the leading inclusive community teaching data and coding skills, yet many have never heard of us. I encourage you to visit www.carpentries.org to learn more.

LYNN ROOT: There are so many big, intense projects out there – and they have their place! But I like to show appreciation to the small and the cheeky. Especially those with a cute logo: check out icecream, and never use `print()` to debug again!

TOM MEAGHER: The open source landscape in journalism has changed quite a bit over the last decade, as many of the most prominent open source projects were sunsetted. One library I've found helpful on recent projects is dedupe, which uses machine learning to help with fuzzy matching of records and weeding out duplicates, a very common problem I face when dealing with messy government data.

GEOFF HING: Frequently, at the start of my data reporting, I’ll look for prior art by just searching for agency names, or data release names, or even column names in some data set I get back from a records request, in GitHub. I don’t want to blow up the spot, but a Gist that I came across with some Python code for decoding the JSON format used by a certain type of widely-used dashboard, was really helpful to me. I imagine that every community has someone hacking around making it easier to work with data in a way that agencies should be producing it, but aren’t. I also really appreciate academics who have written freely-available documentation around confusing and ever-changing data sets, like Jacob Kaplan’s Decoding FBI Crime Data, feels very much in the spirit of open source projects.

I feel like people already know about this project, but I recently used MkDocs and it was so easy to use. I think documentation is really important, and having something that lets someone focus on writing and not on tooling is so great. Finally, VisiData is my go-to tool for taking a first look at data. Quickly exploring data is so much of what I do, and it feels like a spreadsheet application that prioritizes that use. If reading data, rather than making some kind of report for an administrative process is how you mostly engage with spreadsheets, I guarantee you won’t miss Excel.

CORY DOCTOROW: There is a broad, urgent project to update services that use outdated CC licenses (e.g. Flickr) to the latest CC 4.0 licenses. The reason this is so important is that the older CC licenses have a bug in them that allow for "copyleft trolling," a multimillion-dollar, global extortion racket pursued by firms like Pixsy and grifters like Marco Verch.

Here's how that works: older CC licenses have a clause that says they "terminate immediately upon breach." That means that if you screw up the attribution string when you use a CC license (for example, if you forget to explicitly state which license version the work you're reproducing was released under), then you are in breach of the license and are no longer an authorized user.

In practice, *most* CC users make these minor errors. Copyleft trolls post photos and stock art using older licenses, wait for people to make small attribution errors, then threaten them with lawsuits and demand hundreds or even thousands of dollars for using CC-licensed works. They threaten their victims with $150,000 statutory damage penalties if they don't settle.

Some copyleft trolls even commission photo-illustrations based on the top news-site headlines of the day from Upwork or Fiverr, paying photographers a tiny sum to create bait in a trap for the unwary.

The CC 4.0 licenses were released 12 years ago, in 2013, and they fix this bug. They have a "cure provision" that gives people who screw up the attribution 30 days after being notified of the error to fix things before the license terminates.

Getting sites like Flickr - which hosts tens of millions of CC-licensed works and only allows licensing under the 2.0 licenses - to update to modern licenses, and to push existing account holders to upgrade the licenses on works already on the service, is of critical importance.

Flickr, unfortunately, is burdened by decades of tech debt, as a result of massive neglect by Yahoo and then Verizon, its previous owners. Its current owners, Smugmug, are working hard on this, but it's a big project.

Once it's done, all Wikimedia Commons images that have been ganked from Flickr should be regularly checked to see if the underlying Flickr image has had its license updated, and, if so, the license on WM:C should be updated, too.

Thank you to all of our keynote speakers for participating! We are more eager than ever to hear what you have to share with us on the main stage next week. If you haven't got your ticket yet, it's not too late--visit https://us.pycon.org/2025/attend/information/ to get registered today. See you soon!

May 05, 2025 05:19 PM UTC


Real Python

Sets in Python

Python provides a built-in set data type. It differs from other built-in data types in that it’s an unordered collection of unique elements. It also supports operations that differ from those of other data types. You might recall learning about sets and set theory in math class. Maybe you even remember Venn diagrams:

Venn DiagramVenn Diagram

In mathematics, the definition of a set can be abstract and difficult to grasp. In practice, you can think of a set as a well-defined collection of unique objects, typically called elements or members. Grouping objects in a set can be pretty helpful in programming. That’s why Python has sets built into the language.

By the end of this tutorial, you’ll understand that:

In this tutorial, you’ll dive deep into the features of Python sets and explore topics like set creation and initialization, common set operations, set manipulation, and more.

Take the Quiz: Test your knowledge with our interactive “Python Sets” quiz. You’ll receive a score upon completion to help you track your learning progress:


Sets in Python

Interactive Quiz

Python Sets

In this quiz, you'll assess your understanding of Python's built-in set data type. You'll revisit the definition of unordered, unique, hashable collections, how to create and initialize sets, and key set operations.

Getting Started With Python’s set Data Type

Python’s built-in set data type is a mutable and unordered collection of unique and hashable elements. In this definition, the qualifiers mean the following:

As with other mutable data types, you can modify sets by increasing or decreasing their size or number of elements. To this end, sets provide a series of handy methods that allow you to add and remove elements to and from an existing set.

The elements of a set must be unique. This feature makes sets especially useful in scenarios where you need to remove duplicate elements from an existing iterable, such as a list or tuple:

In practice, removing duplicate items from an iterable might be one of the most useful and commonly used features of sets.

Python implements sets as hash tables. A great feature of hash tables is that they make lookup operations almost instantaneous. Because of this, sets are exceptionally efficient in membership operations with the in and not in operators.

Finally, Python sets support common set operations, such as union, intersection, difference, symmetric difference, and others. This feature makes them useful when you need to do some of the following tasks:

As you can see, set is a powerful data type with characteristics that make it useful in many contexts and situations. Throughout the rest of this tutorial, you’ll learn more about the features that make sets a worthwhile addition to your programming toolkit.

Building Sets in Python

To use a set, you first need to create it. You’ll have different ways to build sets in Python. For example, you can create them using one of the following techniques:

In the following sections, you’ll learn how to use the three approaches listed above to create new sets in Python. You’ll start with set literals.

Creating Sets Through Literals

You can define a new set by providing a comma-separated series of hashable objects within curly braces {} as shown below:

Read the full article at https://realpython.com/python-sets/ »


[ Improve Your Python With 🐍 Python Tricks 💌 – Get a short & sweet Python Trick delivered to your inbox every couple of days. >> Click here to learn more and see examples ]

May 05, 2025 02:00 PM UTC


Talk Python to Me

What trends and technologies should you be paying attention to today? Are there hot new database servers you should check out? Or will that just be a flash in the pan? I love these forward looking episodes and this one is super fun. I've put together an amazing panel: Gina Häußge, Ines Montani, Richard Campbell, and Calvin Hendryx-Parker. We dive into the recent Stack Overflow Developer survey results as a sounding board for our thoughts on rising and falling trends in the Python and broader developer space.

Episode sponsors

NordLayer
Auth0
Talk Python Courses

Links from the show

The Stack Overflow Survey Results: survey.stackoverflow.co/2024

Panelists
Gina Häußge: chaos.social/@foosel
Ines Montani: ines.io
Richard Campbell: about.me/richard.campbell
Calvin Hendryx-Parker: github.com/calvinhp

Explosion: explosion.ai
spaCy: spacy.io
OctoPrint: octoprint.org
.NET Rocks: dotnetrocks.com
Six Feet Up: sixfeetup.com
Stack Overflow: stackoverflow.com
Python.org: python.org
GitHub Copilot: github.com
OpenAI ChatGPT: chat.openai.com
Claude: anthropic.com
LM Studio: lmstudio.ai
Hetzner: hetzner.com
Docker: docker.com
Aider Chat: github.com
Codename Goose AI: block.github.io/goose/
IndyPy: indypy.org
OctoPrint Community Forum: community.octoprint.org
spaCy GitHub: github.com
Hugging Face: huggingface.co
Watch this episode on YouTube: youtube.com
Episode transcripts: talkpython.fm

--- Stay in touch with us ---
Subscribe to Talk Python on YouTube: youtube.com
Talk Python on Bluesky: @talkpython.fm at bsky.app
Talk Python on Mastodon: talkpython
Michael on Bluesky: @mkennedy.codes at bsky.app
Michael on Mastodon: mkennedy
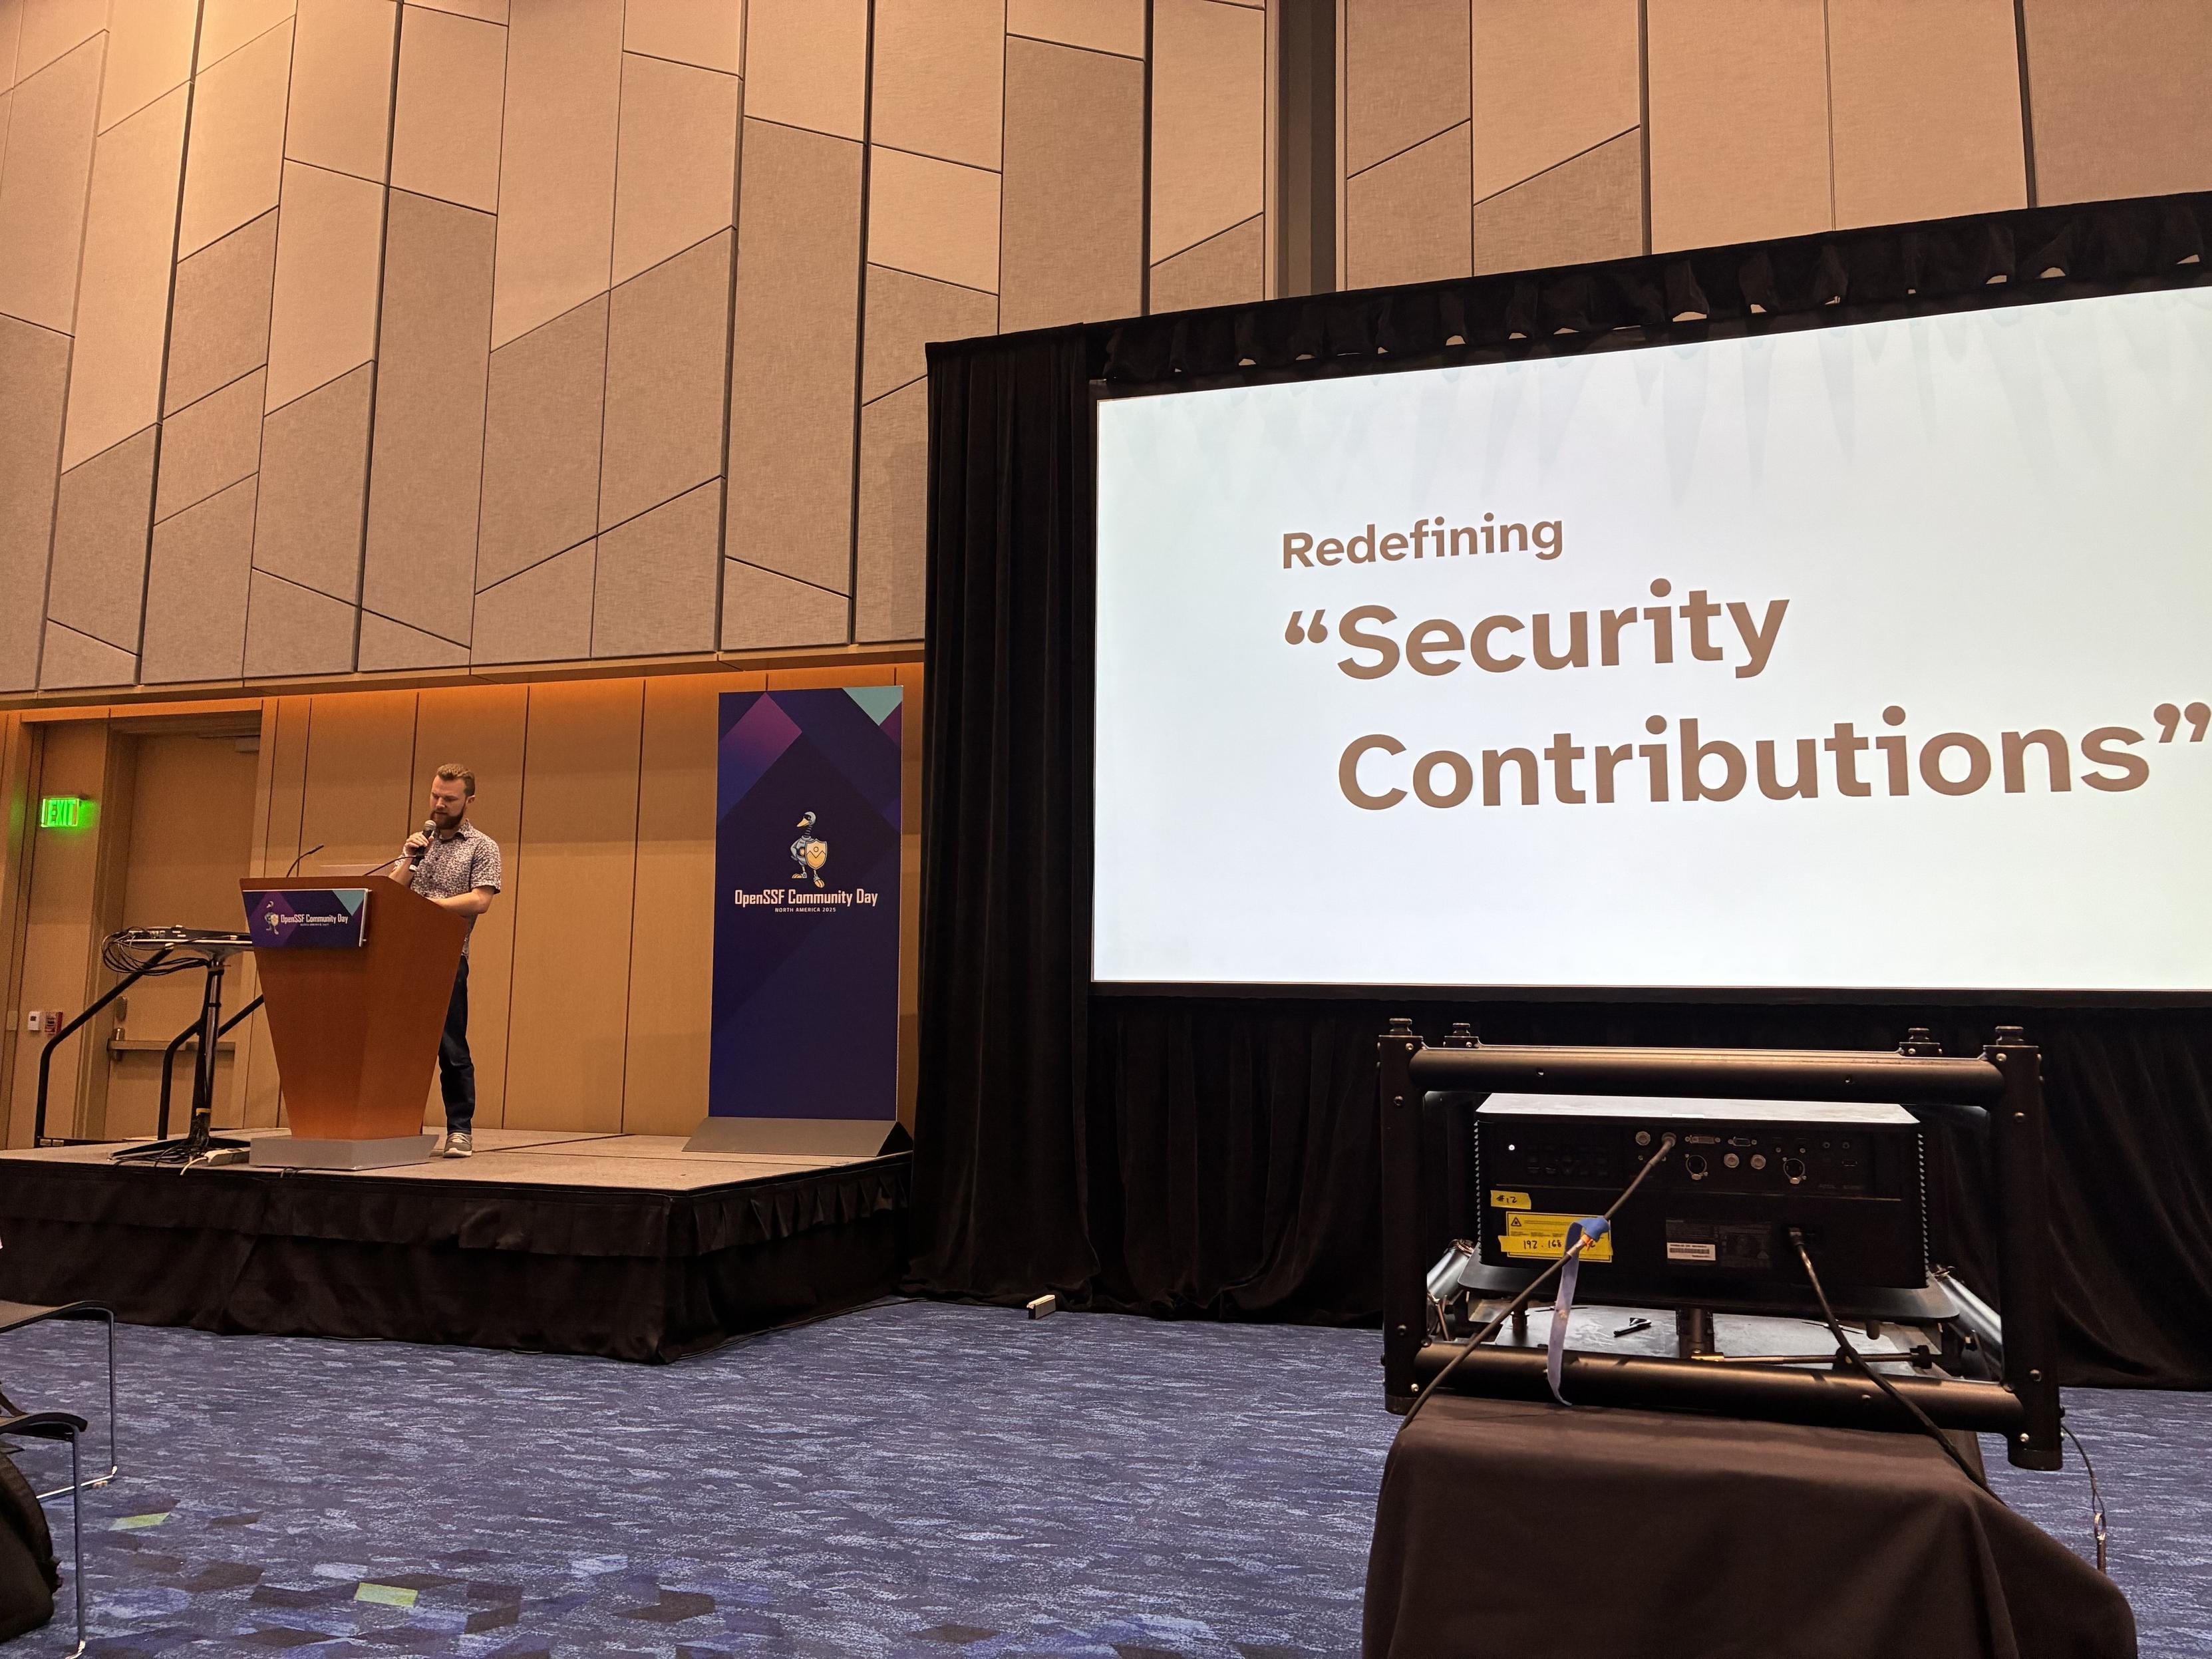
May 05, 2025 08:00 AM UTC


Python Bytes

#431 Nerd Gas

Topics covered in this episode:

<a href='https://www.youtube.com/watch?v=WaWjUlgWpBo' style='font-weight: bold;'data-umami-event="Livestream-Past" data-umami-event-episode="431">Watch on YouTube

About the show

Sponsored by NordLayer: pythonbytes.fm/nordlayer

Connect with the hosts

Join us on YouTube at pythonbytes.fm/live to be part of the audience. Usually Monday at 10am PT. Older video versions available there too.

Finally, if you want an artisanal, hand-crafted digest of every week of the show notes in email form? Add your name and email to our friends of the show list, we'll never share it.

Michael #1: pirel: Python release cycle in your terminal

Brian #2: FastAPI Cloud

Brian #3: Python's new t-strings

Michael #4: zev

Extras

Brian:

Michael:

Joke: Can my friend come in?

May 05, 2025 08:00 AM UTC


Python GUIs

Build an Image Noise Reduction Tool with Streamlit and OpenCV — Clean up noisy images using OpenCV

Image noise is a random variation of brightness or color in images, which can make it harder to discern finer details in a photo. Noise is an artefact of how the image is captured. In digital photography, sensor electronic noise causes random fuzziness over the true image. It is more noticeable in low light, where the lower signal from the sensor is amplified, amplifying the noise with it. Similar noisy artefacts are also present in analog photos and film, but there it is caused by the film grain. Finally, you can also see noise-like artefacts introduced by lossy compression algorithms such as JPEG.

Noise reduction or denoising improves the visual appearance of a photo and can be an important step in a larger image analysis pipeline. Eliminating noise can make it easier to identify features algorithmically. However, we need to ensure that the denoised image is still an accurate representation of the original capture.

Denoising is a complex topic. Fortunately, several different algorithms are available. In this tutorial, we'll use algorithms from OpenCV and build them into a Streamlit app. The app will allow a user to upload images, choose from the common noise reduction algorithms, such as Gaussian Blur, Median Blur, Minimum Blur, and Maximum Blur, and adjust the strength of the noise reduction using a slider. The user can then download the resulting noise-reduced image.

By the end of this tutorial, you will --

There's quite a lot to this example, so we'll break it down into small steps to make sure we understand how everything works.

Table of Contents

Setting Up the Working Environment

In this tutorial, we'll use the Streamlit library to build the noise reduction app's GUI.

To perform the denoising, we'll be using OpenCV. Don't worry if you're not familiar with this library, we'll be including working examples you can copy for everything we do.

With that in mind, let's create a virtual environment and install our requirements into it. To do this, you can run the following commands:

sh

$ mkdir denoise/
$ cd denoise
$ python -m venv venv
$ source venv/bin/activate
(venv)$ pip install streamlit opencv-python pillow numpy

cmd

> mkdir denoise/
> cd denoise
> python -m venv venv
> venv\Scripts\activate.bat
(venv)> pip install streamlit opencv-python pillow numpy

sh

$ mkdir denoise/
$ cd denoise
$ python -m venv venv
$ source venv/bin/activate
(venv)$ pip install streamlit opencv-python pillow numpy

With these commands, you create a denoise/ folder for storing your project. Inside that folder, you create a new virtual environment, activate it, and install Streamlit, OpenCV, Pillow & numpy.

For platform-specific troublshooting, check the Working With Python Virtual Environments tutorial.

Building the Application Outline

We'll start by constructing a simple Streamlit application and then expand it from there.

python

import streamlit as st

# Set the title of our app.
st.title("Noise Reduction App")

Save this file as app.py and use the following command to run it:

python

streamlit run app.py

Streamlit will start up and will launch the application in your default web browser.

The Streamlit application title displayed in the browser The Streamlit application title displayed in the browser.

If it doesn't launch by itself, you can see the web address to open in the console.

The Streamlit application launch message showing the local server address where the app can be viewed The Streamlit application launch message showing the local server address where the app can be viewed.

Now that we have the app working, we can step through and build up our app.

Uploading an Image with Streamlit

First we need a way to upload an image to denoise. Streamlit provides a simple .file_uploader method which can be used to upload an image from your computer. This is a generic file upload handler, but you can provide both a message to display (to specify what to upload) and constrain the file types that are supported.

Below we define a file_uploader which shows a message "Choose an image..." and accepts JPEG and PNG images.

python

import streamlit as st

# Set the title of our app.
st.title("Noise Reduction App")

uploaded_file = st.file_uploader("Choose an image...", type=["jpg", "jpeg", "png"])

print(uploaded_file)

For historic reasons, JPEG images can have both .jpg or .jpeg extensions, so we include both in the list.

Run the code and you'll see the file upload box in the app. Try uploading a file.

Streamlit application with a file-upload widget Streamlit application with a file-upload widget.

The uploaded image is stored in the variable uploaded_file. Before a file is uploaded, the value of uploaded_file will be None. Once the user uploads an image, this variable will contain an UploadedFile object.

python

None
UploadedFile(file_id='73fd9a97-9939-4c02-b9e8-80bd2749ff76', name='headcake.jpg', type='image/jpeg', size=652805, _file_urls=file_id: "73fd9a97-9939-4c02-b9e8-80bd2749ff76"
upload_url: "/_stcore/upload_file/7c881339-82e4-4d64-ba20-a073a11f7b60/73fd9a97-9939-4c02-b9e8-80bd2749ff76"
delete_url: "/_stcore/upload_file/7c881339-82e4-4d64-ba20-a073a11f7b60/73fd9a97-9939-4c02-b9e8-80bd2749ff76"
)

We can use this UploadedFile object to load and display the image in the browser.

How Streamlit Works

If you're used to writing Python scripts the behavior of the script and file upload box might be a confusing. Normally a script would execute from top to bottom, but here the value of uploaded_file is changing and the print statement is being re-run as the state changes.

There's a lot of clever stuff going on under the hood here, but in simple terms the Streamlit script is being re-evaluated in response to changes. On each change the script runs again, from top to bottom. But importantly, the state of widgets is not reset on each run.

When we upload a file, that file gets stored in the state of the file upload widget and this triggers the script to re-start. When it gets to the st.file_uploader call, that UploadedFile object will be returned immediately from the stored state. It can then affect the flow of the code after it.

The following code allows you to see these re-runs more clearly, by displaying the current timestamp in the header. Every time the code is re-executed this number will update.

python

from time import time

import streamlit as st

# Set the title of our app.
st.title(f"Noise Reduction App {int(time())}")

uploaded_file = st.file_uploader("Choose an image...", type=["jpg", "jpeg", "png"])

Try uploading an image and then removing it. You'll see the timestamp in the title change each time. This is the script being re-evaluated in response to changes in the widget state.

Loading and Displaying the Uploaded Image

While we can upload an image, we can't see it yet. Let's implement that now.

As mentioned, the uploaded file is available as an UploadedFile object in the uploaded_file variable. This object can be passed directly to st.image to display the image back in the browser. You can also add a caption and auto resize the image to the width of the application.

python

import numpy as np
import streamlit as st
from PIL import Image

st.title("Noise Reduction App")

uploaded_file = st.file_uploader("Choose an image...", type=["jpg", "jpeg", "png"])


if uploaded_file is not None:
    st.image(image, caption="Uploaded Image", use_container_width=True)

Run this and upload an image. You'll see the image appear under the file upload widget.

Streamlit application showing an uploaded image Streamlit application showing an uploaded image.

Converting the Image for Processing

While the above works fine for displaying the image in the browser, we want to process the image through the OpenCV noise reduction algorithms. For that we need to get the image into a format which OpenCV recognizes. We can do that using Pillow & NumPy.

The updated code to handle this conversion is shown below.

python

import numpy as np
import streamlit as st
from PIL import Image

st.title("Noise Reduction App")

uploaded_file = st.file_uploader("Choose an image...", type=["jpg", "jpeg", "png"])


if uploaded_file is not None:
    # Convert the uploaded file to a PIL image.
    image = Image.open(uploaded_file)

    # Convert the image to an RGB NumPy array for processing.
    image = image.convert("RGB")
    image = np.array(image)

    # Displaying the RGB image.
    st.image(image, caption="Uploaded Image", use_container_width=True)

In this code, the uploaded file is opened using Pillow's Image.open() method, which reads the image into a PIL image format. The image is then converted into Pillows RGB format, for consistency (discarding transparent for example). This regular format is then converted into a NumPy array which OpenCV requires for processing.

Helpfully, Streamlit's st.image method also understands the NumPy RGB image format, so we can pass the image array directly to it. This will be useful when we want to display the processed image, since we won't need to convert it before doing that.

If you run the above it will work exactly as before. But now we have our uploaded image available as an RGB array in the image variable. We'll use that to do our processing next.

Configuring the Noise Reduction Algorithm

The correct noise reduction strategy depends on the image and type of noise present. For a given image you may want to try different algorithms and adjust the extent of the noise reduction. To accommodate that, we're going to add two new controls to our application -- an algorithm drop down, and a kernel size slider.

The first presents a select box from which the user can choose which algorithm to use. The second allows the user to configure the behavior of the given algorithm -- specifically the size of the area being considered by each algorithm when performing noise reduction.

python

import numpy as np
import streamlit as st
from PIL import Image

st.title("Noise Reduction App")

uploaded_file = st.file_uploader("Choose an image...", type=["jpg", "jpeg", "png"])

algorithm = st.selectbox(
    "Select noise reduction algorithm",
    (
        "Gaussian Blur Filter",
        "Median Blur Filter",
        "Minimum Blur Filter",
        "Maximum Blur Filter",
        "Non-local Means Filter",
    ),
)

kernel_size = st.slider("Select kernel size", 1, 10, step=2)


if uploaded_file is not None:
    # Convert the uploaded file to a PIL image.
    image = Image.open(uploaded_file)

    # Convert the image to an RGB NumPy array for processing.
    image = image.convert("RGB")
    image = np.array(image)

    # Displaying the RGB image.
    st.image(image, caption="Uploaded Image", use_container_width=True)

When you run this you'll see the new widgets in the UI. The uploaded image is displayed last since it is the last thing to be added.

The algorithm selection and configuration widgets shown in the app The algorithm selection and configuration widgets shown in the app.

The slider for the kernel size allows the user to adjust the kernel size, which determines the strength of the noise reduction effect. The kernel is a small matrix used in convolution to blur or process the image for noise removal. The larger the kernel size, the stronger the effect will be but also the more blurring or distortion you will see in the image.

The removal of noise is always a balancing act between noise and accuracy of the image.

The slider ranges from 1 to 10, with a step of 2 (i.e., possible kernel sizes are 1, 3, 5, 7, and 9).

The kernel size must be an odd number to maintain symmetry in the image processing algorithms.

Performing the Noise Reduction

Now we have all the parts in place to actually perform noise reduction on the image. The final step is to add the calls to OpenCV's noise reduction algorithms and show the resulting, noise-reduced image back in the UI.

python

import cv2
import numpy as np
import streamlit as st
from PIL import Image

st.title("Noise Reduction App")

uploaded_file = st.file_uploader("Choose an image...", type=["jpg", "jpeg", "png"])

algorithm = st.selectbox(
    "Select noise reduction algorithm",
    (
        "Gaussian Blur Filter",
        "Median Blur Filter",
        "Minimum Blur Filter",
        "Maximum Blur Filter",
        "Non-local Means Filter",
    ),
)

kernel_size = st.slider("Select kernel size", 1, 10, step=2)


if uploaded_file is not None:
    # Convert the uploaded file to a PIL image.
    image = Image.open(uploaded_file)

    # Convert the image to an RGB NumPy array for processing.
    image = image.convert("RGB")
    image = np.array(image)

    # Displaying the RGB image.
    st.image(image, caption="Uploaded Image", use_container_width=True)

    # Applying the selected noise reduction algorithm based on user selection
    if algorithm == "Gaussian Blur Filter":
        denoised_image = cv2.GaussianBlur(image, (kernel_size, kernel_size), 0)
    elif algorithm == "Median Blur Filter":
        denoised_image = cv2.medianBlur(image, kernel_size)
    elif algorithm == "Minimum Blur Filter":
        kernel = np.ones((kernel_size, kernel_size), np.uint8)
        denoised_image = cv2.erode(image, kernel, iterations=1)
    elif algorithm == "Maximum Blur Filter":
        kernel = np.ones((kernel_size, kernel_size), np.uint8)
        denoised_image = cv2.dilate(image, kernel, iterations=1)
    elif algorithm == "Non-local Means Filter":
        denoised_image = cv2.fastNlMeansDenoisingColored(
            image, None, kernel_size, kernel_size, 7, 15
        )

    # Displaying the denoised image in RGB format
    st.image(denoised_image, caption="Denoised Image", use_container_width=True)

If you run this you can now upload your images and apply denoising to them. Try changing the algorithm and adjusting the kernel size parameter to see the effect it has on the noise reduction. The denoised image is displayed at the bottom with the caption "Denoised Image".

Each of the noise reduction strategies is described below. The median blur and non-local means methods are the most effective for normal images.

Gaussian Blur Filter

Gaussian blur smoothens the image by applying a Gaussian function to a pixel's neighbors. The kernel size determines the area over which the blur is applied, with larger kernels leading to stronger blurs. This method preserves edges fairly well and is often used in preprocessing for tasks like object detection.

Gaussian blur filter applied to a image using a 3x3 kernel Gaussian blur filter applied to a image using a 3x3 kernel.

This is effective at removing light noise, at the expense of sharpness.

Median Blur Filter

Median blur reduces noise by replacing each pixel's value with the median value from the surrounding pixels, making it effective against salt-and-pepper noise. It preserves edges better than Gaussian blur but can still affect the sharpness of fine details.

Median blur filter applied to a image using a 3x3 kernel window Median blur filter applied to a image using a 3x3 kernel window.

Median blur noise reduction (kernel size = 7) Median blur noise reduction (kernel size = 7).

Median blur noise reduction (kernel size = 5) Median blur noise reduction (kernel size = 5).

Minimum Blur (Erosion)

This filter uses the concept of morphological erosion. It shrinks bright areas in the image by sliding a small kernel over it. This filter is effective for removing noise in bright areas but may distort the overall structure if applied too strongly.

Erosion algorithm applied to an image using 3x3 kernel window Erosion algorithm applied to an image using 3x3 kernel window.

This works well to remove light noise from dark regions.

Erosion noise reduction (kernel size = 5) Erosion noise reduction (kernel size = 5).

Maximum Blur (Dilation)

In contrast to erosion, dilation expands bright areas and is effective in eliminating dark noise spots. However, it can result in the expansion of bright regions, altering the shape of objects in the image.

Dilation algorithm applied to an image using 3x3 kernel window Dilation algorithm applied to an image using 3x3 kernel window.

This works well to remove dark noise from light regions.

Non-Local Means Denoising

This method identifies similar regions from across the image, then combines these together to average out the noise. This works particularly well in images with repeating regions, or flat areas of color, but less well when the image has too much noise to be able to identify the similar regions.

Non-local means noise reduction on smoke from birthday candles (kernel size = 5). Non-local means noise reduction example.

Improving the Layout

It's not very user friendly having the input and output images one above the other, as you need to scroll up and down to see the effect of the algorithm. Streamlit has support for arranging widgets in columns. We'll use that to put the two images next to one another.

To create columns in Streamlit you use st.columns() passing in the number of columns to create. This returns column objects (as many as you request) which can be used as context managers to wrap your widget calls. In code, this looks like the following:

python

    # Displaying the denoised image in RGB format
    col1, col2 = st.columns(2)

    with col1:
        st.image(image, caption="Uploaded Image", use_container_width=True)

    with col2:
        st.image(denoised_image, caption="Denoised Image", use_container_width=True)

Here we call st.columns(2) creating two columns, returning into col1 and col2. We then use these with with to wrap the two st.image calls. This puts them into two adjacent columns.

Run this and you'll see the two images next to one another. This makes it much easier to see the impact of changes in the algorithm or parameters.

The source and processed image arranged next to one another using columns The source and processed image arranged next to one another using columns.

Downloading the Denoised Image

Our application now allows users to upload images and process them to remove noise, with a configurable noise removal algorithm and kernel size. The final step is to allow users to download and save the processed image somewhere.

You can actually just right-click and use your browser's option to Save the image if you like. But adding this to the UI makes it more explicit and allows us to offer different image output formats.

First, we need to import the io module. In a normal image processing script, you could simply save the generated image to disk. Our Streamlit app could be running on a server somewhere, and saving the result to the server isn't useful: we want to be able to send it to the user. For that, we need to send it to the web browser. We browsers don't understand Python objects, so we need to save our image data to a simple bytes object. The io module allows us to do that.

Add an import for Python's io module to the imports at the top of the code.

python

import io

import cv2
import numpy as np
import streamlit as st
from PIL import Image

Now under the rest of the code we can add the widgets and logic for saving and presenting the image as a download. First add a select box to choose the image format.

python

    # ..snipped the rest of the code.

    # Dropdown to select the file format for downloading
    file_format = st.selectbox("Select output format", ("PNG", "JPEG"))

Next we need to take our denoised_image and convert this from a NumPy array back to a PIL image. Then we can use Pillow's native methods for saving the image to a simple bytestream, which can be sent to the web browser.

python

    # Converting NumPy array to PIL image in RGB mode
    denoised_image_pil = Image.fromarray(denoised_image)

    # Creating a buffer to store the image data in the selected format
    buf = io.BytesIO()
    denoised_image_pil.save(buf, format=file_format)
    byte_data = buf.getvalue()

Since OpenCV operations return a NumPy array (the same format we provide it with) it must be converted back to a PIL image before saving. The io.BytesIO() creates an in-memory file buffer to write to. That way we don't need to actually save the image. We write the image using the Image .save() method in the requested file format.

Note that this saved image is in an actual PNG/JPEG image format at this point, not just pure image data.

We can retrieve the bytes data from the buffer using .getvalue(). The resulting byte_data is a raw bytes object that can be passed to the web browser. This is handled by a Streamlit download button.

python

    # Button to download the processed image
    st.download_button(
        label="Download Image",
        data=byte_data,
        file_name=f"denoised_image.{file_format.lower()}",
        mime=f"image/{file_format.lower()}"
    )

Notice we've also set the filename and mimetype, using the selected file_format variable.

If you're adding additional file formats, be aware that the mimetypes are not always 1:1 with the file extensions. In this case we've used .jpeg since the mimetype is image/jpeg.

Improving the Code Structure

The complete code so far is shown below.

python

import io

import cv2
import numpy as np
import streamlit as st
from PIL import Image

st.title("Noise Reduction App")

uploaded_file = st.file_uploader("Choose an image...", type=["jpg", "jpeg", "png"])

algorithm = st.selectbox(
    "Select noise reduction algorithm",
    (
        "Gaussian Blur Filter",
        "Median Blur Filter",
        "Minimum Blur Filter",
        "Maximum Blur Filter",
        "Non-local Means Filter",
    ),
)

kernel_size = st.slider("Select kernel size", 1, 10, step=2)


if uploaded_file is not None:
    # Convert the uploaded file to a PIL image.
    image = Image.open(uploaded_file)

    # Convert the image to an RGB NumPy array for processing.
    image = image.convert("RGB")
    image = np.array(image)

    # Applying the selected noise reduction algorithm based on user selection
    if algorithm == "Gaussian Blur Filter":
        denoised_image = cv2.GaussianBlur(image, (kernel_size, kernel_size), 0)
    elif algorithm == "Median Blur Filter":
        denoised_image = cv2.medianBlur(image, kernel_size)
    elif algorithm == "Minimum Blur Filter":
        kernel = np.ones((kernel_size, kernel_size), np.uint8)
        denoised_image = cv2.erode(image, kernel, iterations=1)
    elif algorithm == "Maximum Blur Filter":
        kernel = np.ones((kernel_size, kernel_size), np.uint8)
        denoised_image = cv2.dilate(image, kernel, iterations=1)
    elif algorithm == "Non-local Means Filter":
        denoised_image = cv2.fastNlMeansDenoisingColored(
            image, None, kernel_size, kernel_size, 7, 15
        )

    # Displaying the denoised image in RGB format
    col1, col2 = st.columns(2)

    with col1:
        st.image(image, caption="Uploaded Image", use_container_width=True)

    with col2:
        st.image(denoised_image, caption="Denoised Image", use_container_width=True)

    # Dropdown to select the file format for downloading
    file_format = st.selectbox("Select output format", ("PNG", "JPEG", "JPG"))

    # Converting NumPy array to PIL image in RGB mode
    denoised_image_pil = Image.fromarray(denoised_image)

    # Creating a buffer to store the image data in the selected format
    buf = io.BytesIO()
    denoised_image_pil.save(buf, format=file_format)
    byte_data = buf.getvalue()

    # Button to download the processed image
    st.download_button(
        label="Download Image",
        data=byte_data,
        file_name=f"denoised_image.{file_format.lower()}",
        mime=f"image/{file_format.lower()}",
    )

If you run the completed app you can now upload images, denoise them using the different algorithms and kernel parameters and then save them as JPEG or PNG format images.

However, we can still improve this. There is a lot of code nested under the if uploaded_file is not None: branch, and the logic and processing steps aren't well organized -- everything runs together, mixed in with the UI. When developing UI applications it's a good habit to separate UI and non-UI code where possible (logic vs. presentation). That keeps related code together in the same context, aiding readability and maintainability.

Below is the same code refactored to move the file opening, denoising and file exporting logic out into separate handler functions.

python

import io

import cv2
import numpy as np
import streamlit as st
from PIL import Image


def image_to_array(file_to_open):
    """Load a Streamlit image into an array."""
    # Convert the uploaded file to a PIL image.
    image = Image.open(file_to_open)

    # Convert the image to an RGB NumPy array for processing.
    image = image.convert("RGB")
    image = np.array(image)
    return image


def denoise_image(image, algorithm, kernel_size):
    """Apply a denoising algorithm to the provided image, with the given kernel size."""
    # Applying the selected noise reduction algorithm based on user selection
    if algorithm == "Gaussian Blur Filter":
        denoised_image = cv2.GaussianBlur(image, (kernel_size, kernel_size), 0)
    elif algorithm == "Median Blur Filter":
        denoised_image = cv2.medianBlur(image, kernel_size)
    elif algorithm == "Minimum Blur Filter":
        kernel = np.ones((kernel_size, kernel_size), np.uint8)
        denoised_image = cv2.erode(image, kernel, iterations=1)
    elif algorithm == "Maximum Blur Filter":
        kernel = np.ones((kernel_size, kernel_size), np.uint8)
        denoised_image = cv2.dilate(image, kernel, iterations=1)
    elif algorithm == "Non-local Means Filter":
        denoised_image = cv2.fastNlMeansDenoisingColored(
            image, None, kernel_size, kernel_size, 7, 15
        )
    return denoised_image


def image_array_to_bytes(image_to_convert):
    """Given an image array, convert it to a bytes object."""

    # Converting NumPy array to PIL image in RGB mode
    image_pil = Image.fromarray(image_to_convert)

    # Creating a buffer to store the image data in the selected format
    buf = io.BytesIO()
    image_pil.save(buf, format=file_format)
    byte_data = buf.getvalue()
    return byte_data


st.title("Noise Reduction App")

uploaded_file = st.file_uploader("Choose an image...", type=["jpg", "jpeg", "png"])

algorithm = st.selectbox(
    "Select noise reduction algorithm",
    (
        "Gaussian Blur Filter",
        "Median Blur Filter",
        "Minimum Blur Filter",
        "Maximum Blur Filter",
        "Non-local Means Filter",
    ),
)

kernel_size = st.slider("Select kernel size", 1, 10, step=2)


if uploaded_file is not None:
    image = image_to_array(uploaded_file)
    denoised_image = denoise_image(image, algorithm, kernel_size)

    # Displaying the denoised image in RGB format
    col1, col2 = st.columns(2)

    with col1:
        st.image(image, caption="Uploaded Image", use_container_width=True)

    with col2:
        st.image(denoised_image, caption="Denoised Image", use_container_width=True)

    # Dropdown to select the file format for downloading
    file_format = st.selectbox("Select output format", ("PNG", "JPEG", "JPG"))

    byte_data = image_array_to_bytes(denoised_image)

    # Button to download the processed image
    st.download_button(
        label="Download Image",
        data=byte_data,
        file_name=f"denoised_image.{file_format.lower()}",
        mime=f"image/{file_format.lower()}",
    )

As you can see, the main flow of the code now consists entirely of Streamlit UI setup code and calls to the processing functions we have defined. Both the UI and processing code is now easier to read and maintain.

In larger projects you may choose to move the functions out into a separate files of related functions and import them instead.

Conclusion

In this tutorial, you created an image noise reduction application using Streamlit and OpenCV. The app allows users to upload images, apply different noise reduction algorithms, and download the denoised image.

It also allows the user to customize the kernel size, which controls the strength of the effect. This makes the app useful for a variety of noise types and image processing tasks.

Streamlit makes it simple to build powerful web applications, taking the power of Python's rich ecosystem and making it available through the browser.

May 05, 2025 06:00 AM UTC


Seth Michael Larson

Voicemail for notifications

I recently saw a thread on Mastodon about the nagging notifications for mobile applications in particular, specifically ones that don't carry any useful information and simply remind you of the app's existence on your phone. Thanks to Glyph for sharing this thread.

The thread made me think about what the future of notifications are when thinking about past many-to-many attention-demanding technologies, specifically phone calls.

My parents had an active landline only a few years ago, I can attest that the value-to-noise ratio on the landline was zero. The process to arrive there involved three steps:

My parents knew that anyone who called was a "solicitor" or a scammer and so let every call go to voicemail and listened at the end of the day. My brother and I stopped calling the landline because they never picked up, we were calling and texting our parents on their mobile phones because those actually got responses. The network had destroyed its utility and most people moved on.

This isn't exclusive to landlines either, this happens on mobile phones, too. For example, my phone does not ring unless you're in my contacts list. Unknown phone numbers are sent straight to voice mail. The network has an extremely low value to noise ratio without this filtering, and it's hard to imagine how many scam victims and human lifetimes would be saved if this were the default for mobile phones. Alas.

Phones used to be a way to get someone's attention in the moment and have a conversation if the other party was available. "Getting someone's attention" was the whole point. The lack of authentication and filtering controls meant that the many-to-many attention-grabbing network was destined for this fate. Now notifications are in a very similar boat, and I am "calling" (heh) that one day notifications will either be a thing of the past (ie, most people disable them) or more configurable and filterable to match user expectations.

If you look at my phone, almost every application that actually generates notifications is either disabled or it's a messaging application like iMessage, Signal, Discord, etc. Apple does not make this easy at all, you need to click into each application individually and disable notifications (flashback to having to do the same for disabling Apple Intelligence, coming from a "design-oriented" company).

So what would voicemail for notifications look like? All notifications received over the course of the day delivered as a sort of "newsletter" at a specific time of your choosing? Maybe the ability to "sinkhole" notifications that matched or didn't match a pattern. I want to see more APIs and experiments around notification management so that applications could be installed to manage notifications regardless of whatever bad UI Apple forces on its users.

I would love to see a mobile operating system manufacturer or app store actually embrace this future for notifications: the days of spamming users' pockets against their will is not long for this world. They do nothing for a company and only teach users to disable notifications. Will the utility of this "network" be preserved or continue down the road of users steadily disliking their time, friendships, and attention being abused for a fractional ROI?

This little thought exercise made me even more excited for "Other Networks: A Radical Technology Sourcebook" by Lori Emerson which can be pre-ordered on bookshop.org. If you're reading this book (or others like it) and reach out!

May 05, 2025 12:00 AM UTC

May 03, 2025


Techiediaries - Django

The Full Python Cheatsheet: From Basics to Data Science

To help beginners and professionals alike, we are sharing a comprehensive Python cheatsheet that covers everything from the basic syntax to powerful data science libraries. Bookmark it, print it, share it—this is the companion you didn’t know you needed.

May 03, 2025 12:00 AM UTC