The asp:ListView control (Part 1 - Building a Product Listing Page with Clean CSS UI) (original) (raw)
One of the new controls in ASP.NET 3.5 that I think will be very popular is the asp:ListView control. The ListView control supports the data editing, insertion, deleting, paging and sorting semantics of higher-level controls like the GridView. But - unlike the GridView - it provides you with complete control over the html markup generated.
The ListView control, when combined with the new Web Designer and rich CSS support in VS 2008, enables you to build much cleaner HTML UI. Over the next few weeks I'll be putting together several blog posts that show off how you can use it.
Building a Products Catalog Page
For today's blog post we are going to start simple and just build a basic product catalog listing page like below:
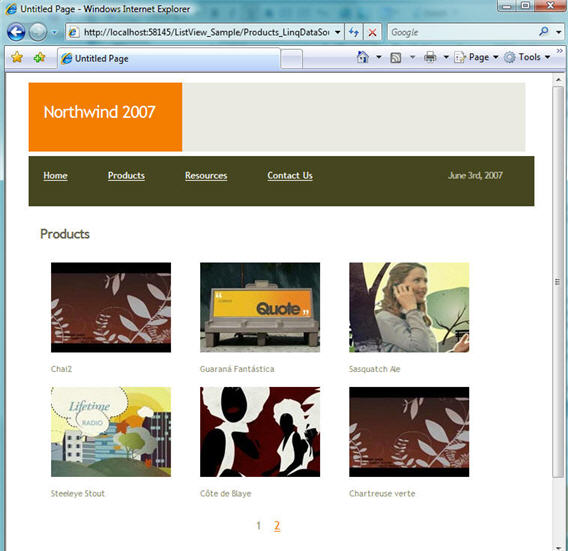
This products.aspx page will take a Catalog index in the URL, and use LINQ to SQL to retrieve and display product information. We will also enable paging navigation at the bottom of the product listing (and do all of the paging operations in the database - so that only 6 products at a time are retrieved from the database).
The HTML markup output from the server will be 100% CSS based (no tables or inline styles).
Step 1: Defining out Site Layout with Nested Master Pages
Before we start working on our product page, we'll first want to define the overall UI and layout structure for our site.
If you are "design challenged" like me, one approach you might want to take with a new site is to get started by using one of the free HTML site templates that you can download from these two sites: http://www.opensourcetemplates.org/ or http://www.oswd.org/. The templates on these sites are pure HTML (meaning you can use them with any server-side programming technology), and are built using clean CSS and XHTML markup. For this blog post I decided to go with the "TerraFirma" template here.
After I downloaded the template, the first thing I did was to create a root "Site.Master" Master Page that defined the overall layout structure for the site. I then created a few nested master pages to define different column style layouts ("SingleColumn.master" and "TwoColumn.master"). VS 2008 now has great support for creating and using nested master pages that makes doing this easy. You can read about how to define and use them in my earlier VS 2008 Nested Master Page Support blog post.
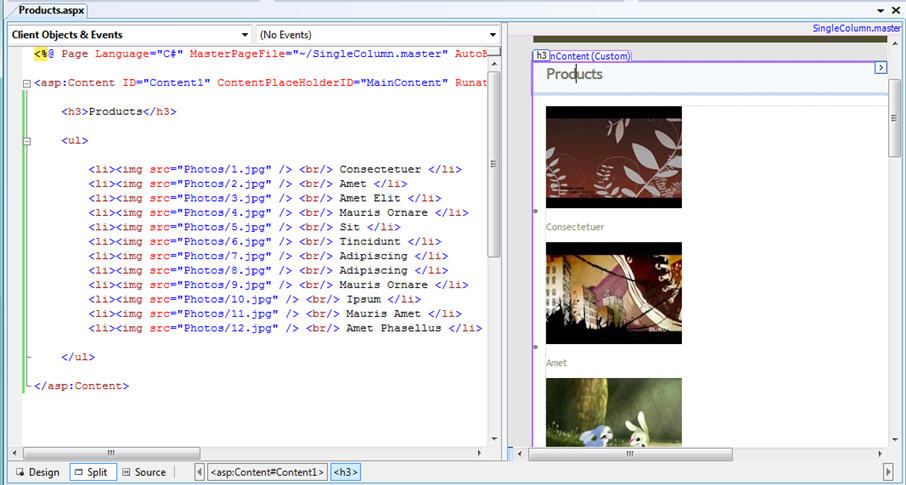
Once we have created our master pages layouts, we can then create a new product catalog page for the site that is based on the single-column nested master page (click below for a full screen picture):

Notice above how we can edit the page using the new VS 2008 Split View mode feature. Above I'm using the "Vertical Split View" option so that I can see both the source and design view on a wide-screen monitor. You can learn how to enable this in my earlier Enabling Vertical Split View in VS 2008 blog post.
Step 2: Defining our CSS Rules using Mock HTML UI
When it comes to defining our product UI for the page, there are a couple of different approaches we can use. One would be to start by writing code to generate some dynamic data UI, and then work to make it pretty. Another approach we could take would be to start by mocking up the HTML UI first, and then once we are happy with it write the code to make it dynamic. For this blog post I'm going to take this second approach.
To start let's just add a standard
- list of product content into the page:
As you can see above, this
- list looks pretty unattractive, and obviously not like what we want our product listing page to look like. To make it more attractive, we'll use some of the new CSS editing features I covered in my earlier VS 2008 Web Designer and CSS Support blog post.
- to the left:
- element to be 15px to space out the products nicely:
- Part 1: Introduction to LINQ to SQL
- Part 2: Defining our Data Model Classes
- Part 3: Querying our Database
- Part 4: Updating our Database
- Part 5: Binding UI using the ASP:LinqDataSource Control
- LayoutTemplate
- ItemTemplate
- AlternatingItemTemplate
- SelectedItemTemplate
- EditItemTemplate
- InsertItemTemplate
- EmptyItemTemplate
- EmptyDataTemplate
- ItemSeparatorTemplate
- GroupTemplate
- GroupSeparatorTemplate
Specifically we'll want to open the new "Manage Styles" tool window in VS 2008 (you can open this by selecting the Format->CSS Styles->Managed Styles menu item):
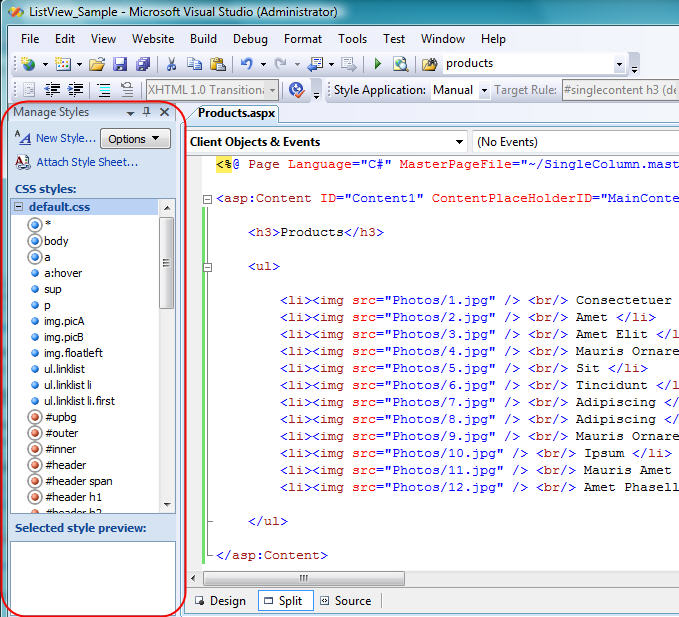
The manage styles window provides an easy way for us to see all CSS rules currently in our CSS stylesheet. It also enables us to quickly lookup CSS selector values, refactor css rules across stylesheets, and create new rules.
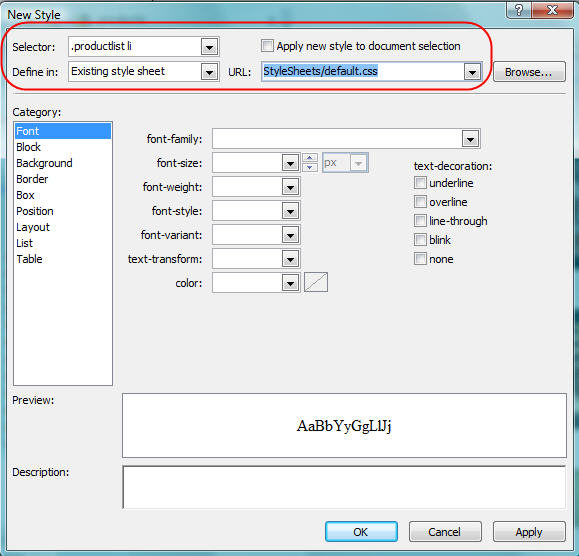
We can create a new CSS rule for our product listing by selecting the "New Style..." link in the "Manage Styles" window. This will bring up a dialog that enables us to choose where we want to define the CSS rule, and configure what settings we want for it. For this sample we'll name the CSS selector ".productslist li" and select the "Define in existing style sheet" option to add it to the external stylesheet we already have for our application:
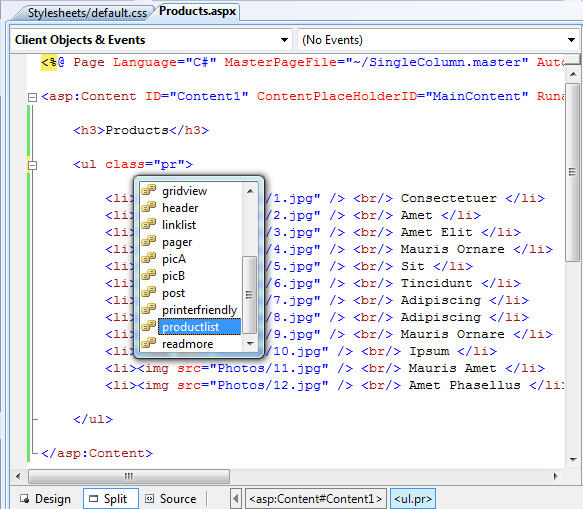
We can then hit "ok", and return back to source mode to assign the CSS rule on our
- list (note how VS 2008 now provides CSS intellisense in source view):
Currently our CSS rule doesn't have settings assigned to it, so our
- list will still look the same as it did before. We can change that by assigning some CSS settings.
There are a couple of ways we could set these CSS settings: 1) open up the CSS stylesheet and set them in source mode, 2) use the manage styles dialog we saw before to set them, or 3) use the new CSS Properties Window to edit the CSS rules in real-time within the designer. We can bring up the CSS Properties Windows via the View->CSS Properties menu:
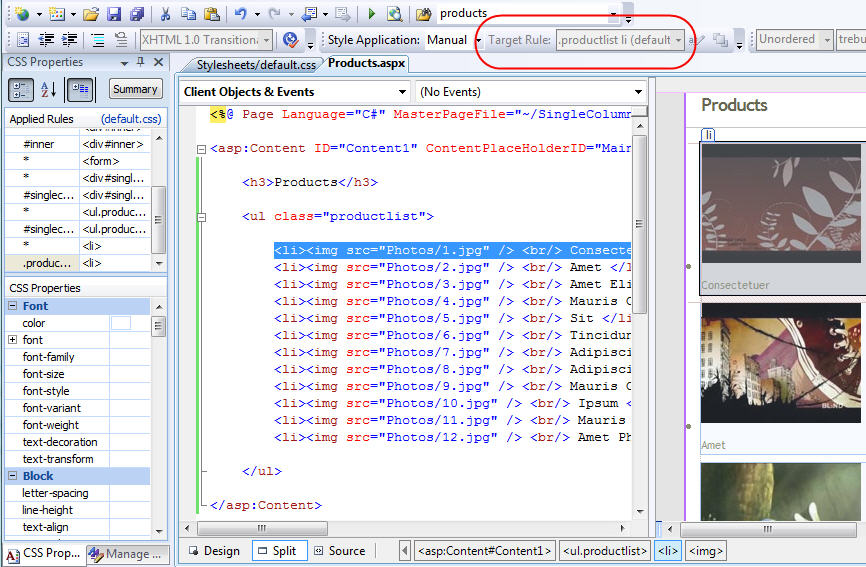
When you select an element either in source-view or design-view, the CSS Properties Windows will list all of the CSS rules that apply to it. The "Applied Rules" list at the top of the CSS Properties window indicates the precedence order of cascading rules. The CSS properties list below it then shows all of the setting values assigned to that element.
The "target rule" drop down in the style application toolbar (circled in red above) indicates which CSS selector a change in the CSS Properties window will be assigned to. In the example above our .productlist li rule is the CSS selector we currently have selected - which means as we set values in the CSS Properties window they will be persisted under that rule name in our external CSS stylesheet. No style settings will be persisted inline the HTML page.
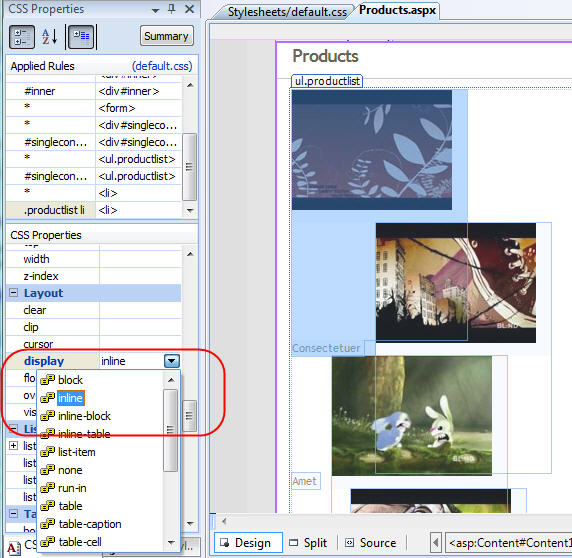
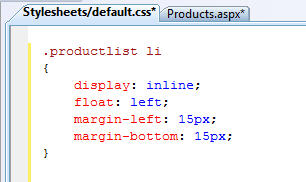
Let's now make some changes to our "productlist li" CSS rule. First we'll change the layout display mode to be "inline":
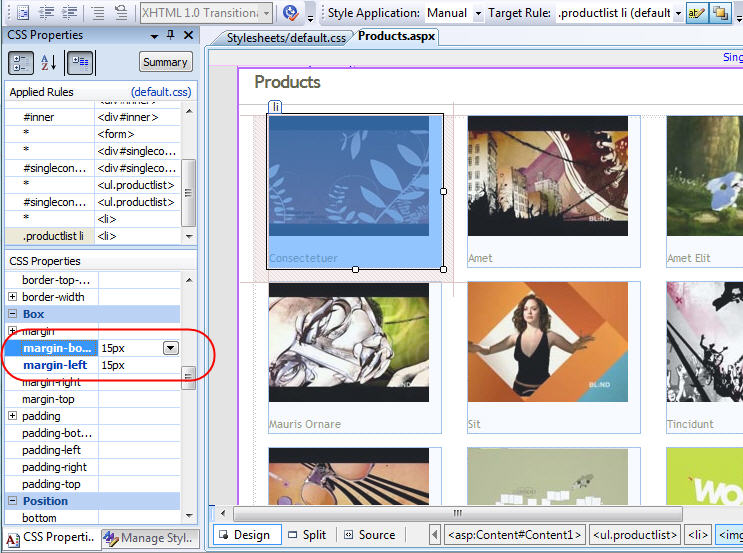
We'll then want to float each

And lastly we'll set the bottom and left margin of each
Notice how when we are done no inline styles have been saved in our HTML page:

Instead they've all been cleanly saved under our "productlist li" CSS selector in the external CSS stylesheet:
Now all that remains is for us to replace the static HTML with some dynamic data coming from a database.
Step 3: Defining our LINQ to SQL Data Model
We'll use LINQ to SQL to retrieve our product data from the database. LINQ to SQL is a great new ORM (object relational mapper) implementation built into .NET 3.5. You can learn more about it from my on-going LINQ to SQL blog series (more posts in it coming soon):
We'll use the Northwind sample database for our product data, and define our data model classes in the LINQ to SQL ORM designer like so:
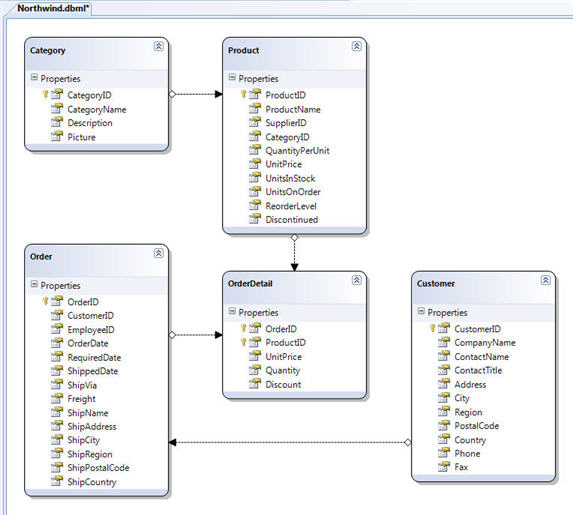
Once we have our LINQ to SQL data model defined, we are ready to use the asp:listview control and bind the data to it.
Step 4: Convert our HTML Mock UI to use the asp:ListView control
The asp:listview control is a template-driven control. The control itself outputs no "built-in" UI, nor any actual HTML markup. Instead, you can define whatever markup *you* want displayed using the below templates:
The first two templates in the list above - LayoutTemplate and ItemTemplate - are the most common ones you'll end up using. The template allows you to define the outer container/wrapper of your data UI. The template then allows you to define what each item in the list should look like.
Within the you then define an "ItemContainer" control that indicates where you want the asp:ListView control to dynamically add the items into the output markup.
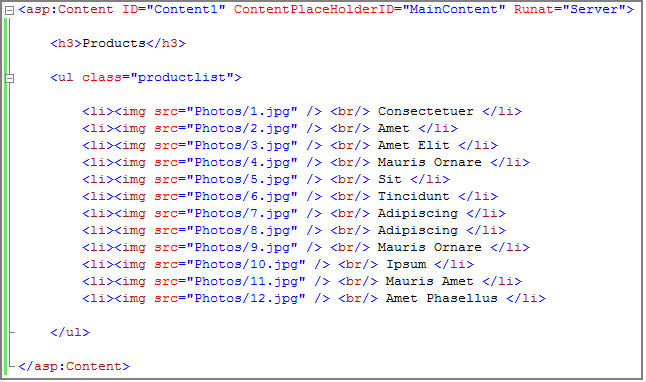
To see how this works in action, we could take our mock products HTML UI:
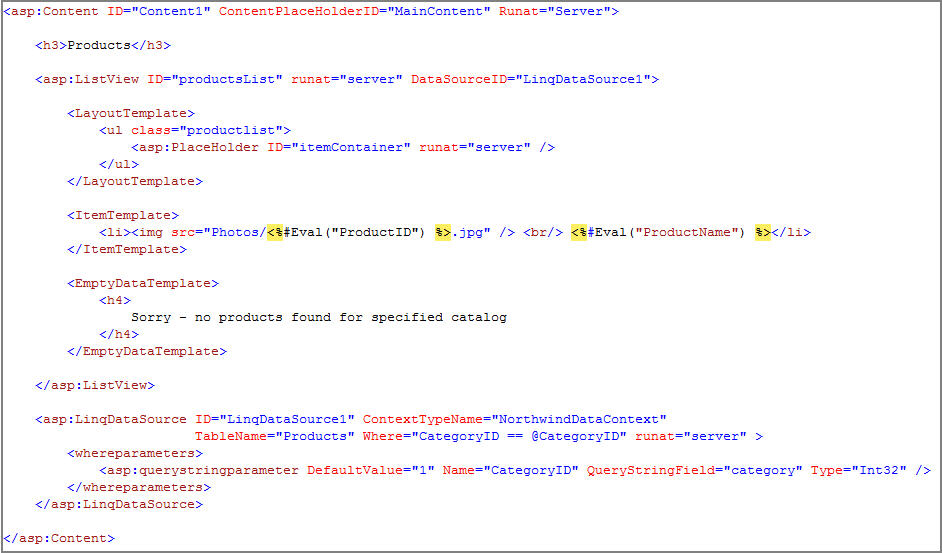
And replace it with a asp:listview that can dynamically generate the exact same markup output like so:
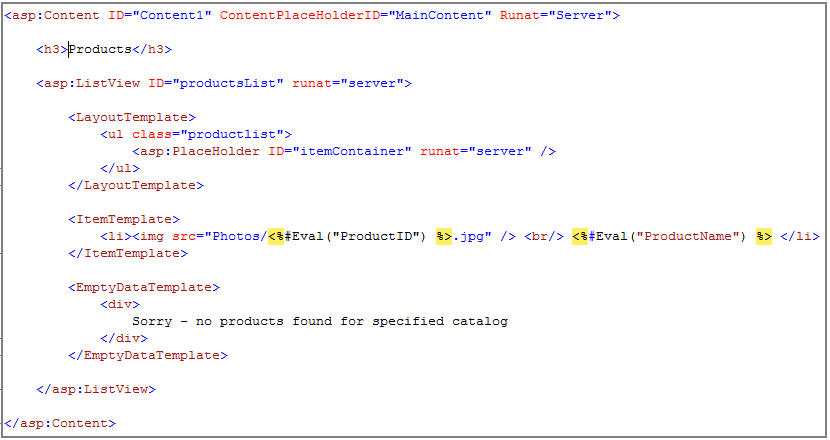
Notice above how I am using a asp:placeholder control in the to indicate where I want to add in my items in the list. I could use other controls instead as the itemContainer if I wanted to - but by using an asp:placeholder control as the itemContainer I will prevent any id values or extra markup being generated.
Notice above how I've also defined an . This will display instead of the if I assign an empty sequence of data to the ListView. This will avoid us inadvertently displaying an empty
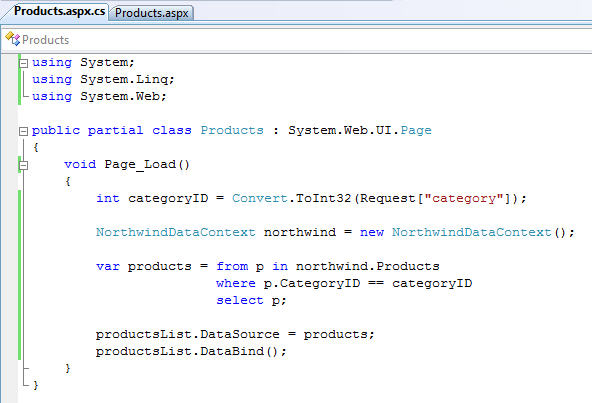
Once we've defined our template above, we can write some code in our code-behind file to retrieve our product data using LINQ to SQL, and bind our ListView with it:
VB:
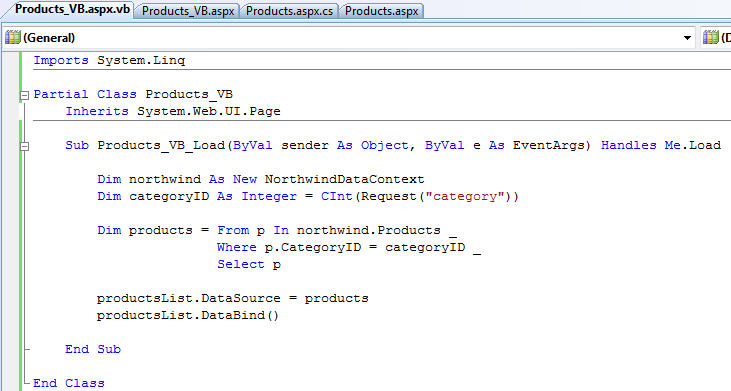
C#:
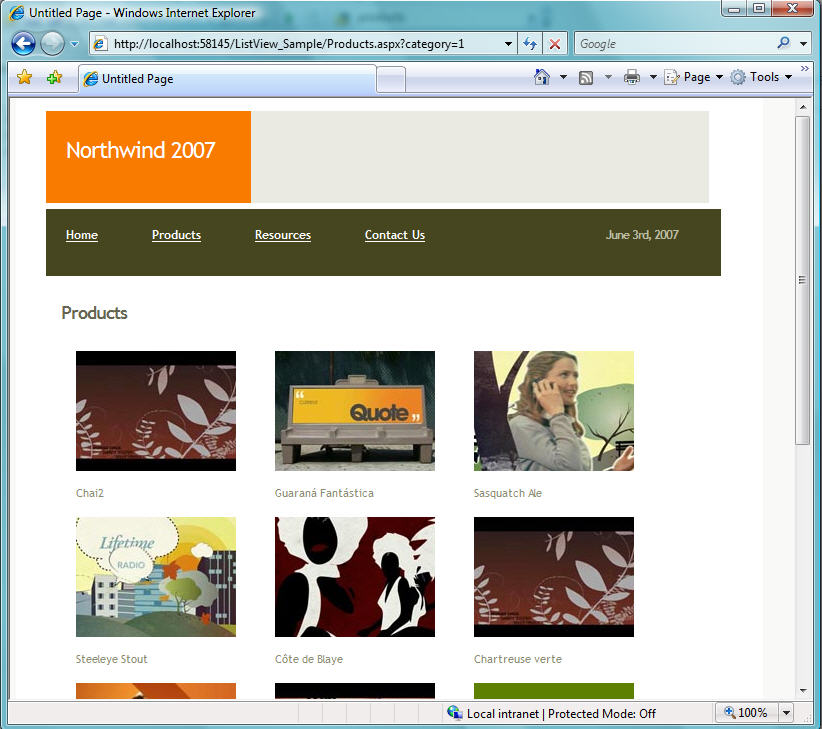
And now when we run the page and supply a valid categoryid as a querystring argument we'll see our products dynamically pulled from the database:
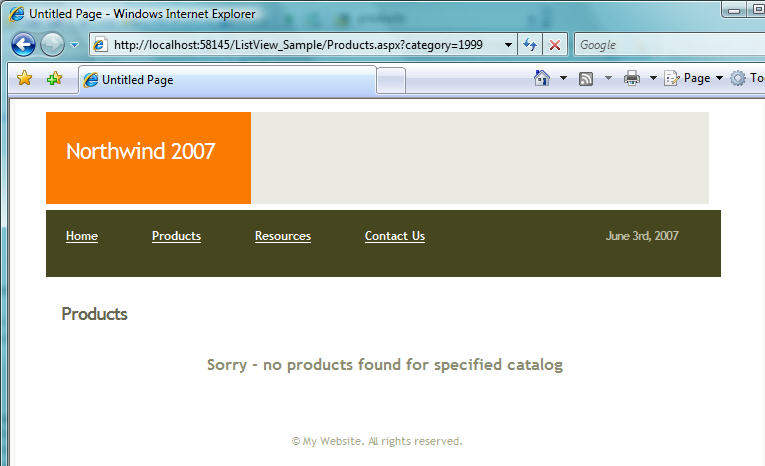
If we try a category that doesn't contain products, we'll get our empty template message:
If you do a "view source" on the products page in the browser, you'll see that the markup generated from our ListView control is the same as what our static HTML was:
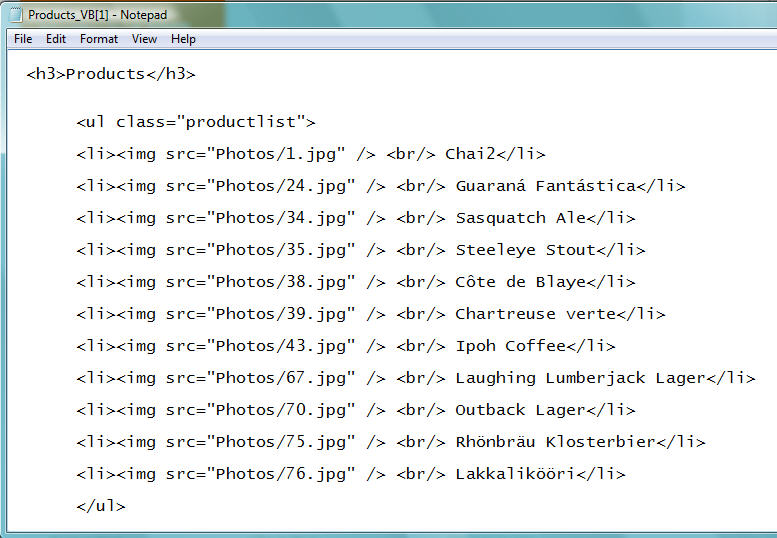
There are no ID elements or inline styles generated. We had complete control over every HTML element and attribute generated.
Step 5: Using a asp:LinqDataSource control instead of writing code
In our previous step above we wrote procedural LINQ to SQL code to databind our asp:ListView. This obviously works, and provides a great deal of control over the logic executed.
Another option you can alternatively use is a declarative ASP.NET datasource control. All of the ASP.NET 2.0 datasource controls (SqlDataSource, ObjectDataSource, AccessDataSource, XmlDataSource, SiteMapDataSource, etc) work with the ListView. You can also use the new asp:LinqDataSource control with it. For more information on the LinqDataSource, check out my previous LINQ to SQL Part 5: Binding UI using the ASP:LinqDataSource Control blog post.
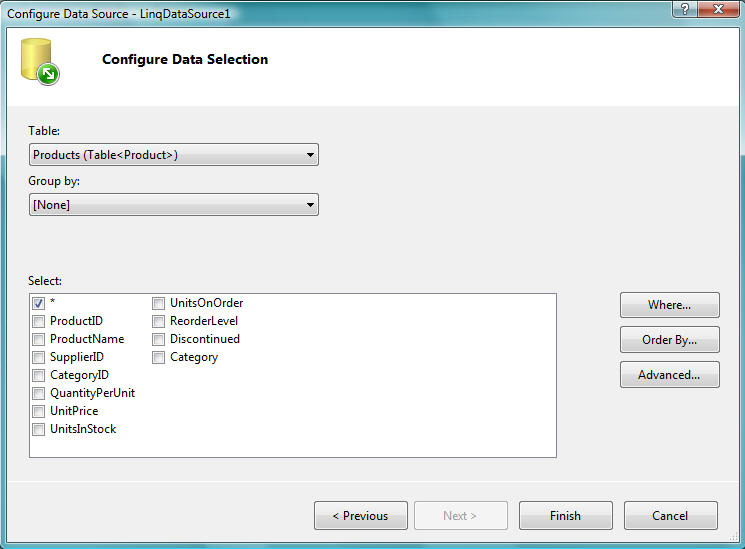
To use the asp:LinqDataSource in the above sample, we'll first delete the previous code we wrote in the code-behind file, and then click on the asp:ListView control in the designer and select the "Choose Data Source->New DataSource" option. We'll pick the "LINQ DataSource" option in the data source dialog, and then bind to the Northwind data model we created earlier.
We can then choose to bind the ListView against the "Products" entity collection in our Northwind data model:
We can then hit the "Where" button to configure a LINQ filter based on the "category" value in the querystring (we could alternatively bind the value from a form value, cookie, session value, another control, etc):
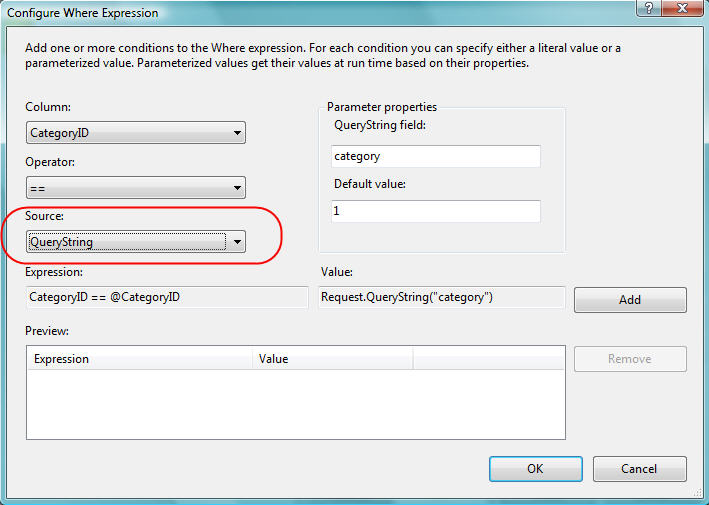
When we press the "ok" button the ListView's DataSourceID will be set to a new asp:LinqDataSource in the page:
And now without us having to have any code in the application we have a product listing with custom HTML UI databinding against our LINQ to SQL data model.
Step 6: Enabling Server Side Paging using the asp:DataPager control
Our last step with this sample will be to enable paging support over the products data. Specifically, we only want to display 6 products at a time on the page, and provide a nice page number UI to allow users to navigate forward and backwards over our product sequence.
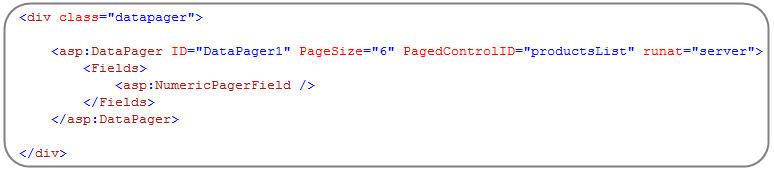
One of the other new controls in ASP.NET 3.5 is the asp:DataPager control - which makes data paging scenarios with the ListView control pretty easy. You can drop it anywhere you want on a page, and set its "PagedControlID" property to point at the ListView, and its "PageSize" property to indicate how many items in the ListView you want displayed at a time:
The asp:DataPager will then output navigation UI for your ListView:
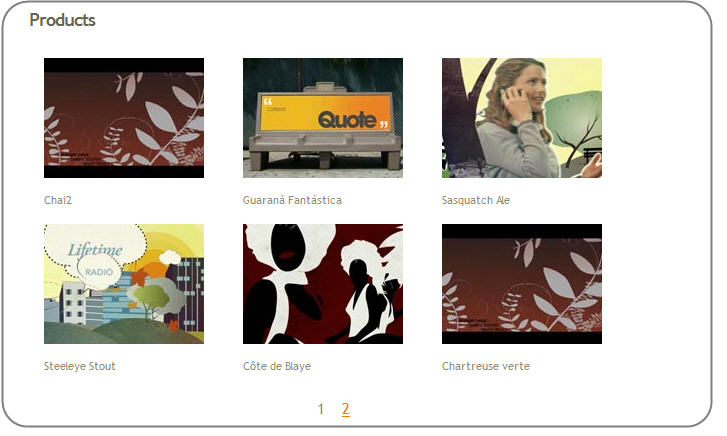
And then if you click the "2" link in the paging UI above it will show you the remaining 5 products in the category:

The asp:LinqDataSource automatically uses LINQ to SQL's built-in support for server-side data paging to ensure that only 6 products (because the PageSize is 6) are ever retrieved from the database at a time. This means that your application and database will scale even if you have thousands of products in a specific category.
Disclaimer: The asp:DataPager in Beta2, though, does have some limitations in that it can't by default be driven off of a querystring value - which makes it not very SEO friendly. I'll cover how to fix this and support a querystring index in a future blog post.
Summary
Hopefully the above walkthrough provides a good first look overview of how to use the new asp:ListView control. You will find that this control provides you with complete control over the markup output sent down to a client - while still providing rich data paging, editing, deleting and insertion semantics. I'll cover many more of these scenarios (along with the ListView's cool grouping functionality) in future blog posts.
Click here to download a copy of the above sample in order to try it out on your own machine.
Hope this helps - and have a great weekend!
Scott