Creating First Java Application in IntelliJ IDEA (original) (raw)
Last Updated : 28 Jan, 2021
IntelliJ IDEA is a Java IDE that is one of the 3 biggest and most popular IDE’s in the world. It has two versions, namely the free open-source community edition and a paid Ultimate edition. Some features of IntelliJ IDEA are as follows:
- Both versions of IntelliJ IDEA support various programming languages like Java, Scala, Kotlin, Groovy, etc.
- There are many features in IntelliJ IDEA that make programming simpler such as debugging, code completion, code inspections, XML editing support, code refactoring, unit testing, TestNG, etc.
- Some other tools that are only offered in the paid Ultimate version duplicate detection, JavaScript and database tools, Perforce integration, etc.
- IntelliJ IDEA can be used on platforms like Linux, macOS, and Windows
Procedure:
- Start a project
- Create a package inside the project and corresponding classes to the package created
- Write the code to be executed in a text editor
- Package the above project in JAR
- Test the application
- Execute the above JAR file
Implementation:
Step 1: Start a project
- When you open IntelliJ for the first time you will get a welcome screen with three options. Out of those three options click on the new project to get started.
- In the next window, you have to give the name of your project
- “GeeksForGeeks” is a custom input used to illustrate here in the article.
- If you want to use an additional library or any kind of template then you have an option to choose from the dropdown menu that will ease your task.
- After clicking finish your IDE will create a virtual environment for your project.

- Name the project as 'GeeksForGeeks' (you can choose any name), and then clicks finish.

Step 2: Create a package inside the project and corresponding classes to the package created
- On the left-hand side of the project window, select 'src → new → java class → write 'GeeksForGeeks.gfg' '
- It will create a project named 'GeeksForGeeks' and create a class of 'GeeksforGeeks'.

Step 3: Write the code to be executed in a text editor
Writinga demo program in the text editor that should only print “This is my first project in java” after the program is successfully compiled and run.
Example
Java `
// Java demo program to print message on the console
// Importing input output classes import java.io.*;
// Class public class Geeksforgeeks {
// Main driver method
public static void main(String[] args)
{
    // Print and display on the console after
    // successful compilation and execution
    System.out.println(
        "This is my first project in java");
}
}
`

- After writing the above code you may check if it is finishing with exit code '0' or not.
Step 4: Package the above project in JAR
- After you have finished with the writing part you can now package your application in a JAR file.
- Select_file → project Structure → artifact_

- Click on the addition sign(+) as you can see in the following image.

- Select the folder icon that is present in the left of the output directory field and define the path to the .jar file.
- Now go to build in the navigation bar and select 'build artifacts' from the drop-down list.

Step 5 -NOW TEST YOUR APPLICATION
- Now select Edit configuration from the field present on the right-hand side as shown below, highlighted with a yellow box.

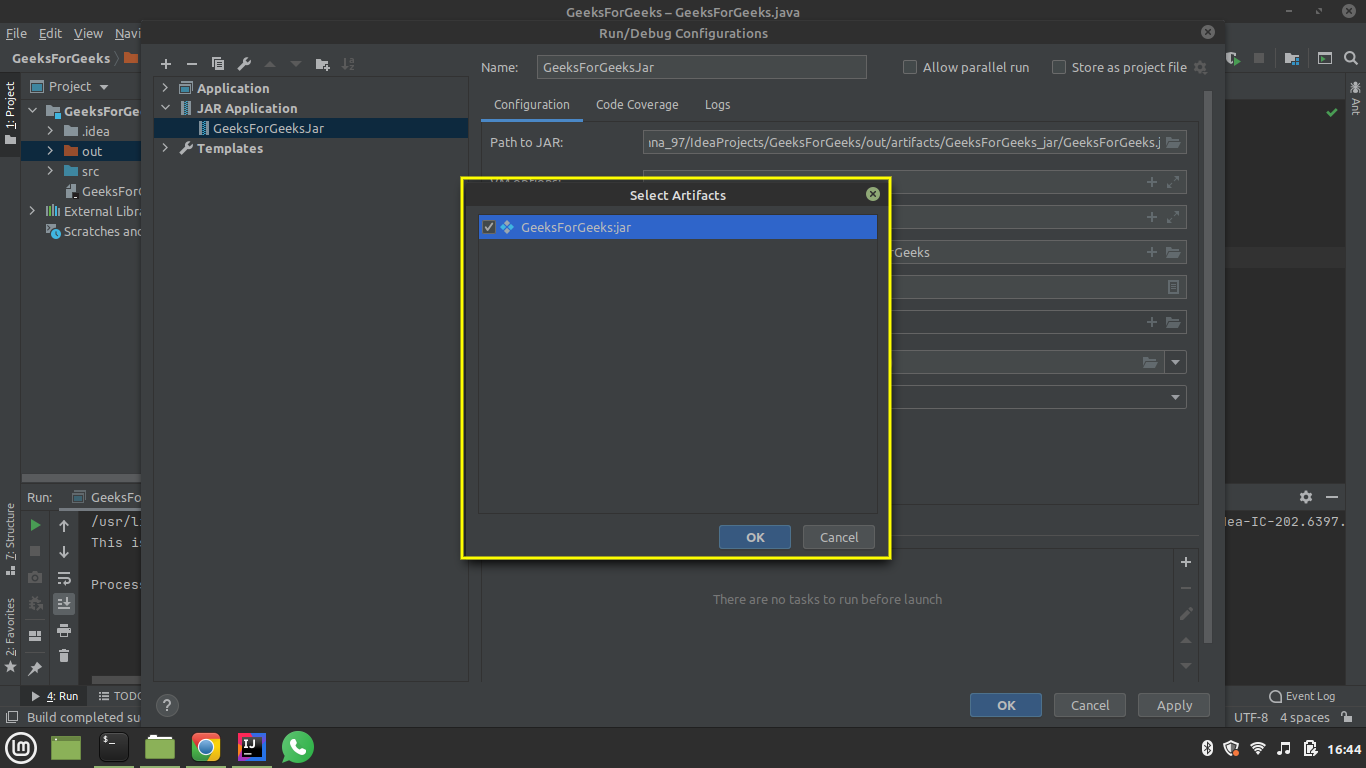
- Now click on the addition sign(+) and select the JAR application from the menu. In the name field write 'GeeksForGeeksJar'.
- Choose the 'GeeksForGeeks.jar' file from the directories.

- In the path to jar field, click the folder sign and specify the path of your .jar file.
- Click on the plus sign(+) in the before launch field and then select build artifacts from the given options.

- Select GeeksForGeeks: jar from the menu and press OK.
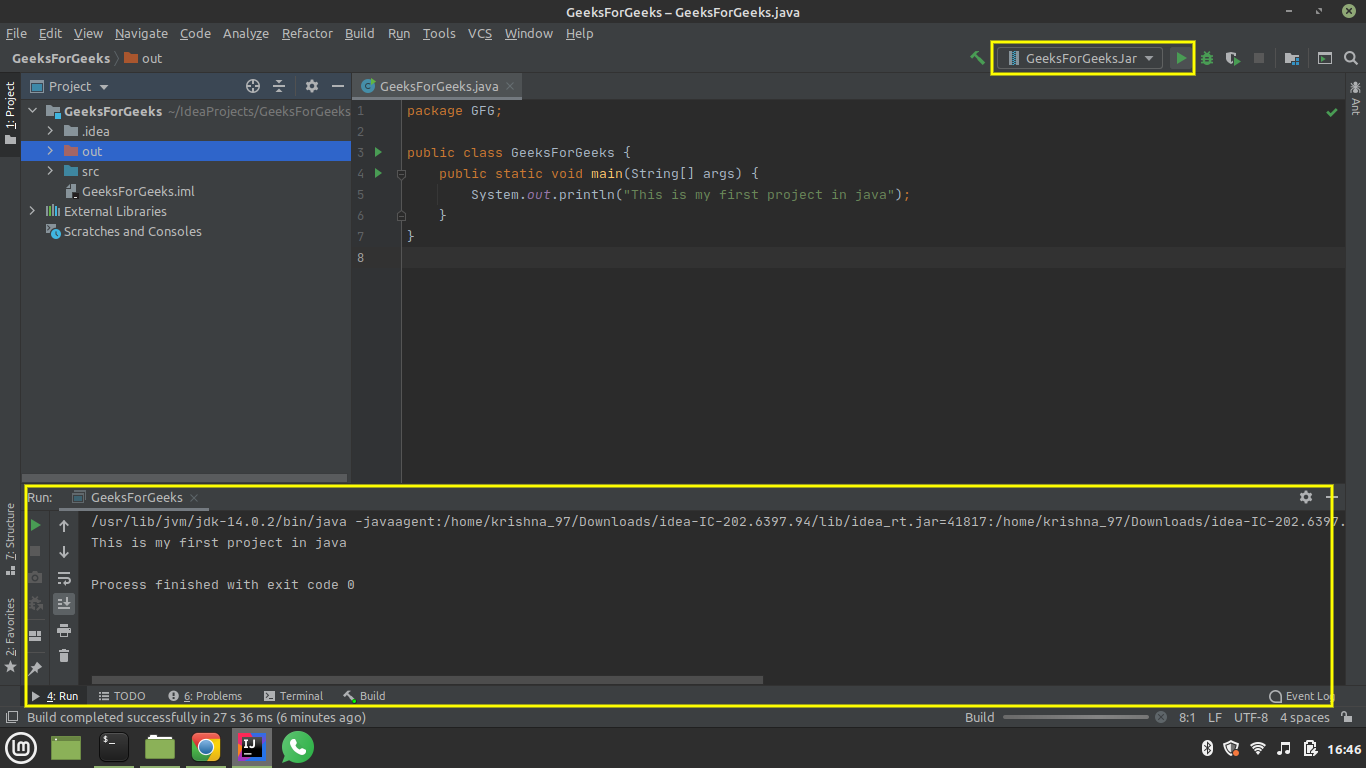
Step 6: Execute the above JAR file
- Select GeeksForGeeks.jar from the toolbar in the top right corner of your IDE and run.
- If the process executed successfully, it means that your application is packaged correctly and you are done with creating your first java application in IntelliJ IDEA.