Wolverine (Logan, pre-current Multiverse) (original) (raw)
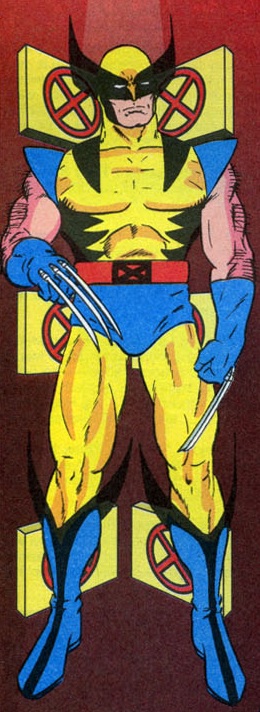 WOLVERINE
(of the pre-current Multiverse reality)
Real Name: Logan (see comments)
Identity/Class: Native of a reality in the Multiverse existing prior to the Big Bang (extratemporal/extradimensional/alternate reality);
His reality shared several features with Earth-92131, albeit with several differences (see comments);
Human mutant/mutate (Canadian)
Occupation: Adventurer;
former government agent, special ops soldier
Group Membership: X-Men (Beast/Henry McCoy, Cyclops/Scott Summers, Gambit/Remy LeBeau, Jubilee/Jubilation Lee, Phoenix/Jean Grey, Professor X/Charles Xavier, Rogue, Storm/Ororo);
formerly Alpha Flight (Puck, others)
Affiliations: Alpha Flight (Aurora, Northstar, Puck, Sasquatch, Shaman, Vindicator/James MacDonald Hudson), Archangel (Warren Worthington III), Banshee (Sean Cassidy), Bishop (of the pre-current Multiverse reality mirroring Earth-31393), Cable (of the pre-current Multiverse reality mirroring Earth-13393), Colossus (Piotr Nikoliverich Rasputin), Valerie Cooper, Dr. Peter Corbeau, Carly Crocker, Darkstar, the Dweller-in-Darkness, the Fall People, Mr. Hodge, Heather Hudson,Hulk (Bruce Banner), Ka-Zar, Lilandra, Longshot, Dr. Moira MacTaggert, Morph, Illyana Rasputin, Gen. "Thunderbolt" Ross, Shanna, S.H.I.E.L.D. (Nick Fury, others), the Starjammers (Ch'od, Corsair, Hepzibah), the Tribe of the Inuit (Keuwock, Kooton, Nobok, Pooyetah, others), X-Factor (Havok/Alex Summers, Polaris/Lorna, Wildchild), Zabu, Erich Zann
Enemies: The Agency for Mutant Affairs (Henry Gyrich, Bolivar Trask, others), Apocalypse (En Sabah Nur), Avalanche (Dominic Petros), Black Tom Cassidy, Blob, the Brotherhood of Mutants (Quicksilver/Pietro, Scarlet Witch/Wanda, Toad), Gen. Chasen, the Circle Club (Emma Frost, Harry Leland, Donald Pierce, Sebastian Shaw, Jason Wyngarde), Dr. Cornelius, Dark Phoenix (Jean Grey), Emperor D'ken, Domo, Eric the Red, the External, the Four Horsemen (Famine/Autumn Rolfson, Pestilence, War/Abraham Lincoln Kieros), the Friends of Humanity (Graydon Creed, Frank, Josh, numerous others), Garokk, the Imperial Guard (Earthquake, Gladiator, Hobgoblin, Hussar, Manta, Oracle, Smasher, Starbolt, Warstar), Juggernaut (Cain Marko), Leader, Magneto, Minister Praelick, Mister Sinister, Mojo, Morlocks (Annalee, Ape, Callisto, Erg, Leech, Slyme, Sunder, numerous others), Mystique, the Nasty Boys (Gorgeous George, Hairbag, Ruckus, Slab), N'Garai demons (Kierrok, others), Nimrod (of the pre-current Multiverse reality mirroring Earth-31393), Omega Red (Arkady), the Professor, Pyro (St. John Allerdyce), the Reavers (Lady Deathstrike/Yuriko Oyama, Macon, Pretty Boy, Reese), Sabretooth, Sauron (Karl Lykos), the Savage Land Mutates (Amphibius, Barbarus, Brainchild, Lupo, Vertigo), Sentinels (Mastermold, numerous unnamed robots), Spiral, the Thieves Guild (Jacques, others)
Known Relatives: None
Aliases: "Animal," "Beast," "Big Claws," "Bub," "Bunkie," "Buster," "Chum," "Furry," "Insect," "Little Man," John Logan, "the Ol' Canucklehead," "Pansy," "Sad Sack," "Shorty," "Stranger," Stumpy," "Sweet Pea," "Toadstool," Weapon X, "Wolvester," "Wolvie"
Base of Operations: Xavier's School for Gifted Youngsters (aka the X-Mansion), Salem Center, New York, USA;
formerly unspecified locations in Canada
First Appearance: X-Men Adventures I#1 (November, 1992)
Powers/Abilities: Wolverine was a mutant with superhuman senses (especially sight, smell and hearing) and a healing factor that could heal any injured or damaged tissue. His skeleton was bonded with the indestructible metal Adamantium and he could extend foot-long Adamantium claws from his forehands.
He was also a ferocious fighter, though he was prone to berserker rages.
Height: 5'3"
Weight: 195 lbs.
Eyes: Brown
Hair: Black
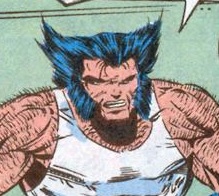 History: (X-Men Adventures II#10 (fb) - BTS) - The man calling himself Logan came from Canada.
(X-Men Adventures III#1 (fb) - BTS) - Logan worked for "some men" in the Canadian government.
(X-Men Adventures I#6 (fb) - BTS) - Logan worked in a special ops unit with the mutant Sabretooth, who often watched Logan's back and beat Logan during sparring matches.
(X-Men Adventures II#4 (fb) - BTS) - During his time with an espionage unit, Wolverine encountered the Russian superhuman operative Omega Red, who considered himself merciful for allowing Wolverine to live before being placed in suspended animation by his superiors after he became out of control.
(X-Men Adventures I#3 (fb) - BTS) - Somewhat becoming friends with Sabretooth, Logan ultimately developed a fierce hatred of Sabretooth after Sabretooth killed some of Wolverine's friends.
(X-Men Adventures I#6 (fb) - BTS) - Now outright enemies with Sabretooth, Logan constantly remained on edge and prepared in case Sabretooth were to randomly attack him.
 (X-Men Adventures III#1 (fb)) - Logan spent some time in Japan with a woman named Yuriko but their time together was cut short when Logan was summoned back to Canada by his former superiors. When Yuriko feared Logan would never see her again, Logan promised that no matter what happened, he would return to her.
(X-Men Adventures II#5 (fb) - BTS) - Logan was captured by agents of a scientific laboratory and taken to their lab for experimentation.
(Adventures of the X-Men I#1 (fb) - BTS) - Logan was unaware that the scientific laboratory was part of Canada's Department H research division.
(X-Men Adventures I#5 (fb) - BTS) - Unidentified "experts" tampered with Logan's mind.
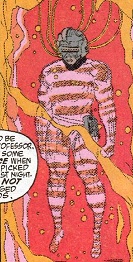 (X-Men Adventures II#5 (fb)) - Logan was placed in a liquid tank, where indestructible Adamantium metal was bonded to his skeleton. Once the bonding process had successfully completed, the lab's Professor informed Logan of what had been done to him and asked how he was doing. Moments after commenting on how itchy his hands were, Logan was shocked when Adamantium claws painfully ripped through the flesh on his forehands. While the Professor marveled at the unexpected breakthrough, Logan used his newfound claws to escape his task and destroy the lab's machinery. He then rushed to attack the Professor, who fled into nearby security room before the nearly feral Logan escaped into the Canadian wilderness via a hole blown out of the lab wall by exploding machinery. A short time later, hungry and in pain from the Adamantium bonding process, Logan attacked hunting researchers James and Heather Hudson, who shot Logan with tranquilizer dart and took him back to their cabin in an attempt to help the man. Strapped to a bed for the safety of the Hudsons and himself, Logan soon escaped his bounds and confronted Heather, who pleaded with Logan to calm down and insisted that the Hudsons only wished to help. Touched by the softness in Heather's voice, Logan calmed down and collapsed to his knees, crying at what had been done to him. Heather then spent weeks nursing Logan back to health, bandaging his hands when his claws uncontrollably extended, getting him normal clothing and soothing Logan when the emotional pain seemed too much to bear. Months later, having regained his humanity, Logan was informed by James Hudson that his friends in the Canadian government might have a place for a superhuman mutant like Logan. Introduced to Department H's General Chasen, Logan became a superhuman government operative, codenamed Weapon X before deciding on the name Wolverine instead.
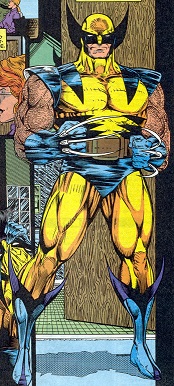 (X-Men Adventures II#5 (fb) - BTS) - Joining Department H's Alpha Flight team, Wolverine trained with his teammates and his teammate Puck often tried and failed to defeat Wolverine using a cartwheel maneuver.
(Adventures of the X-Men I#1 (fb) - BTS) - Wolverine fought the monstrous Hulk.
(X-Men Adventures II#5 (fb) - BTS) - Wolverine ultimately quit Alpha Flight to work for Charles Xavier.
(X-Men Adventures I#1 (fb) - BTS) - Wolverine joined Xavier's X-Men team.
(X-Men Adventures III#1 (fb)) - At some point, Wolverine returned to Japan to find Yuriko but he proved unable to locate her.
(X-Men Adventures I#9 (fb) - BTS) - As part of the X-Men, Wolverine battled Xavier's vengeance-seeking half-brother Juggernaut, learning of Juggernaut's origins and how his helmet protected him from mental attack.
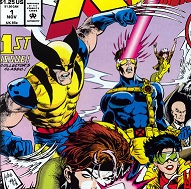
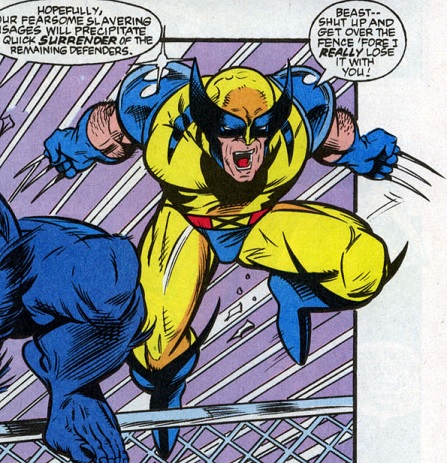 (X-Men Adventures I#1) - Many months later, after young mutant Jubilee was brought to the Xavier's School for Gifted Youngsters and informed of her status as a mutant by Storm, Wolverine introduced himself to Jubilee by questioning the naive Jubilee's description of mutants as "weirdos." Informing Storm that Professor X had summoned them to the X-Men's War Room, Wolverine told Jubilee to stay put, as he wished to have word with her later. Wolverine then met the other X-Men in the War Room, where the X-Men learned that the government's Agency on Mutant Affairs had a hidden agenda and that twelve of their registered mutants had recently gone missing. After the Professor tasked the X-Men with breaking into the Agency on Mutant Affairs and erasing their files, Wolverine and X-Men field leader got into a brief argument when Cyclops questioned the orders before Professor X broke the argument up. Later accompanying the X-Men to the Agency on Mutant Affairs, Wolverine was part of the X-Men squad who infiltrated the Agency itself alongside Morph, Beast and Storm, slicing their way into the Agency itself and prompting Beast to caution Wolverine against federal property damage. Once inside, Wolverine stopped the X-Men after sensing the electronic security beams and, after Storm revealed the beams and Beast disabled them, Wolverine witnessed Morph collapse into a hallucinogenic fit, mumbling about an impending death.
(X-Men Adventures I#2) - Suggesting the X-Men quit wasting time nursing Morph back to reality, Wolverine had the X-Men keep moving until he caught the smell of government-issue shoe polish on the other side of a door, suggesting the presence of armed guards. Storm took out the guards and Wolverine took care of the recovering Morph as the foursome made their way into the records room, where Beast erased the mutant files. Escaping the building, Wolverine and the others found themselves assaulted by the Agency's security reinforcements, including giant robotic Sentinels, one of which mortally hit Morph with energy beams from its eyes. When another Sentinel knocked Beast into an electric fence, Wolverine savagely attacked the Sentinels but was quickly captured by a Sentinel's capture cables. Cyclops freed Wolverine, who flew into a berserker rage, forcing Rogue to absorb part of Wolverine's life force to down him so the X-Men could retreat. Later that evening, Wolverine argued with Cyclops' story of the events, claiming Cyclops had done nothing but leave Morph and Beast behind to die. Still angry at Cyclops, Wolverine later accompanied the X-Men in tracking a damaged Sentinel back to their source, where Wolverine and the X-Men destroyed all Sentinels being produced. Following the Sentinels' destruction, Wolverine questioned where those responsible for the Sentinels' production were, unaware that the Agency's Henry Gyrich and Bolivar Trask had escaped during the battle.
(X-Men Adventures I#3) - Attending the court bail hearing for the incarcerated Beast with Cyclops, whom he blamed for Beast being in the situation, Wolverine noticed an anti-mutant mob forming behind them as lawyer Mr. Hodge defended Beast. After Beast was denied bail, Wolverine returned to the X-Mansion's War Room, where he learned of an old mutant friend-turned-enemy of Professor X's named Magneto and his attempt to forcibly break Beast out of prison. When the conversation turned towards checking on an injured mutant Professor X had brought in to treat, Wolverine immediately recognized the mutant as his old enemy Sabretooth and went berserk. Before Wolverine could attack Sabretooth, however, the X-Men received word that Magneto was attacking Flemington Missile Base in Florida and Wolverine was sent there with the other X-Men to stop Magneto's launch of nuclear missiles. Accusing Cyclops of trying to steal Storm's glory when he assisted Storm in stopping the nuclear missiles from the ground, Wolverine witnessed Storm's successful stopping of the missiles and returned to the X-Mansion, where Wolverine revealed to the X-Men how Sabretooth had once killed some of his friends. Refusing to stay with the X-Men as long as they harbored Sabretooth, Wolverine left the X-Men, telling Cyclops to stow it when he attempted to stop Wolverine.
(X-Men Adventures I#4) - Not straying too far from the X-Mansion in an effort to trick Sabretooth in revealing his true nature to the X-Men, Wolverine returned in time to save Jubilee, who had been tricked into freeing Sabretooth by Sabretooth himself. Wolverine and Sabretooth savagely fought one another but Sabretooth quickly got the upper hand, bragging about how he now worked for Magneto killing mutants that opposed him. His resolve renewed, Wolverine nearly killed Sabretooth before the other X-Men arrived and stopped him from killing. As Wolverine revealed to the X-Men Sabretooth's plans to destroy the Mansion and kill anyone in his way, Sabretooth took advantage of Wolverine's mercy by horribly slashing Wolverine's back, prompting Jubilee to launch Sabretooth through the wall with her pyrokinetic abilities. Professor X immediately ordered the X-Men to get Wolverine to the infirmary, unsure if Wolverine's healing factor could handle such a mortal wound.
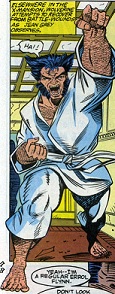 (X-Men Adventures I#5) - While recovering from wounds suffered at Sabretooth's hands, Wolverine practiced karate and Jean Grey visited him, warning him not to overdo it. Grumbling that his injuries were his own fault for letting his guard, Wolverine doubled over in pain and Jean tried to comfort him, the two nearly kissing before Jean hesitated, recalling her relationship with Cyclops and leaving a visibly saddened Wolverine alone. Later that evening, Wolverine destroyed a photo of Cyclops and Jean together before he was summoned with the other X-Men by Professor X to rescue Cyclops and Jean from the sewer-dwelling mutant Morlocks. Determined to save Jean despite his injuries, Wolverine accompanied the team into the Morlock tunnels and tracked Jean into a room where the Morlock hypnotist Annalee was fixing her hair. Demanding Annalee release Jean, Wolverine was affected by Annalee's powers and briefly thought himself covered in scorpions before shrugging off Annalee's influence and terrifying Annalee into releasing Jean. When the Morlock leader Callisto claimed to have killed Cyclops when he tried to escape, Wolverine sensed something off about "Cyclops" and threatened to cut him a new belly button, terrifying "Cyclops" into revealing himself as the Morlock shape-shifter Ape. Callisto responded by ordering the Morlocks to destroy the X-Men and Wolverine chased the fleeing Callisto until picking up the scent of the real Cyclops. Contemplating harming the unconscious Cyclops, Wolverine admitted that he would not be able to stand seeing Jean cry and decided to return Cyclops back to the other X-Men, unaware his moment of hesitation was witnessed by Callisto and Annalee. Once regrouped with the other X-Men, Wolverine suggested they simply leave now that they had rescued Cyclops and Jean but Callisto ordered Annalee to use her powers to make Wolverine think Cyclops was keeping him from a relationship with Jean. Attempting to overcome Annalee's influence, Wolverine fought an emotional mental battle with his own desires before Jean downed Annalee with a telekinetic blast. Recovering from the emotional turmoil, Wolverine witnessed Storm challenge and beat Callisto for leadership for the Morlocks. As the X-Men returned to the surface, Wolverine offered to help Jean with the still-unconscious Cyclops but his offer was rebuffed by Jean, who assured the disappointed Wolverine that Cyclops was not a burden. Once back at the Mansion, Cyclops and Jean visited Wolverine's room, only to find it empty, the destroyed photo of the two laying on the floor.
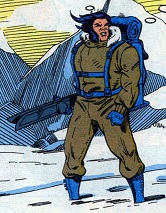 (X-Men Adventures I#6 (fb) - BTS) - Wolverine traveled north to get away from the world and his feelings for Jean, unaware that the X-Men had begun a search for him.
(X-Men Adventures I#6) - Making his way to the arctic days later, Wolverine decided to keep moving north in hopes of forgetting his feelings, unaware that he was being stalked by Sabretooth. When Wolverine ventured over ice bridge that had been secretly strapped with dynamite by Sabretooth, Sabretooth revealed himself by detonating the bridge, launching Wolverine into the freezing waters. The unconscious Wolverine was later found by the Inuit Pooyetah, who brought Wolverine to his tribal village to recover. Awaking in the village, Wolverine asked about Sabretooth, only to learn that the surprised Pooyetah knew nothing of Sabretooth, and decided to repay Pooyetah's kindness by helping work around the village.
As the days passed, Wolverine found peace and excelled at catching fish, inadvertently earning the jealousy of Pooyetah's son Keuwock. That evening, as Wolverine joined the Inuits in celebrating their fish catch, the jealous Keuwock departed the village and ultimately run into Sabretooth, who tricked Keuwock into helping ambush Wolverine. Returning to the village, Keuwock led Wolverine out in a boat the next morning but Wolverine saw through Keuwock's ruse and confronted Keuwock about why he had been led out on the water. When Keuwock accused Wolverine of being a mutant, Wolverine revealed his claws and demanded to know how Keuwock knew what a mutant was before the two heard an explosion at the village. Rushing back to find the tribe missing, Wolverine deduced Sabretooth's involvement and a guilty Keuwock admitted he had worked with Sabretooth to ambush Wolverine. The two then worked together to track Sabretooth and find their tribe, soon finding Sabretooth, who had strapped the tribe to an explosive device set to explode if Wolverine could not get past him within one minute. As Keuwock freed the tribe, Wolverine furiously battled Sabretooth, who nearly crushed Wolverine with a boulder before Keuwock knocked Sabretooth off-balance at the cost of his own life. His courage bolstered by witnessing Keuwock's sacrifice, Wolverine overcame Sabretooth and hurled him off a cliff into the arctic waters. Wolverine managed to get the Inuits to safety moments before Sabretooth's explosives went off, knocking Wolverine over an ice bridge. Pooyetah again came to Wolverine's aid, helping pull him back onto solid ground and, upon looking at Keuwock's corpse, Wolverine told Pooyetah that the entire tribe should be proud of Keuwock's heroism. Wolverine later attended Keuwock's funeral and revealed to Pooyetah why he had left his friends in the first place, prompting Pooyetah to suggest Wolverine return to his family. Thanking Pooyetah for his kind words and treatment while among the tribe, Wolverine said his goodbyes and departed.
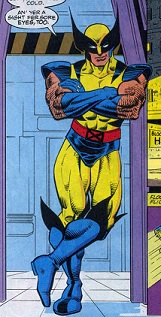 (X-Men Adventures I#7) - Following his two week adventure in the arctic, Wolverine returned to the X-Men as Cyclops, Jean Grey and Rogue found themselves unable to reach Gambit, Storm and Jubilee, who had been sent on a vacation to the island nation of Genosha to investigate its supposed pro-mutant agenda. Surprised, Rogue asked where Wolverine had been and Wolverine smirked, revealing that he had been somewhere cold and that Rogue was a sight for sore eyes.
(X-Men Adventures I#8) - Wolverine eventually accompanied Rogue, Cyclops and Jean Grey to Genosha, where they found that Storm had used her weather-manipulating powers to create a storm so powerful that it destroyed a dam, which in turn destroyed Genosha's giant, Sentinel-producing Mastermold. When Jubilee happily reunited with Wolverine, informing him that only Storm, Gambit and herself had taken out all of Genosha's anti-mutant soldiers, a smiling Wolverine asked if Jubilee was exaggerating. An hour later, Wolverine joined the regrouped X-Men in returning to the X-Mansion, only to find it demolished.
(X-Men Adventures I#9) - After the X-Men landed the Blackbird, Wolverine immediately jumped into digging through the X-Mansion rubble, hoping to find Professor X. After clearing a path to the X-Mansion's War Room, only to find a message from the Professor explaining he had went on a trip, Wolverine returned to the surface with the other X-Men and soon noticed gigantic footprints, somewhat recognizing the scent as familiar. Departing on his own to track the scent to its source, Wolverine encountered Juggernaut at the First National Bank in New Salem, following him and eventually cutting open one of Juggernaut's bags of money to draw Juggernaut's attention. Recognizing Wolverine, Juggernaut bragged about demolishing the X-Mansion, taunting Wolverine into attacking, and Juggernaut caught Wolverine mid-jump and hurled him into some trash cans. The two then fought until Storm, Rogue and Jubilee, who had been tasked with following Wolverine, arrived with their new ally Colossus to intercept Juggernaut. When Cyclops and Jean Grey arrived as well, Wolverine informed them of Juggernaut's weakness to telepathy without his helmet and the X-Men subsequently attacked Juggernaut en masse until Juggernaut's helmet was removed. Wolverine then watched as Jean Grey telepathically attacked Juggernaut's mind, forcing him to temporarily forget who he was and why he was there. Following the battle, Wolverine was present as Cyclops invited Colossus to join the X-Men, only to see the mutant decline the offer in favor of finding his sister and seeing more of America.
(X-Men Adventures I#10) - Wolverine was present when Professor X contacted the X-Men from Muir Island in Scotland to inform them of a Dr. Adler who claimed he could remove a mutant's powers. Once Professor X had signed off, Wolverine admitted that he sensed something not right about this Dr. Adler and after a brief discussion about a mutant's desire to have their powers removed, Jubilee reminded them all that the X-Mansion was still damaged. Cyclops responded by mentioning a contractor who had quoted a fair price and Wolverine questioned how the X-Men planned to pay for the contractor, to which Cyclops replied that he had access to Professor X's emergency funds. When Rogue later left for Muir Island, Wolverine suggested the X-Men tail Rogue to both learn more about Dr. Adler and find out what Rogue planned to do.
(X-Men Adventures I#12) - After seeing a news report of the powerful Apocalypse and his Four Horsemen on television, Wolverine accompanied the X-Men to England, where the X-Men planned to stop Apocalypse. When Apocalypse and his Horsemen emerged from beneath Stonehenge, Wolverine demanded to take care of Apocalypse himself and he fought a losing one-on-one battle against Apocalypse until Rogue managed break the Horseman Archangel free of his brainwashing and Archangel turned on Apocalypse, rescuing Wolverine. Affronted at Archangel's betrayal, Apocalypse retrieved his remaining Horseman and retreated, covering his escape by activating the self-destruct codes in his base beneath Stonehenge, the explosive rumbles of which prevented Wolverine and Cyclops from pursuing Apocalypse.
 (X-Men Adventures I#13) - When the gun-toting mutant Bishop arrived in the modern era from an alternate future to stop an assassination attempt on Presidential candidate Senator Robert Kelly and blasted his way into the X-Mansion, Wolverine quickly tackled Bishop and demanded Bishop drop his weapon and explain himself or risk getting stabbed. When Bishop recognized Wolverine from having worked with his alternate future counterpart, Wolverine was asked to stand down by Professor X and Bishop allowed Xavier to confirm his story about an impending assassination by reading his mind. Still skeptical of Bishop's story, Wolverine nonetheless agreed to help, warning Bishop against any potential tricks, and he accompanied Bishop and the X-Men to area where his temporal displacement had occurred. After the X-Men were attacked by the alternate future Sentinel Nimrod, Wolverine admitted that while he owed Bishop an apology for not believing his story, he still did not trust Bishop.
(X-Men Adventures I#14) - After Bishop attacked Gambit, claiming Gambit was to be the assassin he was sent to stop, Wolverine helped hold the frantic Bishop from killing Gambit and continued trying to calm Bishop down as the argument escalated, threatening Bishop when Bishop accused Wolverine of being equally responsible for the impending assassination by impeding his attempts to stop Gambit. Professor X soon had the X-Men accompany him to Washington, where the assassination was to take place, for a Senate subcommittee hearing and Wolverine was left behind to watch over both Gambit and Bishop. Ultimately deciding to pass the time by playing poker, Wolverine was distracted when Gambit left a kinetically-charged card on the War Room's monitors and escaped in an effort to stop the assassination himself. Following Gambit to Washington, Wolverine and Bishop arrived to find the X-Men battling the mutants Blob, Avalanche and Pyro and aided the X-Men in defeating the criminals. After Bishop departed to find Gambit rescuing Senator Robert Kelly from the shape-changing Mystique, who had assumed Gambit's form, Wolverine and Cyclops gave chase and found the fleeing Senator Kelly, who explained the situation. Rushing to check on Gambit, Wolverine and Cyclops found Rogue, who had deactivated Bishop's Temporal Transceiver, seemingly sending Bishop back to his own timeline as she comforted a barely conscious Gambit.
(X-Men Adventures I#15) - When Senator Kelly went missing and Professor X suspected Magneto's involvement, Wolverine accompanied the X-Men in tracking magnetic disturbances to an abandoned ship along the Atlantic seaboard. Finding no sign of Kelly and a barely conscious Magneto, who revealed that Kelly had been abducted by Sentinels, Wolverine returned to the X-Mansion's War Room, where Professor X learned from Gambit's time in Genosha that the man in charge of the Sentinels was Henry Peter Gyrich. The X-Men then confronted Gyrich and Wolverine forced Gyrich to reveal the location of the Sentinel base in an abandoned Appalachian mine. Venturing into the mine to save Kelly and destroy the Sentinels once and for all, Wolverine, Jean Grey, Cyclops and Gambit created a diversion to draw the Sentinels for the other X-Men to destroy while they searched for Kelly. Soon locating Kelly and the Sentinels' creator Dr. Bolivar Trask, who had both been taken captive by the giant Sentinel Mastermold, Wolverine and the other X-Men were surprised when Dr. Trask caused a cave-in in an attempt to destroy Mastermold. Escaping to regroup with the other X-Men, Wolverine, Cyclops, Gambit, Jean Grey and Senator Kelly witnessed Mastermold emerge from its underground dwelling, only to be destroyed when Professor X decapitated the robot with the X-Men's Blackbird Jet.
(X-Men Adventures II#1) - Wolverine neglected to attend the wedding of Cyclops and Jean Grey in favor of blowing off some anger in the Danger Room against a robot resembling Cyclops, unaware that the "priest" at the wedding ceremony was his supposedly deceased former teammate Morph. Following the ceremony, a concerned Jean located Wolverine, who feigned losing track of time, and when Jean attempted to consul Wolverine, he commented that he didn't need Jean's pity and that a better man would have had the guts to attend the ceremony despite his attraction to the bride. Expressing hope that Jean and Cyclops had a happy life together, Wolverine walked off alone, thinking how if perhaps he had made a move on Jean months earlier, he might be marrying her instead of Cyclops.
Later that evening, Wolverine visited Frank's Pool Hall in New Salem, where Beast and Gambit were playing a game. The anti-mutant Friends of Humanity soon attacked the Pool Hall, however, and Wolverine, Gambit and Beast were taped fighting off the attackers until the police arrived. Returning to the X-Mansion, Wolverine (with the other X-Men) viewed a holographic projection from Professor X explaining his leave to attend to an urgent personal matter and the X-Men were soon surprised when doctored footage incriminating the X-Men in Wolverine's Pool Hall fight made its way to the television news. Angry that he and his friends had been set up, Wolverine announced plans to find the Friends of Humanity, unaware that Morph had secretly witnessed his departure and altered his form to resemble Wolverine in order to get into the Mansion.
(X-Men Adventures II#2) - Wolverine investigated the smashed up remains of Frank's Pool Hall, soon finding a piece of paper with addresses written on it, which he used to locate the meeting place of the Friends of Humanity. Finding Jubilee captured there but unaware that Morph had manipulated Jubilee into going there, Wolverine busted through the building's skylight and slashed apart several of the Friends of Humanity's weapons before the group swarmed him. Threatening the group into backing down, Wolverine freed Jubilee and returned to the X-Mansion, where he immediately recognized the scent of Morph, who was impersonating Professor X. When Wolverine attempted to expose Morph, Morph claimed Wolverine was under the influence of a neural disruptor weapon, prompting some of the X-Men to attempt to restrain Wolverine under "Professor X's" orders. After Morph ordered the X-Men to outright destroy Wolverine, Gambit became suspicious and hurled an explosive card near the "Professor," who stood up and backed away from the card, proving that Morph was not the real, paralyzed Professor X. Morph then tried to escape in the X-Men's hangar and Wolverine and the other X-Men gave chase, with Wolverine attempting to explain to Morph why he had been left behind following his injury by the Sentinels. Before escaping in one of the X-Men's jets, Morph accused Wolverine of attempting to ease his own guilt and Wolverine correctly deduced that Morph would likely next go after Cyclops, whose orders had earlier left him behind. Tracking Morph to Cyclops and Jean Grey, who had been captured by the enigmatic Mister Sinister, Wolverine and the other X-Men battled Sinister's agents, the Nasty Boys, until Morph turned on Mister Sinister himself. During the ensuing battle, Wolverine witnessed both Mister Sinister and Morph escape and announced his plans to find Morph and bring him back to the X-Men.
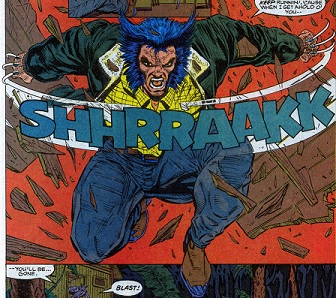
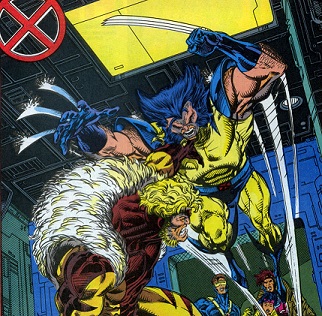 (X-Men Adventures II#3) - Traveling via boat to a bar in the rain forests of Central America, Wolverine confronted Morph, who was posing a bartender. Expressing a willingness to forgive and forget Morph's actions while under Mister Sinister's thrall, Wolverine was surprised when Morph flipped a table over to cover his escape. Morph then transformed himself into the form of Jean Grey in an attempt to psychologically torture Wolverine but only succeeded in angering Wolverine. Smashing the table, Wolverine threatened Morph and ran outside, only to find Morph gone.
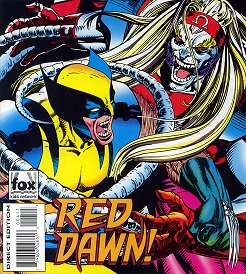 (X-Men Adventures II#4) - Wolverine returned to the X-Mansion as Storm and Rogue were reviewing a note left by Jubilee stating that she had left to accompany their ally Colossus to Russia to battle a foe named Omega Red. Recognizing Omega Red from his own past, Wolverine led Storm and Rogue to Russia to aid Jubilee against Omega Red, who recognized Wolverine from their shared past as well. Following a brief but savage battle in which Omega Red nearly gained the upper hand against Wolverine, Wolverine revealed to the other X-Men his past with Omega Red moments before Omega Red renewed the fight. Russian heroine Darkstar soon arrived and suggested they all stop fighting, prompting Storm to freeze Omega Red as Wolverine and the other heroes watched. Before returning home, Wolverine and the other X-Men again invited Colossus to join their ranks but Colossus again declined, wishing to repair the damage done by Omega Red first.
(X-Men Adventures II#5 (fb) - BTS) - Wolverine received a message from Heather Hudson, who claimed she needed to see Wolverine on a matter of life and death.
(X-Men Adventures II#5) - Traveling north into Canada's national wilderness, Wolverine freed a trapped deer before being attacked from underground by the battlesuit-wearing Vindicator. Demanding to know what was going on, Wolverine was informed of Vindicator's plan to forcibly bring Wolverine back to work for the Canadian government but he refused, only to be subsequently attacked by the rest of his former Alpha Flight teammates. Escaping into the trees when Northstar and Aurora flew him into the air and he knocked them into each other, Wolverine overheard Alpha Flight mentioned how a lab was expecting them. Recalling his own time in a lab years ago, Wolverine was soon knocked out of the tree by Shaman and unconscious by Sasquatch. Placed in shackles, Wolverine was taken to a laboratory, where Heather Hudson revealed herself and how she had been given no choice by Department H's General Chasen in the matter of sending Alpha Flight to acquire Wolverine. After Chasen explained how the Canadian government had tried and failed numerous times to replicate the successful Adamantium bonding process that had given Wolverine his metallic skeleton, Wolverine informed Chasen that he had survived due to his mutant healing factor but Chasen ordered Heather to begin experimenting on Wolverine.
Upon seeing Wolverine's pain from the experiments, Heather refused to continue and when Chasen threatened her, Heather destroyed the computer system with a chair while Wolverine freed himself. Chasen immediately ran for protection, sending robotic guards after Wolverine, who easily knocked them aside before Vindicator barred Wolverine's path. Punching Vindicator, Wolverine nearly used his claws on Vindicator before Heather pleaded with him to stop and when some of the exploding machinery blew a hole in the wall, Wolverine opted to leave the scene, assuring Heather that Vindicator would be fine. Heather informed Wolverine that she had no idea that Chasen intended to hurt Wolverine but Wolverine emotionally admitted that Chasen wasn't the only one who had hurt him before departing, promising that they would next meet on his terms. A recovering Vindicator then asked Heather if it were so wrong to want Wolverine back in Alpha Flight when they once been like family but Heather replied that any part of Wolverine's life that they once had was now gone.
(X-Men Adventures II#6 (fb) - BTS) - At some point, Wolverine heard that his teammate Gambit was not fond of his brother.
(X-Men Adventures II#6) - When Gambit suddenly left the X-Mansion after receiving word that his brother was in trouble, Wolverine and the other X-Men tracked Gambit to the Teche Bayou to make sure Gambit was safe. Following Gambit's trail down the river, Wolverine and the X-Men ventured into the old antebellum mansion housing the Thieves Guild but before a battle could ensure, the X-Men learned Gambit was with Bella Donna, leader of the Assassins Guild. Accompanying the Thieves Guild to the two Guilds' annual tithe offering to the immortal External, Wolverine and the X-Men watched as Gambit was forced to serve Bella Donna via an energized ring utilized by Bella Donna. Attempting to cut the ring off Gambit's finger, Wolverine was forced back by the energy feedback and soon joined the X-Men in attempting to keep the two Guilds from warring until the External appeared. Watching as Jean Grey telepathically flooded the External's mind with images of the Assassins Guild's treachery, leading to Bella Donna's punishment and Gambit's freedom, Wolverine and the other X-Men returned home.

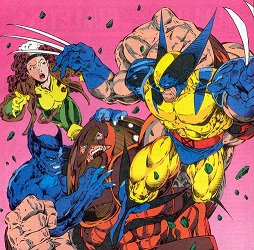 (X-Men Adventures II#7) - After a mysterious plague swept the county, Wolverine and the other X-Men were summoned to the X-Mansion's War Room to watch a broadcast about the virus and the subsequent quarantining of mutants, who were thought to be the cause of the virus' spread. When Storm noticed one of the Friends of Humanity on television, Wolverine accompanied the X-Men in investigating the scene, where they were met by their time-traveling former ally Bishop, who had traveled to the modern era again to stop the virus. Demanding to know why Bishop was there, Wolverine and the X-Men brought back Bishop back to the X-Mansion to let him explain.
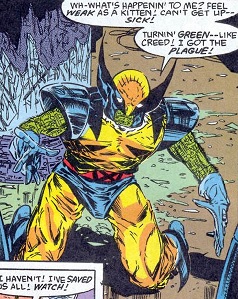 (X-Men Adventures II#8) - Wolverine listened to Bishop's story about the plague affecting the future with the other X-Men, unaware that Cable had also arrived in the modern era from his own alternate future to ensure the plague's occurrence for the sake of his own reality. After Cable learned of Wolverine's healing factor, Cable traveled to the United States Capitol Building, where Wolverine and the X-Men were attending a hearing on mutant affairs. When Bishop saw Friends of Humanity leader Graydon Creed wielding a viral weapon and attacked him, Cable revealed himself and knocked Wolverine out, kidnapping him as the X-Men chose to avoid a larger anti-mutant spectacle that might stem from further public attack. Waking in Cable's motel room, Wolverine learned from Cable how Bishop's earlier time travel to stop Senator Kelly's assassination and the subsequent release of the plague had altered Cable's own future timeline. After Cable explained that he could save both future timelines with Wolverine's assistance, Wolverine reluctantly agreed to help Cable and the two later teleported into an underground base where Graydon Creed had been traced to by the X-Men after being infected with the plague. When Creed's benefactor was revealed as Apocalypse, Wolverine impulsively charged at Apocalypse, who knocked Wolverine into a vat containing the viral plague. Infected, Wolverine quickly became sick and fell to his knees but his healing factor ultimately fought off the plague by creating antibodies needed to ensure mutants would survive the plague. Cable then destroyed the remaining vats of the plague, generating an explosive chain reaction that destroyed Apocalypse's base as Wolverine and the X-Men, as well as Apocalypse himself, escaped.
Later, after both Bishop and Cable had returned to their restored respective timelines, Beast performed a physical on Wolverine, confirming that Wolverine's healing factor had indeed produced the needed antibodies and wondering what further study into Wolverine's healing factor might someday produce.
(X-Men Adventures II#9) - After Rogue began suffering from nightmares and visions of Ms. Marvel, a heroine whose powers and memories she had permanently absorbed while working for Mystique years earlier, Wolverine and the X-Men tracked her to the Midtown Hospital in New York City, where Rogue ultimately and successfully fought a battle for dominance of her body against the personality of Ms. Marvel.
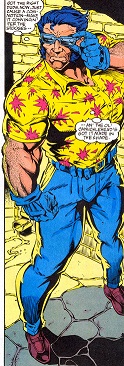
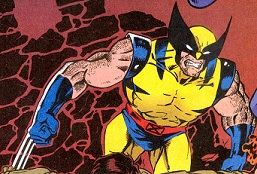 (X-Men Adventures II#10) - After the Friends of Humanity attacked a hospital for the blind that Beast had been volunteering at, Wolverine decided it was time to permanently shut down the Friends of Humanity. Leaving the X-Mansion alone, Wolverine disguised himself as the bigot John Logan and infiltrated the Friends of Humanity by claiming to have been beat up in an alley by mutants. Introduced to Graydon Creed, Logan claimed to have known a Creed in Kentucky twenty years earlier and confirmed his suspicions about Creed when Creed admitted his family came from Canada. When Beast's friend Carly Crocker was subsequently kidnapped by the Friends of Humanity, Wolverine revealed his ruse to save Carly and when Creed denounced Wolverine as a mutant, Wolverine partially deduced Creed's family history and contacted Cyclops to bring a portable Cerebro unit when the X-Men arrived as reinforcements against the Friends of Humanity.
Taunting Creed by asking if he was scared of claws and if he looked familiar, Wolverine freed Carly and reunited with Beast, who had also arrived to rescue Carly, before the other X-Men arrived. As the tide turned against the Friends of Humanity, Wolverine had Cyclops use the portable Cerebro unit to display an image of Sabretooth, causing a panicky Graydon Creed to fire wildly at the hologram. As the hologram played out, Sabretooth's real name was revealed as Victor Creed, father of Graydon, and Wolverine and the other X-Men watched as most of the Friends of Humanity deserted Creed after learning his father was a mutant. Following the battle, Wolverine attempted to cheer up Beast, who was down about the loss of a potential relationship with Carly, by offering to split some brews with him but the despondent Beast instead chose to take a walk alone, asking Wolverine to drink a beer for him.
(X-Men Adventures II#11) - After footage of the X-Men's battles were shown to the extradimensional media mogul Mojo, Mojo demanded the X-Men be brought to his dimension as a midseason replacement for Mojo's previous star, Longshot, and Wolverine and the other X-Men were soon teleported from a shopping center in Salem Center to Mojo's dimension by his agent Spiral. Following several attempts at forcing the X-Men into his televised scenarios, Wolverine and Jean Grey were transported into a television show called "I Dream of Jean," in which Wolverine was forced to fight off robots in an effort to save Jean. When Wolverine was seeming engulfed in flames during the show, Jean realized that she could telekinetically manipulate the electronics broadcasting the show at the same time that Longshot forced Spiral to free Wolverine and the other X-Men from Mojo's service. The X-Men then took the fight directly to Mojo and Spiral took advantage of the distraction to send Wolverine and the other X-Men back to Earth. Informed by a television salesman that the X-Men would have to pay for the damages caused by Mojo and Spiral, Wolverine expressed annoyance and hope that Mojo was in pain following his encounter with the X-Men.
(X-Men Adventures II#12) - Wolverine, Jean Grey and Cyclops were summoned to the Australian outback by Morph, who requested Wolverine's help at the Branston Theater. Once inside the Theater, Wolverine immediately pinpointed Morph's scent from the actor "Xavier Murphy," who was performing in a stage production of "Dr. Jekyll and Mr. Hyde." Unaware that Mister Sinister had forced Morph to lure the X-Men there, Wolverine confronted Morph backstage and a frantic Morph warned Wolverine to get away before Mister Sinister revealed himself. Assuring Morph that the X-Men would not abandon him, Wolverine and the other X-Men fought back against Sinister and his Nasty Boys but Sinister ultimately felled Wolverine and Cyclops on his own and escaped alongside the Nasty Boys with Morph and Jean. Calming the angry Cyclops down as Sinister escaped and assuring him they would get Jean and Morph back, Wolverine was later summoned with the other X-Men to the antarctic Savage Land by Professor X, who had been hypnotized by the pterodactyl-man Sauron under orders from Mister Sinister. During the trip to the Savage Land, Wolverine suggested the X-Men were being led into a trap when Cyclops admitted Professor X's voice seemed off but he admitted that he didn't care, as he hoped to force the responsible parties to free Professor X.
(X-Men Adventures II#13) - Upon arrival in the Savage Land near Mister Sinister's stronghold, Wolverine and the X-Men found their mutant powers nullified moments before the Nasty Boys attacked. While most of the X-Men were captured, Wolverine was knocked over a cliff into the river below and presumed dead, only to encounter the savage Ka-Zar as he made his way back towards Sinister's stronghold. The two briefly battled until Wolverine aided Ka-Zar in defeating a native riding a winged dinosaur, proving himself to Ka-Zar, and the two then utilized the winged dinosaurs to fly the rest of the way to Sinister's stronghold. As they neared the stronghold, Wolverine listened to Ka-Zar's fierce loyalty to the Savage Land and remarked how he might someday purchase a cottage there to free his inner savage before the duo broke into the stronghold in time to prevent Mister Sinister from imprinting Rogue's strength and DNA onto the Savage Land Mutate Vertigo. As Wolverine battled first Mister Sinister then a Magneto-empowered Vertigo, Ka-Zar freed his wife Shanna and Wolverine fought off Vertigo's powers long enough to free the captives Morph, Professor X, Jean Grey and Magneto. Warning his allies to watch out for Vertigo, Wolverine witnessed Morph destroy Sinister's mutant power-nullifying technology, allowing the rest of the X-Men to free themselves and take the fight directly to the Savage Land Mutates and Sinister's Nasty Boys. Defeating Sinister's agents, Wolverine escaped the stronghold with the X-Men, Ka-Zar and Shanna as the repowered Magneto destroyed Sinister's stronghold. A short time later, Wolverine and the X-Men said their goodbyes to Ka-Zar and Shanna before boarding their Blackbird Jet to return home.
(X-Men Adventures III#1) - Wolverine was playing basketball against Gambit and Jubilee when an urgent message from the Morlocks' Leech came in, informing Wolverine that his old flame Yuriko was waiting for him in the Morlock tunnels. Revealing to Gambit and Jubilee that Yuriko was a woman he never thought he'd see again, Wolverine left an hour later to meet Yuriko, concerned that seeing her again might drudge up painful memories from his past. Once in the tunnels, Wolverine was attacked by the cyborg Yuriko, now calling herself Lady Deathstrike. Revealing that she had felt abandoned by Wolverine, whom she ultimately blamed for the death of her Adamantium-bonding scientist father, Lady Deathstrike explained how she had the cyborg Reavers transform her into a cyborg as well in an effort to destroy Wolverine. The two then continued their battle until Wolverine was knocked unconscious and taken to an alien ship that the Reavers had discovered in the Morlock tunnels, where Lady Deathstrike hoped to utilize Wolverine's Adamantium claws to open the ship. Before Lady Deathstrike could kill Wolverine and harvest his severed claws, Gambit and Jubilee arrived to aid Wolverine and a battle ensued that resulted in Wolverine hurling Lady Deathstrike into the ship, accidentally trapping her within the force shield protecting the ship. Unaware the shield was there as a warning, Wolverine cut through the ship's hull to rescue Lady Deathstrike, inadvertently freeing the energy creature within.
(X-Men Adventures III#2) - As the creature emerged, Lady Deathstrike insisted that she had only wished Wolverine might open the hull and that she had no idea what was inside. Moments later, when the creature attacked and drained the life force of the Reavers and Jubilee, Wolverine forced the creature to flee before picking up the lifeless Jubilee and chasing the creature alongside Lady Deathstrike and Gambit. The creature was soon lost in the Morlock tunnels and Wolverine blamed Lady Deathstrike's misguided revenge for freeing the creature, prompting the two to nearly fight again before Gambit broke up the argument and Wolverine suggested a truce. Reluctantly agreeing to work together, Wolverine, Gambit and Lady Deathstrike soon located the creature moments after it had absorbed the life force of the Morlocks and the creature taunted Lady Deathstrike into attacking, only to absorb her life force as well. When Professor X telepathically sensed the creature, he accompanied the other X-Men to regroup with Wolverine and split into two teams, one researching the ship and one following the creature. After Professor X learned from the ship that the creature was a "spirit-drinker" and that its energy could be short-circuited, restoring the life force it had stolen, Wolverine forced the creature onto the electrified third rail of a subway track and the other X-Men combined their powers to overload the creature, seemingly destroying it and restoring the stolen life force to their proper bodies. With the spirit-drinker dissipated, Lady Deathstrike admitted that she now owed Wolverine her life but warned that she would still see him pay for the perceived crime of murdering her father. As she departed, a saddened Wolverine remarked on how he had not murdered Lady Deathstrike's father and Professor X suggested Wolverine pity her, as her hatred would eventually consume her.
(Spider-Man Adventures I#8 (fb) - BTS) - At some point, photographer Peter Parker acquired a poster of Wolverine (see comments).
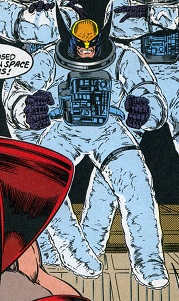 (X-Men Adventures III#3) - After Professor X was awoken by dreams of an alien being and feelings of dread about the upcoming Starcore space launch, he summoned Wolverine and the X-Men and insisted that the X-Men board the Starcore to ensure its safe launch. The next day, Wolverine accompanied the X-Men to Cape Canaveral, where he used his superhuman senses to warn the X-Men of the amount of personnel on the base. Making their way to the astronauts' ready room, Wolverine and the X-Men knocked out and replaced the astronauts to infiltrate the Starcore shuttle. Once the shuttle had launched, Wolverine and Beast stowed away in the shuttle's cargo bay while Cyclops, telepathically disguised by Jean Grey, assisted Starcore's Dr. Peter Corbeau in the cockpit. When the shuttle docked at the Eagle-One space station, Wolverine and the X-Men exited, only to be knocked unconscious by a gas trap set by the alien Shi'ar Eric the Red. When Eric the Red captured Dr. Corbeau and ordered his mind-controlled agents to dispose of the X-Men, a groggy Jean Grey telekinetically rescued the X-Men from the airlock and the X-Men ultimately forced Eric the Red to flee when he was prevented from intercepting a Shi'ar ship that had arrived nearby via wormhole. Returning to the shuttle as Eric the Red's ship destroyed the Eagle-One space station, Wolverine and the X-Men found the shuttle's controls damaged and the shuttle on a course through the Shi'ar ship's energy trail. When Jean Grey volunteered herself to pilot the shuttle through the radioactive energy trail while Wolverine and the other X-Men were safe within the shuttle's solar probe, Wolverine expressed pride in Jean's courage and attempted to tell her about his feelings for her before Jean interrupted to assure him that they would make it through the energy trail unscathed. Wolverine then entered the solar probe with the other X-Men as Jean telepathically absorbed the piloting skills of Dr. Corbeau and attempted to pilot the shuttle through the radiation before it seemingly became too much to bear.
(X-Men Adventures III#4) - As Jean Grey struggled to stay conscious while piloting the shuttle, Wolverine and the other X-Men were banged around inside the probe by the shuttle's sudden movements before the shuttle ultimately crashed back to Earth in New York Harbor. Wolverine freed the X-Men with his claws and the team escaped the shuttle into the river as Jean erupted from the river, claiming to be Phoenix before passing out. As Jean later recovered in a hospital, Wolverine decided to clear his mind by taking a subway trip to get some beers but he soon saw an image of Professor X on the subway that accused him of being an animal before dissipating. After the other X-Men witnessed similar psychic projections, Cyclops had Wolverine and the other X-Men regroup on the roof of Jean's hospital to get some answers from Professor X himself. Informing the X-Men that his mind had been invaded by a psychic probe that had caused him to psychically lash out against that which he cared about most, Professor X informed Wolverine and the X-Men that he would be taking a sabbatical to Scotland's Muir Island before things got worse.
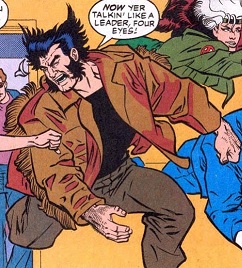 (X-Men Adventures III#5) - Staying at the bedside of Jean Grey with the other X-Men, Wolverine learned that Jean had been possessed by the cosmic entity Phoenix and when the Phoenix identity flared up, claiming it was now one with Jean, Wolverine suggested they do something. Storm soon interrupted with news via phone call from Professor X's friend Dr. Moira MacTaggert that Professor X had been ranting about an alien in his room (actually the Shi'ar rebel Lilandra) before being kidnapped Juggernaut. Fearing that Professor X's mentality was worse than they had feared, Cyclops ordered Wolverine and the other X-Men to Muir Island and, upon arrival, Dr. MacTaggert feared Wolverine and the X-Men's presence would only make Professor X's "delusions" worse. When Wolverine insisted that the X-Men were there to help, Dr. MacTaggert's boyfriend, the mutant Banshee, briefly argued with the threatening Wolverine before the argument was calmed and the X-Men investigated Professor X's empty room. Immediately picking up the scent of Juggernaut and his new ally, Black Tom Cassidy, Wolverine led the X-Men to the villains, who were working with Eric the Red. A battle ensued and continued until the Shi'ar Imperial Guardsman Gladiator arrived and easily defeated the X-Men after berating Eric the Red for not accomplishing his mission of bringing the rebel Lilandra and the powerful M'Kraan Crystal to Shi'ar Emperor D'ken. Wolverine and the X-Men, as well as Banshee, continued to fail in fighting back against Gladiator until Phoenix appeared, hurling Gladiator away and promising to protect the M'Kraan Crystal. Captive alongside Professor X, Lilandra pleaded for Phoenix's continued assistance as Wolverine witnessed the impending arrival of Emperor D'ken's imperial flagship.
(X-Men Adventures III#6) - As D'ken approached, Phoenix teleported Wolverine and the X-Men aboard Lilandra's rebel Shi'ar ship but before they could work towards ensuring the M'Kraan Crystal's protection, they were assaulted by another starship and boarded by the ship's inhabitants, the space pirate Starjammers. After the Starjammers kidnapped Cyclops and absconded with the M'Kraan Crystal, a recovering Wolverine informed the similarly recovering X-Men of the Starjammers' actions and Phoenix subsequently used her telepathic link with Cyclops to track the Starjammers to Emperor D'ken's flagship, where the Starjammers' leader Corsair was feigning an interest in trading the M'Kraan Crystal to D'ken. After Phoenix teleported Wolverine and the X-Men aboard D'ken's flagship, the Starjammers turned against D'ken and aided the X-Men in battling D'ken's Imperial Guard. D'ken quickly ordered Gladiator to end the fight, which he did by knocking aside Wolverine, the X-Men and the Starjammers and retreating with D'ken. When Wolverine and the X-Men pursued, D'ken unlocked the M'Kraan Crystal's power, which began to absorb the cosmos itself.
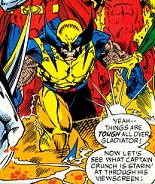 (X-Men Adventures III#7) - Wolverine, the X-Men and the Starjammers were teleported back to the Starjammers' ship for their own safety while Phoenix attempted to contain the M'Kraan Crystal. Unfortunately, Phoenix failed to completely contain the Crystal's power and Wolverine and the other heroes were soon absorbed into the M'Kraan Crystal itself. Inside the Crystal, Gladiator turned on D'ken and led the Imperial Guard in attacking the M'Kraan-powered D'ken alongside Wolverine and the X-Men, who were soon teleported back to Lilandra's rebel ship while Phoenix confronted D'ken personally. From Lilandra's ship, Wolverine then witnessed Phoenix become one with the M'Kraan Crystal to heal the damage D'ken had wrought, ultimately sealing the Crystal's breach by calling upon the psychic power of Cyclops and Professor X. Once the Crystal had been healed with D'ken trapped inside, Phoenix informed Wolverine and the X-Men that the M'Kraan Crystal had to be taken into the sun for safekeeping and Wolverine reminded the heartbroken Cyclops to stay strong, as Phoenix had done what was necessarily to protect all reality. As Phoenix said her goodbyes, Wolverine and the X-Men returned to Earth's Cassidy Keep, saddened at having lost Jean.
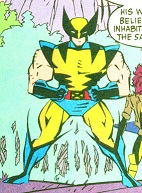 (X-Men Adventures III#8) - While at the Museum of Natural History with Beast and Jubilee, Wolverine witnessed Dr. Karl Lykos weakly stumbling around and when Lykos reached out and began absorbing Wolverine's life force into himself, Wolverine recognized Lykos as a mutant moments before Lykos transformed into the pterodactyl-man Sauron. Wolverine, Beast and Jubilee then followed Sauron as he passed Storm and Rogue outside, only to discover that Sauron had hypnotized Rogue into thinking Wolverine and the others were alien creatures. As Beast subdued and freed Rogue from Sauron's control, Wolverine witnessed Sauron next hypnotize and kidnap Storm, informing his allies that Sauron had headed south. Correcting suspecting Sauron's destination, Wolverine, Rogue, Jubilee and Beast traveled to the Savage Land, passing a large stone monument to the legendary Garokk as they arrived. As soon as they exited their jet, Wolverine and the other X-Men were attacked by a tyrannosaurus and subsequently rescued by their ally Ka-Zar, who was glad to see Wolverine again.
Later that evening, Ka-Zar informed Wolverine and the others of the Fall People's recent worship of Garokk but the conversation was interrupted when Sauron and a hypnotized Storm attacked. During the scuffle, Wolverine took down several of Sauron's dinosaur-riding agents by slashing the legs of the dinosaurs and Sauron soon weakened, transforming back into Karl Lykos and falling from the sky. Upon hearing Lykos' origins as Sauron and his earlier experimentation by Mister Sinister, Wolverine promised to find a way to help Lykos if he would help lead the X-Men to Storm but before Lykos could help, the hypnotized Storm returned to attack.
(X-Men Adventures III#9) - Wolverine watched as the hypnotized Storm went wild with her powers, unaware that Storm was merely a distraction while Garokk high priestess Zaladane resurrected Garokk himself. After Dr. Lykos absorbed some of Storm's life force in an effort to stop her, becoming Sauron once more, Wolverine stayed by Storm's side as Beast gave her a sedative to keep her from going wild again. Unaware that Storm sensed Garokk's resurrection and still thinking Storm to be hypnotized, Wolverine and Rogue attempted to keep Storm sedated as she twice regained consciousness and tried to halt Garokk's complete resurrection. As Garokk grew more powerful, he fought back Storm's attack by generating elastic, diamond-like tendrils that Wolverine, Rogue and Jubilee attempted to stave off until Sauron ultimately drew the Savage Land's energies into himself, draining Garokk of his power and freeing Wolverine and the X-Men from Garokk's tendrils. With Garokk's complete resurrection halted and Sauron back in his human Dr. Lykos form, Wolverine and the X-Men returned home as Ka-Zar invited Dr. Lykos to remain in Savage Land, where no mutants existed to turn him back into Sauron.
(Spider-Man Adventures I#14 (fb) - BTS) - At some point, Wolverine's likeness was utilized in the construction of a Super Hero theme park in New York. Upon completion of the park, a large statue of Wolverine loomed over one of the park's roller coasters. Another, more life-sized, statue of Wolverine was erected alongside statues of Captain America, Spider-Man and the Thing at the entrance to the park's House of Mirrors.
(X-Men Adventures III#10) - Wolverine was cutting meat with his claws when Cyclops returned from a Dazzler concert at a local night club and joked about Wolverine having become domestic. Threatening Cyclops to watch his attitude, Wolverine was present when Professor X returned from Muir Island with Jean Grey, who was still possessed by the Phoenix. Suggesting Cyclops give the strong-willed Jean time to recover from her possession, Wolverine was rebuffed by Cyclops, who was tired of wanting Jean back. Some time later, after Cyclops witnessed Phoenix leave with a strange man, Wolverine and the X-Men were summoned to the entrance of the exclusive Circle Club, where Cyclops had tracked Phoenix. Arriving at the Club to see Phoenix seemingly marrying Club member Jason Wyngarde, Wolverine and the X-Men were drawn into a battle with the mutant Circle Club members when Rogue attempted to rescue Phoenix. During the battle, Wolverine slashed Donald Pierce's arm, revealing his cyborg nature, before turning his attention towards Harry Leland, who used his mass increasing powers to force Wolverine down through several floors of the Circle Club building.
(Spider-Man Adventures I#14 - BTS) - On opening night of New York's Super Hero theme park, Doctor Octopus entered the park, passing nearby the Wolverine statue, and proclaimed superheroes to be egotistical, immoral and powerless. When Spider-Man became involved and tussled with Doctor Octopus, their fight brought them to the park's House of Mirrors, which displayed the statues of Spider-Man, Captain America, Thing and Wolverine. During the fight, Doctor Octopus knocked over the Wolverine statue while trying to hit the real Spider-Man with his tentacles. The police eventually made their way past the Wolverine statue to enter the House of Mirrors and apprehend Doctor Octopus.
 (X-Men Adventures III#11) - Emerging from the Circle Club's underground sewer system, Wolverine realized Phoenix was being manipulated by the Circle Club and became determined to make them pay. Unable to get a proper scent to track in the sewers, Wolverine snuck back into the Circle Club using its dumb waiter and arrived in the kitchen to terrify a cook requesting a bottle of Chateau Claremont '59 wine into telling him where the Club's dining hall was. Arriving in the dining hall as Jason Wyngarde finished an illusory battle with Cyclops, Wolverine tossed aside the Club guards who attempted to bar his entry and announced his plans to rescue Jean and his teammates. Having transformed into the evil Dark Phoenix partly due to Wyngarde's manipulations, Phoenix was ordered to stop Wolverine and she happily blasted Wolverine aside, emotionally shocking Wolverine with the hatred in her eyes. Wyngarde then proclaimed himself the new leader of the Circle Club and ordered Dark Phoenix to kill Wolverine, who pleaded with Phoenix to remember who she was. Tiring of others attempting to control her, Dark Phoenix freed the X-Men to battle the Circle Club in hopes of the two teams destroying each other and Wolverine cornered Leland, using Leland's own powers against him as he allowed himself to fall atop Leland when Leland increased Wolverine's mass. Regrouping with the X-Men, Wolverine then witnessed Dark Phoenix set fire to the Club building.
(X-Men Adventures III#12) - Wolverine watched with the other X-Men as Dark Phoenix grew out of control, refusing to leave without Jean despite Gambit's comments that their chances of taking Jean back were slim. Dark Phoenix soon blasted the X-Men from the Circle Club roof and Wolverine ended up in a nearby pond before Dark Phoenix proclaimed the X-Men's lives to be forfeit. During the ensuing battle against Dark Phoenix, Wolverine was hit by a telekinetically thrown Rogue and Dark Phoenix was ultimately forced to flee into space when Cyclops managed to reach Jean Grey's psyche. Returning to the X-Mansion, Wolverine and the other X-Men discussed how best to handle Dark Phoenix, with Wolverine asking how the X-Men could stop a being that could "gargle a planet" before Beast suggested using a mnemonic scrambler to disable Jean's thoughts long enough for Phoenix to leave her body. Subsequently tracking Dark Phoenix to Jean's childhood home, the X-Men placed the mnemonic scrambler on her head but when Dark Phoenix resisted, Wolverine jumped onto Dark Phoenix' back in an effort to hold her down and assured her that he did not wish to hurt her. Tossing Wolverine aside, Dark Phoenix proclaimed that Wolverine could do nothing to hurt her and Wolverine regrouped with the X-Men as Professor X telepathically shut down Jean's mind when she became distracted by Cyclops. Dark Phoenix quickly recovered by Professor X managed to contain the Phoenix psyche with the help of Jean herself and Wolverine was soon surprised with the other X-Men as the Shi'ar ship of now Empress Lilandra appeared and Lilandra proclaimed that Dark Phoenix must be destroyed for the safety of the entire universe.
(X-Men Adventures III#13) - When Lilandra ordered the Imperial Guard to apprehend Jean grey, Wolverine threatened that they would only capture Jean over his dead body before Professor X challenged Lilandra to duel of honor in an effort to save Jean. Unable to refuse Professor X's challenge by law, Lilandra teleported Wolverine and the X-Men aboard her flagship and revealed had Dark Phoenix had earlier destroyed the sun of the uninhabited D'Bari star system, much to the shock of Wolverine and the others, who remained determined to defend Jean. Following a brief respite, Wolverine and the X-Men were teleported to the Blue Area of Earth's Moon for the duel against Lilandra's Imperial Guard champions and the X-Men soon split up as the battle began. During the duel, Wolverine fought the Imperial Guardsman Warstar alongside Storm, Gambit and Beast but he was ultimately defeated by the Imperial Guardswoman Manta, who had to hit Wolverine with an energy blast twice to make sure he would stay down. When the rest of the X-Men were subsequently defeated as well, Jean became Dark Phoenix again and Lilandra was forced to kill Jean to stop the Phoenix. Upon Jean's physical death, the Phoenix Force emerged from her body and revealed that Jean could be restored with the life force of another, prompting Wolverine to argue with Cyclops over giving up the life force, feeling as if his life force would allow Cyclops and Jean to live happily together. The Phoenix Force then explained that the life force need not come from a single being and Wolverine offered a portion of his life force alongside the other X-Men to restore Jean to life. Once Jean had been resurrected, the Phoenix Force departed, teleporting Wolverine and the X-Men back to the X-Mansion.
(Adventures of the X-Men I#1 (fb) - BTS) - At some point, Wolverine heard about the government-sponsored mutant X-Factor team, which Wolverine thought were a group of mutant hunters led by Cyclops' brother Havok.
(Adventures of the X-Men I#1) - Feeling confined at the X-Mansion, Wolverine took a camping vacation to the Colorado Rocky Mountains, only to be nearly be landed on by the monstrous Hulk. Misunderstanding Hulk's landing as an attack, an angry Wolverine attacked the Hulk, both combatants wishing alone to be left alone. The two furiously fought until the government-sponsored X-Factor team arrived and attempted to take the Hulk into custody. Thinking X-Factor to be mutant hunters and feeling as if Hulk deserved his freedom, Wolverine defended the Hulk from X-Factor but was ultimately taken into custody alongside the Hulk. Taken to a Hulkbuster Base led by General "Thunderbolt" Ross, Wolverine secretly escaped his restraints and took down a small group of soldiers, learning about the base from one soldier whose uniform he stole to disguise himself. Using the soldier's communications equipment, Wolverine contacted the X-Men for reinforcements before investigating the base further, soon locating the Hulk. Recalling his days of government experimentation, Wolverine prepared to free the Hulk but was blasted down when the villainous Leader burst his way into the facility.
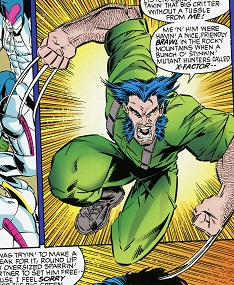 (Adventures of the X-Men I#2) - Refusing to allow the Leader to capture the Hulk, Wolverine fought against the Leader's Humanoids before being knocked aside by the Leader, who absconded with the Hulk as X-Factor, General Ross and Valerie Cooper arrived on the scene. Wolverine briefly argued with Ross about the Hulk's inhuman treatment on the base and his X-Men teammates arrived shortly after to ensure Wolverine's release from the base. The X-Men, X-Factor, Ross and Cooper then exchanged information on recent events and, after Ross informed the X-Men of Hulk's origins, Wolverine expressed his desire to rescue the Hulk. Tracking the Hulk using a Hulkbuster implant within the monster, X-Factor, Wolverine and the X-Men left to find the Hulk, with Wolverine refusing to accept Havok's apology for X-Factor's earlier treatment along the way. Reluctantly working with Havok despite their animosity, Wolverine joined the X-Men and X-Factor in storming the Leader's base, battling the Leader's Humanoids upon arrival. As the Leader escaped despite Wolverine and X-Factor member Wildchild's attempts to stop him, Wolverine helped free Bruce Banner from an illusory dream the Leader within Banner's mind. Banner immediately transformed back into the Hulk and Wolverine (together with his X-Men teammates) prevented X-Factor from apprehending the Hulk again. Not wishing to fight Wolverine or his brother Cyclops, Havok ordered X-Factor to stand down and as the two teams parted ways, Wolverine warned Havok that the next time they met, it would be just the two of them one-on-one. Briefly visiting Hulkbuster base before returning home, Wolverine watched as Havok lied to General Ross, claiming the Hulk had escaped.
(Adventures of the X-Men I#4 (fb) - BTS) - After lending Cyclops a motorcycle, Wolverine learned that the demon Kierrok was performing a spell to summon forth an army of N'Garai demons and he joined Gambit and Jean Grey in entering the spatial rift created by Kierrok, only to become trapped in the rift.
(Adventures of the X-Men I#4) - Unaware of what had transpired with Wolverine, Gambit and Jean Grey, Cyclops returned to New York to find the city swarming with N'Garai demons. Led to Kierrok by an enigmatic named Erich Zann, Cyclops noticed Wolverine, Jean Grey and Gambit trapped in the spatial rift and entered the rift himself to rally Wolverine and the others into escaping the rift. Dodging an immense tentacled creature that emerged from the rift behind them, Wolverine and Gambit fought off the demons while Jean Grey telekinetically sent Cyclops Kierrok's spell book, which Cyclops had Erich Zann utilize to banish the demons at the cost of Zann's life. As the world returned to normal, Wolverine informed Cyclops that he owed him a new motorcycle as Cyclops had left the previous one inside the rift.
 (Adventures of the X-Men I#5) - Wolverine joined the other X-Men in a Danger Room training session in which Cyclops commended Wolverine and Jean Grey for performing to capacity despite Jubilee losing her footing during the exercise. Afterwards summoned to the X-Mansion's War Room, Wolverine and the X-Men were shown a communication from high-ranking government agent Nick Fury, who requested the X-Men's aid against Magneto, whose Asteroid M base had crash landed near a Moscow missile silo. Professor X then sent Wolverine and the X-Men to investigate the situation in hopes of preventing Magneto from gaining access to the missiles and once there, the X-Men found themselves battling Magneto's Brotherhood of Mutants accomplices. Easily taking out the Brotherhood, Wolverine and the X-Men then confronted Magneto himself, who launched the Russian nuclear missiles, only to be congratulated via video from Apocalypse, who had manipulated the entire situation by shooting down Asteroid M in the first place.
(Adventures of the X-Men I#6) - Prepared to confront Magneto when the master of magnetism lowered his magnetic shield, Wolverine and the X-Men were surprised when Magneto did not defend himself, instead acting unmotivated at the idea of being Apocalypse's unwitting pawn. Wolverine and the others then watched as Magneto, wishing to distance himself from Apocalypse, departed to stop the launched missiles with the help of his Brotherhood ally Scarlet Witch. Following Magneto, Wolverine and the X-Men found him battling Apocalypse and joined in the battle against Apocalypse in an effort to allow Magneto more time to disable the missiles. Fiercely battling Apocalypse with the aid of the other Brotherhood members, Wolverine and his allies gained the upper hand until the Russian military became involved, forcing Wolverine and the X-Men to retreat rather than fight a two-pronged battle. During the diversion of the X-Men retreating, Apocalypse made his own escape and Magneto successfully disabled nearly all of the missiles, saving the final missile for Apocalypse's Nevada desert base.
(Adventures of the X-Men I#7) - Unaware that the vengeance-crazed Sabretooth had survived their earlier arctic encounter, Wolverine was on the way back to the X-Mansion with the other X-Men following their fight against Apocalypse when Sabretooth invaded the X-Mansion, seeking to make Wolverine pay for his earlier defeat. By the time Wolverine and the other X-Men arrived at the X-Mansion, however, Sabretooth had been subdued and restrained by Jubilee and Professor X. Laughing at how Sabretooth had seemingly been so easily defeated by Jubilee, Wolverine bowed to Jubilee and jokingly apologized for ever doubting Jubilee's abilities, promising to keep his mouth shut in the future.
(Adventures of the X-Men I#12) - Wolverine was summoned by Professor X with the other X-Men to the X-Mansion's War Room to view a transmission from Shi'ar Empress Lilandra regarding the enlarging M'Kraan Crystal that threatened to engulf all reality. After Jean Grey agreed to host the Phoenix Force again in order save all reality, Lilandra had Wolverine and the X-Men teleported to her imperial flagship, where Wolverine expressed concern about Jean becoming Dark Phoenix again. Accompanying the X-Men into the M'Kraan Crystal itself and finding it overrun with N'Garai demons sent by the Dweller-in-Darkness, who hoped to feed off the fear generated from an universe-ending threat, Wolverine joined his life force with that of the other X-Men to help empower Phoenix enough to repair the damage done to the Crystal by the N'Garai. With the X-Men's power added to her own, Phoenix briefly succeeded in restoring reality before the M'Kraan Crystal shattered, extinguishing all life through the Multiverse, including those of Wolverine and the X-Men, who finally experienced universal brotherhood as all life died together. The deaths of Wolverine, the X-Men and the entire Multiverse created a new Big Bang event that birthed a new Multiverse with the alien explorer Galan surviving into this new Multiverse.
Comments: Created by Ralph Macchio, Andrew Wildman and Robert Campanella.
While the current Multiverse uses the Core Continuum Designation system to identify each Earth/reality, we do not know what system was used in the previous Multiverse. However, in an infinite Multiverse, for each reality from the previous Multiverse, there would be a reality that mirrors it in the current Multiverse. Therefore, the Wolverine in this profile is from a pre-current Multiversal reality that shared some similarities to the current Multiverse's Earth-92131.
For further clarification, reality-92131 is the main reality seen in the X-Men: The Animated Series, Spider-Man: The Animated Seriescartoons, as well as both volumes of the X-Men '92 comic book. All three volumes of the X-Men Adventures comic book, the Spider-Man Adventures comic book, Adventures of the X-Men comic book and Adventures of Spider-Man comic books started out adapting cartoon episodes but had several significant variations before eventually straying from the cartoon completely. Therefore, the main reality seen in these comic books would not actually BE reality-92131 but rather (judging from the final issue of Adventures of the X-Men) a reality existing in and prior to the current Multiverse that shared many features with the current Multiverse's reality-92131. In the case of this profile, this Wolverine was a from a pre-current Multiverse reality seen in the X-Men Adventures comic and this reality shared several similarities to the current Multiverse's Earth-92131, the main reality seen in the X-Men: The Animated Series cartoon.
It was never revealed if this reality's Wolverine was actually James Howlett. He only ever went by Logan but it should be noted that this was obviously because all of this reality's Wolverine appearances were published prior to the Earth-616 revelation of Wolverine's real name being James Howlett.
In X-Men Adventures II#12, X-Men Adventures III#5 & 8, Wolverine's eyes were depicted as blue (and at one point, red), whereas they were brown in all other appearances.
Peter Parker has a Wolverine poster on his apartment wall in Spider-Man Adventures I#8. It seems unlikely that Wolverine would have merchandised his image but, given that Peter Parker was a photographer, it is possible that Parker merely enlarged a photo of Wolverine to poster size. Perhaps Parker was a fan of the mutant?
Interesting note: At one point in X-Men Adventures III#10, Wolverine's claws appear to be bone claws yet there was never a story in which he lost his Adamantium, as he did on Earth-616. Since it only occurs on 1-2 panels, this can be chalked up to artistic error.
This Wolverine existed in a reality that existed in the Multiverse prior to the emergence of the current iteration of the Multiverse. He was killed when the previous Multiverse was destroyed but his reality shared many similarities to reality-92131 in the current Multiverse though some events differed in this new reality. On a similar note, the home realities of the Bishop and Cable mentioned in this profile were part of the previous Multiverse but their realities were mirrored in the current Multiverse as Earth-31393 and Earth-13393, respectively.
Profile by Proto-Man.
CLARIFICATIONS:
The pre-current Multiverse reality's Wolverine has no known connections to:
- Wolverine (James Howlett), his Earth-616 counterpart @ Incredible Hulk II#180
- Wolverine (Ryan Laporto), of M Branch's X-Force @ Cloak & Dagger III#9
- Wolverine, alias briefly used by Daken as part of Norman Osborn's Avengers @ Dark Avengers I#1
- Wolverine, alias briefly used by Gorgon (Tomo Shishido) as part of Norman Osborn's Avengers @ Avengers IV#
- Wolverine, alias temporarily used by X-23 (Laura Kinney) @ NYX I#3
- Wolverine (Logan) of Earth-92131, a similar counterpart to the Wolverine profiled here @ X-Men: The Animated Series cartoon episode "Night of the Sentinels, Part 1"
- Wolverine Jet, vehicle utilized by Suprema & Scarbo @ Captain America I#123
- Wolverine tribeof Never-Summer, Microverse tribe @ Micronauts I#57
- or any other "Wolverine" counterparts or characters
images: (without ads)
X-Men Adventures I#15, p38, Wolverine files image (Wolverine, main image)
X-Men Adventures II#8, p22, pan4 (Wolverine, unmasked headshot)
X-Men Adventures III#1, p11, pan1 (younger Logan in Japan with Yuriko)
X-Men Adventures II#5, p7, pan4 (Logan during Adamantium bonding process)
X-Men Adventures II#5, p18, pan4 (Logan as Canadian operative Weapon X)
X-Men Adventures I#1, front cover (with the X-Men)
X-Men Adventures I#1, p20, pan4 (Wolverine leaping over a fence)
X-Men Adventures I#5, p6, pan1 (Wolverine in karate gi)
X-Men Adventures I#6, p1, splash page (Wolverine in arctic gear)
X-Men Adventures I#7, p10, pan4 (Wolverine leaning against a wall)
X-Men Adventures I#13, p20, pan3 (Wolverine running)
X-Men Adventures II#3, p7, pan4 (Wolverine in civilian clothes)
X-Men Adventures II#3, p23, splash page (Wolverine vs. Sabretooth)
X-Men Adventures II#4, front cover (Wolverine vs. Omega Red)
X-Men Adventures II#7, p16, pan3 (Wolverine rushing to the X-Mansion's war room)
X-Men Adventures II#7, p22, splash page (Wolverine & the X-Men vs. Juggernaut)
X-Men Adventures II#8, p19, pan2 (Wolverine, infected with viral plague)
X-Men Adventures II#10, p11, pan1 (Wolverine as John Logan)
X-Men Adventures II#10, p23, splash page (Wolverine with brick wall background)
X-Men Adventures III#3, p16, pan2 (Wolverine in space suit)
X-Men Adventures III#5, p6, pan4 (Wolverine running in civilian clothes)
X-Men Adventures III#7, p3, pan1 (Wolverine crouched over, ready to attack)
X-Men Adventures III#8, p16, pan2 (Wolverine posing, arms akimbo)
X-Men Adventures III#11, front cover (Wolverine in the sewers)
Adventures of the X-Men I#2, p2, pan3 (Wolverine in military uniform disguise)
Adventures of the X-Men I#5, front cover (Wolverine crouched on the side of a missile)
Appearances:
X-Men Adventures I#1 (November, 1992) - Ralph Macchio (writer), Andrew Wildman (pencils), Robert Campanella (inks), Kelly Corvese (editor)
X-Men Adventures I#2 (December, 1992) - Ralph Macchio (writer), Andrew Wildman (pencils), Robert Campanella (inks), Kelly Corvese (editor)
X-Men Adventures I#3 (January, 1993) - Ralph Macchio (writer), Andrew Wildman (pencils), Robert C. Campanella (inks), Kelly Corvese (editor)
X-Men Adventures I#4 (February, 1993) - Ralph Macchio (writer), Andrew Wildman (pencils), Robert Campanella (inks), Kelly Corvese (editor)
X-Men Adventures I#5 (March, 1993) - Ralph Macchio (writer), Andrew Wildman (pencils), Robert Campanella (inks), Kelly Corvese (editor)
X-Men Adventures I#6 (April, 1993) - Ralph Macchio (writer), Andrew Wildman (pencils), Robert Campanella, Andrew Pepoy (inks), Kelly Corvese (editor)
X-Men Adventures I#7 (May, 1993) - Ralph Macchio (writer), Chris Batista (pencils), Andrew Pepoy (inks), Kelly Corvese (editor)
X-Men Adventures I#8 (June, 1993) - Ralph Macchio (writer), Chris Batista (pencils), Mark McKenna (inks), Kelly Corvese (editor)
X-Men Adventures I#9 (July, 1993) - Ralph Macchio (writer), Andrew Wildman (pencils, inks), Kelly Corvese (editor)
X-Men Adventures I#10 (August, 1993) - Ralph Macchio (writer), Andrew Wildman (pencils), Mark McKenna (inks), Kelly Corvese (editor)
X-Men Adventures I#12 (October, 1993) - Ralph Macchio (writer), Andrew Wildman (pencils), Jeff Albrecht, John Stanisci, Brad Vancata (inks), Kelly Corvese (editor)
X-Men Adventures I#13 (November, 1993) - Ralph Macchio (writer), Andrew Wildman (pencils), Ariane, Mickey Ritter (inks), Kelly Corvese (editor)
X-Men Adventures I#14 (December, 1993) - Ralph Macchio (writer), Nick Napalitano (pencils), Jeff Albrecht (inks), Kelly Corvese (editor)
X-Men Adventures I#15 (January, 1994) - Ralph Macchio (writer), Andrew Wildman (pencils), Jeff Albrecht, Ariane (inks), Kelly Corvese (editor)
X-Men Adventures II#1 (February, 1994) - Ralph Macchio (writer), Andrew Wildman (pencils), Jeff Albrecht (inks), Kelly Corvese (editor)
X-Men Adventures II#2 (March, 1994) - Ralph Macchio (writer), Andrew Wildman (pencils), Ariane, Jeff Albrecht (inks), Kelly Corvese (editor)
X-Men Adventures II#3 (April, 1994) - Ralph Macchio (writer), John Hebert (pencils), Jeff Albrecht (inks), Kelly Corvese (editor)
X-Men Adventures II#4 (May, 1994) - Ralph Macchio (writer), John Hebert (pencils), Greg Adams (inks), Kelly Corvese (editor)
X-Men Adventures II#5 (June, 1994) - Ralph Macchio (writer), John Hebert (pencils), Greg Adams (inks), Kelly Corvese (editor)
X-Men Adventures II#6 (July, 1994) - Ralph Macchio (writer), John Hebert (pencils), Greg Adams (inks), Kelly Corvese (editor)
X-Men Adventures II#7 (August, 1994) - Ralph Macchio (writer), Scott Rosema (pencils), Kevin Conrad (inks), Kelly Corvese (editor)
X-Men Adventures II#8 (September, 1994) - Ralph Macchio (writer), John Hebert (pencils), Greg Adams (inks), Kelly Corvese (editor)
X-Men Adventures II#9 (October, 1994) - Ralph Macchio (writer), John Hebert (pencils), Greg Adams (inks), Kelly Corvese (editor)
X-Men Adventures II#10 (November, 1994) - Ralph Macchio (writer), Paul Borges (pencils), James Pascoe (inks), Kelly Corvese (editor)
X-Men Adventures II#11 (December, 1994) - Ralph Macchio (writer), John Hebert (pencils), Greg Adams (inks), Kelly Corvese (editor)
X-Men Adventures II#12 (January, 1995) - Ralph Macchio (writer), John Hebert (pencils), Greg Adams (inks), Kelly Corvese (editor)
X-Men Adventures II#13 (February, 1995) - Ralph Macchio (writer), John Hebert (pencils), James Pascoe, Greg Adams (inks), Kelly Corvese (editor)
X-Men Adventures III#1 (March, 1995) - Ralph Macchio (writer), Manny Clark (pencils), James Pascoe (inks), Kelly Corvese (editor)
X-Men Adventures III#2 (April, 1995) - Ralph Macchio (writer), John Hebert (pencils), Greg Adams (inks), Kelly Corvese (editor)
X-Men Adventures III#3 (May, 1995) - Ralph Macchio (writer), John Hebert (pencils), Greg Adams (inks), Kelly Corvese (editor)
X-Men Adventures III#4 (June, 1995) - Ralph Macchio (writer), John Hebert (pencils), Greg Adams, Jim Amash, Bill Anderson, Joe Rubinstein (inks), Kelly Corvese (editor)
X-Men Adventures III#5 (July, 1995) - Ralph Macchio (writer), Ernie Stiner (pencils), Joe Rubinstein (inks), Kelly Corvese (editor)
Spider-Man Adventures I#8 (July, 1995) - Nel Yomtov (writer), Alex Saviuk (pencils), Rob Stull (inks), Sarra Mossoff (editor)
X-Men Adventures III#6 (August, 1995) - Ralph Macchio (writer), John Hebert, Jerry Bingham (pencils), Tom Christopher, Mike Witherby (inks), Kelly Corvese (editor)
X-Men Adventures III#7 (September, 1995) - Ralph Macchio (writer), Stefano Raffaele (pencils), Tom Christopher, Ralph Cabrera, Mark McKenna (inks), Kelly Corvese (editor)
X-Men Adventures III#8 (October, 1995) - Ralph Macchio (writer), Hector Collazo, Harry Candelario (art), Mark Powers (editor)
X-Men Adventures III#9 (November, 1995) - Ralph Macchio (writer), Hector Collazo (pencils), Harry Candelario (inks), Mark Powers (editor)
X-Men Adventures III#10 (December, 1995) - Ralph Macchio (writer), Ben Herrera (pencils), Mike Christian (inks), Mark Powers (editor)
Spider-Man Adventures I#14 (January, 1996) - Nel Yomtov (writer), Alex Saviuk (pencils), Rob Stull, Loretta Krol, Keith Williams (inks), Sarra Mossoff (editor)
X-Men Adventures III#11 (January, 1996) - Ralph Macchio (writer), Ben Herrera (pencils), Mike Christian (inks), Mark Powers (editor)
X-Men Adventures III#12 (February, 1996) - Ralph Macchio (writer), Ben Herrera (pencils), Mike Christian (inks), Mark Powers (editor)
X-Men Adventures III#13 (March, 1996) - Ralph Macchio (writer), Ben Herrera (pencils), Mike Miller (pencils, inks), Mike Christian (inks), Mark Powers (editor)
Adventures of the X-Men I#1 (April, 1996) - Ralph Macchio (writer), Ben Herrera (pencils), Mike Christian (inks), Mark Powers (editor)
Adventures of the X-Men I#2 (May, 1996) - Ralph Macchio (writer), Mike Miller (pencils), Dan Panosian (inks), Mark Powers (editor)
Adventures of the X-Men I#4 (July, 1996) - Ralph Macchio (writer), Mike Miller (pencils), Dan Panosian (inks), Mark Powers (editor)
Adventures of the X-Men I#5 (August, 1996) - Ralph Macchio (writer), Ben Herrera (pencils), Gary Martin (inks), Mark Powers (editor)
Adventures of the X-Men I#6 (September, 1996) - Ralph Macchio (writer), Ben Herrera, Roberto Flores (pencils), Gary Martin, Ralph Cabrera (inks), Mark Powers (editor)
Adventures of the X-Men I#7 (October, 1996) - Ralph Macchio (writer), Andy Kuhn (pencils), Ralph Cabrera (inks), Mark Powers (editor)
Adventures of the X-Men I#12 (March, 1997) - Ralph Macchio (writer), Yancey Labat (pencils), Ralph Cabrera (inks), Mark Bernardo (editor)
First Posted: 10/22/2019
Last updated: 11/27/2021
Any Additions/Corrections? please let me know.
Non-Marvel Copyright info
All other characters mentioned or pictured are ™ and © 1941-2099 Marvel Characters, Inc. All Rights Reserved. If you like this stuff, you should check out the real thing!
Please visit The Marvel Official Site at: http://www.marvel.com
Special Thanks to www.g-mart.comfor hosting the Appendix, Master List, etc.!