How to Film a YouTube Video (original) (raw)
Sure, it’s important to position your channel and plan your videos in advance. But at some point you’ll need to develop a process for filming videos.
And when it comes to filming videos, you have A LOT of options. There are hundreds of varieties of lights, cameras, microphones, angles, techniques, and more. It can get really overwhelming really quickly.
Fortunately, whether you shoot in a professional studio or with an iPhone, these tips will help make your videos look and sound great.
Best Practices
Establish a Distinct Style
Your video’s style is something that’s hard to put a finger on… but you know it when you see it.
For example, Marie Forleo’s videos have an unmistakable style:
A distinct video style is important because it helps your channel stand out from other channels that cover your topic.
Here are some of the most important elements that go into establishing a style for your videos:
- Setting: Outside or inside? In an office or a kitchen? Your setting communicates a lot of information to the viewer. So make sure to find a setting that reinforces the style you want to convey.
- Wardrobe: Business casual or in a bathing suit? Your clothing and accessories tell viewers what kind of video they’re in for.
- Props: Props aren’t right for every type of video. That said, props aren’t limited to comedy videos. For example, if you run a baking channel, you may use props like a rolling pin or bag of flour.
- Background: Your background is a key element of setting a consistent style. Some creators opt for a plain background (like a wall or white sheet). Others prefer to use a “real life” background, like a home office, recording studio or bedroom.
- Music: If you use music in your videos, think of the radically different messages music can convey. A heavy metal riff and a piece by Bach tell completely different stories.
The cool thing about setting up a style is that it’s completely up to you. That said, do your best to make your style consistent. Over time, this will establish a sense of identity and style that’ll help your channel stand out from the pack.
Choose The Best Frames and Shots
The Frame
Your “Frame” is simply what people see in the final video.
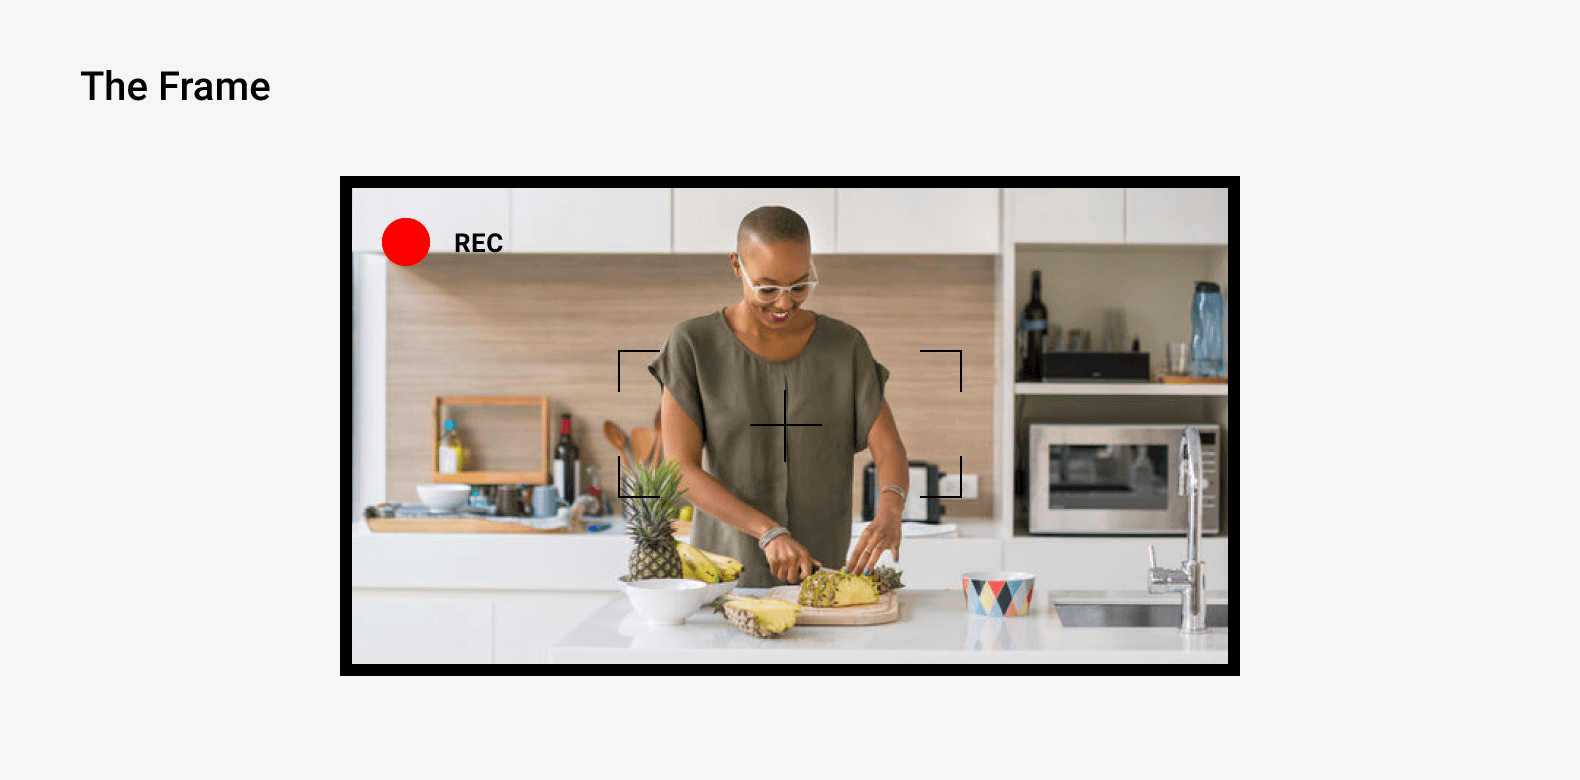
You want the important stuff prominently in the frame. For example, if you’re a vlogger, that “important stuff” will probably be you.
Or, if you run a cooking channel, you’d want your ingredients and final dish prominently in the frame.
For example, this video on frying the perfect egg always keeps the most important elements clearly in-frame:
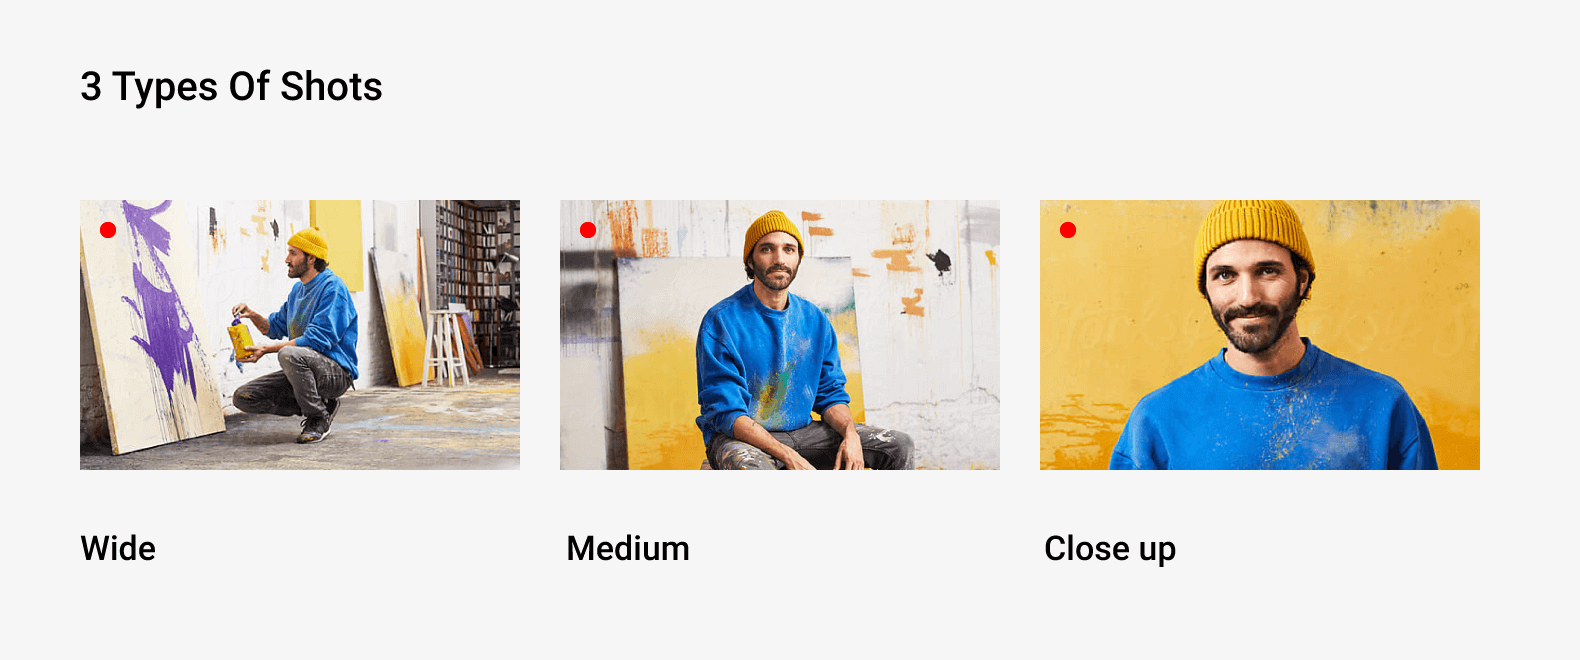
3 Types of Shots
Technically, there are an infinite number of shots (or “angles”) you can take with a camera.
That said most YouTubers only need to pay attention to 3 of the main types of shots. Each shot works best in different situations. And when you can match the shot to the type of video you’re making, your video will look super-duper professional.
- Wide Shot: A wide shot works best when multiple people are in the frame (for example in an interview). Or, if you want the environment to show prominently in your frame (for example: a hiking vlog).
- Medium Shot: Medium shots can work for almost any type of video.
- Close Shot: Also known as “the close up”. This is ideal for a highly-personal type of video (like a vlog).
You’re free to alternate between different angles and types of shots in your videos (in fact, this makes for a more dynamic video). That said, try to choose one type of shot that serves as a “homebase” shot that you use most often.
That way viewers will get used to seeing you in this particular shot, which helps establish your channel’s style.
For example, Mindvalley’s videos alternate between medium and close shots. But as you can see in this example, they use a medium shot as their “homebase”:
Brighten Up Your Videos With Lighting
Lighting is one of the most important elements of your video shoot. You can have the perfect setting, frame, mic and camera. But if your lighting is off, it will ruin your entire video.
A good rule of thumb to remember is: it’s almost impossible to have too much light.
In other words: most videos don’t have enough lighting. A lack of lighting makes your videos look dark and grainy. So you definitely want to avoid this at all costs.
As you may have seen, there are thousands of bulbs, watts and stands to choose from. Fortunately, there are only a handful of light types. And once you learn about these handful of light options, you can choose the exact setup that works best for you.
2 Main Lighting Types
Ambient Light
This is the type of light that fills the room naturally.
If you shoot outside, the light outside is your ambient light. If you film in your home office, ambient light will be your overhead lights and any light coming in through your window.
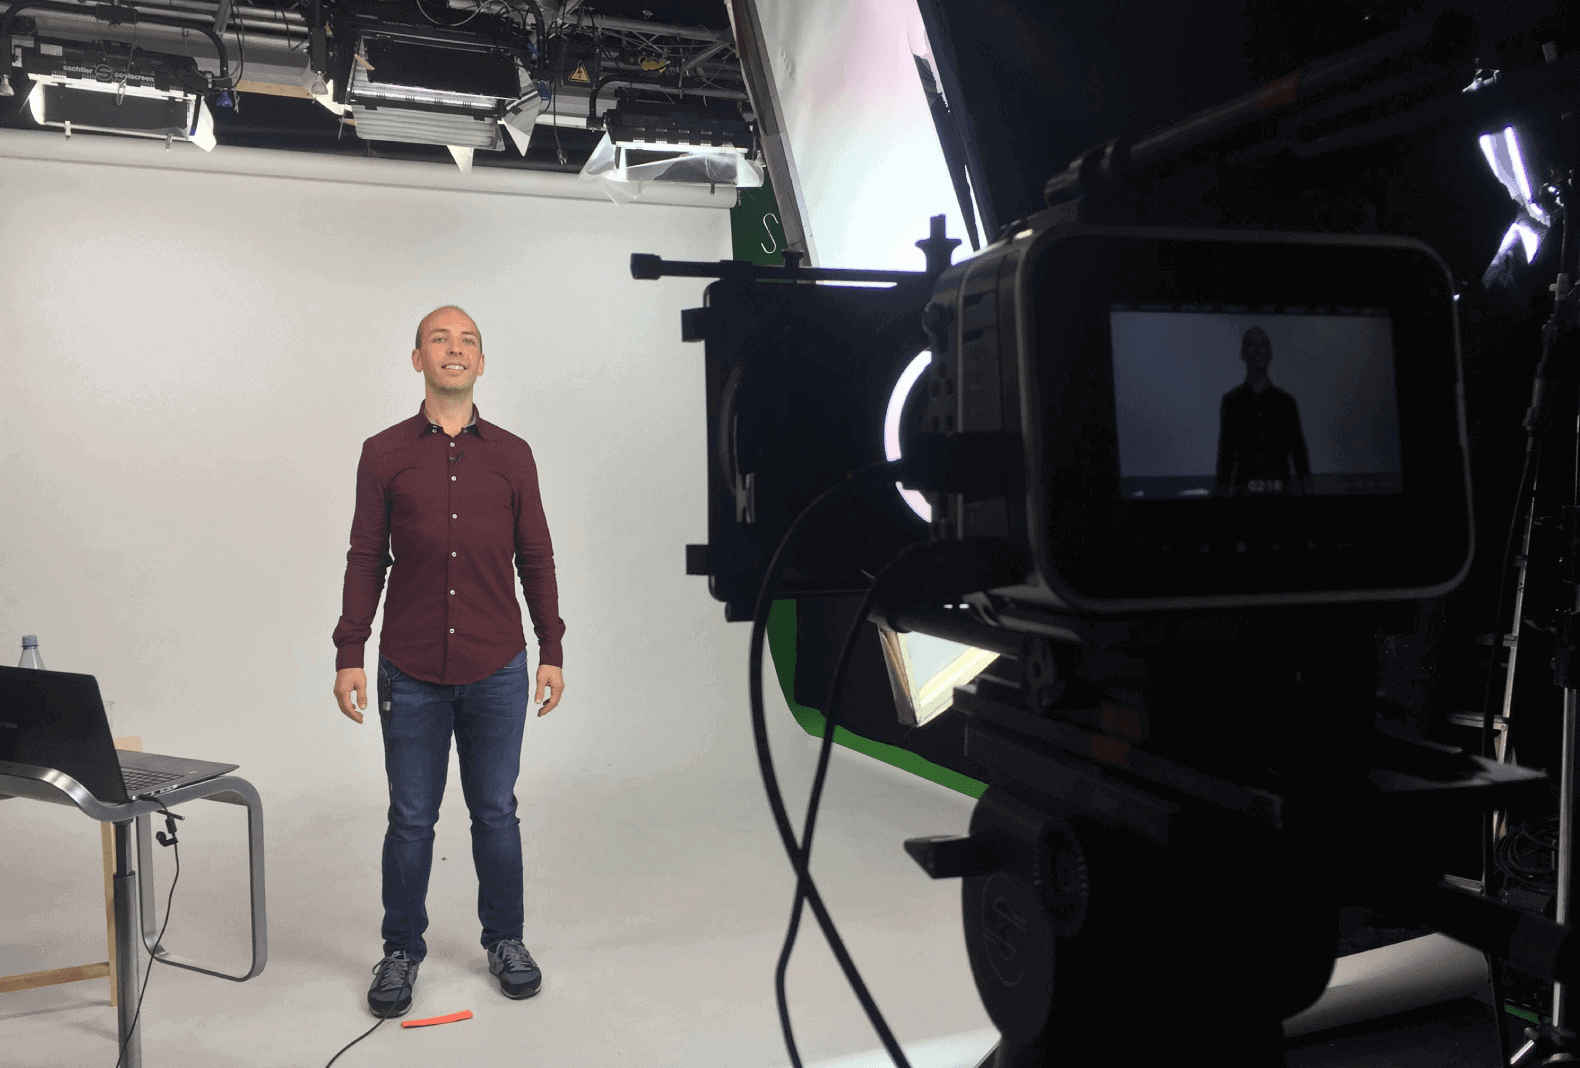
And if you shoot in a studio, you can expect ambient light too (usually a handful of overhead lamps pointing away from the subject).
For most videos, ambient light won’t be enough. So to fully light up your shot, you’ll need…
Direct Light
As the name suggests, direct light is the light that points directly at your subject.
If you only use ambient light, you’ll likely see big ol’ shadows on your subject’s face and body (which isn’t flattering).
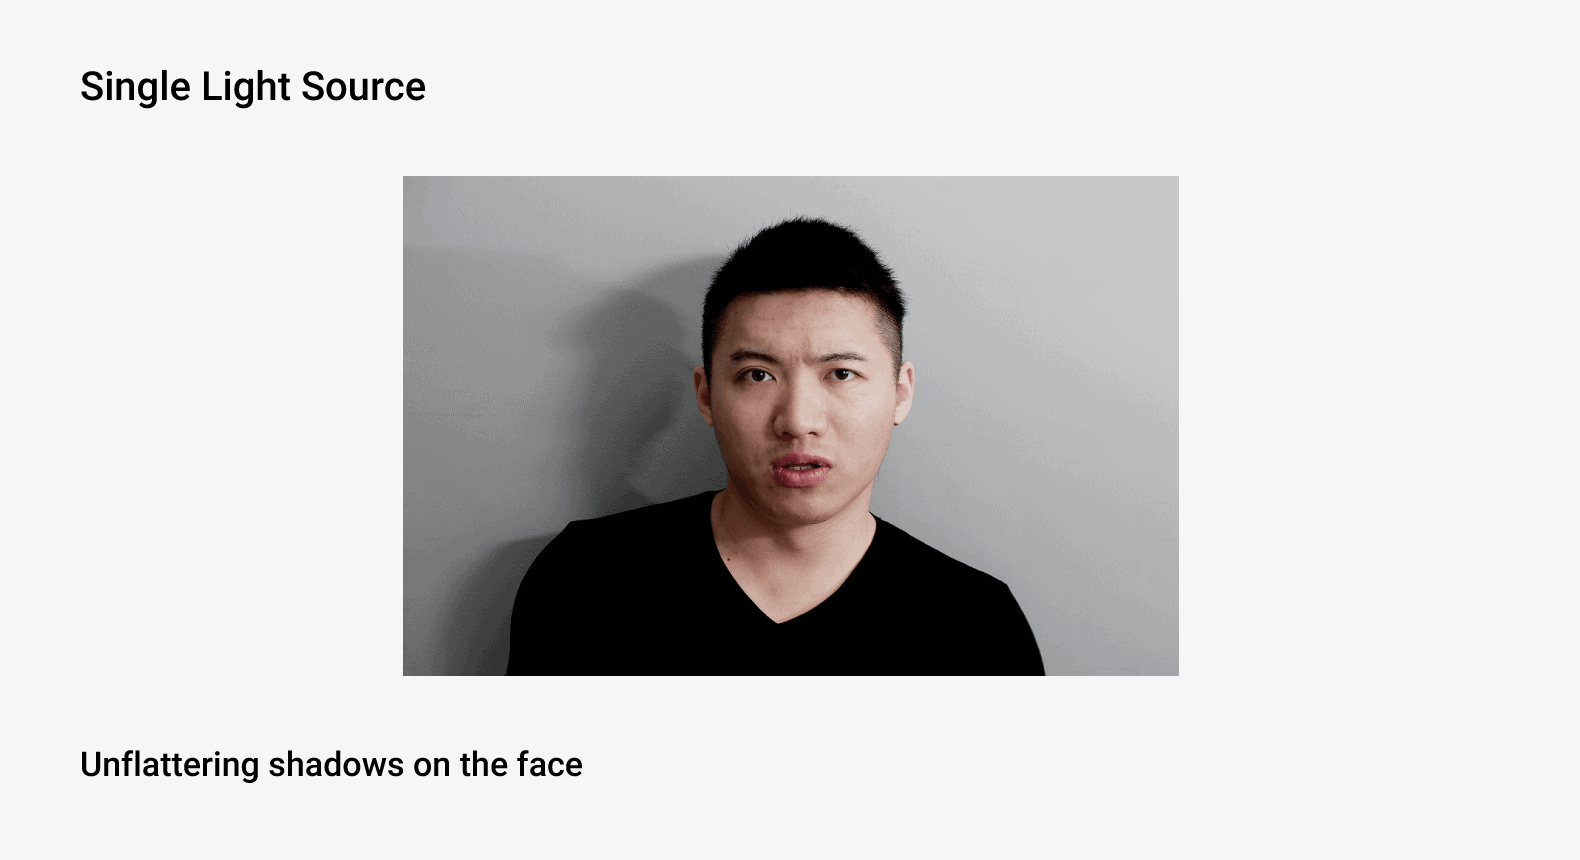
A few direct lights will eliminate these nasty shadows. They’ll also brighten up the shot.
Lighting Options
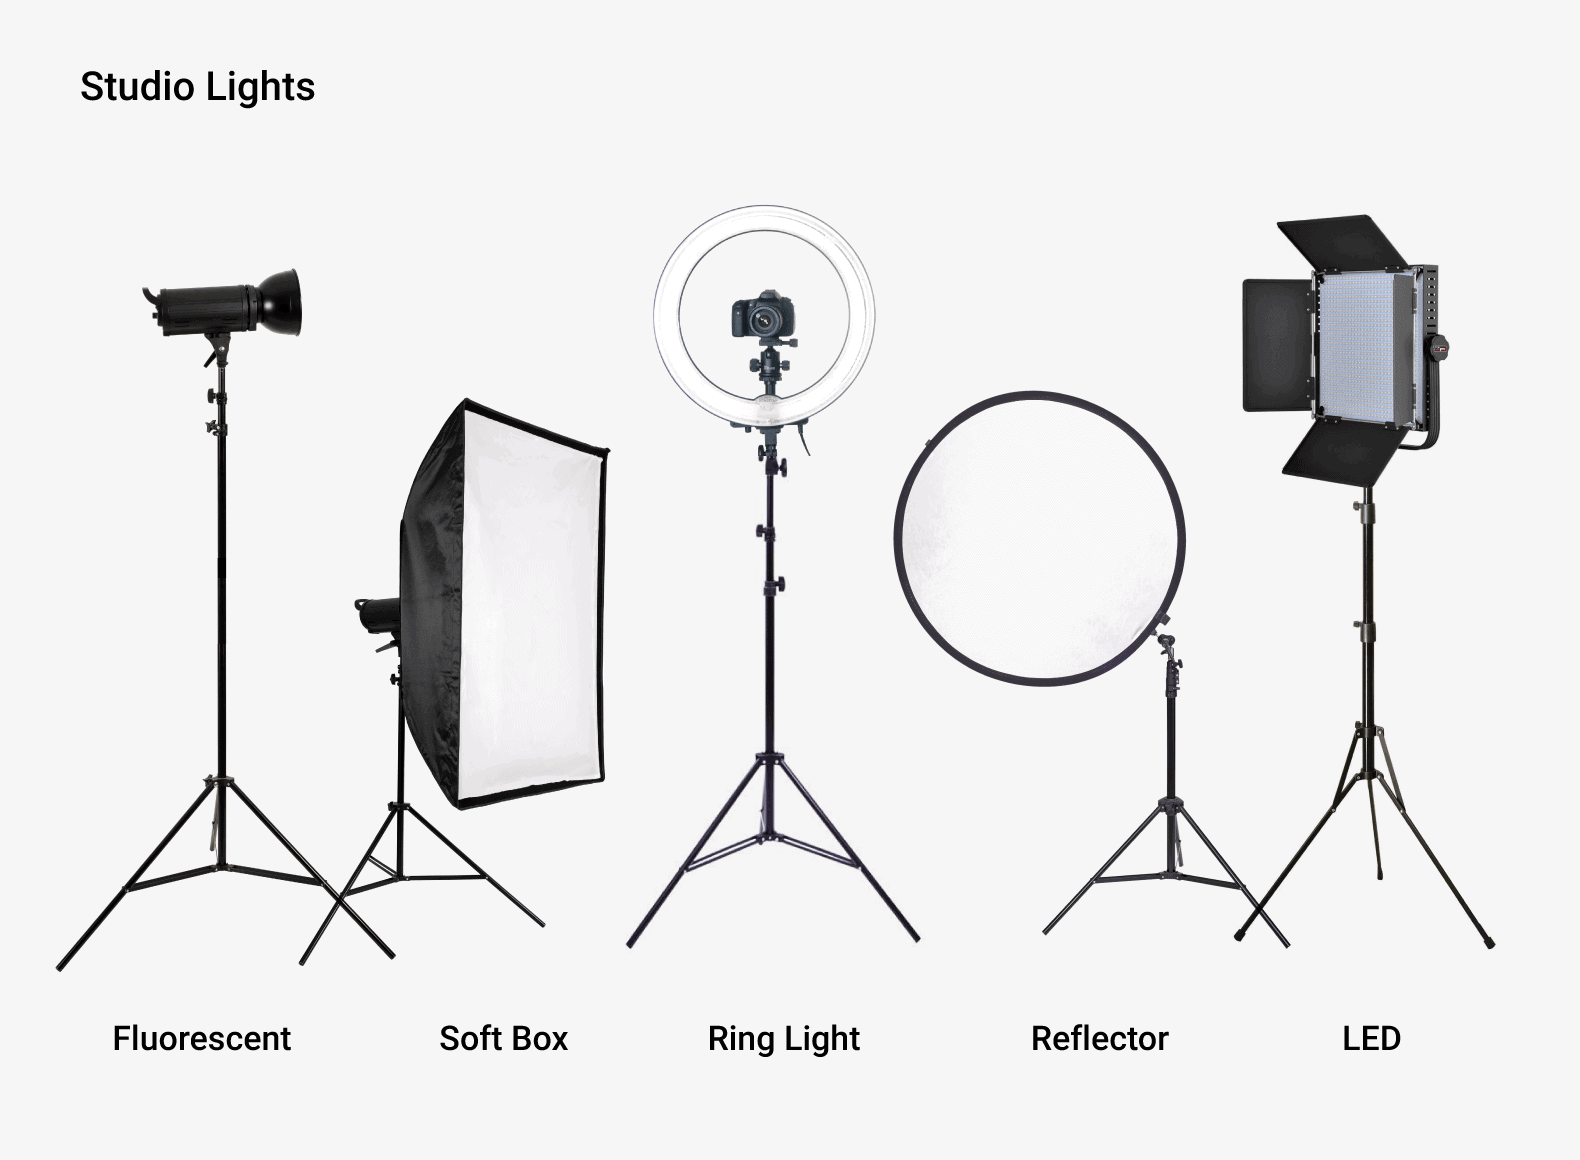
When it comes to lighting, you have 5 main options:
- Natural Light: “Natural light” includes filming outside… and any light that comes into an indoors shot from windows or open doors. Natural light tends to be flattering. But it’s hard to get enough of it (especially on cloudy days). That’s where a hand-held reflector can come in handy.
- Fluorescent: This is the most common type of direct and ambient lighting option out there. However, raw fluorescent lighting is pretty harsh. So you want to cover the bulb with a “soft box”.
- LED: LED lights dish out less light per bulb than fluorescent. So you may need lots of them to get the lighting your shot needs. That said, LEDs have a number of pros over fluorescent lights (to name a few: they don’t get super hot, they’re more portable, and you can easily dim them).
- Ring Lights: Great for close up shots. In fact, a single ring light can work as an entire shot’s direct lighting. However, ring lights don’t work for medium or wide-angle shots.
- Reflectors: Reflectors are a great way to make your direct light significantly softer. Reflectors include handheld reflectors, white poster board, styrofoam or a piece of whiteboard.
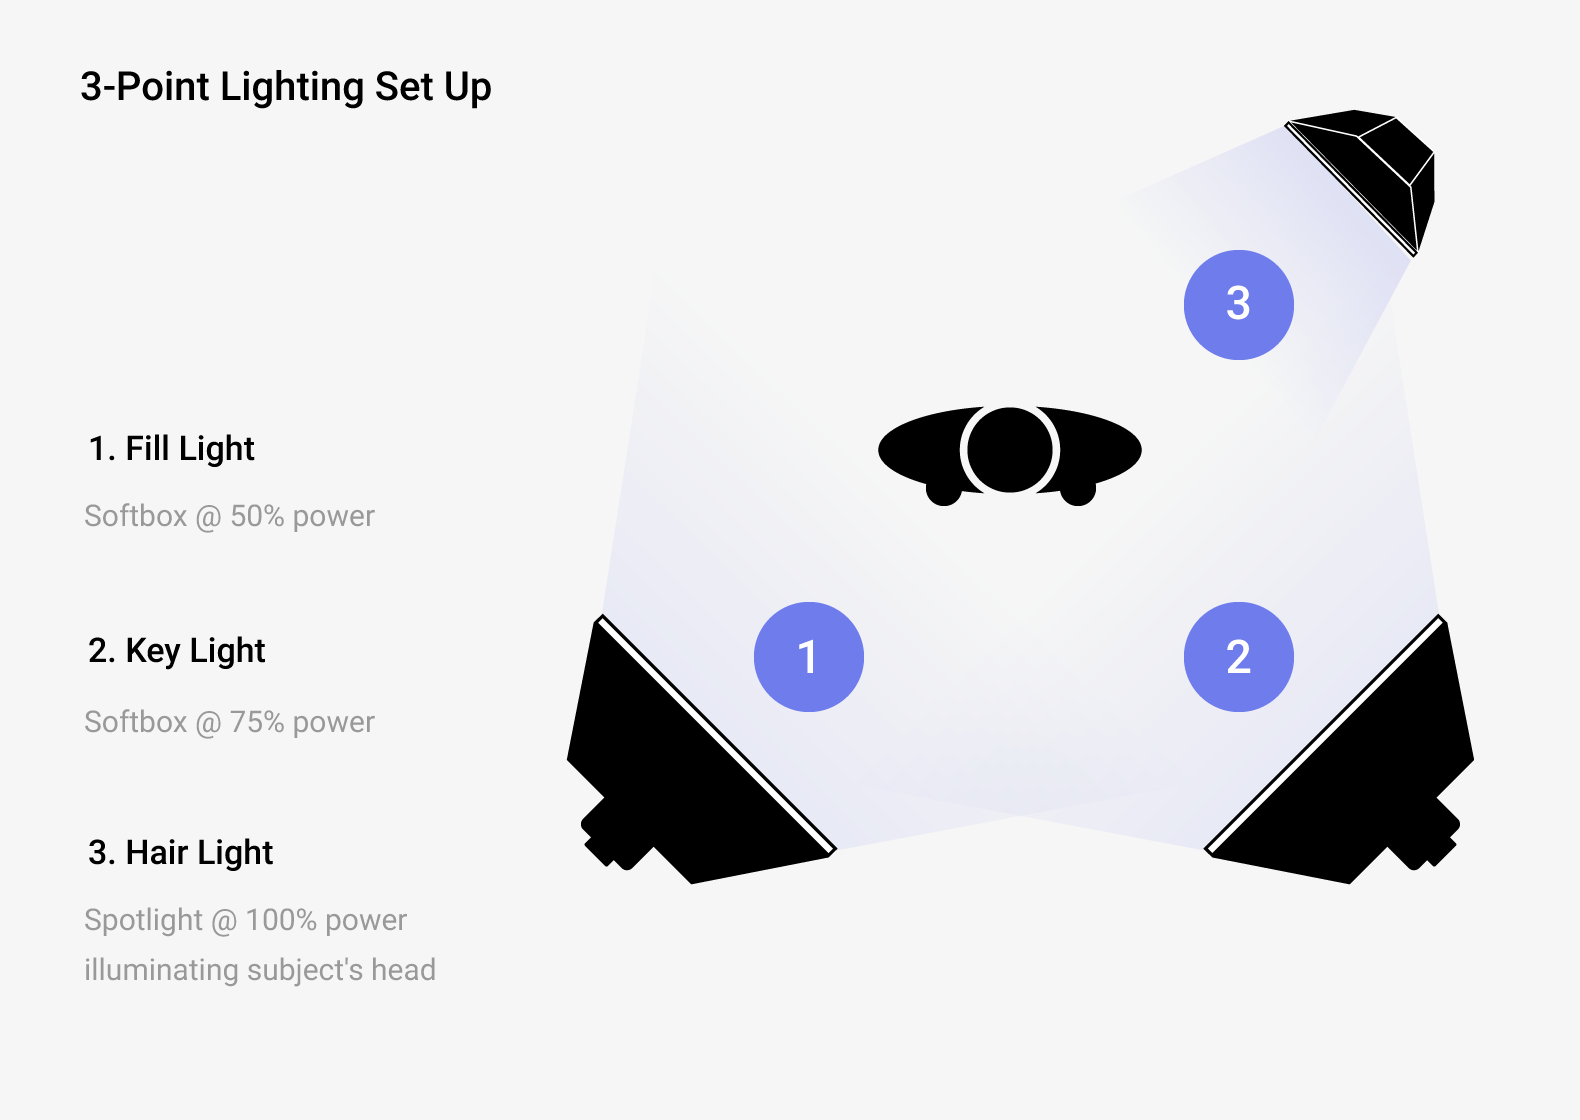
Setting Up Your Lighting
There’s no “right” way to setup your lighting. It all depends on your equipment, environment, style and setting.
That said, most creators just want to look good in their videos. For that, your best bet is to use a setup that includes:
- Some ambient light
- Direct light on the subject (make sure it’s even on both sides)
- A single bright light pointing at the background
For example, Justin Brown’s video below uses fantastic lighting. Justin is well-lit yet there are almost no unflattering shadows or reflections on his face.
Make Your Video’s Audio Sound Great
Audio can make or break your entire video. If your video has lots of static or echo, YouTube viewers are going to click away in a hurry.
Fortunately, great-sounding audio isn’t hard or expensive. Here are some tips to make sure your videos sound great.
Soundproof Your Environment
It’s almost impossible to fix audio issues in the editing process. And no microphone can overcome loud street noise or an echoey room.
So before you film, take some time to make sure your environment is ideal for audio:
- Check for loud noise coming from other rooms or outside. Noisey audio is super distracting for viewers.
- Also keep an ear out for quiet “humms” or buzzes coming from computers, air conditioners or traffic. Quieter, consistent sounds are easier to edit out than loud noises. But it’s best to avoid them altogether.
- Do a test recording to see if your audio has a lot of echo (or “reverb”). If so, put some blankets the floor and walls (yoga mats work great for floors). Or invest in professional soundproofing panels.
For example, this video from Kriscoart was filmed with a fairly cheap lav mic. But because the recording environment was soundproofed, the audio quality is amazing:
Types of Mics
- Shotgun (“Boom”) Mic: Perfect for picking up audio from a very specific area (like a single person talking towards the camera).
- Lav Mic: This is a mic you wear on your shirt. It’s small, lightweight and portable. And when positioned right, the audio quality is surprisingly good (although not as good as a shotgun mic).
- Camera Mic: Camera microphones are notoriously bad (plus, it’s hard to position your camera in a place that’s best for audio and video).
- iPhone: Better option than a camera mic because you can position your iPhone close to your subject.
Learn More
The Down and Dirty DIY Lighting Kit: A nifty guide from Wistia on making a pro lighting setup for only $100.
How to Film Yourself: Detailed guide to filming yourself on camera.
YouTube Studio Setup – Home Video Studio Setup and Tour: Go behind the scenes of a successful YouTuber’s home studio setup.