How to Do the Perfect Front-Foot-Elevated Split Squat (original) (raw)
Trying to strengthen your lower body, particularly your quads? The often dreaded (but never duplicated) front-foot-elevated split squat will do just that (and more). Not only will it light up your quads like a 10-foot Christmas tree, but it’s also a great movement for those with minimal equipment: Just grab a bumper plate and you’re ready to start.
So you may be asking yourself, “Why do this exercise?” Well, there are a lot of good reasons. The front-foot-elevated split squat is a unilateral exercise, which means it uses one leg at a time. Besides the real-life application (such as climbing stairs or reaching down to grab dishes from the dishwasher) you’ll also get a deep range of motion during the movement, which strengthens the surrounding muscles in your knee.
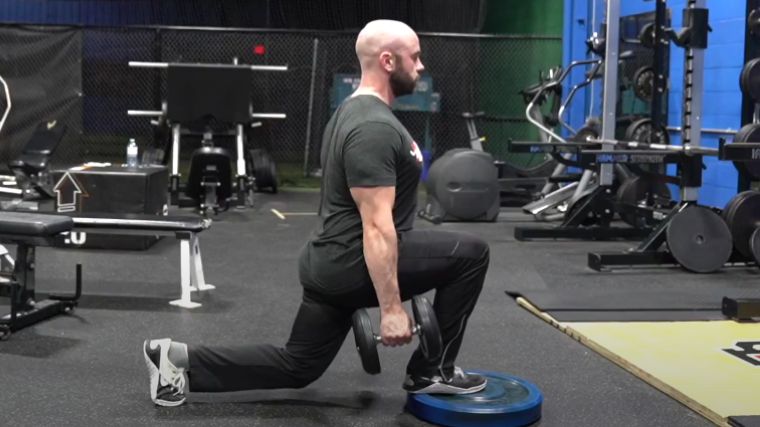
Credit: Hockey Training Exercise Demonstrations / Youtube
This exercise also forces you to activate your core and practice balance, which are extremely important components as you age. Having obviously piqued your interest, here’s how to do this movement properly (plus some helpful suggestions on set and rep counts).
- How to Do the Front-Foot-Elevated Split Squat
- Front-Foot-Elevated Split Squat Sets and Reps
- Common Front-Foot-Elevated Split Squat Mistakes
- Front-Foot-Elevated Split Squat Variations
- Front-Foot-Elevated Split Squat Alternatives
- Muscles Worked by the Front-Foot-Elevated Split Squat
- Benefits of the Front-Foot-Elevated Split Squat
- Who Should Do the Front-Foot-Elevated Split Squat
- Frequently Asked Questions
Editor’s Note: The content on BarBend is meant to be informative in nature, but it should not be taken as medical advice. When starting a new training regimen and/or diet, it is always a good idea to consult with a trusted medical professional. We are not a medical resource. The opinions and articles on this site are not intended for use as diagnosis, prevention, and/or treatment of health problems. They are not substitutes for consulting a qualified medical professional.
Before attempting to do an elevated split squat, master a non-elevated split squat to ensure you have the movement pattern down. If you feel confident in this exercise (and aren’t falling over), it’s time to kick it up a notch.
You’ll need some sort of elevated surface to perform this movement. Grab one or two 45-pound plates, use a riser or step-up platform, or find a 25-pound bumper plate. Whichever you choose, place it flat on the ground.
If you’re a beginner to this movement, choose a lower height (around 2 inches) to elevate your foot. For those who are more advanced, a height between 3 to 5 inches is ideal to deepen the range of motion.
Step 1 — Split Your Feet
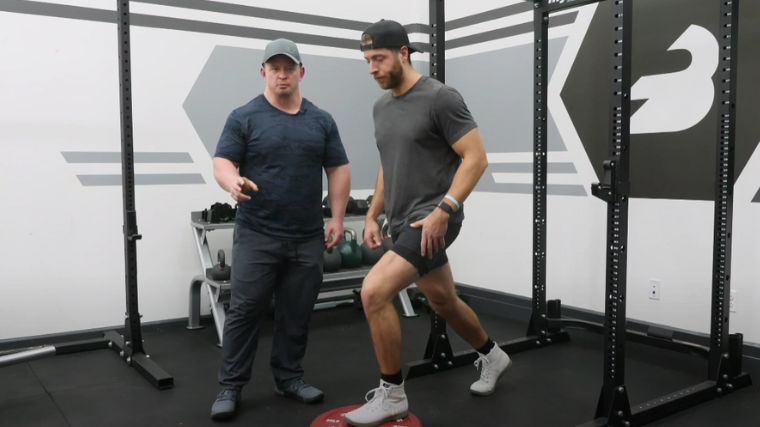
Take an above-average step forward with your dominant, placing your front foot fully on your elevated surface. Ensure your legs are about hip-width apart. Use your back leg as a kickstand of sorts, bearing little weight. This will help you keep your balance.
Coach’s Tip: Make sure your weight distributes mostly into your front working leg. Think of your back leg in this movement as a stabilizer rather than a real participant.
Step 2 — Drop Your Body Straight Down
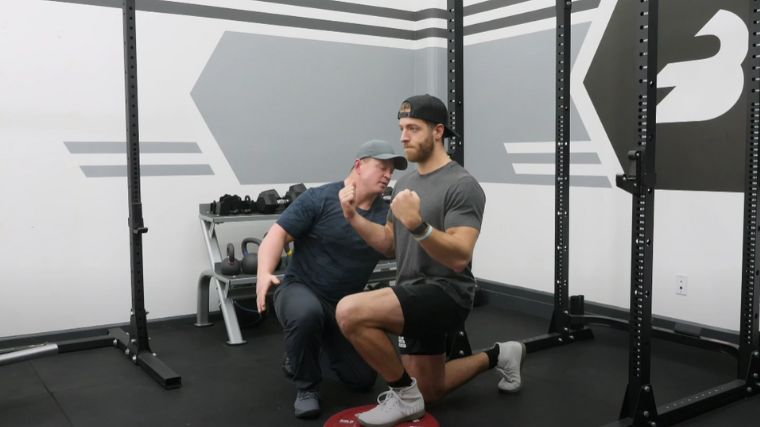
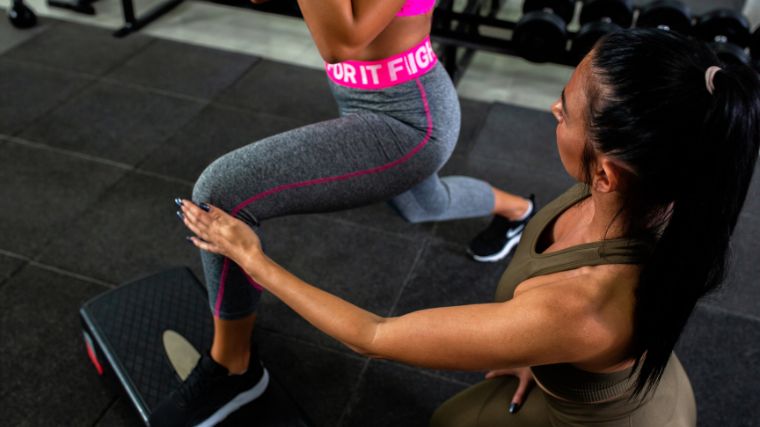
Flex both of your knees at the same time, allowing your front leg to do the work to lower your body down. Some people prefer to fully touch their back knee to the ground, while others would rather hover. Regardless of what you choose, ensure your working knee tracks over your toes, rather than inward.
Coach’s Tip: Keep your torso in a neutral position during this movement; don’t arch your back or lean backwards.
Step 3 — Drive Through Your Front Knee
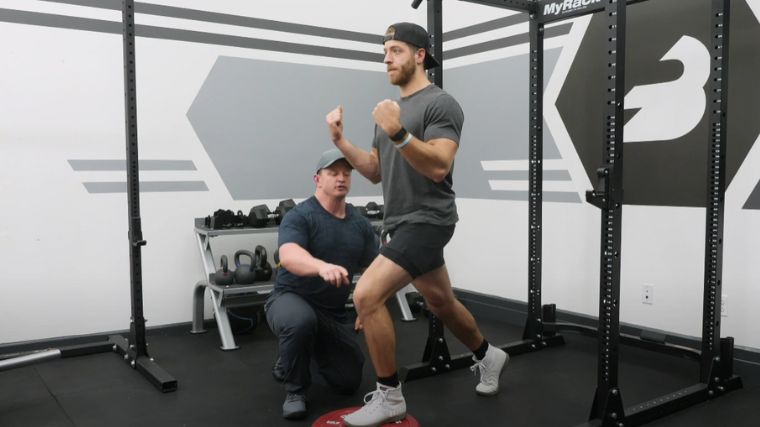
Use the power in your quads to reverse the motion and power your body upwards. End with both knees fully extended, back in your original split stance position.
Coach’s Tip: Focus on the reps and proper movement while driving upwards. The mind-muscle connection pipeline to muscle growth is legit and backed by science. (1)
Luckily for you, this is an exercise that easily progresses up (or scales down) as needed. Regardless of your fitness goals, the front-foot-elevated split squat can likely work for you. Check out these recommendations to get started:
- For Beginners: Keep this movement simple and don’t add weight. 3 sets of 8-10 bodyweight reps will work great.
- For Strength: Use heavy weight (whatever that looks like for you) and complete 5 sets of 6 reps with 2 minutes of rest in between sets.
- For Endurance: Choose moderate dumbbells and perform 3 sets of 15-20 reps.
As with any movement, there’s room for error — the front-foot-elevated split squat is no different. Here are the top three mistakes most people make with this movement:
Going Too Heavy
Don’t grab too-heavy dumbbells for a split squat; you may do more harm than good. Oftentimes, when people go too heavy too quickly in this movement, they are unable to keep their spine in a stable or neutral position. Instead, they end up arching their back like a cat because they don’t have the strength and mobility necessary for such a heavy load. Arching your back can put unwanted emphasis on your hamstrings, quads, and core, potentially causing injury if you overdo it or lose control of your form.
Using an Unstable Surface
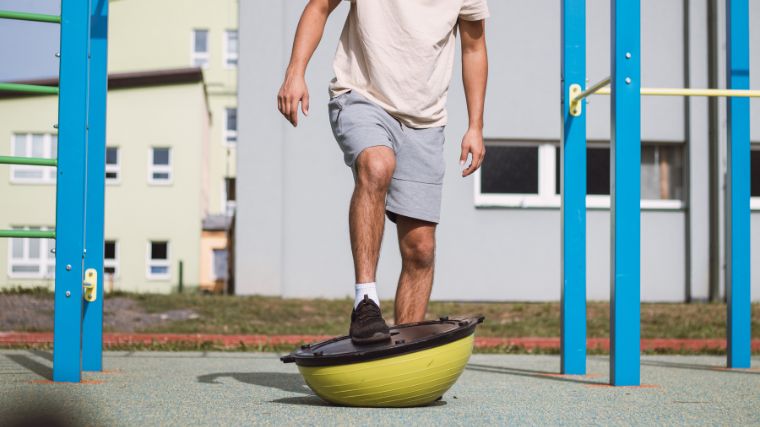
Unstable surfaces, like Bosu balls, may do more harm than good if you’re performing the front-foot-elevated split squat to build strength or muscle.
Credit: Vaclav Sonnek / Shutterstock
If you use an unstable surface for this movement, you may struggle to generate adequate power, limiting how much weight you can use. Opt for a stable surface like a riser or plates to ensure the focus stays on strengthening your muscles.
Wearing Highly-Cushioned Shoes
With this movement, you want the most stable connection with the floor that you can get. And although your favorite sneakers might be uber-comfy, they aren’t the best choice for a front-foot-elevated split squat. Instead, choose flat-soled shoes with a limited heel-to-toe drop or go barefoot altogether.
If you want to switch it up from time to time, BarBend has you covered. Here are three split squat variations you’ll want to add to your routine ASAP:
Assisted Split Squat
Some research indicates that if you’re new to exercising or are coming back from an injury, an assisted split squat might be what the doctor ordered, literally. Standard split squats with a balance assist are commonly used in rehabilitation settings. (2)
[Read More: The Best Foods for Energy Before, During, and After Your Workouts]
To perform an assisted split squat, grab something stable (a pair of TRX straps, for example) attached to a fixed point and assume the typical split stance position. Use the support as needed to correct your balance and perform your reps comfortably.
Deficit Split Squat
Looking for a little glute activation? If you are, the deficit split squat might be right up your alley. Grab two 45-pound bumper plates (or risers) and set them up about a foot apart.
By elevating both of your feet, you’ll allow your knee greater range of motion than you’d traditionally get in a regular split squat form, which will activate your glutes.
Rear-Foot Elevated Split Squat
You’ve probably done a rear-foot elevated (commonly called a Bulgarian) split squat a million times, but it burns just the same every workout. To perform this movement, use a flat bench or a box and elevate your rear foot.
[Read More: Do the Bulgarian Split Squat for Brutal Leg Gains]
From there, you’ll use your front leg’s power to move your body up and down. This movement requires more balance than the front-foot split squat because you lose the benefit of the “kickstand” leg. On the upside, even a light weight will feel quite challenging.
The front-foot-elevated split squat isn’t exactly attainable for everyone. It can be difficult to do for those with mobility or injury issues. If this is you, don’t worry! Here are three great alternatives that still keep the focus on unilateral training:
Single-Leg Hip Thrust
Grab a flat bench and situate your upper back so you feel supported. Place one foot flat on the ground, making sure your knee bends at a 90-degree angle. Keep the opposite leg also bent in a 90-degree angle, but lift it off the floor.
[Read More: Best Weight Benches]
Power up from your hips, lifting everything but your upper back and grounded foot by contracting your working glute. Hold for a few seconds (you should feel the burn in your quads and glutes) and repeat.
Weighted (or Unweighted) Step-Up
To do a proper step-up, first determine if you’d like it weighted or unweighted. If you’re unsure, start with the bodyweight movement first before moving to the weighted version.
Grab a box (and your dumbbells if you’re using them) and step up, keeping your core engaged. You’ll then step back down with the opposite leg and repeat the movement. This exercise is a bit more dynamic than a split squat; expect to get your heart rate pumping.
The front-foot-elevated split squat works a host of muscles. Here’s what they are and why you should care:
Quads
Your quadriceps are a group of four muscles located at the front of your thigh. They help you do all the things you love: running, skipping, walking, and jumping. Additionally, your quads and hamstrings work together to bend and straighten your leg.
When you bend your leg, your quad muscles relax and your hamstrings contract. As such, it’s essential to train them both. Having strong quads can be a benefit in both your day-to-day life, during just about any sport, or when performing a functional training workout.
Glutes
Your glutes consist of three distinct compartments; the gluteus maximus, medius, and minimus. Working together, your glutes help to stabilize and extend your hips any time you tip over at the waist, perform a hip hinge, or sink into a squat.
Credit: didesign021 / Shutterstock
Increasing your glute strength can help give you the peach you’ve been working for, but it can also make unilateral movements easier, give you better alignment in your pelvis, and increase explosiveness in sports performance.
Core
Your core provides the balance and stability you need to do almost every exercise and movement in your day-to-day life (plus, it protects your spine). In fact, your core refers to everything from the lower trunk all the way to your hips and stomach including your rectus abdominis, external obliques, and erector spinae. Bracing your abdominal muscles will keep you upright during the front-foot-elevated split squat.
Although having a killer physique is a nice perk to working out, it isn’t everything. Here are some of the tangible benefits you’ll see when you start adding front-foot-elevated split squats into your programming:
Targets Lower Body
Although the front-foot-elevated split squat primarily works the quads, it also gives a pump to the glutes and hamstrings. In one movement, you’ll get a greater range of motion in both your knee and glutes, especially when compared to the shorter range of motion of many other squat variations.
Increases Core Stabilization and Balance
Increasing your core strength helps you out in a myriad of ways: Not only can a stronger core help with better balance, but it can also prevent lower back injuries and bad posture. Plus, who doesn’t like a strong core?
It helps with every movement you’ll do in the gym including deadlifts, pull-ups, squats, and more.
Increases Unilateral Strength
Unilateral work is severely underrated. In your day-to-day life, you do tons of unilateral movements like reaching for a can on a high shelf or picking clothes up off the floor. The front-foot-elevated split squat allows you to train for those everyday moments (not to mention the increased benefits for sports), which is critical to a high quality of life as you age.
Trying to decide if the front-foot-elevated split squat is for you? Odds are, it can probably enhance your fitness in some way. That said, here’s who it’s particularly potent for:
People Working on Increasing Mobility
Elevating your front foot allows you to access a deeper range of motion in your hip joint. Do this enough times, with proper technique and appropriate load, and you’ll improve your mobility. If you’re trying to gain control over your body and master your movement, the front-foot-elevated split squat is a great exercise for you to incorporate into your training
Taller Folks
If you’re on the tall side or have long legs, you may find that your non-working knee collides with the floor during a standard split squat before you can really engage your quads or glutes. Elevating your front foot remedies this, elongating your range of motion and providing a nice, deep stretch.
If You Want Unilateral Strength
If you’re looking to incorporate more unilateral movements into your training to simulate real-life scenarios or bolster your performance with the barbell, the front-foot-elevated split squat is an ideal choice.
[Read More: The 7 Best Adjustable Dumbbells (2023 Update)]
Unilateral leg movements help you identify any potential imbalances in strength or stability, and split squats in particular tend to have strong carryover effects to bilateral movements like squats or deadlifts.
Party in the Front
If you’re tired of doing rear-foot elevated split squats, it’s time to spice it up and take the party to the front. The front-foot-elevated split squat allows you to work your quads unilaterally, increasing explosiveness and power, and creating a more stable core (not to mention better balance). So, what are you “weight-ing” for? It’s time to get down and dirty with a few sets of front-foot-elevated split squats!
FAQs
Still have questions? Don’t stress — the front-foot-elevated split squat isn’t all that complicated once you’ve worked out the kinks. Check out these common questions.
What does a front-foot-elevated split squat work?
A front-foot-elevated split squat works your lower body, particularly your quads. It also strengthens the muscles around your knee and improves overall core stability.
Should your knee touch the floor in a split squat?
This is a deeply divided question in the fitness industry. Some people swear getting your knee on the ground is critical, while others are fine with a hover. Generally speaking, it is more important to consider the person doing the movement and the purpose of the exercise as it relates to the person. Not everyone needs this deep of a range of motion, and for some, getting their knee to the floor may not be possible.
Should I add weight to my front-foot-elevated split squat?
If you have mastered the proper form of a bodyweight front-foot-elevated split squat, you can add weight to the movement and implement some progressive overload.
References
- Calatayud J; Vinstrup J; Jakobsen MD; Sundstrup E; Brandt M; Jay K; Colado JC; Andersen LL; (n.d.). Importance of mind-muscle connection during progressive resistance training. European journal of applied physiology.
- Cirer-Sastre, R., Beltrán-Garrido, J. V., & Corbi, F. (2017, June 1). Contralateral effects after unilateral strength training: A meta-analysis comparing training loads. Journal of sports science & medicine.
