3 Push-Up Challenges That Build Muscle and Sculpt Your Arms (original) (raw)
Push-ups are one of the most foundational upper-body bodyweight movements you can do. Some may think push-ups are too easy, which is exactly why we came up with these three (3) push-up workouts to challenge even the most advanced lifters and athletes.
Before diving into the below push-up challenges, it’s a great idea to do a push-up form check and assess your push-up readiness. After all, embarking on an epic 100-rep challenge with poor form isn’t exactly accomplishing the goal you’ve landed on this page to do.
For a quick push-up tune-up and reminder, check out our push-up guide,
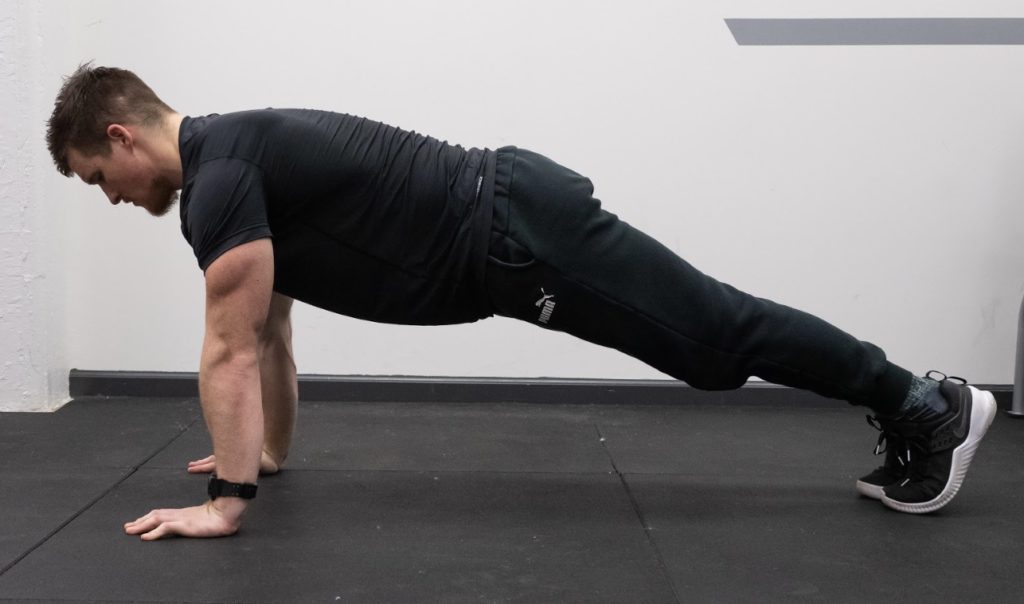
Assume a Plank Position
To perform the push-up, start at the top of the plank position with the back flat. The arms should be fully extended with the hands directly underneath the shoulder joint. The feet and thighs should be pressed actively together.
Often, beginners will place their hands too far forwards in front of them. Be sure to place the hands under the shoulder joint, maybe even slightly back towards your hips.
Coach’s Tip: Assume a plank with the torso rigid and back flat. The head should remain in a neutral position.
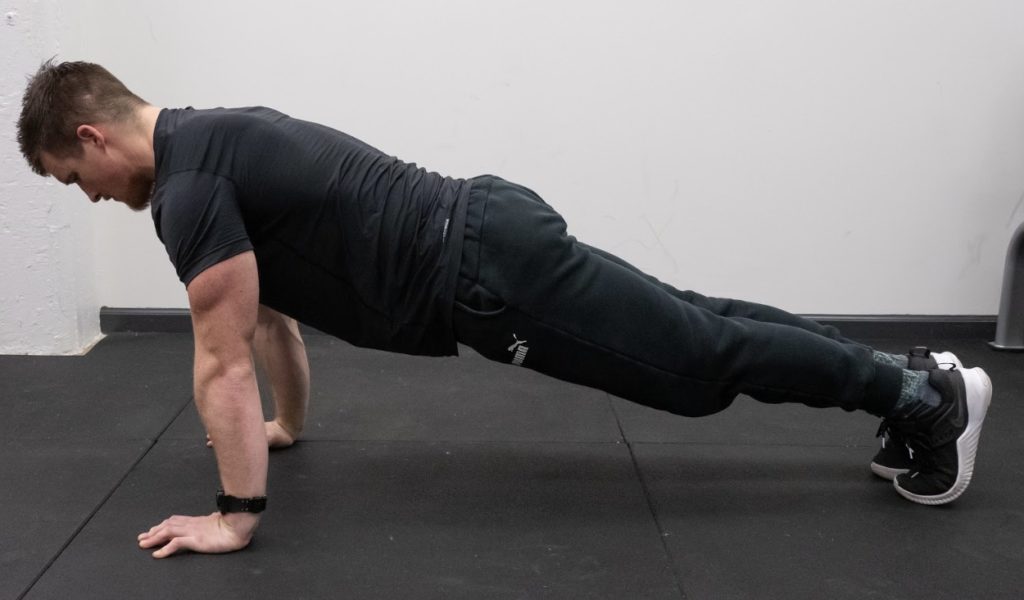
Set Your Back
While in the plank position, actively pull your shoulder blades together to create tension in the upper back. This will help stabilize the shoulder girdle and ensure proper stability in the lowering phase of the push-up.
Set the back by pulling the shoulder blades towards the hips and extending the upper back. Be sure to not let the hips sag or lower back hyperextend while in this position.
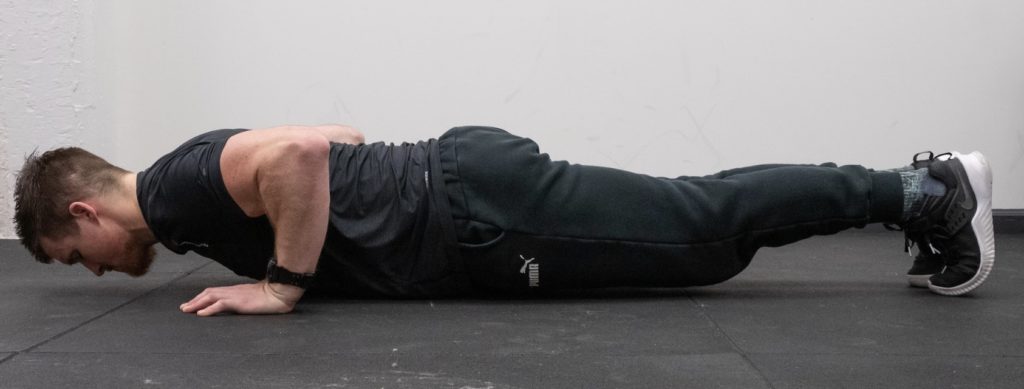
Pull Yourself to the Floor
Once you are set, think about pulling your elbows to the back, similar to a row position. This will help activate the upper back muscles and provide you with stability as you approach the bottom of the push-up.
Do not let you head or shoulders slouch forwards towards the floor. Rather, think about pulling your sternum in between your hands.
Coach’s Tip: The thighs, hips, and chest should all make contact on the floor at the same time. If these are out of order or do not occur at the same time, this may suggest sagging of the hips and/or hyperextension in the lower back.
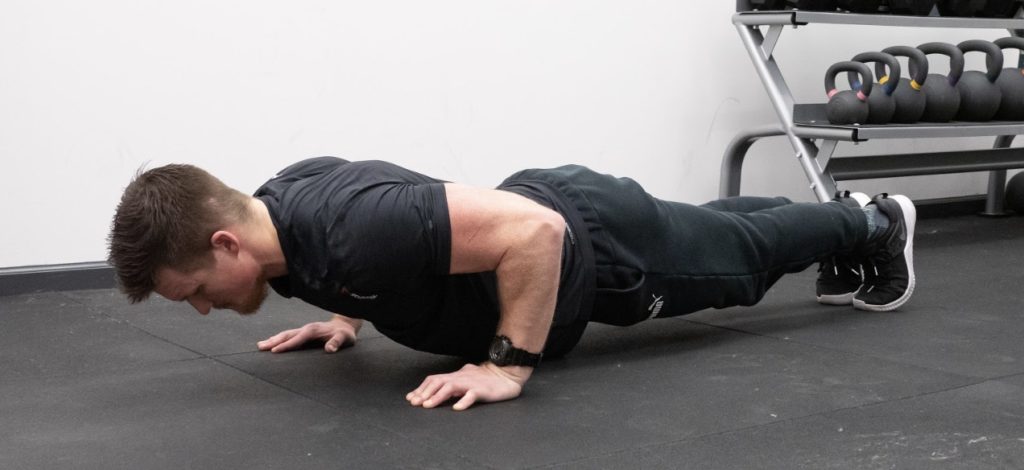
Reach Into the Floor
Once you have touched the floor, press yourself away and upwards by trying to reach your hands into the floor. By thinking about reaching, rather than pushing, you can reframe the movement to have the body find stability and strength from the upper back.
Push yourself away from the floor, and focus on keeping tension in the upper back.
Coach’s Tip: Stay rigid in the torso and be sure to not let the hips sag in the upwards movement of the push-up.
Below are three (3) push-up challenges we dare you to try.
1. 100-Rep Push-Up Challenge
This workout is a high-intensity based workout, combining high volumes with short rest periods to induce muscle growth. This is a perfect workout for those short on time and with limited equipment.
Challenge Instructions
This one is pretty basic, but brutal. Perform 100 push-ups, yet every time you break, your rest period duration is the amount of reps you have left to reach 100.
- Perform as many push-ups as you can.
- Subtract the total push-ups you just completed from 100, and that is the amount of seconds you get to rest.
- Continue in this manner tallying up each round of push-ups, and subtracting that from 100 total reps.
- Your rest periods should drastically decrease the closer you get to 100 total reps.
- Record the total time to finish all 100 reps of push-ups.
For example,
Let’s say you perform 40 push-ups in the first round, then you now have 60 seconds of rest. In the second round you perform 25 push-ups (40 + 25 = 65 total push-ups). You now have 35 reps left to reach 100 total push-ups, so you only rest 35 seconds. Repeat this method in every successive round of push-ups until you reach a total of 100 reps.
Continue to do this until you reach 100 total reps. With the rest periods being minimal at then end, driving up maximal fatigue.
Progressions and Regressions
Use the below progressions and regressions to modifying the intensity of this challenge.
- To progress this: Make the push-ups either close grip push-ups to target the triceps more, or swap in deficit push-ups to increase muscle demands on the chest. If you feel super fit, try performing this with strict handstand push-ups, just be sure to pace yourself.
- To regress this: You can perform as many rounds of regular push-ups you can until you cannot stay with the rest periods. When that happens, switch over to kneeling push-ups.
2. Push-Up Strength EMOM
This combines standard push-ups and an advanced variation — the handstand push-up. Now, I know some may not think the handstand push-up isn’t a push-up, but think again!
While the handstand push-up is done in a different plane of movement, it still stresses the upper chest, shoulders, and triceps; making it a great swap for those who don’t have weights to do incline presses and/or those looking to beef up the intensity.
Get Into Position
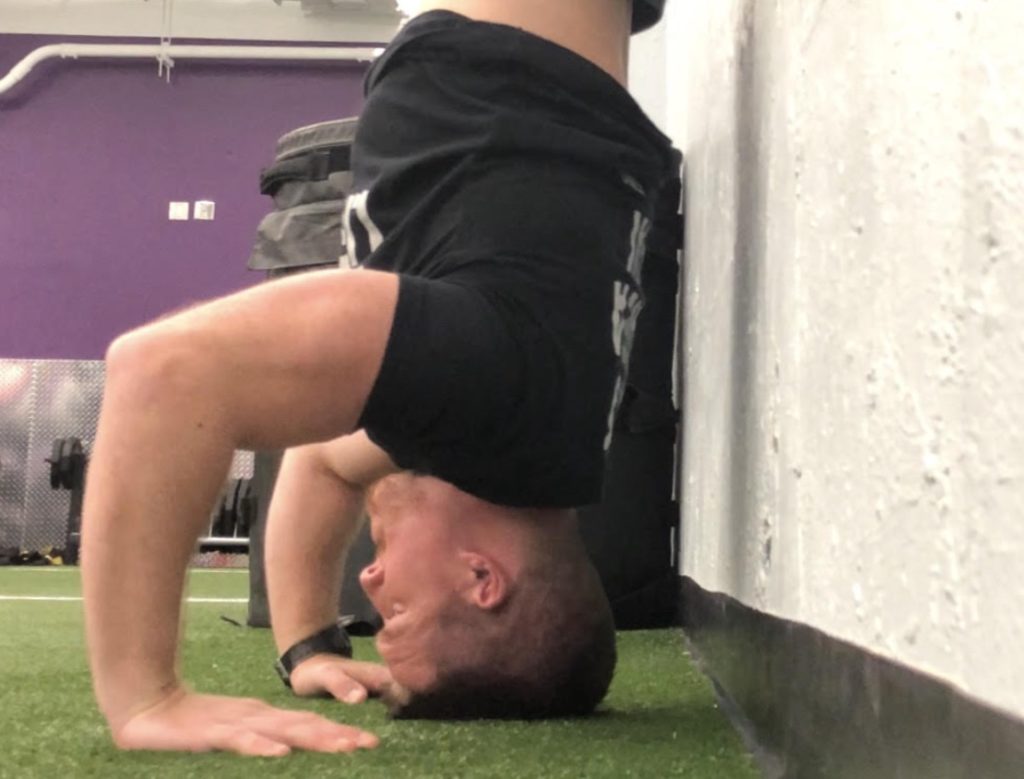
Start by placing your hands about 6 inches from the wall, slightly wider than shoulder width.
Lifters can use a pad and place it between the hands, slightly closer to the wall (for the head). Note, that the head should be closer to the wall than the hands, to create a tripod base of support. The higher the pad, the “easier” the HSPU will be.
The Kick Up
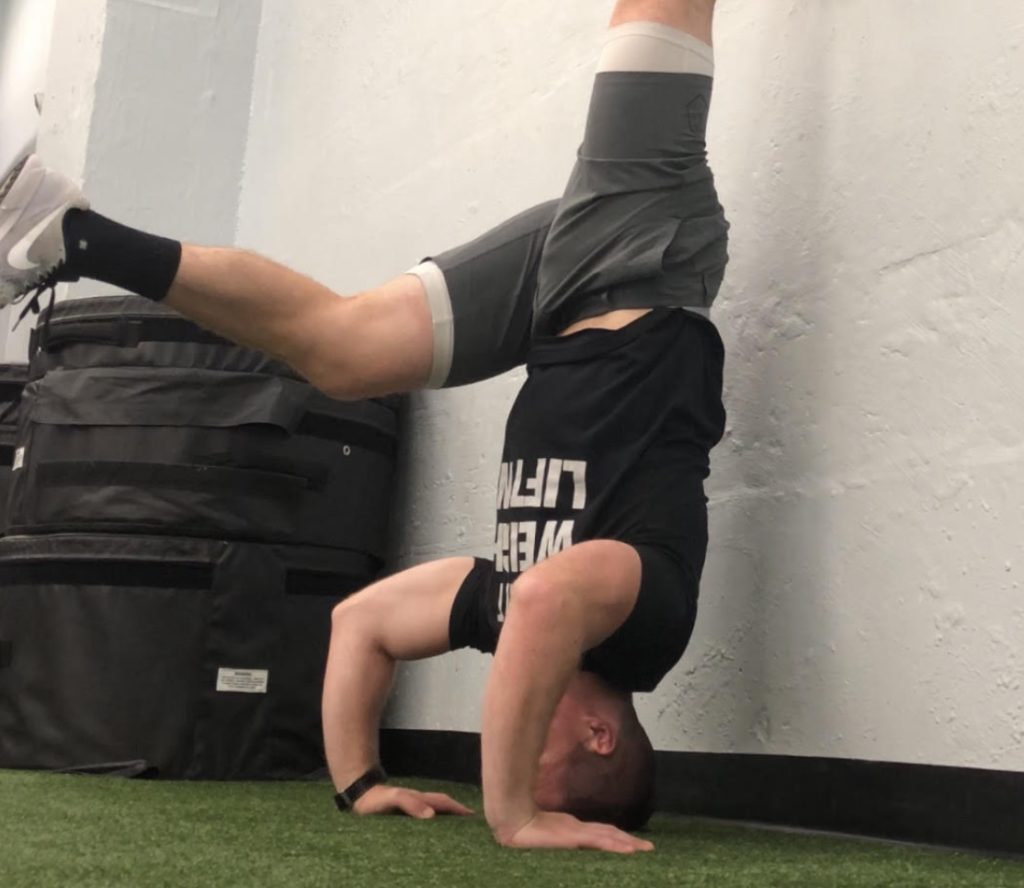
With the palms and fingers pressed into the floor, have the lifter kick one foot upwards towards the wall, with the back leg following.
This can be done by keeping the head on the pad and kicking the legs up (to start in the bottom position) or by kicking the feet upwards and keeping the arms extended (to start in the top position).
Establish an Overhead Position
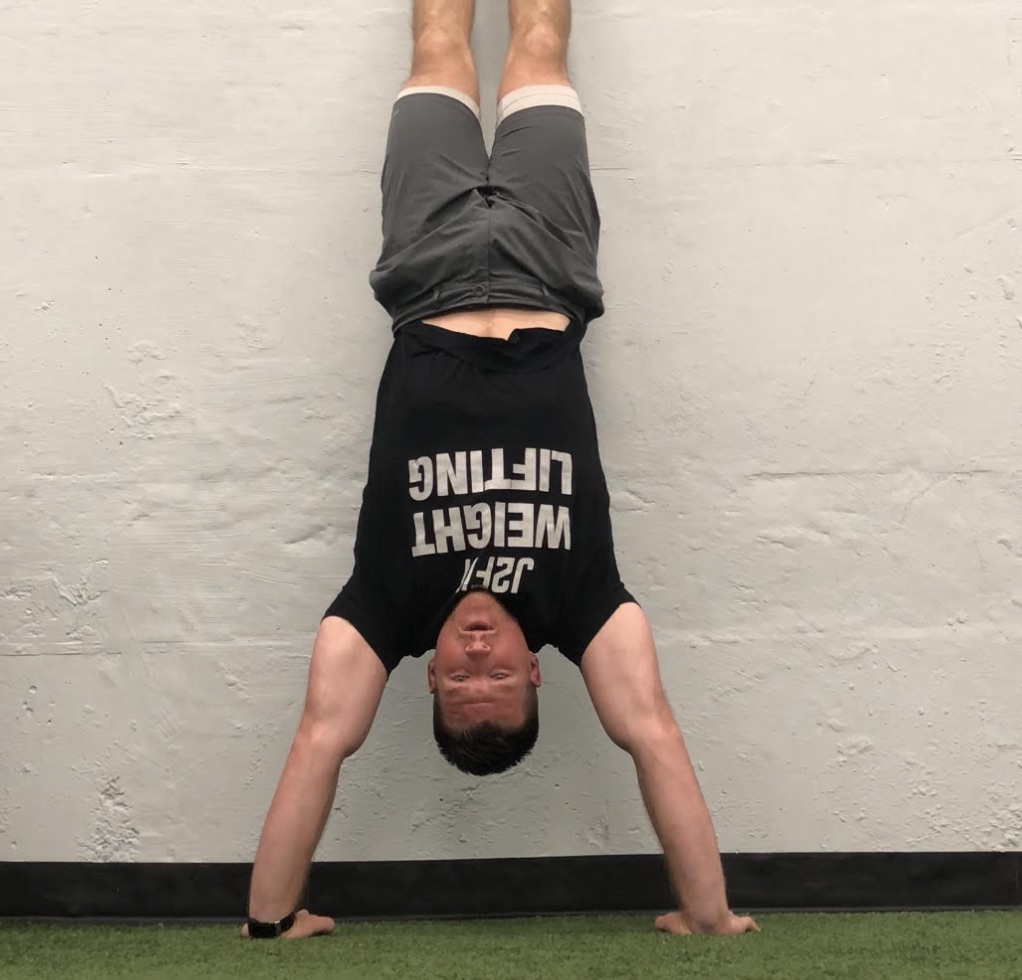
Establish a strong overhead position by pulling the belly button into the body (creating a rigid torso, similar to that in the hollow hold position).
Establishing control at the top and bottom of the movement is key, so if you cannot perform this step, perform handstand support holds for time.
The Descent
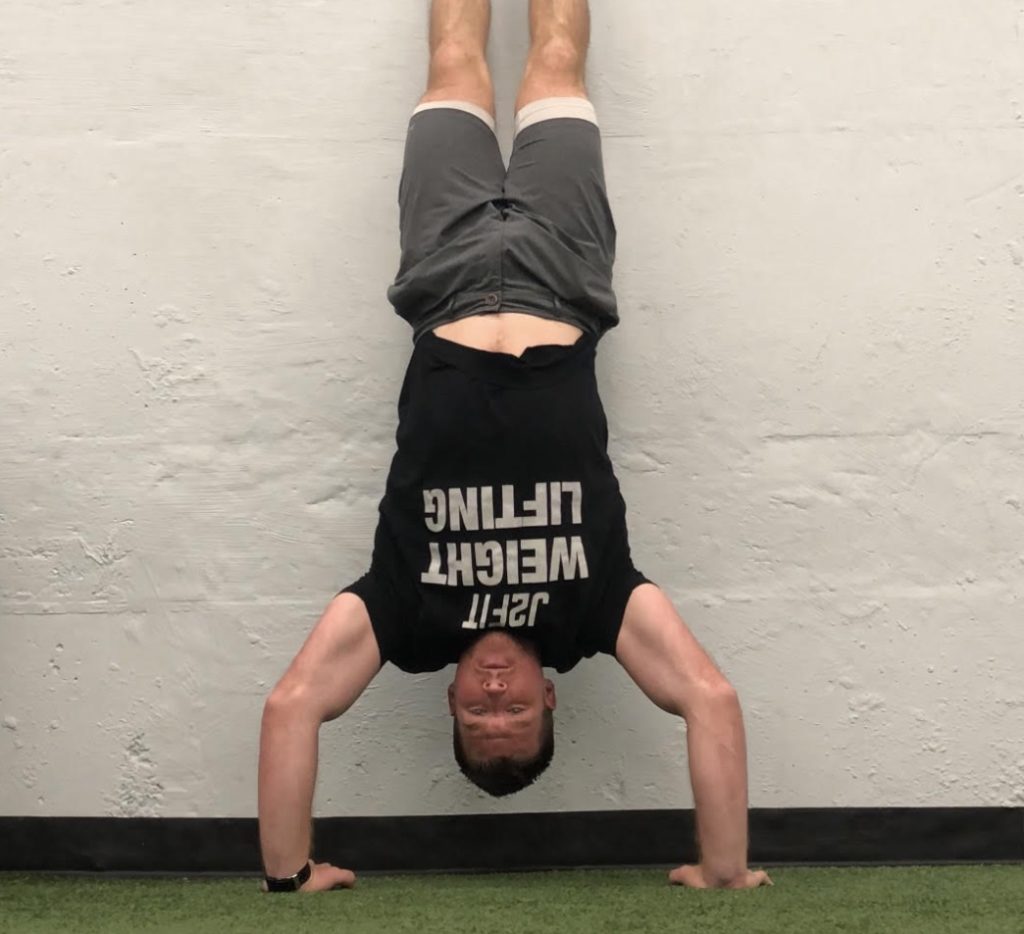
When starting from the top position, lower yourself downwards so that the head moves backwards towards the pad/wall, making sure to keep the elbows inwards on a 30-45 degree angle.
This will ensure proper loading at the bottom of the movement. If you allow your elbows to flair out you will end with the palms and head to all be in one line, which is incorrect (as you did not establish a proper tripod base of support).
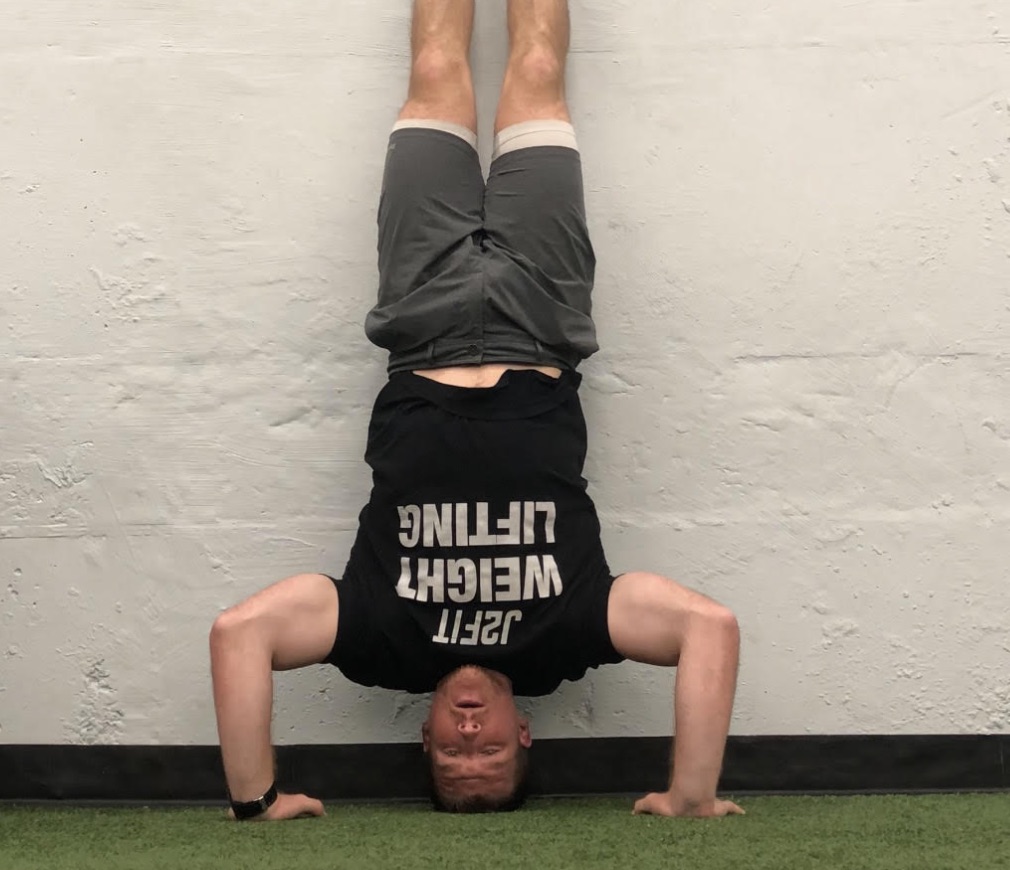
The Press
When starting from the bottom position, set the upper back and pull the elbows in on a 30-45 degree angle, making sure they do not flair outwards (as this will result in the excessive internal rotation). From here, keep the legs pressed together and core tight, and press yourself upwards.
If you started from the top of the moment, this is the exact way you will push yourself upwards from the bottom.
Challenge Instructions
This is an EMOM (every minute on the minute) workout. Every minute, perform 5 handstand push-ups and 10 push-ups for a total of 10 minutes.
10-Minute EMOM
Every minute, perform:
- 5 Handstand Push-Ups
- 10 Push-Ups
At the end of the 10-minute EMOM, you should have competed 50 handstand push-ups and 100 regular push-ups. Talk about volume.
Progressions and Regressions
Use the below progressions and regressions to modifying the intensity of this challenge. Once you can successfully accomplish all repetitions in the allotted 10-minute EMOM, you can progress to more advanced push-up variations.
- To progress this: Make the handstand push-up (strict) by performing them from deficits or parallettes. You can also make the push-ups all plyometric push-ups to really challenge yourself.
- To regress this: You can do kipping handstand push-ups or pike push-ups. You can also regress the regular push-up to a kneeling version if needed.
https://www.instagram.com/p/BxQcOxFg-C_/
3. Push-Up HIIT
This is a metabolic combination of bodyweight training, push-ups, and bike/row/ski ergometer sprints. It’s fast, it’s hard, and it’s an effective way to build muscle and burn body fat.
Challenge Instructions
Perform the following circuit 10-rounds for time. You can use the below fitness classifications to determine where you stack up.
10-Rounds for Time
- 5 Plyometric Push-Ups
- 5 Close Grip Push-Ups
- 5 Push-Ups
- 10 Calories on Bike/Rower/Ski Ergometer
If you are a BEGINNER…
Aim to finish all 10 rounds in 20 minutes or less. This is roughly performing one round every two minutes.
If you are PRETTY FIT…
Aim to finish all 10 rounds in 15 minutes or less. This is roughly performing one round every 90 seconds.
If you are a FITNESS ATHLETE…
Aim to finish all 10 rounds in 10 minutes or less. This is roughly performing one round every 60 seconds.
Progressions and Regressions
Use the below progressions and regressions to modifying the intensity of this challenge.
- To progress this: Add one repetition for every push-up variation. This will increase the total push-up volume from 15 to 20 push-ups every round. You can also keep the push-ups the same (5-5-5) and perform 12 or even 15 calories per minute instead of 10 calories, if you dare.
- To regress this: You first need to determine what part of the workout is holding you back.
Coaching Tip: If it is upper body strength, try decreasing the number of push-ups from 5 to 3 (3-3-3).
If you still cannot perform nine push-ups per round, or have issues performing plyometric push-ups or close grip push-ups, simply build up your strength with 10-15 regular push-ups per round. If you still cannot do this, perform 10-15 kneeling push-ups. And if you cannot maintain an output of 10 calories per minute on the bike/row/ski ergometer, simply drop that to 8 calories per minute.
More Push-Up Workouts and Guides
Looking for more body eight and push-up training guides and workout ideas? Check out the articles below and get training!
- 5 Types of Push-Ups for Every Fitness Goal
- Bodyweight Training for Weightlifters and Strength Athletes
Feature image from @thej2fit Instagram page.