Detailed report - Clockify Help (original) (raw)
Detailed report lets you see, export, and edit full details of all the time entries. You can open the detailed report by hovering over Reports in the Clockify sidebar and clicking Detailed.
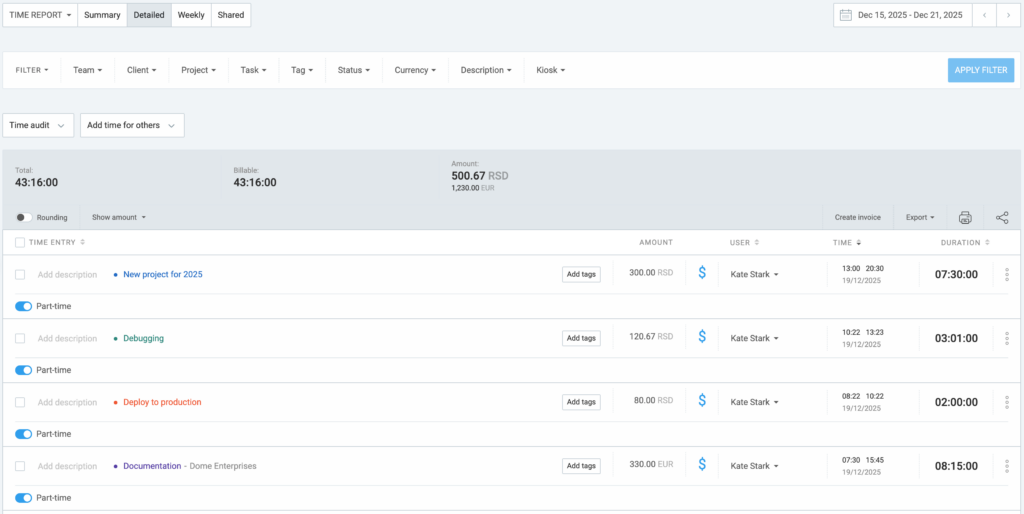
Editing time entries #
What makes Detailed report special is that admins can edit and delete time entries others made (regular members can only edit and delete time entries that belong to them). On the other hand, all users can immediately undo the ‘delete’ action from the success toast message they get after the entry is deleted.
Workspace owners and admins can add entries to archived projects on Detailed reports.
Editing time entries in the Detailed report is useful when you’re cleaning up data and want to make sure all time entries are filled out correctly. For example, you can use filters to see all time entries that are missing a project, or a tag and add them right there and even adjust the size of columns, so all data is visible and properly displayed.
Although the option to merge projects is not available, you can achieve similar results by following the instructions in the Troubleshooting section.
Exporting Detailed report #
Detailed report export is available in PDF (Free plan), or CSV/Excel (Basic plan or higher). It can be useful when you need a file that contains all the details of each time entry (project, client, description, task, user, email, tags, who approved, billable status, start date, start time, end date, end time, duration, billable rate, billable amount, currency).
The export is also useful when you need more control over grouping time entries. For example, you can export your time entries in Excel file and then slice and dice data however you want.
Like in any other time report, you can use filters, change timeframe, save and share the report, create invoice from report and print and export the results.
Include approval timestamp in export #
This feature is available to Workspace owners, admins, and managers.
When exporting Detailed reports, you can include timestamps for the following:
- When a timesheet was submitted
- When a timesheet was approved or rejected
- Who approved or rejected a timesheet
- The approval status of a submitted timesheet
To get this information on your report:
- Go to Reports > Detailed
- Click the Export button
- Select Customization
- Check the following:
- Date of creation
- Date of approval submission
- Time of approval submission
- Date of approval processing
- Time of approval processing
- Approval processed by
- Approval status
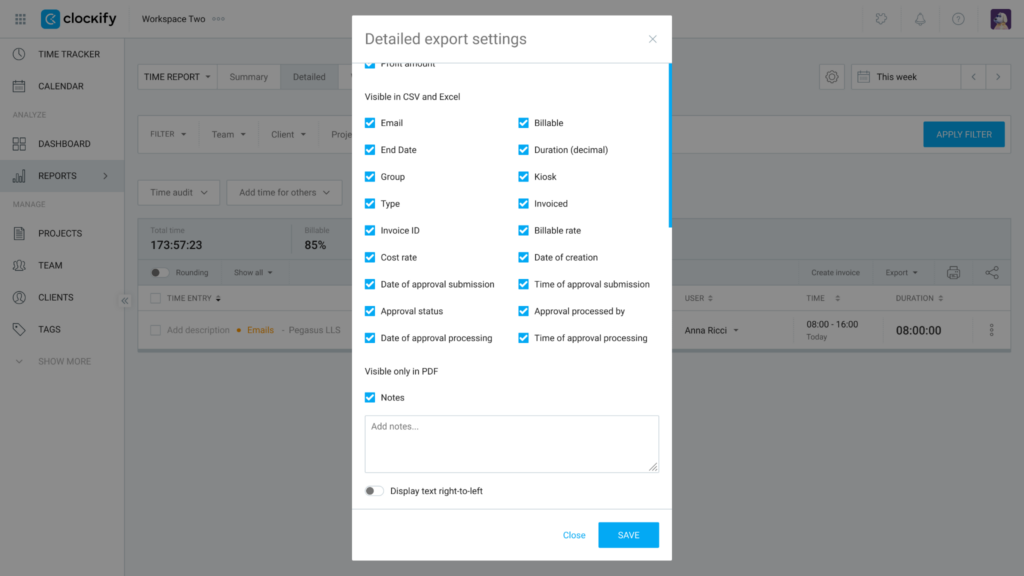
5. Click Save
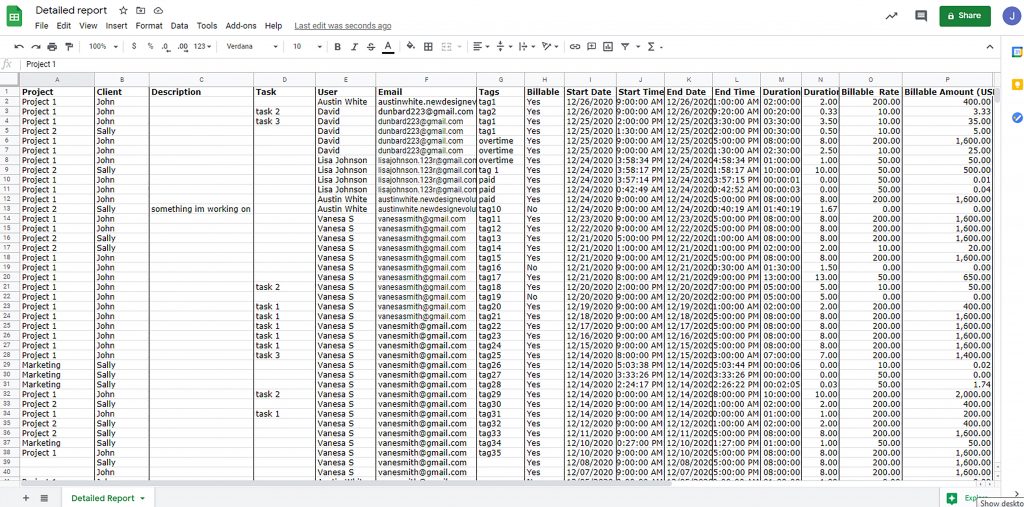
You should be able to see the columns you’ve selected in the exported file.
Example CSV file:

Adding time for others in Detailed report #
If you’re an admin, you can add time on your team members’ behalf directly from the Detailed Reports page with just a few clicks.
Adding time for others is a Basic feature, which you can enable once you upgrade your workspace to the Basic subscription plan.
- Hover over Reports on the sidebar and click Detailed
- Click Add Time For Others button
- Click Users and choose Team member for whom you’d like to add time
- Enter start and end time and pick date
- Click Add
You can also add a description, select a project, add tags, choose if the time entry is billable or not, and add custom fields.

Please note that, if the start and end time include an overnight period, there will be a superscript number next to the end time, showing how many additional days the time entry covers.
More on reports #
- If you’d like to see the reports that categorize your time and expenses by project, client, user, group, tag, or specific date, explore our Summary report.
- For an analysis of scheduled tasks versus tracked assignments, refer to the Assignments report.
- To view a detailed weekly breakdown of your tracked time and expenses, visit our Weekly report article.
Was this article helpful?
Thank you! If you’d like a member of our support team to respond to you, please drop us a note at support@clockify.me