CMake support in Visual Studio - C++ Team Blog (original) (raw)
⏱ Updated on October 5, 2017 with the latest functionality included with Visual Studio 2017 15.4
Visual Studio 2017 introduces built-in support for handling CMake projects. This makes it a lot simpler to develop C++ projects built with CMake without the need to generate VS projects and solutions from the command line. This post gives you an overview of the CMake support, how to easily get started and stay productive in Visual Studio.
Getting started with CMake in Visual Studio
To start, create a simple CMakeLists.txt file in the same folder with your cpp file as in the example below. Then, open the folder in Visual Studio (via File > Open > Folder… or devenv.exe ). Alternatively, open a folder inside VS containing one of your existing CMake projects.
Hello.cpp
#include
int main(int argc, char* argv[]) { std::cout << "Hello" << std::endl; }
CMakeLists.txt
project (hello-cmake)
add_executable(hello-cmake hello.cpp)
As soon as you start, VS will load your CMake project and you can get started coding. Here’s an overview of the different pieces of the Visual Studio 2017 UI when doing C++ development with CMake (click the picture to view larger):

What is CMake
CMake is a cross-platform open-source tool for defining build processes that run across multiple platforms by abstracting away native build environments and compilers. CMake interprets a CMakeLists.txt script the user authors and generates a build plan in a build environment of choice (e.g. Visual studio projects, make scripts, Xcode projects, etc.).
CMake has seen a tremendous uptick in the C++ community in recent years across all platforms. In our developer surveys, we have seen CMake constantly grow in usage year over year since 2012, surpassing in 2015 the make family (make/gmake/nmake) in terms of adoption.
Visual Studio support for CMake
Two initiatives that started taking shape in early 2016 marked a turning point in our planning. By this time, we already knew we wanted to tackle this problem space but we weren’t sure yet how to fix many of the challenges we heard from you.
- The first initiative, in the CMake community, was the CMake-server prototype developed initially by Stephen Kelly to improve the tooling story for CMake. This started some interesting conversation in the CMake community as well as internally in our team and it was dubbed the missing link between CMake and the IDE.
- The second one, a Visual Studio initiative (“Open Folder”) designed to enable the developer inner-loop (edit-build-debug experience) without the existing VS solution & C++ project system infrastructure, allowing non-MSBuild C++ codebases to be loaded in Visual Studio in a folder-based experience. This is now part of Visual Studio 2017 “Open Folder” C++ capability.
Visual Studio 2017 takes advantage of both functionalities to provide an end-to-end C++ development experience for CMake projects that includes:
- Reading C++ code
- Editing C++ code
- Editing CMake projects
- Configuring CMake
- Building CMake projects
- Debugging C++ code build with CMake
- Target Linux with CMake
- Opening multiple CMake projects at once
Reading C++ code
As soon as you open a folder containing a CMake project, Solution Explorer will display the files in that folder and you can open any one of them in the editor.
In the background, VS will start indexing the C++ sources in your folder. It will also run CMake.exe to collect more information about your CMake project (CMake cache will be generated in the process). CMake is invoked with a specific set of switches that are defined as part of a default CMake configuration that VS creates under the name “x86-Debug” – if this configuration is insufficient for CMake to successfully create its cache, you can further configure it: how to configure CMake is explained later in the post.
Visual Studio gives you access to all its capabilities for reading and browsing C++ code that is part of the CMake project (e.g. Find all references, Go to…, Peek definition, Semantic colorization and highlighting, Class View, Call hierarchy, etc.)

Editing C++ code
Visual Studio will rely on the folder structure and will monitor changes in the editor and on disk as needed to have C++ IntelliSense updating and assisting you with the latest information from your C++ sources.

When editing your C++ code, you can also use all of the refactoring features that Visual Studio supports for C++ e.g. Rename symbol, extract function, move definition location, change signature, convert to raw string literals, etc.

Editing CMake projects
As you make changes to your sources, or even create, rename or remove source files from your CMake projects, you don’t have to worry about manually rerunning CMake to regenerate the VS solution or projects like in previous VS releases. Visual Studio will automatically run CMake configure step and give you the most up-to-date C++ IntelliSense, language services, build and debug support.

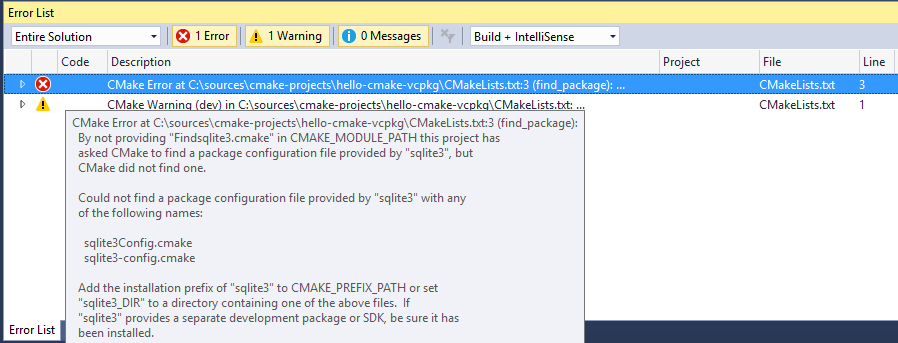
In case of a configuration error or warning, you can review these in the Error List or Output Window. Double-clicking on an error will navigate to the offending line in CMakeLists.txt in the editor.
As soon as you address any potential issues and save the file, the configuration step will automatically rerun again. If you need more information about the state of the CMake cache to diagnose a problem, there are several cache operations available either in the CMake main menu or the CMakeLists.txt context menu in Solution Explorer:
- “View Cache” will open the CMakeCache.txt file from the build root folder in the editor. You can technically edit the file and save, but we recommend following the steps in the Configure CMake section below instead to configure CMake (changes to CMakeCache.txt are wiped out if you clean the cache)
- “Open Cache Folder” will open an Explorer window to the build root folder
- “Clean Cache” will delete the build root folder allowing for the next time the CMake configure runs to run clean
- “Generate Cache” forces the generate step to rerun even if VS considers the environment up-to-date (in case you’re operating changes that are not detected by VS).
Note: If, at a given time, you don’t expect the CMake generation to succeed, you can also cancel the operation either from the yellow info-bar in the editors or by right-clicking on the root CMakeLists.txt in Solution Explorer and select “Cancel Cache Generation“. You can restart the CMake generation step later by right clicking on the CMakeLists.txt and select “Generate Cache“.
Also, when the configure step completes, the Startup Item dropdown will contain the updated list of CMake targets.

Configuring CMake
By default, Visual Studio provides four default CMake configurations (“x86-Debug”, “x86-Release”, “x64-Debug” and “x64-Release”) that define the way CMake.exe is invoked to create the CMake cache for a given CMake project (CMake cache is needed for editing and building the project).
You can switch between the available CMake configurations from the C++ Configuration dropdown in the General Tab.

When your CMake project requires additional settings for the CMake cache to create correctly, you can customize a CMake configuration or create new ones by creating/editing a CMakeSettings.json file in the same folder with the root CMakeLists.txt.
You can create the CMakeSettings.json file by selecting CMake > Change CMake Settings > path-to-CMakeLists (configuration-name) from the main menu or by right clicking on the CMakeLists.txt file in Solution Explorer and select “Change CMake Settings“.

Note: JSON IntelliSense is available to assist with editing the CMakeSettings.json file.

If you already have CMake.exe working on the command line, creating a new CMake configuration in the CMakeSettings.json should be trivial:
CMakeSettings.json example
{ "configurations": [ { "name": "my-config", "generator": "Visual Studio 15 2017", "buildRoot": "${env.LOCALAPPDATA}\CMakeBuild\${workspaceHash}\build\${name}", "cmakeCommandArgs": "", "variables": [ { "name": "VARIABLE", "value": "value" } ] } ] }
- name: is the configuration name that will show up in the C++ configuration dropdown. This property value can also be used as a macro ${name} to specify other property values e.g. see “buildRoot” definition
- generator: maps to -G switch and specifies the generator to be used. This property can also be used as a macro ${generator} to help specify other property values. VS currently supports the following CMake generators:
- “Ninja”
- “Visual Studio 14 2015”
- “Visual Studio 14 2015 ARM”
- “Visual Studio 14 2015 Win64”
- “Visual Studio 15 2017”
- “Visual Studio 15 2017 ARM”
- “Visual Studio 15 2017 Win64”
- buildRoot: maps to -DCMAKE_BINARY_DIR switch and specifies where the CMake cache will be created. If the folder does not exist, it will be created
- variables: contains a name+value pair of CMake variables that will get passed as -Dname=value to CMake. If your CMake project build instructions specify adding any variables directly to the CMake cache file, it is recommended that you add them here instead.
- cmakeCommandArgs: specifies any additional switches you want to pass to CMake.exe
- configurationType: defines the build configuration type for the selected generator. Currently supported values are “Debug”, “MinSizeRel”, “Release” and “RelWithDebInfo”
CMakeSettings.json also supports consuming environment variables in any of the properties mentioned above. The syntax to use is ${env.FOO} to expand the environment variable %FOO%.
You also have access to built-in macros inside this file:
- ${workspaceRoot} – provides the full path to the workspace folder
- ${workspaceHash} – hash of workspace location; useful for creating a unique identifier for the current workspace (e.g. to use in folder paths)
- ${projectFile} – the full path for the root CMakeLists.txt
- ${projectDir} – the full path to the folder of the root CMakeLists.txt file
- ${thisFile} – the full path to the CMakeSettings.json file
- ${name} – the name of the configuration
- ${generator} – the name of the CMake generator used in this configuration
As significant changes are made to the CMakeSettings.json or to CMakeLists.txt files, VS will automatically rerun the CMake configure step. If the configure step finishes successfully (no errors), the information collected will be available in C++ IntelliSense and language services as well as build and debug operations.
Building CMake projects
You can build a CMake project in one of 2 ways:
- Right click on the CMakeLists.txt and select Build from the context menu
- From the main menu, select Build > Build Solution (F7 or Ctrl+Shift+B) (for this to work, make sure that a CMake target is already selected in the Startup Item dropdown in the General toolbar)
When a VS generator is selected for the active configuration, MSBuild.exe is invoked with “-m -v:minimal” arguments. To customize the build, inside the CMakeSettings.json file, you can specify additional command line arguments to be passed to the build system via the “buildCommandArgs” property e.g.
"buildCommandArgs": "-m:8 -v:minimal -p:PreferredToolArchitecture=x64"
As you would expect, the results of the build are available in the Output window and any errors and warnings are available for searching, filtering and grouping in the Error List window.

You also can be specific about which CMake target you want to build (if you want to minimize the code being built) or whether you want to select a full build.

Debugging C++ binaries built with CMake
All executable CMake targets are populated in the Startup Item dropdown in the General toolbar. To start a debugging session, just select one and launch the debugger.

You can also customize the debugger settings for any executable CMake target in your project. When selecting “Debug and Launch Settings” context menu in Solution Explorer and select a specific CMake target in the sub-menu, a file called launch.vs.json is created. This file is pre-populated with information about the CMake target you have selected and allows you to specify additional parameters like program arguments or debugger type.

launch.vs.json example
{ "version": "0.2.1", "defaults": {}, "configurations": [ { "type": "default", "project": "CMakeLists.txt", "projectTarget": "tests\hellotest", "name": "tests\hellotest with args", "args": ["argument after argument"] } ] }
As soon as you save the launch.vs.json file, an entry is created in the Startup Item dropdown with the new name. By editing the launch.vs.json file, you can create as many debug configurations as you like for any number of CMake targets.

Target Linux with CMake
Visual Studio now supports targeting Linux directly with CMake:

This feature allows you to open your Linux projects without modification, edit on Windows with full IntelliSense, and build and debug on a remote Linux target. Additionally, Visual Studio handles the connection to the remote target for you, so you don’t need to worry about setting up SSH tunnels. This should make cross-platform development a breeze, because you can switch between targeting Windows and Linux by switching configurations in the dropdown. Check out the link above if you want to learn more.
Opening multiple CMake projects
Note that you don’t have to limit your experience to a single CMake project – you can open folders containing an unlimited number of CMake projects. Visual Studio will detect all the “root” CMakeLists.txt files in your workspace and configure them appropriately. CMake operations (configure, build, debug) as well as C++ IntelliSense and browsing are available to all CMake projects in your workspace.

When more than one CMake project uses the same CMake configuration name, all of them get configured and built (each in their own independent build root folder) when that particular configuration is selected. You also are able to debug the targets from all of the CMake projects that participate in that CMake configuration.

In case you prefer project isolation, you can still create CMake configurations that are unique to a specific CMakeLists.txt file (via the CMakeSettings.json file). In that case, when the particular configuration is selected, only that CMake project will be available for building and debugging and CMake-based C++ IntelliSense will only be available to its source files.
What’s next
Download Visual Studio 2017 today and try it with your favorite CMake project – no need to generate a SLN file on the command line, just point VS to the folder containing the CMakeLists.txt and let the IDE do the rest.
Please share your feedback – we’re interested in learning from you whether this experience meets your needs and how we can further improve it.
Author

Working on the C++ experience for @visualstudio, @code, @visualc compiler & libs, #vcpkg