Configure on-device developer options (original) (raw)
The Settings app on Android includes a screen called Developer options where you can configure system behaviors that help you profile and debug your app performance. For example, you can enable debugging over USB, capture a bug report, enable visual feedback for taps, flash window surfaces when they update, use the GPU for 2D graphics rendering, and more.
Enable Developer options
On Android 4.1 and lower, the Developer options screen is available by default. On Android 4.2 and higher, you must enable this screen.
Note: On some devices, the Developer options screen might be located or named differently.
- On your device, find the Build number option. The following table shows the settings location of the Build number on various devices:
Table 1. Device settings location for theBuild number optionDevice Setting Google Pixel Settings > About phone > Build number Google Pixel Watch Settings > System > About > Versions > Build number Samsung Galaxy S8 and later Settings > About phone > Software information >Build number LG G6 and later Settings > About phone > Software info > Build number HTC U11 and later Settings > About > Software information > More >Build number or Settings > System > About phone > Software information > More > Build number OnePlus 5T and later Settings > About phone > Build number - Tap the Build Number option seven times until you see the message
You are now a developer!This enables developer options on your device. - Return to the previous screen to find Developer options at the bottom.
![]()
Figure 1. On-device developer options.
At the top of the Developer options screen, you can toggle the options on and off, as shown in figure 1. Keep this on. When off, most options are disabled except those that don't require communication between the device and your development computer.
Enable debugging on your device
Before you can use the debugger and other tools, you need to enable debugging, which allows Android Studio and other SDK tools to communicate with your device. You can connect overUSB or Wi-Fi.
Enable USB debugging in the device system settings under Developer options. You can find this option in one of the following locations, depending on your Android version.
- Wear OS 6 (API level 36) and higher: Settings > Developer options > ADB debugging
- Android 9 (API level 28) and higher: Settings > System > Advanced > Developer Options > USB debugging
- Android 8.0.0 (API level 26) and Android 8.1.0 (API level 27): Settings > System > Developer Options > USB debugging
- Android 7.1 (API level 25) and lower: Settings > Developer Options > USB debugging
Enable Wi-Fi debugging in the device system settings under Developer options. You can find this option in one of the following locations, depending on your Android version.
- Android 16 (API level 36) and higher: Settings > System > Developer options > Wireless debugging
- Wear OS 6 (API level 36) and higher: Settings > Developer options > Wireless debugging
After you've enabled Wi-Fi debugging on the device, pair your device to your development computer. See Connect to a device over Wi-Fi.
General options
Tap Quick settings developer tiles to add selected developer options to your Quick Settings panel.
Once you select one or more of the available tiles, shown in figure 2, open the Quick Settings panel and tap the pencil to enter edit mode. Then, drag the developer tiles from the tiles pane onto the Quick settings panel, and tap the pencil again to exit edit mode.
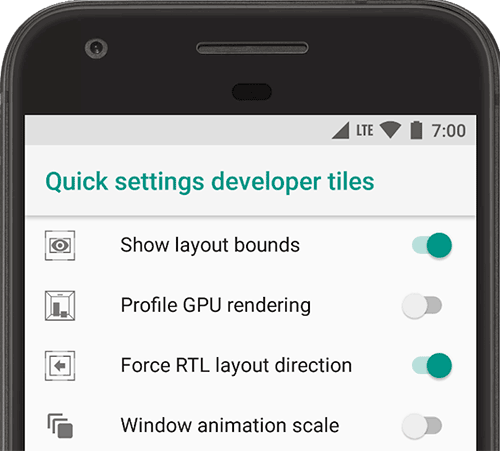
Figure 2. Add options to the Quick Settings panel.
Other general options include the following:
- Memory: Displays memory stats, such as average memory usage, memory performance, total memory available, average memory used, how much free memory is available, and how much memory apps are using.
- Take bug report: Gets a copy of the current device log files to share with someone. When you get a notification that the bug report is ready, tap the notification to share it.
- System UI demo mode: Makes it easier to take clean screenshots by displaying a generic, preset notification bar that doesn't show notifications or low battery warnings.Enable Demo Mode lets you change the appearance of the status bar using adb demo mode commands. Or you can useShow Demo Mode to hide notifications and display a preset status bar.
- Desktop backup password: Sets a backup password so you can use
adbcommands to back up and restore device apps and data under password protection. - Stay awake: Sets your screen to stay on while the device is plugged in.
- Enable Bluetooth Host Controller Interface (HCI) snoop log: Captures all Bluetooth HCI packets in a file stored at
/sdcard/btsnoop_hci.log. You can retrieve the packets and use a program like Wireshark to analyze and troubleshoot the information.
Debugging
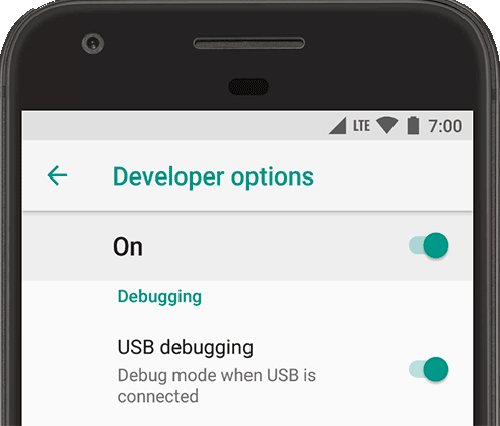
Figure 3. Debugging options enabled.
Debugging options provide ways to configure on-device debugging and to establish communication between the device and your development computer.
Enable USB debugging, as shown in figure 3, so your Android device can communicate with your development machine through Android Debug Bridge (adb). The Wait for Debugger option is unavailable until you useSelect debug app to select the app to debug. If you enable Wait for Debugger, the selected app waits for the debugger to attach before it executes.
Other debugging options include the following:
- Store logger data persistently on device: Select the type of log messages you want to store persistently on the device. The options are off, all, all but radio, or kernel only.
- Select mock location app: Use this option to fake the GPS location of the device to test whether your app behaves the same in other locations. To use this option, download and install a GPS mock location app.
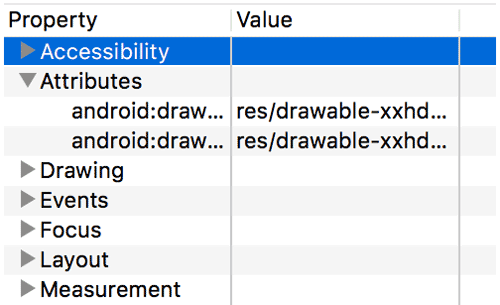
Figure 4. View attributes.
- Enable view attribute inspection: Saves view attribute information in the
mAttributesmember variable of aView instance so it can be used for debugging. You can access the attribute information through the Layout Inspector user interface, as shown in figure 4. Without this enabled, the Attributes item is not available. - Enable GPU debug layers: Available on devices running Android 9 (API level 28) and higher. Enable this option to allow Vulkan validation layers to be loaded from local device storage. To learn more, readVulkan validation layers on Android.
Networking
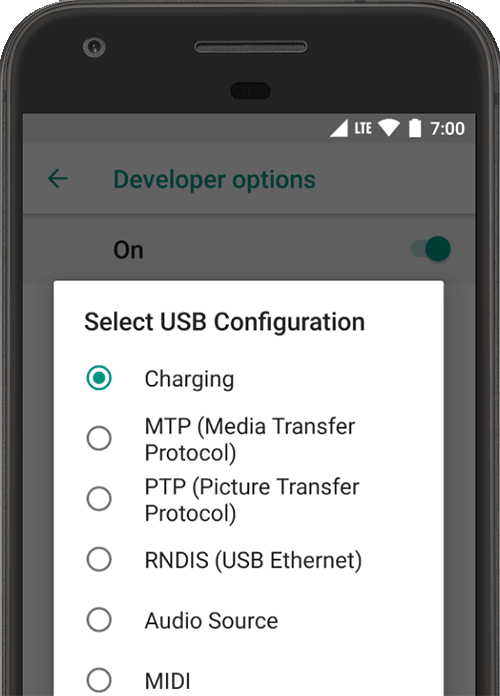
Figure 5. Select USB Configuration options.
Networking options provide ways to configure Wi-Fi and DHCP settings.
Tap Select USB Configuration to specify how you want the computer to identify the device. As shown in figure 5, you can configure devices for charging only, to transfer files (MTP), to transfer pictures (PTP), to use your mobile internet on the PC (RNDIS), or to transfer audio or MIDI files.
Tap Bluetooth AVRCP version and select the profile version you want to use to control the Bluetooth A/V equipment your device has access to.
Additionally, to fine-tune audio playback on the device, tap and set the following options:
- Bluetooth Audio Codec: Adjust the sound quality (codec) of your devices by selecting one of the following codecs:
- SBC: Transfers data to Bluetooth audio output devices such as headphones and speakers.
- AAC: Provides better sound quality from wired devices than MP3 at similar bit rates.
- aptX: Provides a wireless sound in high-quality smartphones, speakers, soundbars, headphones, and tablets.
- aptX HD: Provides high-resolution streaming to Bluetooth devices.
- LDAC: Provides high-quality music listening over wireless connections.
- Enable Optional Codecs and Disable Optional Codecs: If you have additional codec implementations installed, use these options to enable and disable them.
- Bluetooth Audio Sample Range: Adjusts the number of audio samples per second by selecting an audio codec sample rate. Higher sample rates use more resources.
- Bluetooth Audio Bits Per sample: Sets the number of bits of information in each audio sample. With a higher the bit rate, the sound is better but the sample file is larger.
- Bluetooth Audio Channel Mode: Selects mono or stereo.
- Bluetooth Audio LDAC Codec: Optimizes the sound to increase audio quality, balance audio and connection quality, increase connection quality, or use an adaptive bit rate to balance audio and connection quality.
The following list describes other ways to configure Wi-Fi and DHCP setup:
- Wireless display certification: Enables advanced configuration controls and settings for Wireless Display certification to the specifications set forth in the Wi-Fi Alliance Wi-Fi Display Specification.
- Enable Wi-Fi verbose logging: Increases the Wi-Fi logging level for each wireless network (SSID) you connect to according to its relative received signal strength (RSSI). For more information about logs, seeWrite and view logs with Logcat.
- Aggressive Wi-Fi to cellular handover: When the signal is low, makes Wi-Fi more efficient in handing over the data connection to a cellular network.
Input
Enable Show taps to display taps when you touch the screen. A circle appears under your finger or stylus and follows you as you move around the screen. A tap works like a pointer when you record a video on your device.
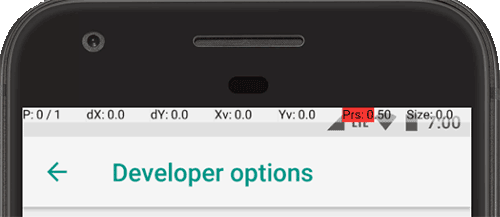
Figure 6. Pointer location bar.
Enable Pointer Location to show the pointer (tap) location on the device with cross-hairs. A bar appears across the top of the screen to track the cross-hair coordinates, as shown in figure 6. As you move the pointer, the coordinates in the bar track the cross-hair location and the pointer path draws on the screen.
Drawing
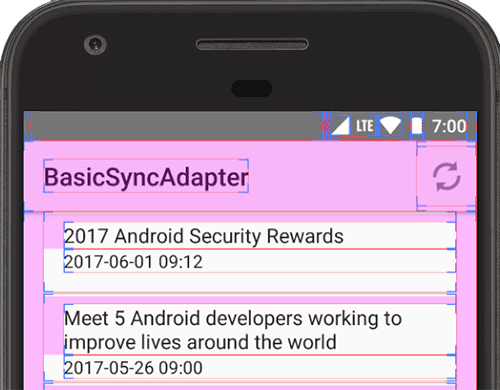
Figure 7. User interface constructions.
Drawing options provide visual cues about the app's user interface and how it operates.
Enable Show Layout Bounds to show your app's clip bounds, margins, and other user interface constructions on the device, as shown in figure 7.
Other drawing options include the following:
- Force RTL layout direction: Forces the screen layout direction to be from right to left (RTL) or from left to right (default).
- Window animation scale: Sets the window animation playback speed so you can check its performance at different speeds. A lower scale results in a faster speed.
- Transition animation scale: Sets the transition animation playback speed so you can check its performance at different speeds. A lower scale results in a faster speed.
- Simulate secondary displays: Creates a secondary display as an overlay on the device. This is useful when supporting additional displays with thePresentation API. For more information, seeSecondary displays.
Hardware-accelerated rendering
Figure 8. Deuteranomaly color space.
Hardware-accelerated rendering options provide ways to optimize your app for its target hardware platforms by leveraging hardware-based options such as the GPU, hardware layers, and multisample anti-aliasing (MSAA).
Tap Simulate color space to change the color scheme of the entire device UI. The options refer to types of color blindness. The choices are:
- Disabled (no simulated color scheme)
- Monochromacy (limits color scheme to black, white, and gray)
- Deuteranomaly (affects the display of red and green)
- Protanomaly (affects the display of red and green)
- Tritanomaly (affects the display of blue and yellow)
Protanomaly refers to red-green color blindness with weakness in red colors, and Deuteranomaly, shown in figure 8, refers to red-green color blindness with weakness in green colors.
If you take screenshots in a simulated color space, they appear normal, as if you didn't change the color scheme.
Some other ways to leverage hardware-based options are the following:
- Set GPU renderer: Changes the default Open GL graphics engine to the Open GL Skia graphics engine.
- Force GPU rendering: Forces apps to use the GPU for 2D drawing if they were written without GPU rendering by default.
- Show GPU view updates: Displays any onscreen element drawn with the GPU.
- Debug GPU overdraw: Displays color-coding on your device so you can visualize how how many times the same pixel has been drawn in the same frame. The visualization shows where your app might be doing more rendering than necessary. For more information, see Visualize GPU overdraw.
- Debug non-rectangular clip operations: Turns off the clipping area on the canvas to create unusual (non-rectangular) canvas areas. Normally, the clipping area prevents drawing anything outside the bounds of the circular clipping area.
- Force 4x MSAA: Enables multisample anti-aliasing (MSAA) in Open GL ES 2.0 apps.
- Disable HW overlays: Disables the hardware overlay. Note that using the hardware overlay lets apps that display something on the screen use less processing power. Without the overlay, apps share the video memory and have to constantly check for collision and clipping to render a proper image. The checking uses a lot of processing power.
Set Disable USB audio routing on to disable automatic routing to external audio devices connected to a computer through a USB port. Automatic routing can interfere with apps that are USB-aware.
In Android 11 and higher, when an application withoutRECORD_AUDIO permission usesUsbManager to request direct access to a USB audio device with audio capture capability (such as a USB headset), a warning message appears asking the user to confirm permission to use the device. The system ignores any "always use" option, so the user must acknowledge the warning and grant permission every time an app requests access. To avoid this behavior, your app should request theRECORD_AUDIO permission.
Monitoring
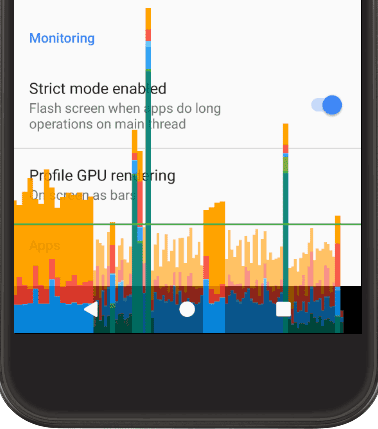
Figure 9. GPU rendering profile as bar representation.
Monitoring options provide visual information about app performance, such as long thread and GPU operations.
Tap Profile GPU Rendering and then On screen as bars to display the GPU rendering profile as bars, as shown in figure 9. For more information, see Profile GPU rendering speed.
Apps
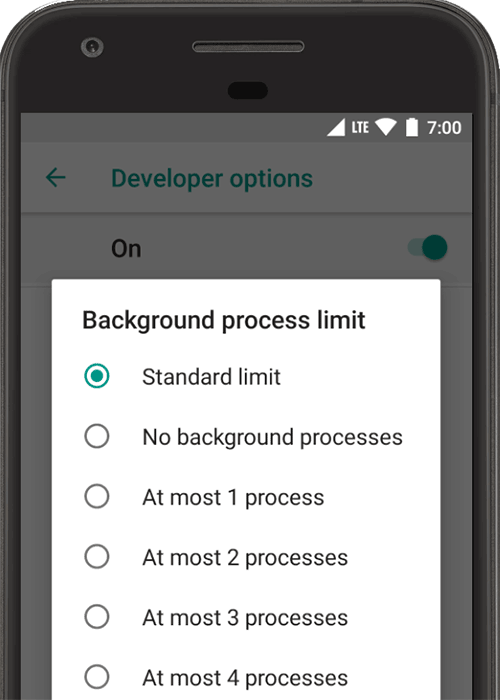
Figure 10. Set background process limit.
App options help you understand how your app operates on the target device.
Tap Background process limit to set the number of processes that can run in the background at one time. Possible settings are shown in figure 10.
Tap Reset ShortcutManager rate-limiting during testing so background apps can continue to call shortcut APIs until the rate limit is reached again. For more information about shortcuts and rate limits, seeShortcutManager.
Enable Don't keep activities to increase battery life by destroying every activity as soon as the user leaves the activity's main view.
To turn off system protections for sensitive app content for upcoming screen share sessions tap Disable screen share protections. This setting is intended to be used only for demos or testing, and should not be used as a permanent setting.