Run apps on a hardware device (original) (raw)
Always test your Android app on a real device before releasing it to users. This page describes how to set up your development environment and Android device for testing and debugging over an Android Debug Bridge (ADB) connection.
Set up a device for development
Before you can start debugging on your device, decide whether you want to connect to the device using a USB cable or Wi-Fi. Then do the following:
- On the device, open the Settings app, select Developer options, and then enable USB debugging (if applicable).
- Set up your system to detect your device.
- ChromeOS: No additional configuration required.
- macOS: No additional configuration required.
- Windows: Install a USB driver for ADB (if applicable). For an installation guide and links to OEM drivers, see Install OEM USB drivers.
- Ubuntu Linux: Set up the following:
* Each user that wants to use ADB needs to be in theplugdevgroup. If you see an error message that says you're not in theplugdevgroup, add yourself to it using the following command:
sudo usermod -aG plugdev $LOGNAMEGroups only update on login, so you must log out for this change to take effect. When you log back in, you can use
idto check that you're in theplugdevgroup.
* The system needs to haveudevrules installed that cover the device. Theandroid-sdk-platform-tools-commonpackage contains a community-maintained default set ofudevrules for Android devices. To install it, use the following command:apt-get install android-sdk-platform-tools-common
Connect to your device using USB
When you're set up and plugged in over USB, click Run  in Android Studio tobuild and run your app on the device.
You can also use adb to issue commands, as follows:
- Verify that your device is connected by running the
adb devicescommand from yourandroid_sdk/platform-tools/directory. If connected, you'll see the device listed. - Issue any adb command with the
-dflag to target your device.
Connect to your device using Wi-Fi
Android 11 and higher supports deploying and debugging your app wirelessly from your workstation via Android Debug Bridge (ADB). For example, you can deploy your debuggable app to multiple remote devices without physically connecting your device via USB and contending with common USB connection issues, such as driver installation.
To use wireless debugging, you need to pair your device to your workstation using a pairing code. To begin, complete the following steps:
- Ensure that your workstation and device are connected to the same wireless network.
- Ensure that your device is running Android 11 or higher. For more information, see Check & update your Android version.
- Ensure that you have the latest version of Android Studio installed.Download it here.
- On your workstation, update to the latest version of theSDK Platform Tools.
To connect to your device, follow these steps:
- Open Android Studio and select Pair Devices Using Wi-Fi from the run configurations menu.
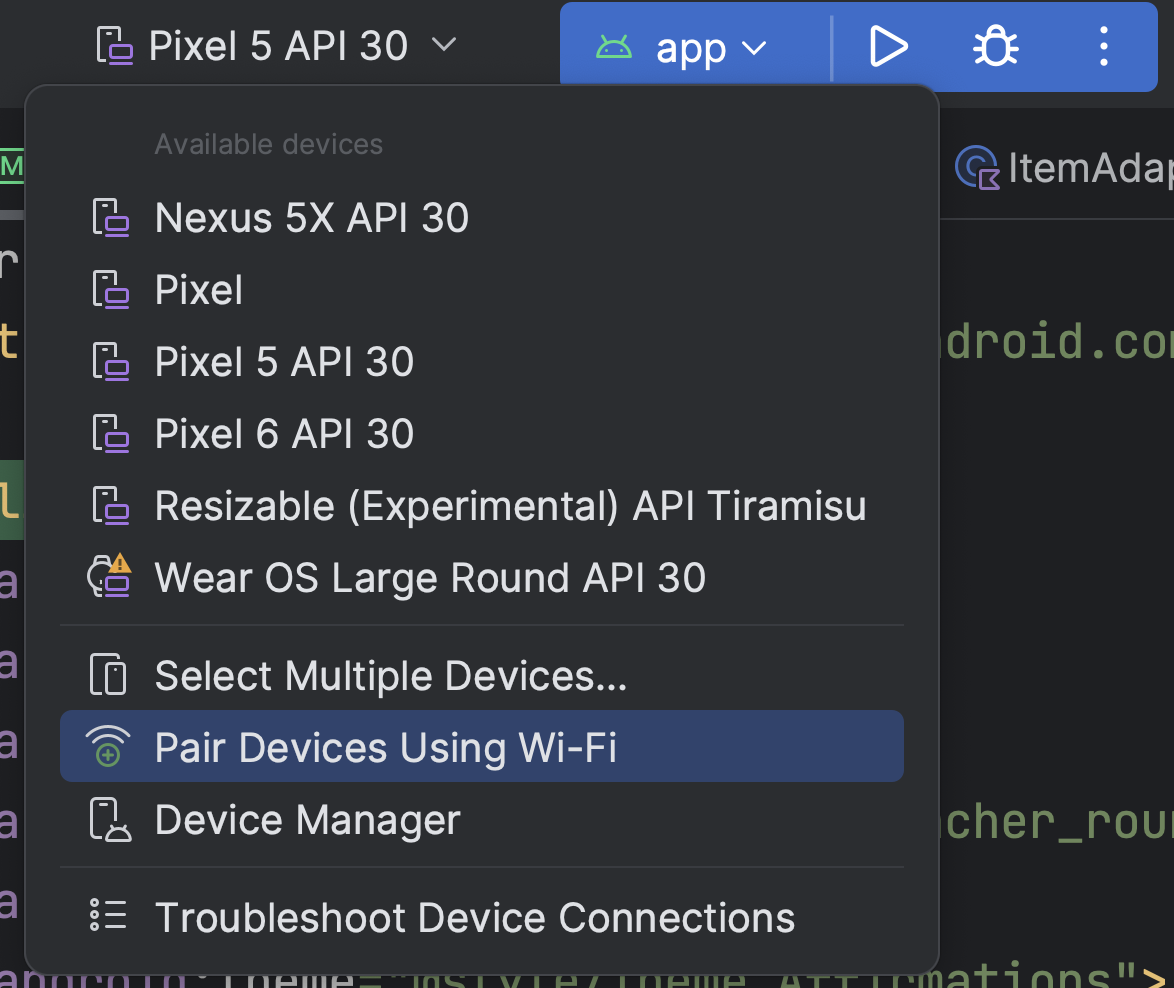
Figure 1. Run configurations menu.
The Pair devices over Wi-Fi dialog appears, as shown in figure 2.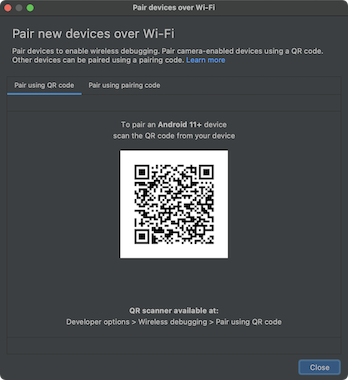
Figure 2. Dialog to pair devices using QR code or pairing code.
2. Enable developer optionson your device.
3. Enable debugging over Wi-Fion your device.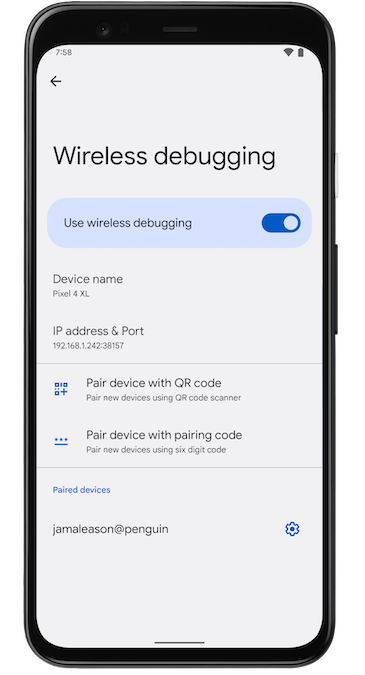
Figure 3. TheWireless debugging setting on a Google Pixel phone.
4. Tap Wireless debugging and pair your device:
- To pair your device with a QR code, select Pair device with QR codeand scan the QR code, shown in figure 2.
- To pair your device with a pairing code, select Pair device with pairing code from the Pair new devices over Wi-Fi dialog. On your device, select Pair using pairing code. A six-digit code appears. Once your device appears on thePair devices over Wi-Fi window, enter the six-digit code shown on your device and select Pair .
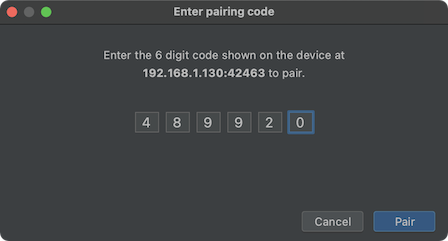
Figure 4. Example of six-digit pairing code entry. - After pairing, you can attempt to deploy your app to your device.
To pair a different device or to forget this device on your workstation:
- Navigate to Wireless debugging on your device.
- Tap your workstation name under Paired devices.
- Select Forget.
Device mirroring
You can mirror your physical device in the Running Devices window in Android Studio. By streaming your device's display directly to Android Studio, you can use the Studio IDE itself to execute common actions such as starting apps and interacting with them, rotating the screen, folding and unfolding the phone, and changing the volume.
Device mirroring is always available when there are devices connected to the computer that have USB or wireless debugging enabled. You can start and stop mirroring using the Running Devices window or the Device Manager(View > Tool Windows > Device Manager). You can also customize when device mirroring is activated in its settings (Settings > Tools > Device Mirroring).
Redirect audio
When you're using device mirroring, you can redirect audio from connected physical devices to your computer speakers or headphones. With audio redirection, keep your headphones connected to your computer and listen to both the computer and connected phone without having to manually reconnect to one device and then another. To enable audio redirection, go to File (Android Studio on macOS) > Settings > Tools > Device Mirroring and selectRedirect audio from local devices. Note that audio is always redirected, regardless of the settings, for Firebase Test Lab devices running Android 12 or higher.
Known issues
Some devices might not be capable of encoding at a bitrate sufficient to support device mirroring. In these situations, you might see an error in theRunning Devices window as well as logs similar to the following.
2023-06-01 15:32:22,675 [  56094]   WARN - ScreenSharingAgent Samsung SM-A045F API 33 - Too many video encoder errors:
2023-06-01 15:32:22,676 [  56095]   WARN - ScreenSharingAgent Samsung SM-A045F API 33 - encoder: c2.android.vp8.encoder
2023-06-01 15:32:22,676 [  56095]   WARN - ScreenSharingAgent Samsung SM-A045F API 33 - mime type: video/x-vnd.on2.vp8
2023-06-01 15:32:22,676 [  56095]   WARN - ScreenSharingAgent Samsung SM-A045F API 33 - max resolution: 640x640
2023-06-01 15:32:22,676 [  56095]   WARN - ScreenSharingAgent Samsung SM-A045F API 33 - min resolution: 2x2
2023-06-01 15:32:22,676 [  56095]   WARN - ScreenSharingAgent Samsung SM-A045F API 33 - alignment: 2x2
2023-06-01 15:32:22,676 [  56095]   WARN - ScreenSharingAgent Samsung SM-A045F API 33 - max frame rate: 960
2023-06-01 15:32:22,676 [  56095]   WARN - ScreenSharingAgent Samsung SM-A045F API 33 - max frame rate for 288x640: 960
2023-06-01 15:32:22,870 [  56289]   WARN - ScreenSharingAgent Samsung SM-A045F API 33 - max bitrate: 20000000
2023-06-01 15:32:22,871 [  56290]   WARN - ScreenSharingAgent Samsung SM-A045F API 33 - terminated with code 1
Privacy notice
Based on the device mirroring settings, Android Studio can automatically start device mirroring for any connected and paired device. This might result in information disclosure for devices connected with the adb tcpip command because the mirroring information and commands are passed over a non-encrypted channel. In addition, Android Studio uses a non-encrypted channel to communicate with the adb server, so mirroring information can be intercepted by other users on your host machine.
Troubleshoot device connection
If your device is not connecting to Android Studio, try the following steps to resolve the issue:
Troubleshoot with the Connection Assistant
The Connection Assistant provides step-by-step instructions to help you set up and use a device over the ADB connection.
To start the assistant, choose Tools > Troubleshoot Device Connections.
The Connection Assistant provides instructions, in-context controls, and a list of connected devices in a series of pages in the Assistant panel. Use theNext and Previous buttons at the bottom of the Assistant panel to work through the pages as needed:
- Connect your device over USB: The Connection Assistant first prompts you to connect your device over USB and provides a Rescan USB devicesbutton where you can start a new scan for connected devices.
- Enable USB debugging: The Connection Assistant then tells you how to enable USB debugging in the on-device developer options.
- Restart the ADB server: If you still don't see your device on the list of available devices, use the Restart ADB server button on the last page of the Connection Assistant. Restarting the ADB server also causes ADB to scan for devices again. If you still don't see your device on the list of available devices, try the troubleshooting steps in the following section.
Resolve USB connection issues
If the Connection Assistant doesn't detect your device over USB, try the following troubleshooting steps to resolve the issue:
Check that Android Studio connects to the Android Emulator
To check whether the issue is being caused by a connection problem between Android Studio and the Android Emulator, follow these steps:
- Open the Device Manager.
- Create a new AVD if you don't already have one.
- Run the emulator using your AVD.
- Do one of the following:
- If Android Studio can't connect to the emulator, download the latestSDK Platform Toolsand then try again.
- If the emulator starts successfully, check the USB cable as described in the following section.
Check the USB cable
To check whether the issue is being caused by a faulty USB cable, follow the steps in this section.
If you have another USB cable:
- Connect the device using the secondary cable.
- Check whether the Connection Assistant can now detect the device.
- If the device is not detected, try the primary cable again.
- If the device still isn't detected, assume that the problem is with the device, andcheck whether the device is set up for developmentas described in the following section.
If you don't have another USB cable but you do have another Android device:
- Connect the secondary device to your computer.
- If the Connection Assistant can detect the secondary device, assume that the problem is with the primary device, andcheck whether the device is set up for development.
If the secondary device is not detected, the problem might be with the USB cable.
Check whether the device is set up for development
To check whether the issue is being caused by settings on the device, follow these steps:
- Follow the steps in the Set up a device for developmentsection.
- If this doesn't resolve the problem, contact the device OEM's customer support for help. Tell the customer support representative that the device doesn't connect to Android Studio using ADB.
Resolve wireless connection issues
If you are having issues connecting to your device wirelessly, you can try the following troubleshooting steps to resolve the issue:
Check whether your workstation and device meet the prerequisites
To meet the prerequisites for wireless debugging, ensure that:
- Your workstation and device are connected to the same wireless network.
- Your device is running Android 11 or higher. For more information, seeCheck & update your Android version.
- You have the latest version of Android Studio. You can download it from the main Android Studio page.
- You have the latest version of theSDK Platform Tools on your workstation.
Check for other known issues
The following is a list of current known issues with wireless debugging in Android Studio and how to resolve them:
- Wi-Fi is not connecting: Some Wi-Fi networks, such as corporate Wi-Fi networks, may block p2p connections and not let you connect over Wi-Fi. Try connecting with a cable or another Wi-Fi network.
- ADB over Wi-Fi sometimes turns off automatically: This can happen if the device either switches Wi-Fi networks or disconnects from the network.
RSA security key
When you connect a device running Android 4.2.2 (API level 17) or higher to your computer, the system shows a dialog asking whether to accept an RSA key that allows debugging through this computer. This security mechanism protects user devices because USB debugging and other adb commands can't be executed unless you're able to unlock the device and acknowledge the dialog.