Change settings (original) (raw)
Change your Docker Desktop settings
To navigate to Settings either:
- Select the Docker menu
 and then Settings
 - Select the Settings icon from the Docker Desktop Dashboard.
You can also locate the settings-store.json file (or settings.json for Docker Desktop versions 4.34 and earlier) at:
- Mac:
~/Library/Group\ Containers/group.com.docker/settings-store.json - Windows:
C:\Users\[USERNAME]\AppData\Roaming\Docker\settings-store.json - Linux:
~/.docker/desktop/settings-store.json
On the General tab, you can configure when to start Docker and specify other settings:
- Start Docker Desktop when you sign in to your computer. Select to automatically start Docker Desktop when you sign in to your machine.
- Open Docker Dashboard when Docker Desktop starts. Select to automatically open the dashboard when starting Docker Desktop.
- Choose theme for Docker Desktop. Choose whether you want to apply a Light or Dark theme to Docker Desktop. Alternatively you can set Docker Desktop to Use system settings.
- Configure shell completions. Automatically edits your shell configuration and gives you word completion for commands, flags, and Docker objects (such as container and volume names) when you hit
<Tab>as you type into your terminal. For more information, seeCompletion. - Choose container terminal. Determines which terminal is launched when opening the terminal from a container. If you choose the integrated terminal, you can run commands in a running container straight from the Docker Desktop Dashboard. For more information, seeExplore containers.
- Enable Docker terminal. Interact with your host machine and execute commands directly from Docker Desktop.
- Enable Docker Debug by default. Check this option to use Docker Debug by default when accessing the integrated terminal. For more information, seeExplore containers.
- Mac only Include VM in Time Machine backups. Select to back up the Docker Desktop virtual machine. This option is turned off by default.
- Use containerd for pulling and storing images. Turns on the containerd image store. This brings new features like faster container startup performance by lazy-pulling images, and the ability to run Wasm applications with Docker. For more information, seecontainerd image store.
- Windows only Expose daemon on tcp://localhost:2375 without TLS. Check this option to enable legacy clients to connect to the Docker daemon. You must use this option with caution as exposing the daemon without TLS can result in remote code execution attacks.
- Windows only Use the WSL 2 based engine. WSL 2 provides better performance than the Hyper-V backend. For more information, seeDocker Desktop WSL 2 backend.
- Windows only Add the
*.docker.internalnames to the host's/etc/hostsfile (Password required). Lets you resolve*.docker.internalDNS names from both the host and your containers. - Mac only Choose Virtual Machine Manager (VMM). Choose the Virtual Machine Manager for creating and managing the Docker Desktop Linux VM.
- Select Docker VMM for the latest and most performant Hypervisor/Virtual Machine Manager. This option is available only on Apple Silicon Macs running macOS 12.5 or later and is currently in Beta.
Turn this setting on to make Docker Desktop run faster.
- Alternatively, you can choose Apple Virtualization framework, QEMU (for Apple Silicon in Docker Desktop version 4.43 and earlier), or HyperKit (for Intel Macs). For macOS 12.5 and later, Apple Virtualization framework is the default setting.
For more information, seeVirtual Machine Manager.
- Select Docker VMM for the latest and most performant Hypervisor/Virtual Machine Manager. This option is available only on Apple Silicon Macs running macOS 12.5 or later and is currently in Beta.
- Mac only Choose file sharing implementation for your containers. Choose whether you want to share files using VirtioFS, gRPC FUSE, or osxfs (Legacy). VirtioFS is only available for macOS 12.5 and later, and is turned on by default.
Use VirtioFS for speedy file sharing. VirtioFS has reduced the time taken to complete filesystem operations by up to 98%. It is the only file sharing implementation supported by Docker VMM.
- Mac only Use Rosetta for x86_64/amd64 emulation on Apple Silicon. Turns on Rosetta to accelerate x86/AMD64 binary emulation on Apple Silicon. This option is only available if you have selected Apple Virtualization framework as the Virtual Machine Manager. You must also be on macOS 13 or later.
- Send usage statistics. Select so Docker Desktop sends diagnostics, crash reports, and usage data. This information helps Docker improve and troubleshoot the application. Clear the checkbox to opt out. Docker may periodically prompt you for more information.
- Use Enhanced Container Isolation. Select to enhance security by preventing containers from breaching the Linux VM. For more information, seeEnhanced Container Isolation.
This setting is only available if you are signed in to Docker Desktop and have a Docker Business subscription.
- Show CLI hints. Displays CLI hints and tips when running Docker commands in the CLI. This is turned on by default. To turn CLI hints on or off from the CLI, set
DOCKER_CLI_HINTStotrueorfalserespectively. - Enable Scout image analysis. When this option is enabled, inspecting an image in Docker Desktop shows a Start analysis button that, when selected, analyzes the image with Docker Scout.
- Enable background SBOM indexing. When this option is enabled, Docker Scout automatically analyzes images that you build or pull.
- Mac only Automatically check configuration. Regularly checks your configuration to ensure no unexpected changes have been made by another application.
Docker Desktop checks if your setup, configured during installation, has been altered by external apps like Orbstack. Docker Desktop checks:- The symlinks of Docker binaries to
/usr/local/bin. - The symlink of the default Docker socket. Additionally, Docker Desktop ensures that the context is switched to
desktop-linuxon startup.
You are notified if changes are found and are able to restore the configuration directly from the notification. For more information, see theFAQs.
- The symlinks of Docker binaries to
The Resources tab allows you to configure CPU, memory, disk, proxies, network, and other resources.
Advanced
On Windows, the Resource allocation options in the Advanced tab are only available in Hyper-V mode, because Windows manages the resources in WSL 2 mode and Windows container mode. In WSL 2 mode, you can configure limits on the memory, CPU, and swap size allocated to the WSL 2 utility VM.
On the Advanced tab, you can limit resources available to the Docker Linux VM.
Advanced settings are:
- CPU limit. Specify the maximum number of CPUs to be used by Docker Desktop. By default, Docker Desktop is set to use all the processors available on the host machine.
- Memory limit. By default, Docker Desktop is set to use up to 50% of your host's memory. To increase the RAM, set this to a higher number; to decrease it, lower the number.
- Swap. Configure swap file size as needed. The default is 1 GB.
- Disk usage limit. Specify the maximum amount of disk space the engine can use.
- Disk image location. Specify the location of the Linux volume where containers and images are stored.
You can also move the disk image to a different location. If you attempt to move a disk image to a location that already has one, you are asked if you want to use the existing image or replace it.
If you feel Docker Desktop starting to get slow or you're running multi-container workloads, increase the memory and disk image space allocation
- Resource Saver. Enable or disableResource Saver mode, which significantly reduces CPU and memory utilization on the host by automatically turning off the Linux VM when Docker Desktop is idle (i.e., no containers are running).
You can also configure the Resource Saver timeout which indicates how long should Docker Desktop be idle before Resource Saver mode kicks in. Default is 5 minutes.Exit from Resource Saver mode occurs automatically when containers run. Exit may take a few seconds (~3 to 10 secs) as Docker Desktop restarts the Linux VM.
File sharing
On Windows, the File sharing tab is only available in Hyper-V mode because the files are automatically shared in WSL 2 mode and Windows container mode.
Use File sharing to allow local directories on your machine to be shared with Linux containers. This is especially useful for editing source code in an IDE on the host while running and testing the code in a container.
Synchronized file shares
Synchronized file shares is an alternative file sharing mechanism that provides fast and flexible host-to-VM file sharing, enhancing bind mount performance through the use of synchronized filesystem caches. Available with Pro, Team, and Business subscriptions.
To learn more, seeSynchronized file share.
Virtual file shares
By default the /Users, /Volumes, /private, /tmp and /var/folders directory are shared. If your project is outside this directory then it must be added to the list, otherwise you may get Mounts denied or cannot start service errors at runtime.
File share settings are:
- Add a Directory. Select
+and navigate to the directory you want to add. - Remove a Directory. Select
-next to the directory you want to remove - Apply makes the directory available to containers using Docker's bind mount (
-v) feature.
- Share only the directories that you need with the container. File sharing introduces overhead as any changes to the files on the host need to be notified to the Linux VM. Sharing too many files can lead to high CPU load and slow filesystem performance.
- Shared folders are designed to allow application code to be edited on the host while being executed in containers. For non-code items such as cache directories or databases, the performance will be much better if they are stored in the Linux VM, using adata volume(named volume) ordata container.
- If you share the whole of your home directory into a container, MacOS may prompt you to give Docker access to personal areas of your home directory such as your Reminders or Downloads.
- By default, Mac file systems are case-insensitive while Linux is case-sensitive. On Linux, it is possible to create two separate files:
testandTest, while on Mac these filenames would actually refer to the same underlying file. This can lead to problems where an app works correctly on a developer's machine (where the file contents are shared) but fails when run in Linux in production (where the file contents are distinct). To avoid this, Docker Desktop insists that all shared files are accessed as their original case. Therefore, if a file is created calledtest, it must be opened astest. Attempts to openTestwill fail with the error "No such file or directory". Similarly, once a file calledtestis created, attempts to create a second file calledTestwill fail.For more information, seeVolume mounting requires file sharing for any project directories outside of /Users
Shared folders on demand
On Windows, you can share a folder "on demand" the first time a particular folder is used by a container.
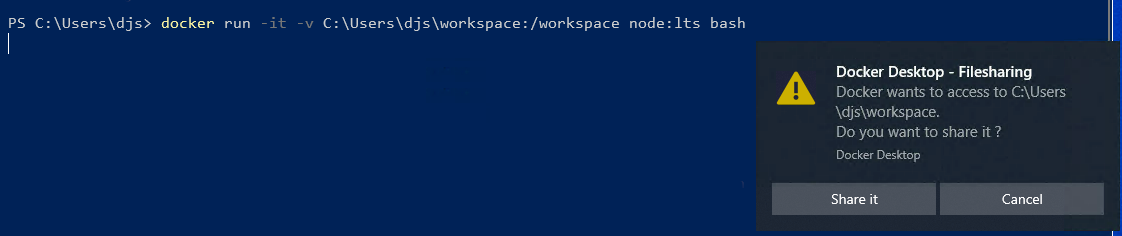
If you run a Docker command from a shell with a volume mount (as shown in the example below) or kick off a Compose file that includes volume mounts, you get a popup asking if you want to share the specified folder.
You can select to Share it, in which case it is added to your Docker Desktop Shared Folders list and available to containers. Alternatively, you can opt not to share it by selecting Cancel.
Proxies
Docker Desktop supports the use of HTTP/HTTPS andSOCKS5 proxies.
HTTP/HTTPS proxies can be used when:
- Signing in to Docker
- Pulling or pushing images
- Fetching artifacts during image builds
- Containers interact with the external network
- Scanning images
If the host uses a HTTP/HTTPS proxy configuration (static or via Proxy Auto-Configuration (PAC)), Docker Desktop reads this configuration and automatically uses these settings for signing in to Docker, for pulling and pushing images, and for container Internet access. If the proxy requires authorization then Docker Desktop dynamically asks the developer for a username and password. All passwords are stored securely in the OS credential store. Note that only the Basic proxy authentication method is supported so we recommend using an https://URL of your HTTP/HTTPS proxies to protect passwords while in transit on the network. Docker Desktop supports TLS 1.3 when communicating with proxies.
To set a different proxy for Docker Desktop, turn on Manual proxy configuration and enter a single upstream proxy URL of the form http://proxy:port or https://proxy:port.
To prevent developers from accidentally changing the proxy settings, seeSettings Management.
The HTTPS proxy settings used for scanning images are set using the HTTPS_PROXY environment variable.
If you are using a PAC file hosted on a web server, make sure to add the MIME type
application/x-ns-proxy-autoconfigfor the.pacfile extension on the server or website. Without this configuration, the PAC file may not be parsed correctly. For more details on PAC files and Docker Desktop, seeHardened Docker Desktop
You cannot configure the proxy settings using the Docker daemon configuration file (
daemon.json), and we recommend you do not configure the proxy settings via the Docker CLI configuration file (config.json).To manage proxy configurations for Docker Desktop, configure the settings in the Docker Desktop app or useSettings Management.
Proxy authentication
Basic authentication
If your proxy uses Basic authentication, Docker Desktop prompts developers for a username and password and caches the credentials. All passwords are stored securely in the OS credential store. It will request re-authentication if that cache is removed.
It's recommended that you use an https:// URL of HTTP/HTTPS proxies to protect passwords during network transit. Docker Desktop also supports TLS 1.3 for communication with proxies.
Kerberos and NTLM authentication
Available for Docker Business subscribers with Docker Desktop for Windows version 4.30 and later.
Developers are no longer interrupted by prompts for proxy credentials as authentication is centralized. This also reduces the risk of account lockouts due to incorrect sign in attempts.
If your proxy offers multiple authentication schemes in 407 (Proxy Authentication Required) response, Docker Desktop by default selects the Basic authentication scheme.
For Docker Desktop version 4.30 to 4.31:
To enable Kerberos or NTLM proxy authentication, no additional configuration is needed beyond specifying the proxy IP address and port.
For Docker Desktop version 4.32 and later:
To enable Kerberos or NTLM proxy authentication you must pass the --proxy-enable-kerberosntlm installer flag during installation via the command line, and ensure your proxy server is properly configured for Kerberos or NTLM authentication.
Network
On Windows, the Network tab isn't available in the Windows container mode because Windows manages networking.
Docker Desktop uses a private IPv4 network for internal services such as a DNS server and an HTTP proxy. In case Docker Desktop's choice of subnet clashes with IPs in your environment, you can specify a custom subnet using the Network setting.
On Windows and Mac, you can also set the default networking mode and DNS resolution behavior. For more information, seeNetworking.
On Mac, you can also select the Use kernel networking for UDP setting. This lets you use a more efficient kernel networking path for UDP. This may not be compatible with your VPN software.
WSL Integration
On Windows in WSL 2 mode, you can configure which WSL 2 distributions will have the Docker WSL integration.
By default, the integration is enabled on your default WSL distribution. To change your default WSL distribution, run wsl --set-default <distribution name>. (For example, to set Ubuntu as your default WSL distribution, run wsl --set-default ubuntu).
You can also select any additional distributions you would like to enable the WSL 2 integration on.
For more details on configuring Docker Desktop to use WSL 2, seeDocker Desktop WSL 2 backend.
The Docker Engine tab allows you to configure the Docker daemon used to run containers with Docker Desktop.
You configure the daemon using a JSON configuration file. Here's what the file might look like:
You can find this file at $HOME/.docker/daemon.json. To change the configuration, either edit the JSON configuration directly from the dashboard in Docker Desktop, or open and edit the file using your favorite text editor.
To see the full list of possible configuration options, see thedockerd command reference.
Select Apply to save your settings.
If you have turned on theDocker Desktop Builds view, you can use theBuilders tab to inspect and manage builders in the Docker Desktop settings.
Inspect
To inspect builders, find the builder that you want to inspect and select the expand icon. You can only inspect active builders.
Inspecting an active builder shows:
- BuildKit version
- Status
- Driver type
- Supported capabilities and platforms
- Disk usage
- Endpoint address
Select a different builder
The Selected builder section displays the selected builder. To select a different builder:
- Find the builder that you want to use under Available builders
- Open the drop-down menu next to the builder's name.
- Select Use to switch to this builder.
Your build commands now use the selected builder by default.
Create a builder
To create a builder, use the Docker CLI. SeeCreate a new builder
Remove a builder
You can remove a builder if:
- The builder isn't yourselected builder
- The builder isn'tassociated with a Docker context.
To remove builders associated with a Docker context, remove the context using thedocker context rmcommand.
To remove a builder:
- Find the builder that you want to remove under Available builders
- Open the drop-down menu.
- Select Remove to remove this builder.
If the builder uses the docker-container or kubernetes driver, the build cache is also removed, along with the builder.
Stop and start a builder
Builders that use thedocker-container driverrun the BuildKit daemon in a container. You can start and stop the BuildKit container using the drop-down menu.
Running a build automatically starts the container if it's stopped.
You can only start and stop builders using the docker-container driver.
On Windows the Kubernetes tab is not available in Windows container mode.
Docker Desktop includes a standalone Kubernetes server, so that you can test deploying your Docker workloads on Kubernetes. To turn on Kubernetes support and install a standalone instance of Kubernetes running as a Docker container, select Enable Kubernetes.
With Docker Desktop version 4.38 and later, you can choose your cluster provisioning method:
- Kubeadm creates a single-node cluster and the version is set by Docker Desktop.
- kind creates a multi-node cluster and you can set the version and number of nodes.
Select Show system containers (advanced) to view internal containers when using Docker commands.
Select Reset Kubernetes cluster to delete all stacks and Kubernetes resources.
For more information about using the Kubernetes integration with Docker Desktop, seeDeploy on Kubernetes.
The Software updates tab lets you manage your Docker Desktop updates. When there's a new update, you can choose to download the update right away, or select the Release Notes option to learn what's included in the updated version.
The Automatically check for updates setting notifies you of any updates available to Docker Desktop in the Docker menu and the footer of the Docker Desktop Dashboard. This is turned on by default.
To allow Docker Desktop to automatically download new updates in the background, select Always download updates. This downloads newer versions of Docker Desktop when an update becomes available. After downloading the update, selectApply and restart to install the update. You can do this either through the Docker menu or in the Updates section in the Docker Desktop Dashboard.
The Automatically update components setting checks whether components of Docker Desktop, such as Docker Compose, Docker Scout, and the Docker CLI, can be updated independently without the need for a full restart. This is turned on by default.
Use the Extensions tab to:
- Enable Docker Extensions
- Allow only extensions distributed through the Docker Marketplace
- Show Docker Extensions system containers
For more information about Docker extensions, seeExtensions.
Beta features provide access to future product functionality. These features are intended for testing and feedback only as they may change between releases without warning or remove them entirely from a future release. Beta features must not be used in production environments. Docker doesn't offer support for beta features.
You can also sign up to the Developer Preview program from the Beta features tab.
For a list of current experimental features in the Docker CLI, see Docker CLI Experimental features.
For Docker Desktop versions 4.41 and earlier, there is also an Experimental features tab under the Features in development page.
As with beta features, experimental features must not be used in production environments. Docker does not offer support for experimental features.
Use the Notifications tab to turn on or turn off notifications for the following events:
- Status updates on tasks and processes
- Recommendations from Docker
- Docker announcements
- Docker surveys
By default, all general notifications are turned on. You'll always receive error notifications and notifications about new Docker Desktop releases and updates.
You can alsoconfigure notification settings for Docker Scout-related issues.
Notifications momentarily appear in the lower-right of the Docker Desktop Dashboard and then move to the Notifications drawer which can be accessed from the top-right of the Docker Desktop Dashboard.
On Mac, you can reconfigure your initial installation settings on the Advanced tab:
- Choose how to configure the installation of Docker's CLI tools.
- System: Docker CLI tools are installed in the system directory under
/usr/local/bin - User: Docker CLI tools are installed in the user directory under
$HOME/.docker/bin. You must then add$HOME/.docker/binto your PATH. To add$HOME/.docker/binto your path:
1. Open your shell configuration file. This is~/.bashrcif you're using a bash shell, or~/.zshrcif you're using a zsh shell.
2. Copy and paste the following:
3. Save and the close the file. Restart your shell to apply the changes to the PATH variable.
- System: Docker CLI tools are installed in the system directory under
- Allow the default Docker socket to be used (Requires password). Creates
/var/run/docker.sockwhich some third party clients may use to communicate with Docker Desktop. For more information, seepermission requirements for macOS. - Allow privileged port mapping (Requires password). Starts the privileged helper process which binds the ports that are between 1 and 1024. For more information, seepermission requirements for macOS.
For more information on each configuration and use case, seePermission requirements.