FUJIFILM X RAW STUDIO - Features & Users Guide | X Stories | FUJIFILM X Series & GFX - Germany (original) (raw)


![]()

“FUJIFILM X RAW STUDIO” is Fujifilm’s new RAW conversion software which offers alternative functionality to existing RAW conversion software. Once a compatible digital camera has been connected to a computer, “FUJIFILM X RAW STUDIO” allows users to:
- Quickly convert RAW files. Converting RAW files with FUJIFILM X RAW STUDIO takes around the same time as taking a photo on the camera, regardless of the performance of your computer, because the FUJIFILM X RAW STUDIO system utilizes the image processor in the camera instead of the CPU in the computer.
- Retain the exceptional image quality from the camera, including the tonality, color reproduction and noise reduction.

Compatibility
Please note, the RAW conversion is only compatible with a RAW file taken by the same camera model as the camera connected to the computer. For example, if the connected camera is a FUJIFILM X-T2, the RAW file must be taken by a FUJIFILM X-T2.
User Guide 1
-Preparing for RAW conversion
1. Put the camera in USB RAW CONVERSION mode.
Following the instructions in the camera’s Owner’s Manual or New Feature Guide, put the camera in to USB RAW CONVERSION mode under the SET UP menu.
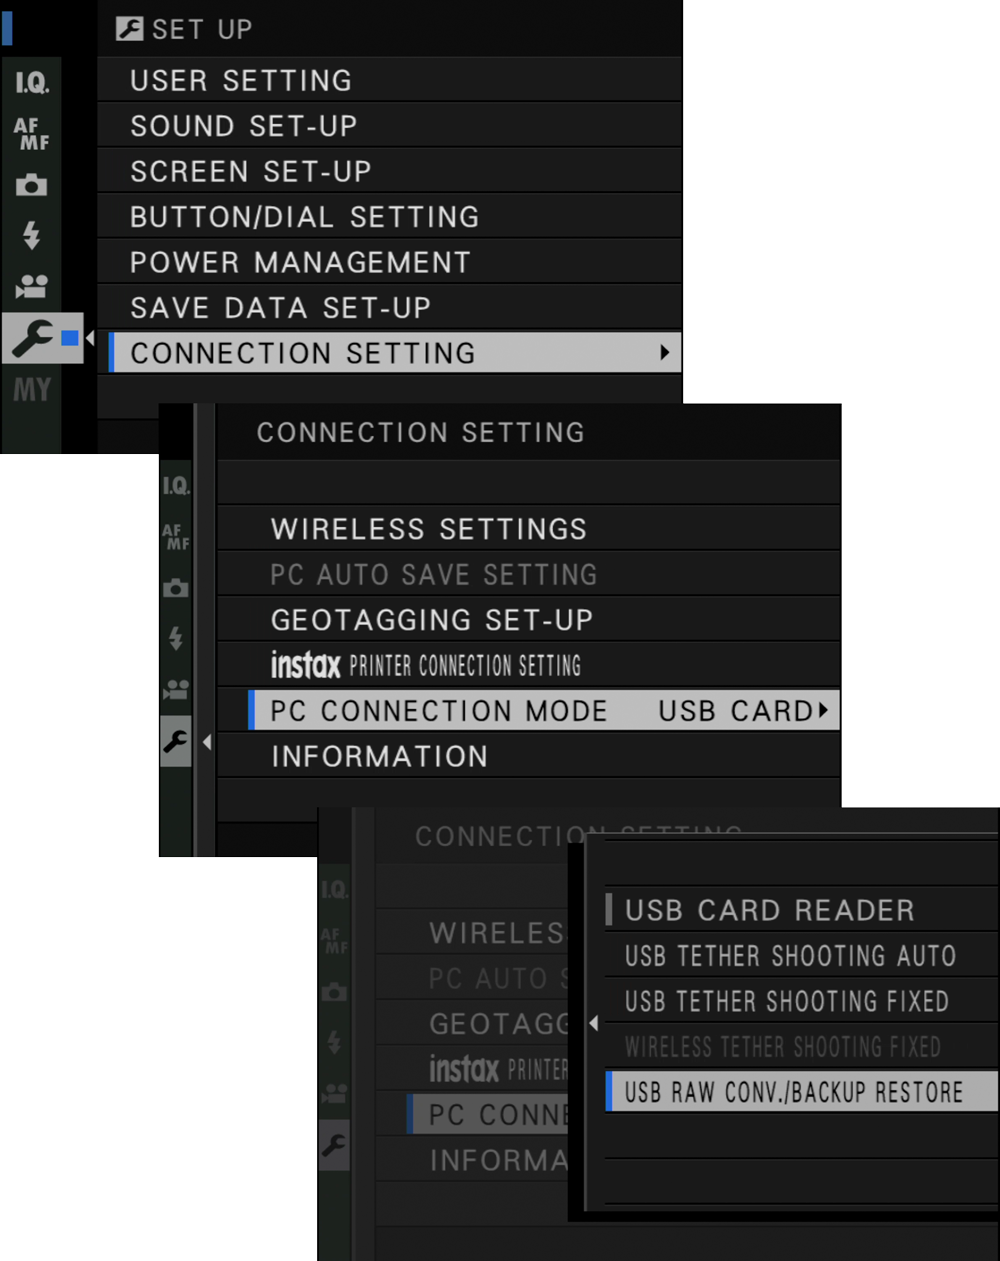
* The image is an example for FUJIFILM GFX 50S Ver.2.00 or FUJIFILM X-T2 Ver.3.00. The structure and the name of the menu are different from the image between models. Refer the instructions in the Owner’s Manual or New Feature Guide in detail.
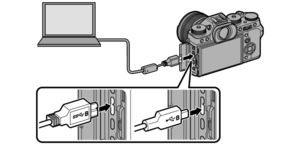
2. Connect the camera with your Mac or PC via USB cable
Use a USB cable to connect the camera with your Mac or PC. If the camera and your Mac or PC are compatible with USB3.0, connecting via USB3.0 cable is recommended. USB3.0 cable allows you to convert RAW files in a shorter time.
3. Turn the camera ON
Turn the power switch of the camera ON. The back LCD monitor of the camera will be suppressed and the LED will flash green.
The power saving feature of the camera does not work when it is connected in the USB RAW CONVERSION mode so you will need to make sure the camera has enough battery for the RAW conversion process. The battery level can be checked at the FUJIFILM X RAW STUDIO window.
* FUJIFILM X-T2 and X100F are driven with USB bus power assist.
1. Launch the FUJIFILM X RAW STUDIO
Double-click the FUJIFILM X RAW STUDIO icon in the Applications folder to launch.

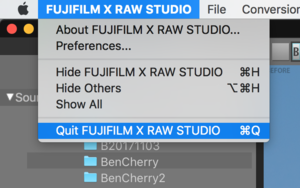
1. Close the FUJIFILM X RAW STUDIO
(Mac) Select “Quit FUJIFILM X RAW STUDIO” from the “FUJIFILM X RAW STUDIO” menu.
(Windows) Select “Exit” from the “File” menu.


⑬ Single View Mode
⑭ Before (B) / After (A) View Mode
⑮ Zoom Selection
⑯ Actual Pixels Mode
⑰ Actual Pixels Mode
⑱ Zoom-in Tool
⑲ Zoom-out Tool
⑳ Hand Tool

㉑ File Type Filter Selection
㉒ Camera Model Filter Selection
㉓ Thumbnail Order Selection
 : Thumbnail order by file name (ascending order) : Thumbnail order by file name (ascending order) |
|---|
 : Thumbnail order by file name (descending order) : Thumbnail order by file name (descending order) |
 : Thumbnail order by file size (ascending order) : Thumbnail order by file size (ascending order) |
 : Thumbnail order by file size (descending order) : Thumbnail order by file size (descending order) |
 : Thumbnail order by file type (ascending order) : Thumbnail order by file type (ascending order) |
 : Thumbnail order by file type (descending order) : Thumbnail order by file type (descending order) |
 : Thumbnail order by timestamp (ascending order) : Thumbnail order by timestamp (ascending order) |
 : Thumbnail order by timestamp (descending order) : Thumbnail order by timestamp (descending order) |
1. Check that the model of the connected camera matches the camera model the images were taken on, under “Connected Camera Information”

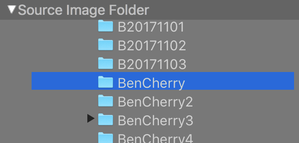
2. Select a source image folder under the “Source Image Folder Pane”
RAW files have to be saved onto the SSD or HDD of the computer.
3. Select a single RAW file to be converted under the “Thumbnail View”.
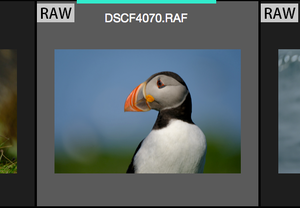
When a RAW file is selected, a color bar will be displayed above the thumbnail. The selected image will be displayed in the “Preview Pane”
4. Adjust the conversion settings under the “Conversion Settings Pane”.
Once you have selected the conversion settings, the image in the “Preview Pane” will be updated to reflect these changes.
The conversion settings applied will automatically be saved as a “Profile” in to the same folder as the RAW file. An image with a “Profile” applied is indicated by the * mark on the thumbnail.
5. Select single/multiple RAW files under the “Thumbnail View” and then convert them.
Select single/multiple RAW files on the “Thumbnail View” and then click “Convert” button to convert them into JPEG or TIFF files (RAW files taken by FUJIFILM GFX 50S support conversion into TIFF format).


The converted images are saved in to the same folder as the original RAW file.
* RAW conversion is only compatible with a RAW file taken by the same model as the connected camera.
* RAW conversion requires the use of the camera’s battery. You will need to ensure there is enough charge in the battery to process the conversions. You can check the battery level of the camera under the “Battery Level of the Connected Camera”. FUJIFILM X-T2 and X100F are driven with USB bus power assist.
User Guide 5-
Shortcut Key
The list below is the shortcut keys for FUJIFILM X RAW STUDIO Ver.1.1
⌘ Command
⌥ Option / Alt
⇧ Shift
^ Control
Souce Image Folder Pane
| Mac | Windows | |
|---|---|---|
| Refresh Folder List | ⌘ R | Ctrl R |
RAW Conversion
| Mac | Windows | |
|---|---|---|
| Copy Conversion Profile | ⌘ C | Ctrl C |
| Paste Conversion Profile | ⌘ V | Ctrl V |
| Register Conversion Profile | ⌘ V | Ctrl S |
| Undo | ⌘ Z | Ctrl Z |
| Redo | ⌘ Y | Ctrl Y |
| Convert | ⌘ D | Ctrl D |
Preview Pane
| Mac | Windows | |
|---|---|---|
| Zoom In | ⌘ . | Ctrl . |
| Zoom Out | ⌘, | Ctrl, |
| Hand Tool | H | H |
| Fit to | ^Z | Shift Z |
| 400% | ⌘3 | Ctrl 3 |
| 300% | ⌘2 | Ctrl 2 |
| 200% | ⌘1 | Ctrl 1 |
| 100% | Z | Z |
| 66.7% | ^⌘1 | Ctrl Shift 1 |
| 50% | ^⌘2 | Ctrl Shift 2 |
| 33.3% | ^⌘3 | Ctrl Shift 3 |
| 25% | ^⌘4 | Ctrl Shift 4 |
| 16.7% | ^⌘5 | Ctrl Shift 5 |
| 12.5% | ^⌘6 | Ctrl Shift 6 |
| 8.33% | ^⌘7 | Ctrl Shift 7 |
| 6.25% | ^⌘8 | Ctrl Shift 8 |
| 5% | ^⌘9 | Ctrl Shift 9 |
| Fit on Screen | -Z | Shift Z |
| Actual Pixels | Z | Z |
| Before / After | Y | Y |
Thumbnail View
| Mac | Windows | |
|---|---|---|
| List All | L | L |
| List Target File Only | ⌥ V | Alt L |
| List RAW File Only | ⌘ L | Ctrl L |
| Sort in File Name (Descending Order) | ⇧⌥⌘ 1 | Ctrl Alt Shift 1 |
| Sort in File Name (Ascending Order) | ⌥⌘ 1 | Ctrl Alt 1 |
| Sort in Timestamp (Descending Order) | ⇧⌥⌘ 5 | Ctrl Alt Shift 5 |
| Sort in Timestamp (Ascending Order) | ⌥⌘ 5 | Ctrl Alt 5 |
| Sort in File (Descending Order) | ⇧⌥⌘ 6 | Ctrl Alt Shift 6 |
| Sort in File Size (Ascending Order) | ⌥⌘ 6 | Ctrl Alt 6 |
| Sort in File Type (Descending Order) | ⇧⌥⌘ 2 | Ctrl Alt Shift 2 |
| Sort in File Type (Ascending Order) | ⌥⌘ 2 | Ctrl Alt 2 |
| Link Original RAW File | ⌘ A | Ctrl A |
| Select All | R | R |