GitHub - decacent/PyNanoLab: all in one GUI software for data analysis and visualization (original) (raw)
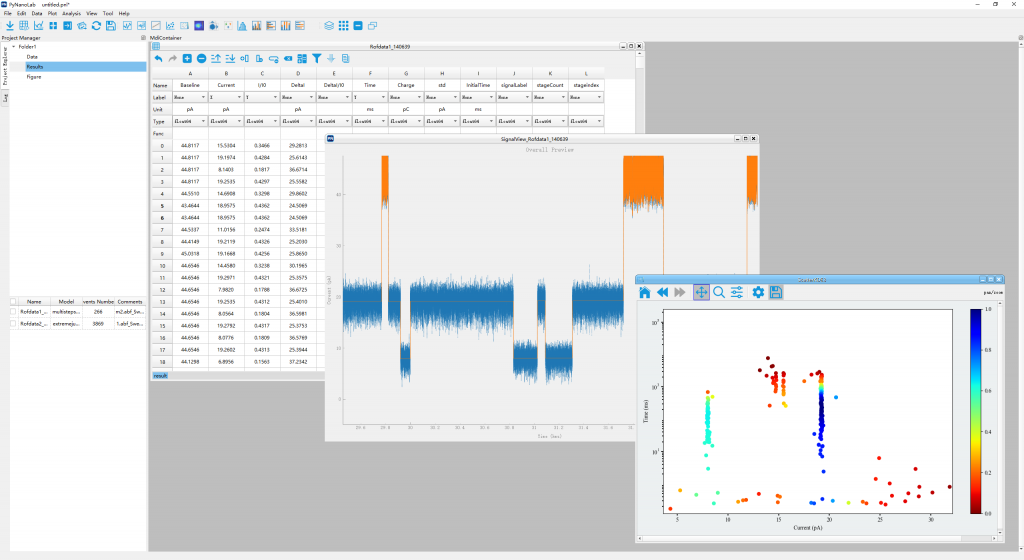
PyNanoLab is an all-in-one GUI software for data analysis and visualization, expecially for nanopore analysis.
Installition
In the version 3.X, binary installer (*.exe) is not provided anymore owing to the complex workflow and lost feature and performance.
We recommend you use the pip install to obtain all the advanced features.
System Required
Firstly, you should have already installed the python or conda virtual environment in your system.
Miniconda is recommended. And you should add the conda to your system environment variable.
In windows, you also need to install a terminal. git-windows or windows-terminal is recommended.
1. Create a new python virtual environment
PyNanoLab depend on th PySide6 to create its GUI. And it's not compatible with the other PyQt package. So we highly recommend to install pynanolab to a new python virtual environment.
use following command in a terminal:
conda create -n pnl python=3.13.2
source activate
conda activate pnl # activate the pnl environment.
conda install numpy # optional, install the numpy-MKL to speed up the software.
Then, you should install Pytorch on this environment (Any version, you should select a version, GPU verison is more better).
For example:
CPU 版本
pip install torch torchvision torchaudio
或者自行安装GPU版本
pip3 install torch torchvision torchaudio --index-url https://download.pytorch.org/whl/cu128
! warning: at windows, you should install hdbscan by manually compiling. For example using conda
conda install hdbscan -c conda-forge
If using pip, you should have c/c++ compiler on your system.
Now, you have created a new python virtual environment and activated it. The name is pnl, and you can change the name to anything you want, and the python version is specified to >=3.11. (We recommend >=3.13.x)
2. Install the pynanolab by pip
Then, you can directly install as general python packages.
Use the above command, the pynanolab will be installed automaticly. And a entry fille will be created in the Scripts folder of the "pnl" virtual environment. In windows is named "pynanolab.exe" and "pynanolab" in Linux and MacOSX.
Then, you can directily conduct the following command to open it in a terminal with pnl virtual environment activated.
If you want to create a shortcut or a desktop entry. Use the following command:
3. Upgrade pynanolab
If you use the pip installtion. You can upgrade the packages manually using the following command:
pip install --upgrade pynanolab
Signal Extraction
- Extract signal automaticall
- Multiple File management
- Raw data denoise and filter


Data Processing
- Data filter and calculate with pandas
- iPython integration
- Manage your data like the excel


Visualization
- Visualize data with matplotlib
- Interactive setup Figure
- Rebuild data and fig from project file.


Curves Fitting
- Curves fitting with lmfit
- Multiple build-in models
- Interactive fitting


Clustering
- Clustering of with scikit-learn
- Interactive parameter setting
- Real-time visualization


Nanopore ToolBox
- Custom and Auto signal analysis
- Time-Frequency spectral analysis
- Signal batch processing

