Perfect Instant Pot Brown Rice - iFoodReal.com (original) (raw)
Learn how to cook perfect Instant Pot Brown Rice every time. It comes out fluffy, firm but tender, not mushy and is completely hands off method.
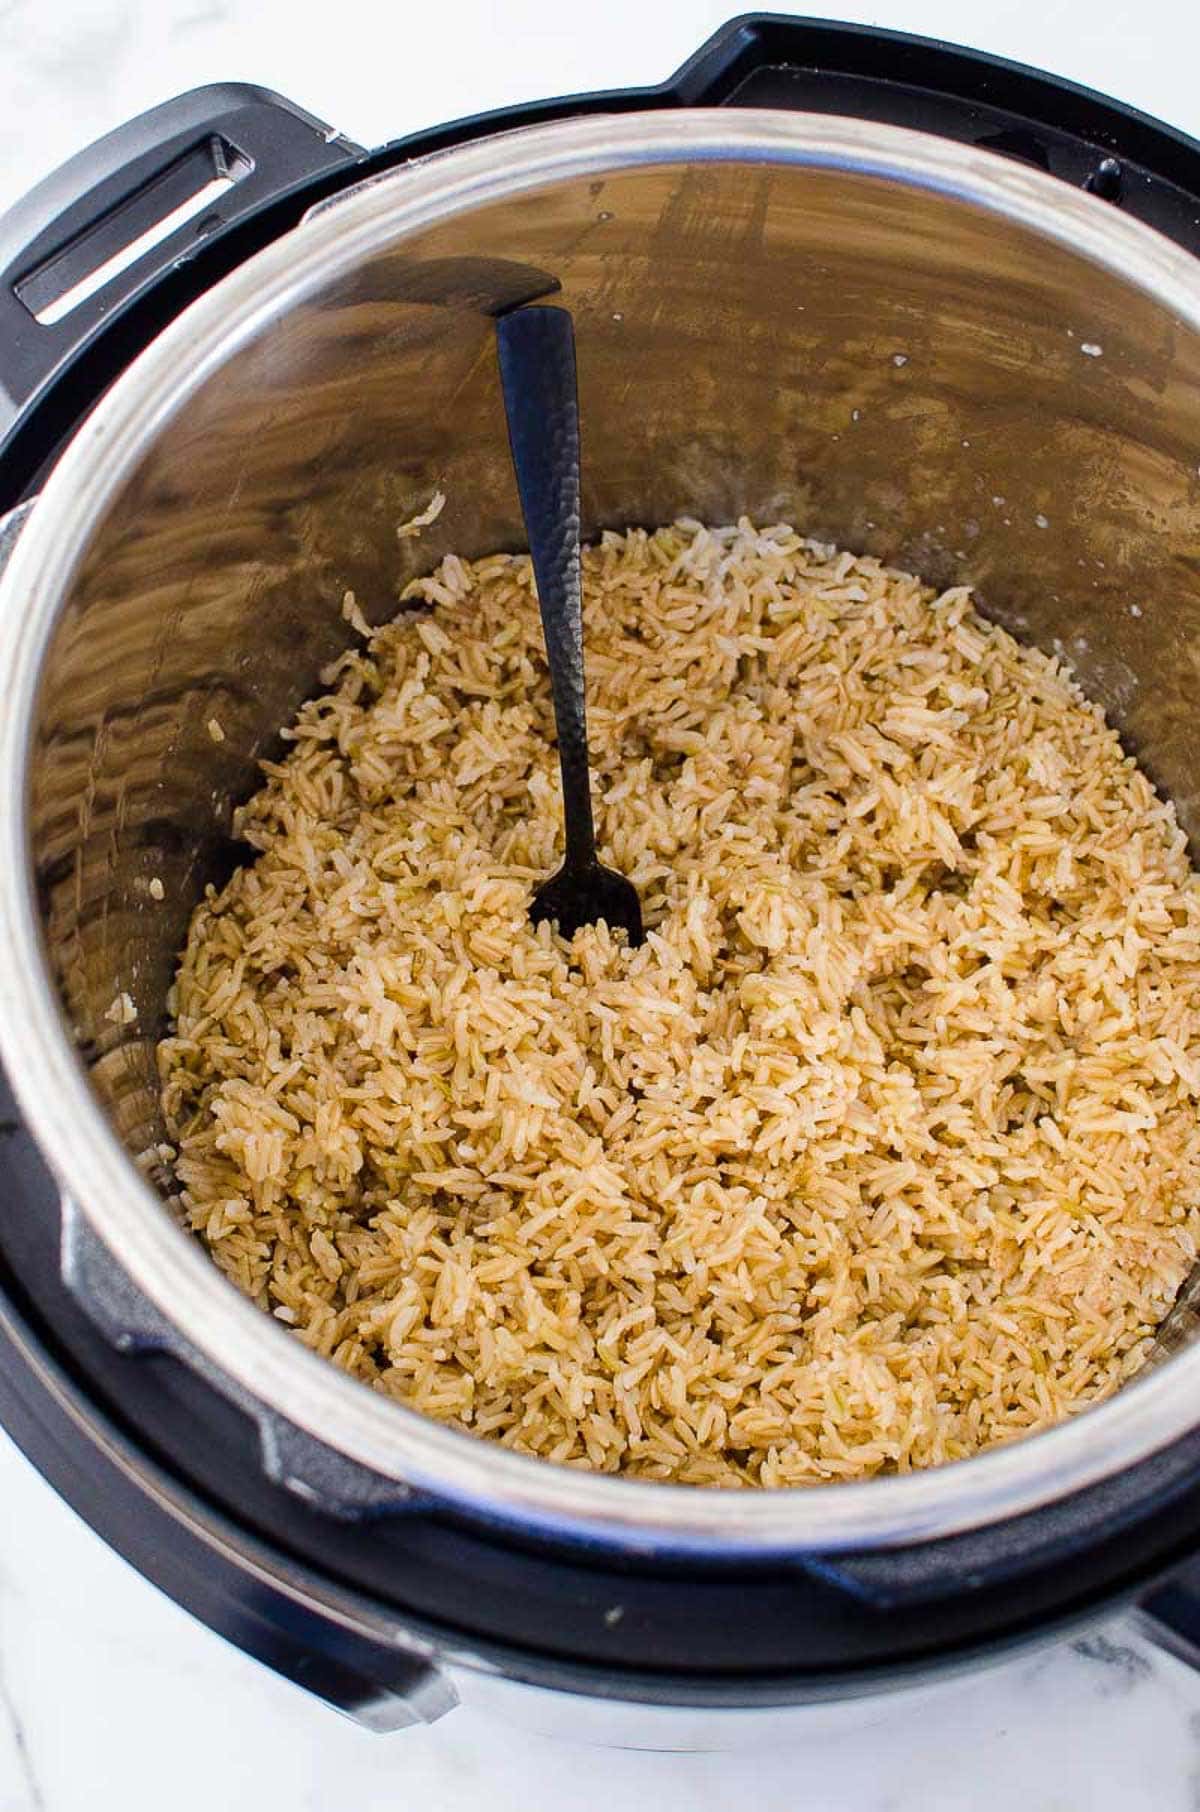
Table of Contents
- How to Cook Brown Rice in Instant Pot
- Tips for Best Results
- How To Use Instant Pot Brown Rice
- How to Store and Reheat
- FAQs
- More Instant Pot Rice Recipes
- More Favorite Instant Pot Basics
- Instant Pot Brown Rice Recipe
If you were to buy an electric pressure cooker, it would be completely worth it for this Instant Pot brown rice recipe alone! I can guarantee you that once you try brown rice cooked in the Instant Pot, you will never make it on the stove again!
Brown rice cooked on the stovetop comes out too soft and mushy no matter what time and water to rice ratio I tried. Pressure cooker brown rice comes out firm but tender, with a bit of a chew, and just perfect!
Not to mention it’s completely hands off method! In fact, we cook any rice only in Instant Pot now! We alternate between Instant Pot white rice, Instant Pot jasmine rice and Instant Pot basmati rice, and of course this Instant Pot brown rice.
How to Cook Brown Rice in Instant Pot
It really couldn’t be simpler to make Instant Pot brown rice! All you need is just brown rice and water. It’s one of the easiest Instant Pot recipes!
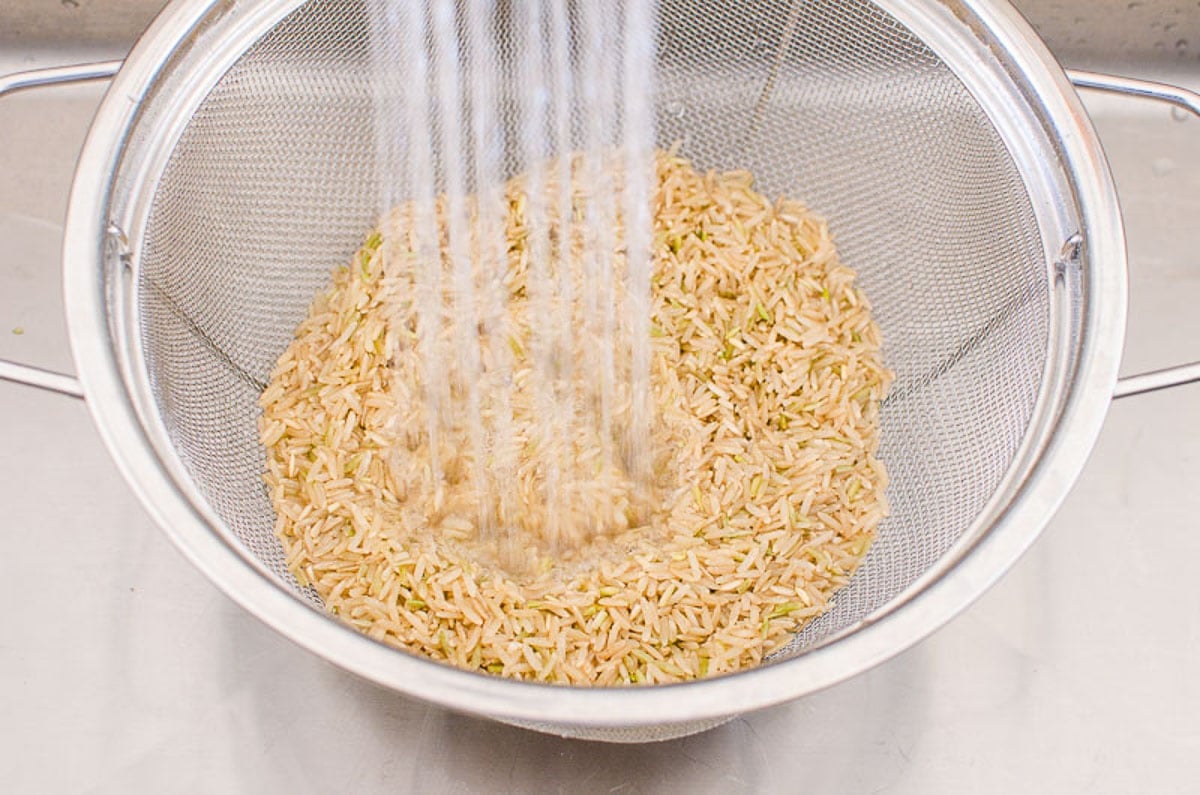
- Rinse the rice: I recommend to always rinse rice to remove extra starch. It helps to avoid rice grains clumping together and to keep them separated.
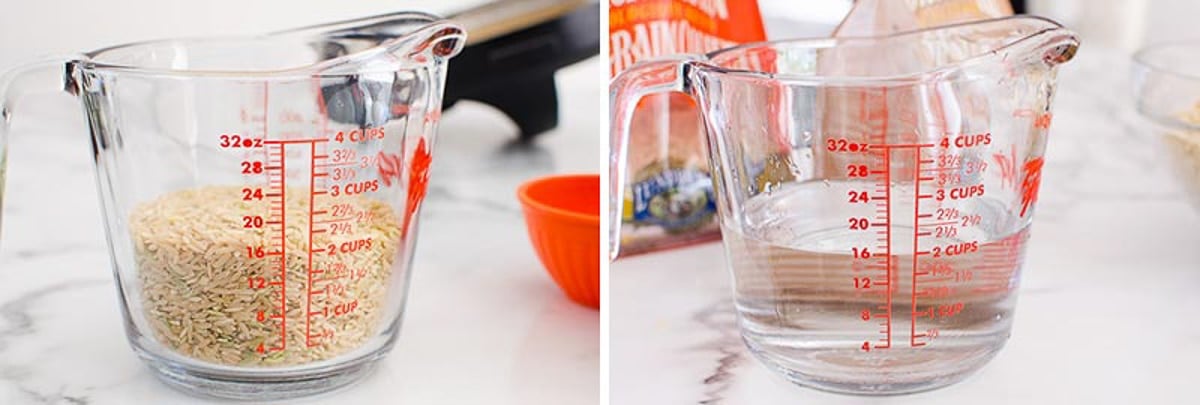
- Add rice: To the Instant Pot, add rinsed brown rice. The ratio if rice to water is 1:1 because water doesn’t evaporate in a pressure cooker.
- Add water: Add cold water and salt. I believe a touch of salt is all that is necessary.
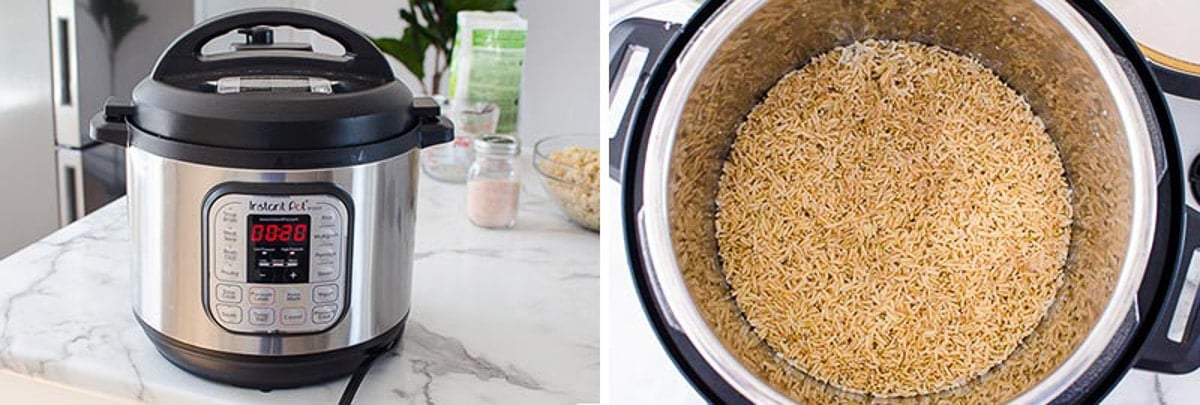
- Pressure cook: Cook on High pressure for 20 minutes. Release pressure only with Natural Release and don’t turn valve to Venting. This ensures brown rice sits and absorbs any remaining liquid and becomes perfect. Takes about 15 minutes.
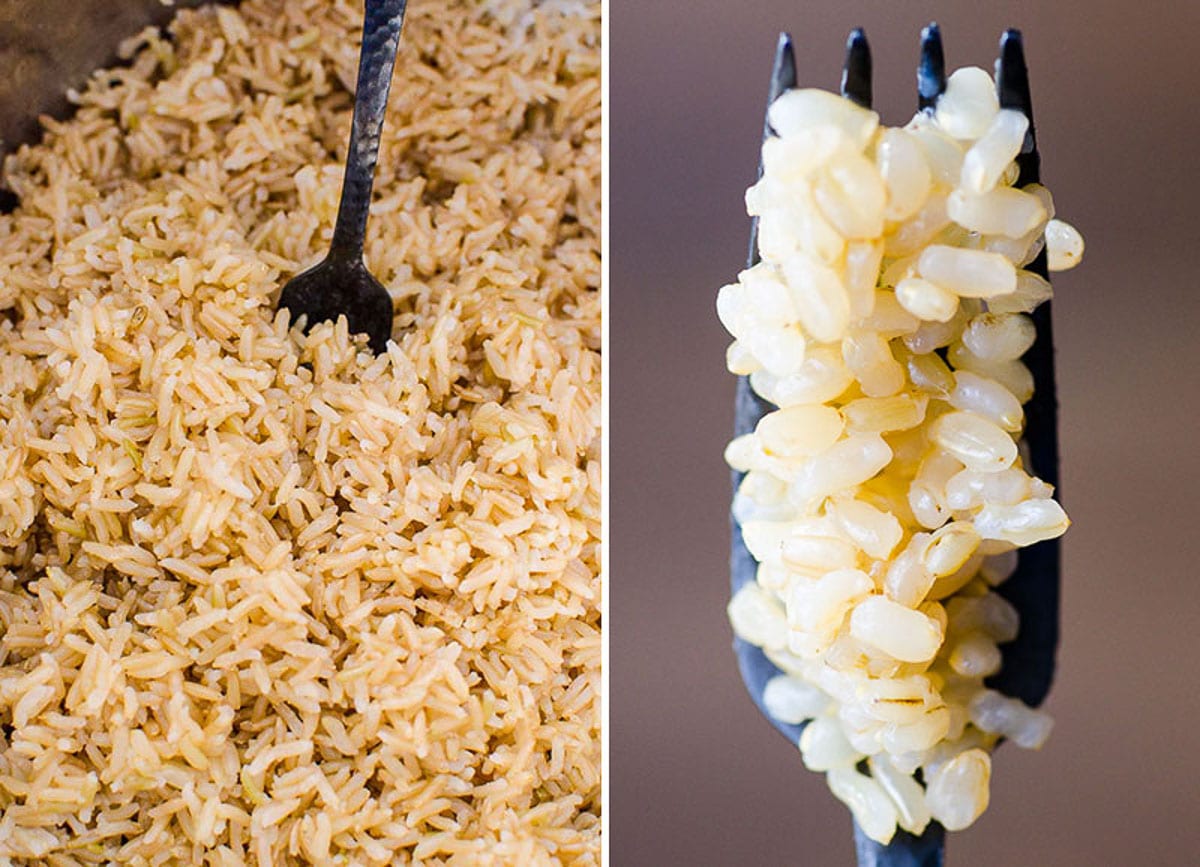
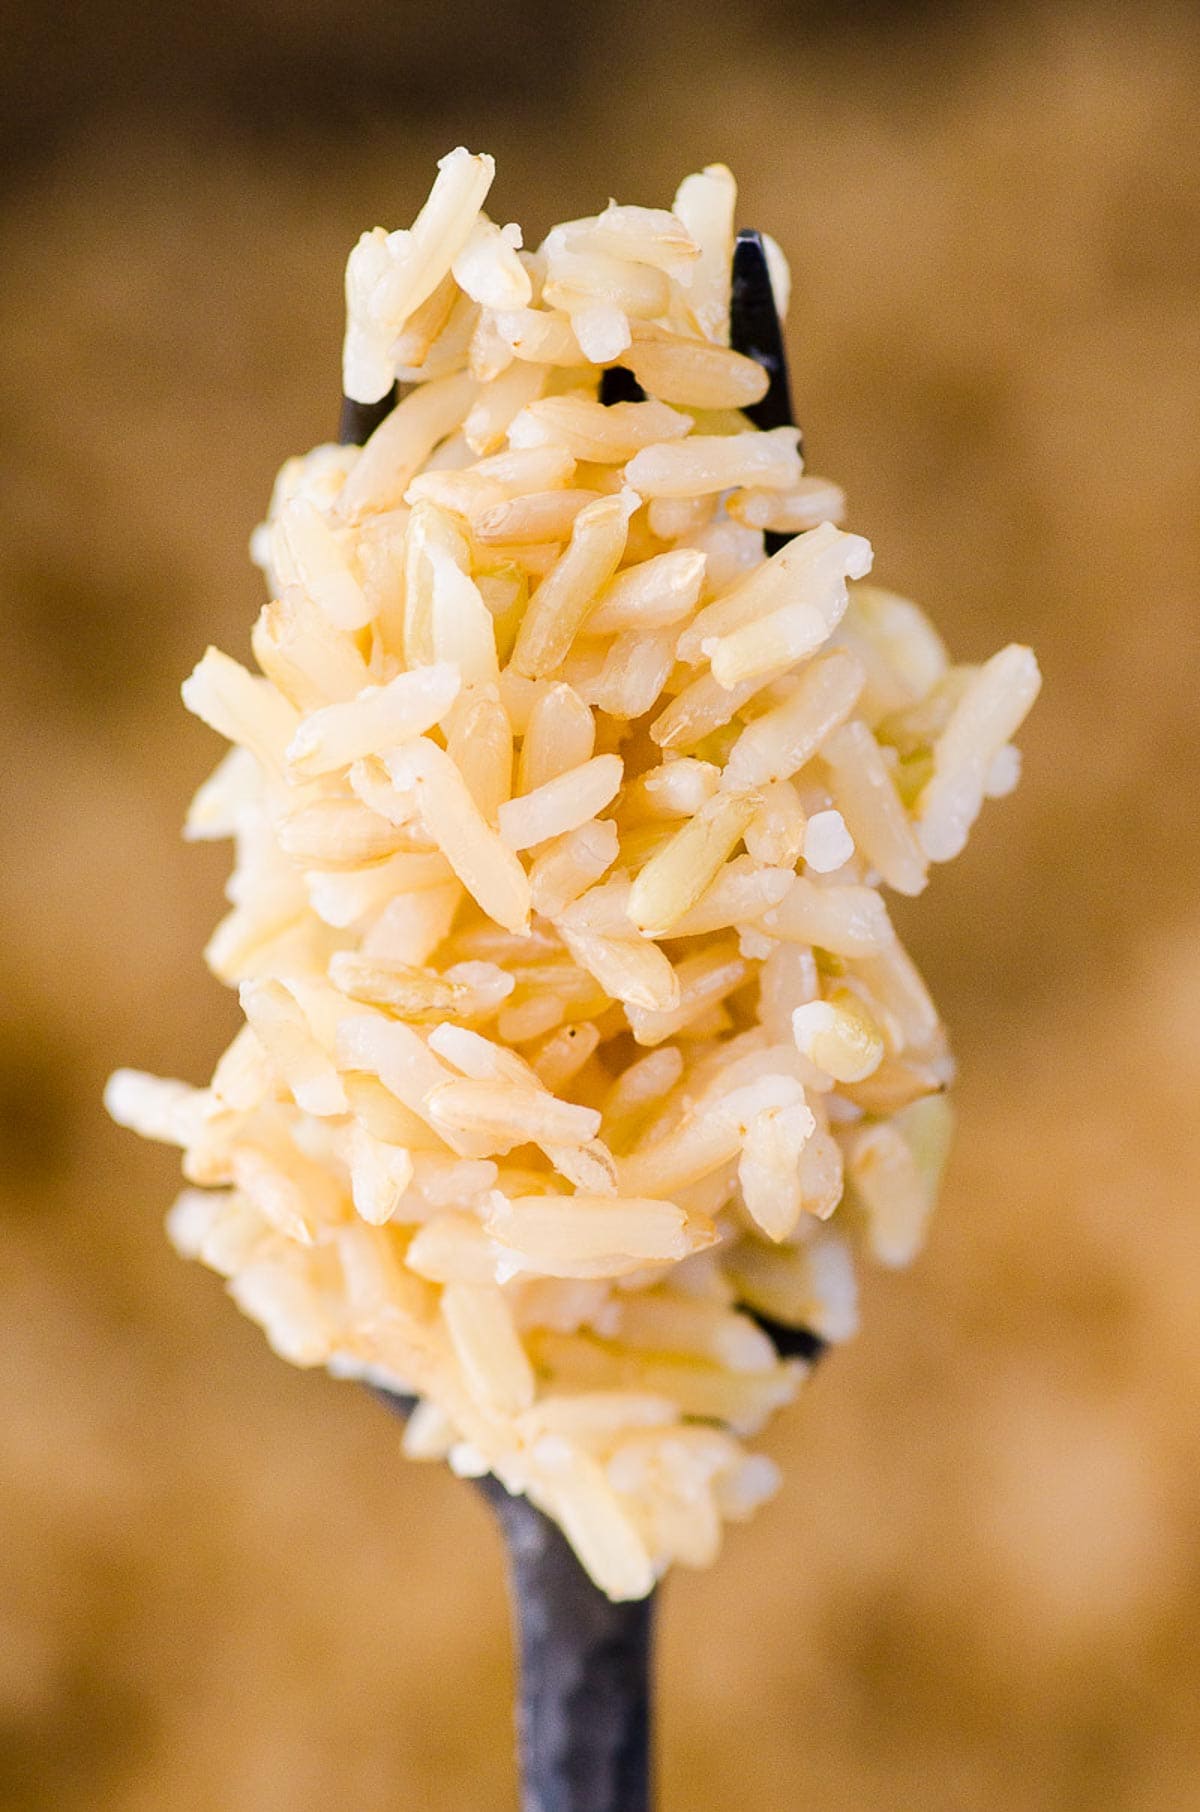
- Fluff with a fork: Never stir cooked rice to make rice mushy. Separate the grains by fluffing it with a fork.
Tips for Best Results
- Water to rice ratio stays the same whether you cook 1 cup or 5 cups of brown rice.
- Pressure cooking time stays the same for any amount of rice.
- Use cold water: Warm or hot water will overcook the rice.
- Do not use the Rice button: It cooks on Low pressure and is good only for Instant Pot white rice.
- Size of Instant Pot: You can use any size of electric pressure cooker as long as you don’t fill it more than 1/2 full. I use 6 quart and 8 quart Instant Pot.
- Pressure cooking time can differ slightly based on your altitude: Even same type of rice can be of different quality or age. Plus cook time may differ if you live at higher altitude. If your brown rice comes out a bit crunchy or mushy, add or reduce a few minutes to the brown rice cooking time. Not a big deal.
How To Use Instant Pot Brown Rice
I often serve brown rice as a side to a stir fry, meatballs or curry!
It’s also perfect for meal prep!
This method is good to prepare rice for salmon sushi bake or brown rice pudding.
How to Store and Reheat
Store: Cook and cool Instant Pot brown rice. Store in an airtight container for up to 5 days.
Freeze: Freeze rice in airtight containers or in a resealable plastic bag, letting out as much air as possible, for up to 3 months. When ready to eat, take it out of the freezer in the morning and thaw on a counter.
Reheat: To reheat rice, add to a small pot with a splash of water and cook on low heat while covered, stirring every few minutes. Add more water if necessary.
Recipe Tip
Cold or frozen rice can be added to soups, casseroles and salads without the need to thaw first.
FAQs
What brown rice can I cook using this recipe?
I have tested the following varieties of brown rice in Instant Pot using this recipe with great results – basmati brown rice, long grain brown rice, short grain brown rice and even this wild rice blend!
What is the ratio of water to brown rice?
It’s 1:1. Be sure to use cold water too!
How much does 1 cup of brown rice yields?
Rice expands when it has been cooked and has absorbed all of the liquid. Therefore, 1 cup of uncooked brown rice makes about 2 1/2 cups cooked.
Can I use the rice button on my Instant Pot for brown rice?
No. The button is intended for white rice. Since brown rice and white rice have very different cook times, the low pressure used when pressing the button isn’t enough to cook the brown rice in the time given.
More Instant Pot Rice Recipes
- Instant Pot chicken and rice
- Instant Pot rice and beans
- Instant Pot chicken fried rice
- Instant Pot jambalaya
- Instant Pot mushroom risotto
- Instant Pot coconut rice
- Instant Pot cabbage rolls
More Favorite Instant Pot Basics
- ▢ 2 cups brown rice, rinsed and drained
- ▢ 2 cups cold water
- ▢ Pinch of salt
Cook ModePrevent your screen from going dark
- In Instant Pot, add brown rice, water and a pinch of salt. Close the lid, set pressure vent to Sealing and press Pressure Cook on High or Manual for 20 minutes.
- Pressure Release for 6 quart Instant Pot: Do Natural Release by allowing pressure come down on its own for perfectly cooked rice. Do not do Quick Releaseby turning pressure valve to Venting position. Rice won't be cooked.
- Pressure Release for 8 quart Instant Pot: Do Natural Release by allowing pressure come down on its own for soft rice. If you like a bit crunchy with a bite rice do Quick Release after 10 minutes of Natural Release.
- Open the lid and fluff rice with a fork. That’s it!
🎉 Last step! If you made this recipe, please leave a review and let us know what you think!
- Store: Refrigerate in an airtight container for up to 5 days.
- Freeze: Fully cook, cool completely and freeze in an airtight container for up to 3 months. Thaw in a fridge or on a counter.
- Types of brown rice: I have tested long grain, basmati, short grain brown rice and even the wild rice blend! All came out perfect with same cooking time.
- More or less rice: You can cook less or more rice with same 1:1 rice to water ratio and cooking time.
Serving: 1cup, Calories: 275kcal, Carbohydrates: 58g, Protein: 6g, Fat: 2g, Saturated Fat: 1g, Sodium: 8mg, Fiber: 3g
Nutrition information is automatically calculated, so should only be used as an approximation.

Watch Olena Cooking on Youtube
5 new videos every week
You may also like
HPHigh Protein RecipesGFGluten Free RecipesVGVegetarian RecipesMPMeal Prep
Banana Protein Balls
HPHigh Protein RecipesLCLow CarbGFGluten Free Recipes
Salmon Ceviche
GFGluten Free RecipesVGVegetarian Recipes
Healthy Lemon Zucchini Bread
HPHigh Protein RecipesLCLow CarbGFGluten Free RecipesMPMeal Prep
Greek Yogurt Tuna Salad
Welcome! I grew up in Ukraine watching my grandma cook with simple ingredients. I have spent the last 14 years making it my mission to help you cook quick and easy meals for your family!