Secure an ASP.NET Core Blazor Web App with Microsoft Entra ID (original) (raw)
This article describes how to secure a Blazor Web App with Microsoft identity platform with Microsoft Identity Web packages for Microsoft Entra ID using a sample app.
This version of the article covers implementing Entra without adopting the Backend for Frontend (BFF) pattern. The BFF pattern is useful for making authenticated requests to external services. Change the article version selector to BFF pattern if the app's specification calls for adopting the BFF pattern.
The following specification is covered:
- The Blazor Web App uses the Auto render mode with global interactivity (InteractiveAuto).
- The server project calls AddAuthenticationStateSerialization to add a server-side authentication state provider that uses PersistentComponentState to flow the authentication state to the client. The client calls AddAuthenticationStateDeserialization to deserialize and use the authentication state passed by the server. The authentication state is fixed for the lifetime of the WebAssembly application.
- The app uses Microsoft Entra ID, based on Microsoft Identity Web packages.
- Automatic non-interactive token refresh is managed by the framework.
- The app uses server-side and client-side service abstractions to display generated weather data:
- When rendering the
Weathercomponent on the server to display weather data, the component uses theServerWeatherForecaster. Microsoft Identity Web packages provide API to create a named downstream web service for making web API calls. IDownstreamApi is injected into theServerWeatherForecaster, which is used to call CallApiForUserAsync to obtain weather data from an external web API (MinimalApiJwtproject). - When the
Weathercomponent is rendered on the client, the component uses theClientWeatherForecasterservice implementation, which uses a preconfigured HttpClient (in the client project'sProgramfile) to make a web API call to the server project's Minimal API (/weather-forecast) for weather data. The Minimal API endpoint obtains the weather data from theServerWeatherForecasterclass and returns it to the client for rendering by the component.
- When rendering the
Sample solution
The sample solution consists of the following projects:
BlazorWebAppEntra: Server-side project of the Blazor Web App, containing an example Minimal API endpoint for weather data.BlazorWebAppEntra.Client: Client-side project of the Blazor Web App.MinimalApiJwt: Backend web API, containing an example Minimal API endpoint for weather data.
Access the sample through the latest version folder in the Blazor samples repository with the following link. The sample is in the BlazorWebAppEntra folder for .NET 9 or later.
Start the solution from the Aspire/Aspire.AppHost project.
View or download sample code (how to download)
Microsoft Entra ID app registrations
We recommend using separate registrations for apps and web APIs, even when the apps and web APIs are in the same solution. The following guidance is for the BlazorWebAppEntra app and MinimalApiJwt web API of the sample solution, but the same guidance applies generally to any Entra-based registrations for apps and web APIs.
Register the web API (MinimalApiJwt) first so that you can then grant access to the web API when registering the app. The web API's tenant ID and client ID are used to configure the web API in its Program file. After registering the web API, expose the web API in App registrations > Expose an API with a scope name of Weather.Get. Record the App ID URI for use in the app's configuration.
Next, register the app (BlazorWebAppEntra) with a Web platform configuration and a Redirect URI of https://localhost/signin-oidc (a port isn't required). The app's tenant ID, tenant domain, and client ID, along with the web API's base address, App ID URI, and weather scope name, are used to configure the app in its appsettings.json file. Grant API permission to access the web API in App registrations > API permissions. If the app's security specification calls for it, you can grant admin consent for the organization to access the web API. Authorized users and groups are assigned to the app's registration in App registrations > Enterprise applications.
In the Entra or Azure portal's Implicit grant and hybrid flows app registration configuration, don't select either checkbox for the authorization endpoint to return Access tokens or ID tokens. The OpenID Connect handler automatically requests the appropriate tokens using the code returned from the authorization endpoint.
Create a client secret in the app's registration in the Entra or Azure portal (Manage > Certificates & secrets > New client secret). Hold on to the client secret Value for use the next section.
Additional Entra configuration guidance for specific settings is provided later in this article.
Server-side Blazor Web App project (BlazorWebAppEntra)
The BlazorWebAppEntra project is the server-side project of the Blazor Web App.
Client-side Blazor Web App project (BlazorWebAppEntra.Client)
The BlazorWebAppEntra.Client project is the client-side project of the Blazor Web App.
If the user needs to log in or out during client-side rendering, a full page reload is initiated.
Backend web API project (MinimalApiJwt)
The MinimalApiJwt project is a backend web API for multiple frontend projects. The project configures a Minimal API endpoint for weather data.
The MinimalApiJwt.http file can be used for testing the weather data request. Note that the MinimalApiJwt project must be running to test the endpoint, and the endpoint is hardcoded into the file. For more information, see Use .http files in Visual Studio 2022.
The project includes packages and configuration to produce OpenAPI documents and the Swagger UI in the Development environment. For more information, see Use the generated OpenAPI documents.
A secure weather forecast data endpoint is in the project's Program file:
app.MapGet("/weather-forecast", () =>
{
    var forecast = Enumerable.Range(1, 5).Select(index =>
        new WeatherForecast
        (
            DateOnly.FromDateTime(DateTime.Now.AddDays(index)),
            Random.Shared.Next(-20, 55),
            summaries[Random.Shared.Next(summaries.Length)]
        ))
        .ToArray();
    return forecast;
}).RequireAuthorization();
The RequireAuthorization extension method requires authorization for the route definition. For any controllers that you add to the project, add the [Authorize] attribute to the controller or action.
Configure the backend web API project (MinimalApiJwt)
Configure the project in the JwtBearerOptions of the AddJwtBearer call in the MinimalApiJwt project's Program file.
For the web API app's registration, the Weather.Get scope is configured in the Entra or Azure portal in Expose an API.
Authority sets the Authority for making OIDC calls.
jwtOptions.Authority = "{AUTHORITY}";
The following examples use a Tenant ID of aaaabbbb-0000-cccc-1111-dddd2222eeee.
If the app is registered in an ME-ID tenant, the authority should match the issurer (iss) of the JWT returned by the identity provider:
jwtOptions.Authority = "https://sts.windows.net/aaaabbbb-0000-cccc-1111-dddd2222eeee/";
If the app is registered in an AAD B2C tenant:
jwtOptions.Authority = "https://login.microsoftonline.com/aaaabbbb-0000-cccc-1111-dddd2222eeee/v2.0/";
Audience sets the Audience for any received JWT access token.
jwtOptions.Audience = "{AUDIENCE}";
Match the value to just the path of the Application ID URI configured when adding the Weather.Get scope under Expose an API in the Entra or Azure portal. Don't include the scope name, "Weather.Get," in the value.
The following examples use an Application (Client) Id of 11112222-bbbb-3333-cccc-4444dddd5555. The second example uses a tenant domain of contoso.onmicrosoft.com.
ME-ID tenant example:
jwtOptions.Audience = "api://11112222-bbbb-3333-cccc-4444dddd5555";
AAD B2C tenant example:
jwtOptions.Audience = "https://contoso.onmicrosoft.com/11112222-bbbb-3333-cccc-4444dddd5555";
Configure the server project (BlazorWebAppEntra)
AddMicrosoftIdentityWebApp from Microsoft Identity Web (Microsoft.Identity.Web NuGet package, API documentation) is configured in the BlazorWebAppEntra project's Program file.
Obtain the application (client) ID, tenant (publisher) domain, and directory (tenant) ID from the app's registration in the Entra or Azure portal. The App ID URI is obtained for the Weather.Get scope from the web API's registration. Don't include the scope name when taking the App ID URI from the portal.
In the BlazorWebAppEntra project's Program file, provide the values for the following placeholders in Microsoft Identity Web configuration:
builder.Services.AddAuthentication(OpenIdConnectDefaults.AuthenticationScheme)
    .AddMicrosoftIdentityWebApp(msIdentityOptions =>
    {
        msIdentityOptions.CallbackPath = "/signin-oidc";
        msIdentityOptions.ClientId = "{CLIENT ID (BLAZOR APP)}";
        msIdentityOptions.Domain = "{DIRECTORY NAME}.onmicrosoft.com";
        msIdentityOptions.Instance = "https://login.microsoftonline.com/";
        msIdentityOptions.ResponseType = "code";
        msIdentityOptions.TenantId = "{TENANT ID}";
    })
    .EnableTokenAcquisitionToCallDownstreamApi()
    .AddDownstreamApi("DownstreamApi", configOptions =>
    {
        configOptions.BaseUrl = "{BASE ADDRESS}";
        configOptions.Scopes = [ "{APP ID URI}/Weather.Get" ];
    })
    .AddDistributedTokenCaches();
Placeholders in the preceding configuration:
{CLIENT ID (BLAZOR APP)}: The application (client) ID.{DIRECTORY NAME}: The directory name of the tenant (publisher) domain.{TENANT ID}: The directory (tenant) ID.{BASE ADDRESS}: The web API's base address.{APP ID URI}: The App ID URI for web API scopes. Either of the following formats are used, where the{CLIENT ID (WEB API)}placeholder is the Client Id of the web API's Entra registration, and the{DIRECTORY NAME}placeholder is the directory name of the tenant (publishers) domain (example:contoso).- ME-ID tenant format:
api://{CLIENT ID (WEB API)} - B2C tenant format:
https://{DIRECTORY NAME}.onmicrosoft.com/{CLIENT ID (WEB API)}
- ME-ID tenant format:
Example:
builder.Services.AddAuthentication(OpenIdConnectDefaults.AuthenticationScheme)
    .AddMicrosoftIdentityWebApp(msIdentityOptions =>
    {
        msIdentityOptions.CallbackPath = "/signin-oidc";
        msIdentityOptions.ClientId = "00001111-aaaa-2222-bbbb-3333cccc4444";
        msIdentityOptions.Domain = "contoso.onmicrosoft.com";
        msIdentityOptions.Instance = "https://login.microsoftonline.com/";
        msIdentityOptions.ResponseType = "code";
        msIdentityOptions.TenantId = "aaaabbbb-0000-cccc-1111-dddd2222eeee";
    })
    .EnableTokenAcquisitionToCallDownstreamApi()
    .AddDownstreamApi("DownstreamApi", configOptions =>
    {
        configOptions.BaseUrl = "https://localhost:7277";
        configOptions.Scopes = [ "api://11112222-bbbb-3333-cccc-4444dddd5555/Weather.Get" ];
    })
    .AddDistributedTokenCaches();
This version of the article covers implementing Entra with the Backend for Frontend (BFF) pattern. Change the article version selector to Non-BFF pattern if the app's specification doesn't call for adopting the BFF pattern.
The following specification is covered:
- The Blazor Web App uses the Auto render mode with global interactivity (InteractiveAuto).
- The server project calls AddAuthenticationStateSerialization to add a server-side authentication state provider that uses PersistentComponentState to flow the authentication state to the client. The client calls AddAuthenticationStateDeserialization to deserialize and use the authentication state passed by the server. The authentication state is fixed for the lifetime of the WebAssembly application.
- The app uses Microsoft Entra ID, based on Microsoft Identity Web packages.
- Automatic non-interactive token refresh is managed by the framework.
- The Backend for Frontend (BFF) pattern is adopted using .NET Aspire for service discovery and YARP for proxying requests to a weather forecast endpoint on the backend app.
- A backend web API uses JWT-bearer authentication to validate JWT tokens saved by the Blazor Web App in the sign-in cookie.
- Aspire improves the experience of building .NET cloud-native apps. It provides a consistent, opinionated set of tools and patterns for building and running distributed apps.
- YARP (Yet Another Reverse Proxy) is a library used to create a reverse proxy server.
- The app uses server-side and client-side service abstractions to display generated weather data.
- When rendering the
Weathercomponent on the server to display weather data, the component uses theServerWeatherForecaster. Microsoft Identity Web packages provide API to create a named downstream web service for making web API calls. IDownstreamApi is injected into theServerWeatherForecaster, which is used to call CallApiForUserAsync to obtain weather data from an external web API (MinimalApiJwtproject). - When the
Weathercomponent is rendered on the client, the component uses theClientWeatherForecasterservice implementation, which uses a preconfigured HttpClient (in the client project'sProgramfile) to make a web API call to the server project's Minimal API (/weather-forecast) for weather data. The Minimal API endpoint obtains an access token for the user by calling GetAccessTokenForUserAsync. Along with the correct scopes, a reverse proxy call is made to the external web API (MinimalApiJwtproject) to obtain and return weather data to the client for rendering by the component.
- When rendering the
For more information on .NET Aspire, see General Availability of .NET Aspire: Simplifying .NET Cloud-Native Development (May, 2024).
Prerequisites
.NET Aspire requires Visual Studio version 17.10 or later.
Also, see the Prerequisites section of Quickstart: Build your first .NET Aspire app.
Sample solution
The sample solution consists of the following projects:
- .NET Aspire:
Aspire.AppHost: Used to manage the high-level orchestration concerns of the app.Aspire.ServiceDefaults: Contains default .NET Aspire app configurations that can be extended and customized as needed.
MinimalApiJwt: Backend web API, containing an example Minimal API endpoint for weather data.BlazorWebAppEntra: Server-side project of the Blazor Web App.BlazorWebAppEntra.Client: Client-side project of the Blazor Web App.
Access the sample through the latest version folder in the Blazor samples repository with the following link. The sample is in the BlazorWebAppEntraBff folder for .NET 9 or later.
View or download sample code (how to download)
Microsoft Entra ID app registrations
We recommend using separate registrations for apps and web APIs, even when the apps and web APIs are in the same solution. The following guidance is for the BlazorWebAppEntra app and MinimalApiJwt web API of the sample solution, but the same guidance applies generally to any Entra-based registrations for apps and web APIs.
Register the web API (MinimalApiJwt) first so that you can then grant access to the web API when registering the app. The web API's tenant ID and client ID are used to configure the web API in its Program file. After registering the web API, expose the web API in App registrations > Expose an API with a scope name of Weather.Get. Record the App ID URI for use in the app's configuration.
Next, register the app (BlazorWebAppEntra) with a Web platform configuration and a Redirect URI of https://localhost/signin-oidc (a port isn't required). The app's tenant ID, tenant domain, and client ID, along with the web API's base address, App ID URI, and weather scope name, are used to configure the app in its appsettings.json file. Grant API permission to access the web API in App registrations > API permissions. If the app's security specification calls for it, you can grant admin consent for the organization to access the web API. Authorized users and groups are assigned to the app's registration in App registrations > Enterprise applications.
In the Entra or Azure portal's Implicit grant and hybrid flows app registration configuration, don't select either checkbox for the authorization endpoint to return Access tokens or ID tokens. The OpenID Connect handler automatically requests the appropriate tokens using the code returned from the authorization endpoint.
Create a client secret in the app's registration in the Entra or Azure portal (Manage > Certificates & secrets > New client secret). Hold on to the client secret Value for use the next section.
Additional Entra configuration guidance for specific settings is provided later in this article.
.NET Aspire projects
For more information on using .NET Aspire and details on the .AppHost and .ServiceDefaults projects of the sample app, see the .NET Aspire documentation.
Confirm that you've met the prerequisites for .NET Aspire. For more information, see the Prerequisites section of Quickstart: Build your first .NET Aspire app.
The sample app only configures an insecure HTTP launch profile (http) for use during development testing. For more information, including an example of insecure and secure launch settings profiles, see Allow unsecure transport in .NET Aspire (.NET Aspire documentation).
Server-side Blazor Web App project (BlazorWebAppEntra)
The BlazorWebAppEntra project is the server-side project of the Blazor Web App.
Client-side Blazor Web App project (BlazorWebAppEntra.Client)
The BlazorWebAppEntra.Client project is the client-side project of the Blazor Web App.
If the user needs to log in or out during client-side rendering, a full page reload is initiated.
Backend web API project (MinimalApiJwt)
The MinimalApiJwt project is a backend web API for multiple frontend projects. The project configures a Minimal API endpoint for weather data. Requests from the Blazor Web App server-side project (BlazorWebAppEntra) are proxied to the MinimalApiJwt project.
The MinimalApiJwt.http file can be used for testing the weather data request. Note that the MinimalApiJwt project must be running to test the endpoint, and the endpoint is hardcoded into the file. For more information, see Use .http files in Visual Studio 2022.
The project includes packages and configuration to produce OpenAPI documents and the Swagger UI in the Development environment. For more information, see Use the generated OpenAPI documents.
A secure weather forecast data endpoint is in the project's Program file:
app.MapGet("/weather-forecast", () =>
{
    var forecast = Enumerable.Range(1, 5).Select(index =>
        new WeatherForecast
        (
            DateOnly.FromDateTime(DateTime.Now.AddDays(index)),
            Random.Shared.Next(-20, 55),
            summaries[Random.Shared.Next(summaries.Length)]
        ))
        .ToArray();
    return forecast;
}).RequireAuthorization();
The RequireAuthorization extension method requires authorization for the route definition. For any controllers that you add to the project, add the [Authorize] attribute to the controller or action.
Configure the backend web API project (MinimalApiJwt)
Configure the MinimalApiJwt project in the JwtBearerOptions of the AddJwtBearer call in the project's Program file.
For the web API app's registration, the Weather.Get scope is configured in the Entra or Azure portal in Expose an API.
Authority sets the Authority for making OIDC calls.
jwtOptions.Authority = "{AUTHORITY}";
The following examples use a Tenant ID of aaaabbbb-0000-cccc-1111-dddd2222eeee.
If the app is registered in an ME-ID tenant, the authority should match the issurer (iss) of the JWT returned by the identity provider:
jwtOptions.Authority = "https://sts.windows.net/aaaabbbb-0000-cccc-1111-dddd2222eeee/";
If the app is registered in an AAD B2C tenant:
jwtOptions.Authority = "https://login.microsoftonline.com/aaaabbbb-0000-cccc-1111-dddd2222eeee/v2.0/";
Audience sets the Audience for any received JWT access token.
jwtOptions.Audience = "{AUDIENCE}";
Match the value to just the path of the Application ID URI configured when adding the Weather.Get scope under Expose an API in the Entra or Azure portal. Don't include the scope name, "Weather.Get," in the value.
The following examples use an Application (Client) Id of 11112222-bbbb-3333-cccc-4444dddd5555. The second example uses a tenant domain of contoso.onmicrosoft.com.
ME-ID tenant example:
jwtOptions.Audience = "api://11112222-bbbb-3333-cccc-4444dddd5555";
AAD B2C tenant example:
jwtOptions.Audience = "https://contoso.onmicrosoft.com/11112222-bbbb-3333-cccc-4444dddd5555";
Configure the server project (BlazorWebAppEntra)
AddMicrosoftIdentityWebApp from Microsoft Identity Web (Microsoft.Identity.Web NuGet package, API documentation) is configured in the BlazorWebAppEntra project's Program file.
Obtain the application (client) ID, tenant (publisher) domain, and directory (tenant) ID from the app's registration in the Entra or Azure portal. The App ID URI is obtained for the Weather.Get scope from the web API's registration. Don't include the scope name when taking the App ID URI from the portal.
In the BlazorWebAppEntra project's Program file, provide the values for the following placeholders in Microsoft Identity Web configuration:
builder.Services.AddAuthentication(OpenIdConnectDefaults.AuthenticationScheme)
    .AddMicrosoftIdentityWebApp(msIdentityOptions =>
    {
        msIdentityOptions.CallbackPath = "/signin-oidc";
        msIdentityOptions.ClientId = "{CLIENT ID (BLAZOR APP)}";
        msIdentityOptions.Domain = "{DIRECTORY NAME}.onmicrosoft.com";
        msIdentityOptions.Instance = "https://login.microsoftonline.com/";
        msIdentityOptions.ResponseType = "code";
        msIdentityOptions.TenantId = "{TENANT ID}";
    })
    .EnableTokenAcquisitionToCallDownstreamApi()
    .AddDownstreamApi("DownstreamApi", configOptions =>
    {
        configOptions.BaseUrl = "{BASE ADDRESS}";
        configOptions.Scopes = [ "{APP ID URI}/Weather.Get" ];
    })
    .AddDistributedTokenCaches();
Placeholders in the preceding configuration:
{CLIENT ID (BLAZOR APP)}: The application (client) ID.{DIRECTORY NAME}: The directory name of the tenant (publisher) domain.{TENANT ID}: The directory (tenant) ID.{BASE ADDRESS}: The web API's base address.{APP ID URI}: The App ID URI for web API scopes. Either of the following formats are used, where the{CLIENT ID (WEB API)}placeholder is the Client Id of the web API's Entra registration, and the{DIRECTORY NAME}placeholder is the directory name of the tenant (publishers) domain (example:contoso).- ME-ID tenant format:
api://{CLIENT ID (WEB API)} - B2C tenant format:
https://{DIRECTORY NAME}.onmicrosoft.com/{CLIENT ID (WEB API)}
- ME-ID tenant format:
Example:
builder.Services.AddAuthentication(OpenIdConnectDefaults.AuthenticationScheme)
    .AddMicrosoftIdentityWebApp(msIdentityOptions =>
    {
        msIdentityOptions.CallbackPath = "/signin-oidc";
        msIdentityOptions.ClientId = "00001111-aaaa-2222-bbbb-3333cccc4444";
        msIdentityOptions.Domain = "contoso.onmicrosoft.com";
        msIdentityOptions.Instance = "https://login.microsoftonline.com/";
        msIdentityOptions.ResponseType = "code";
        msIdentityOptions.TenantId = "aaaabbbb-0000-cccc-1111-dddd2222eeee";
    })
    .EnableTokenAcquisitionToCallDownstreamApi()
    .AddDownstreamApi("DownstreamApi", configOptions =>
    {
        configOptions.BaseUrl = "https://localhost:7277";
        configOptions.Scopes = [ "api://11112222-bbbb-3333-cccc-4444dddd5555/Weather.Get" ];
    })
    .AddDistributedTokenCaches();
Warning
Production apps should use a production distributed token cache provider. Otherwise, the app may have poor performance in some scenarios. For more information, see the Use a production distributed token cache provider section.
The callback path (CallbackPath) must match the redirect URI (login callback path) configured when registering the application in the Entra or Azure portal. Paths are configured in the Authentication blade of the app's registration. The default value of CallbackPath is /signin-oidc for a registered redirect URI of https://localhost/signin-oidc (a port isn't required).
The SignedOutCallbackPath is the request path within the app's base path intercepted by the OpenID Connect handler where the user agent is first returned after signing out from Entra. The sample app doesn't set a value for the path because the default value of "/signout-callback-oidc" is used. After intercepting the request, the OpenID Connect handler redirects to the SignedOutRedirectUri or RedirectUri, if specified.
Configure the signed-out callback path in the app's Entra registration. In the Entra or Azure portal, set the path in the Web platform configuration's Redirect URI entries:
Note
A port isn't required for localhost addresses when using Entra.
If you don't add the signed-out callback path URI to the app's registration in Entra, Entra refuses to redirect the user back to the app and merely asks them to close their browser window.
Warning
Don't store app secrets, connection strings, credentials, passwords, personal identification numbers (PINs), private C#/.NET code, or private keys/tokens in client-side code, which is always insecure. In test/staging and production environments, server-side Blazor code and web APIs should use secure authentication flows that avoid maintaining credentials within project code or configuration files. Outside of local development testing, we recommend avoiding the use of environment variables to store sensitive data, as environment variables aren't the most secure approach. For local development testing, the Secret Manager tool is recommended for securing sensitive data. For more information, see Securely maintain sensitive data and credentials.
Establish the client secret
This section only applies to the server project of the Blazor Web App.
Use either or both of the following approaches to supply the client secret to the app:
- Secret Manager tool: The Secret Manager tool stores private data on the local machine and is only used during local development.
- Azure Key Vault: You can store the client secret in a key vault for use in any environment, including for the Development environment when working locally. Some developers prefer to use key vaults for staging and production deployments and use the Secret Manager tool for local development.
We strongly recommend that you avoid storing client secrets in project code or configuration files. Use secure authentication flows, such as either or both of the approaches in this section.
Secret Manager tool
The Secret Manager tool can store the server app's client secret under the configuration key AzureAd:ClientSecret.
The Blazor server app hasn't been initialized for the Secret Manager tool. Use a command shell, such as the Developer PowerShell command shell in Visual Studio, to execute the following command. Before executing the command, change the directory with the cd command to the server project's directory. The command establishes a user secrets identifier (<UserSecretsId>) in the server app's project file, which is used internally by the tooling to track secrets for the app:
dotnet user-secrets init
Execute the following command to set the client secret. The {SECRET} placeholder is the client secret obtained from the app's Entra registration:
dotnet user-secrets set "AzureAd:ClientSecret" "{SECRET}"
If using Visual Studio, you can confirm that the secret is set by right-clicking the server project in Solution Explorer and selecting Manage User Secrets.
Azure Key Vault
Azure Key Vault provides a safe approach for providing the app's client secret to the app.
To create a key vault and set a client secret, see About Azure Key Vault secrets (Azure documentation), which cross-links resources to get started with Azure Key Vault. To implement the code in this section, record the key vault URI and the secret name from Azure when you create the key vault and secret. For the example in this section, the secret name is "BlazorWebAppEntraClientSecret."
When establishing the key vault in the Entra or Azure portal:
- Configure the key vault to use Azure role-based access control (RABC). If you aren't operating on an Azure Virtual Network, including for local development and testing, confirm that public access on the Networking step is enabled (checked). Enabling public access only exposes the key vault endpoint. Authenticated accounts are still required for access.
- Create an Azure Managed Identity (or add a role to the existing Managed Identity that you plan to use) with the Key Vault Secrets User role. Assign the Managed Identity to the Azure App Service that's hosting the deployment: Settings > Identity > User assigned > Add.
Note
If you also plan to run an app locally with an authorized user for key vault access using the Azure CLI or Visual Studio's Azure Service Authentication, add your developer Azure user account in Access Control (IAM) with the Key Vault Secrets User role. If you want to use the Azure CLI through Visual Studio, execute theaz logincommand from the Developer PowerShell panel and follow the prompts to authenticate with the tenant.
To implement the code in this section, record the key vault URI (example: "https://contoso.vault.azure.net/", trailing slash required) and the secret name (example: "BlazorWebAppEntraClientSecret") from Azure when you create the key vault and secret.
Important
A key vault secret is created with an expiration date. Be sure to track when a key vault secret is going to expire and create a new secret for the app prior to that date passing.
Add the following AzureHelper class to the server project. The GetKeyVaultSecret method retrieves a secret from a key vault. Adjust the namespace (BlazorSample.Helpers) to match your project namespace scheme.
Helpers/AzureHelper.cs:
using Azure.Core;
using Azure.Security.KeyVault.Secrets;

namespace BlazorWebAppEntra.Helpers;

public static class AzureHelper
{
    public static string GetKeyVaultSecret(string vaultUri,
        TokenCredential credential, string secretName)
    {
        var client = new SecretClient(new Uri(vaultUri), credential);
        var secret = client.GetSecretAsync(secretName).Result;

        return secret.Value.Value;
    }
}
Where services are registered in the server project's Program file, obtain and apply the client secret using the following code:
TokenCredential? credential;

if (builder.Environment.IsProduction())
{
    credential = new ManagedIdentityCredential("{MANAGED IDENTITY CLIENT ID}");
}
else
{
    // Local development and testing only
    DefaultAzureCredentialOptions options = new()
    {
        // Specify the tenant ID to use the dev credentials when running the app locally
        // in Visual Studio.
        VisualStudioTenantId = "{TENANT ID}",
        SharedTokenCacheTenantId = "{TENANT ID}"
    };

    credential = new DefaultAzureCredential(options);
}
Where MicrosoftIdentityOptions are set, call GetKeyVaultSecret to receive and assign the app's client secret:
msIdentityOptions.ClientSecret = AzureHelper.GetKeyVaultSecret("{VAULT URI}",
    credential, "{SECRET NAME}");
{MANAGED IDENTITY CLIENT ID}: The Azure Managed Identity Client ID (GUID).
{TENANT ID}: The directory (tenant) ID. Example: aaaabbbb-0000-cccc-1111-dddd2222eeee
{VAULT URI}: Key vault URI. Include the trailing slash on the URI. Example: https://contoso.vault.azure.net/
{SECRET NAME}: Secret name. Example: BlazorWebAppEntraClientSecret
Configuration is used to facilitate supplying dedicated key vaults and secret names based on the app's environmental configuration files. For example, you can supply different configuration values for appsettings.Development.json in development, appsettings.Staging.json when staging, and appsettings.Production.json for the production deployment. For more information, see ASP.NET Core Blazor configuration.
Only serialize the name and role claims
In the Program file, all claims are serialized by setting SerializeAllClaims to true. If you only want the name and role claims serialized for CSR, remove the option or set it to false.
Supply configuration with the JSON configuration provider (app settings)
The sample solution projects configure Microsoft Identity Web and JWT bearer authentication in their Program files in order to make configuration settings discoverable using C# autocompletion. Professional apps usually use a configuration provider to configure OIDC options, such as the default JSON configuration provider. The JSON configuration provider loads configuration from app settings files appsettings.json/appsettings.{ENVIRONMENT}.json, where the {ENVIRONMENT} placeholder is the app's runtime environment. Follow the guidance in this section to use app settings files for configuration.
In the app settings file (appsettings.json) of the BlazorWebAppEntra project, add the following JSON configuration:
{
  "AzureAd": {
    "CallbackPath": "/signin-oidc",
    "ClientId": "{CLIENT ID (BLAZOR APP)}",
    "Domain": "{DIRECTORY NAME}.onmicrosoft.com",
    "Instance": "https://login.microsoftonline.com/",
    "ResponseType": "code",
    "TenantId": "{TENANT ID}"
  },
  "DownstreamApi": {
    "BaseUrl": "{BASE ADDRESS}",
    "Scopes": [ "{APP ID URI}/Weather.Get" ]
  }
}
Update the placeholders in the preceding configuration to match the values that the app uses in the Program file:
{CLIENT ID (BLAZOR APP)}: The application (client) ID.{DIRECTORY NAME}: The directory name of the tenant (publisher) domain.{TENANT ID}: The directory (tenant) ID.{BASE ADDRESS}: The web API's base address.{APP ID URI}: The App ID URI for web API scopes. Either of the following formats are used, where the{CLIENT ID (WEB API)}placeholder is the Client Id of the web API's Entra registration, and the{DIRECTORY NAME}placeholder is the directory name of the tenant (publishers) domain (example:contoso).- ME-ID tenant format:
api://{CLIENT ID (WEB API)} - B2C tenant format:
https://{DIRECTORY NAME}.onmicrosoft.com/{CLIENT ID (WEB API)}
- ME-ID tenant format:
Example:
"AzureAd": {
  "CallbackPath": "/signin-oidc",
  "ClientId": "00001111-aaaa-2222-bbbb-3333cccc4444",
  "Domain": "contoso.onmicrosoft.com",
  "Instance": "https://login.microsoftonline.com/",
  "ResponseType": "code",
  "TenantId": "aaaabbbb-0000-cccc-1111-dddd2222eeee"
},
"DownstreamApi": {
  "BaseUrl": "https://localhost:7277",
  "Scopes": [ "api://11112222-bbbb-3333-cccc-4444dddd5555/Weather.Get" ]
}
Update any other values in the preceding configuration to match custom/non-default values used in the Program file.
The configuration is automatically picked up by the authentication builder.
Make the following changes in the Program file:
builder.Services.AddAuthentication(OpenIdConnectDefaults.AuthenticationScheme)
-   .AddMicrosoftIdentityWebApp(msIdentityOptions =>
-   {
-       msIdentityOptions.CallbackPath = "...";
-       msIdentityOptions.ClientId = "...";
-       msIdentityOptions.Domain = "...";
-       msIdentityOptions.Instance = "...";
-       msIdentityOptions.ResponseType = "...";
-       msIdentityOptions.TenantId = "...";
-   })
+   .AddMicrosoftIdentityWebApp(builder.Configuration.GetSection("AzureAd"))
    .EnableTokenAcquisitionToCallDownstreamApi()
-   .AddDownstreamApi("DownstreamApi", configOptions =>
-   {
-       configOptions.BaseUrl = "...";
-       configOptions.Scopes = [ "..." ];
-   })
+   .AddDownstreamApi("DownstreamApi", builder.Configuration.GetSection("DownstreamApi"))
    .AddDistributedTokenCaches();
Note
Production apps should use a production distributed token cache provider. Otherwise, the app may have poor performance in some scenarios. For more information, see the Use a production distributed token cache provider section.
In the MinimalApiJwt project, add the following app settings configuration to the appsettings.json file:
"Authentication": {
  "Schemes": {
    "Bearer": {
      "Authority": "https://sts.windows.net/{TENANT ID (WEB API)}/",
      "ValidAudiences": [ "{APP ID URI (WEB API)}" ]
    }
  }
},
Update the placeholders in the preceding configuration to match the values that the app uses in the Program file:
{TENANT ID (WEB API)}: The Tenant Id of the web API.{APP ID URI (WEB API)}: The App ID URI of the web API.
Authority formats adopt the following patterns:
- ME-ID tenant type:
https://sts.windows.net/{TENANT ID}/ - B2C tenant type:
https://login.microsoftonline.com/{TENANT ID}/v2.0/
Audience formats adopt the following patterns ({CLIENT ID} is the Client Id of the web API; {DIRECTORY NAME} is the directory name, for example, contoso):
- ME-ID tenant type:
api://{CLIENT ID} - B2C tenant type:
https://{DIRECTORY NAME}.onmicrosoft.com/{CLIENT ID}
The configuration is automatically picked up by the JWT bearer authentication builder.
Remove the following lines from the Program file:
- jwtOptions.Authority = "...";
- jwtOptions.Audience = "...";
For more information on configuration, see the following resources:
Use a production distributed token cache provider
In-memory distributed token caches are created when calling AddDistributedTokenCaches to ensure that there's a base implementation available for distributed token caching.
Production web apps and web APIs should use a production distributed token cache (for example: Redis, Microsoft SQL Server, Microsoft Azure Cosmos DB).
Note
For local development and testing on a single machine, you can use in-memory token caches instead of distributed token caches:
builder.Services.AddInMemoryTokenCaches();
Later in the development and testing period, adopt a production distributed token cache provider.
AddDistributedMemoryCache adds a default implementation of IDistributedCache that stores cache items in memory, which is used by Microsoft Identity Web for token caching.
The distributed token cache is configured by MsalDistributedTokenCacheAdapterOptions:
- In development for debugging purposes, you can disable the L1 cache by setting DisableL1Cache to
true. Be sure to reset it back tofalsefor production. - Set the maximum size of your L1 cache with L1CacheOptions.SizeLimit to prevent the cache from overrunning the server's memory. The default value is 500 MB.
- In development for debugging purposes, you can disable token encryption at rest by setting Encrypt to
false, which is the default value. Be sure to reset it back totruefor production. - Set token eviction from the cache with SlidingExpiration. The default value is 1 hour.
- For more information, including guidance on the callback for L2 cache failures (OnL2CacheFailure) and asynchronous L2 cache writes (EnableAsyncL2Write), see MsalDistributedTokenCacheAdapterOptions and Token cache serialization: Distributed token caches.
builder.Services.AddDistributedMemoryCache();

builder.Services.Configure<MsalDistributedTokenCacheAdapterOptions>(
    options =>
    {
      // The following lines that are commented out reflect
      // default values. We recommend overriding the default
      // value of Encrypt to encrypt tokens at rest.

      //options.DisableL1Cache = false;
      //options.L1CacheOptions.SizeLimit = 500 * 1024 * 1024;
      options.Encrypt = true;
      //options.SlidingExpiration = TimeSpan.FromHours(1);
    });
AddDistributedMemoryCache requires a package reference to the Microsoft.Extensions.Caching.Memory NuGet package.
To configure a production distributed cache provider, see Distributed caching in ASP.NET Core.
Warning
Always replace the in-memory distributed token caches with a real token cache provider when deploying the app to a production environment. If you fail to adopt a production distributed token cache provider, the app may suffer significantly degraded performance.
For more information, see Token cache serialization: Distributed caches. However, the code examples shown don't apply to ASP.NET Core apps, which configure distributed caches via AddDistributedMemoryCache, not AddDistributedTokenCache.
Use a shared Data Protection key ring in production so that instances of the app across servers in a web farm can decrypt tokens when MsalDistributedTokenCacheAdapterOptions.Encrypt is set to true.
Note
For early development and local testing on a single machine, you can set Encrypt to false and configure a shared Data Protection key ring later:
options.Encrypt = false;
Later in the development and testing period, enable token encryption and adopt a shared Data Protection key ring.
The following example shows how to use Azure Blob Storage and Azure Key Vault (PersistKeysToAzureBlobStorage/ProtectKeysWithAzureKeyVault) for the shared key ring. The service configurations are base case scenarios for demonstration purposes. Before deploying production apps, familiarize yourself with the Azure services and adopt best practices using the Azure services' dedicated documentation sets, which are linked at the end of this section.
Confirm the presence of the following packages in the server project of the Blazor Web App:
Note
Before proceeding with the following steps, confirm that the app is registered with Microsoft Entra.
The following code is typically implemented at the same time that a production distributed token cache provider is implemented. Other options, both within Azure and outside of Azure, are available for managing data protection keys across multiple app instances, but the sample app demonstrates how to use Azure services.
Configure Azure Blob Storage to maintain data protection keys. Follow the guidance in Key storage providers in ASP.NET Core.
Configure Azure Key Vault to encrypt the data protection keys at rest. Follow the guidance in Configure ASP.NET Core Data Protection.
Use the following code in the Program file where services are registered:
TokenCredential? credential;

if (builder.Environment.IsProduction())
{
    credential = new ManagedIdentityCredential("{MANAGED IDENTITY CLIENT ID}");
}
else
{
    // Local development and testing only
    DefaultAzureCredentialOptions options = new()
    {
        // Specify the tenant ID to use the dev credentials when running the app locally
        // in Visual Studio.
        VisualStudioTenantId = "{TENANT ID}",
        SharedTokenCacheTenantId = "{TENANT ID}"
    };

    credential = new DefaultAzureCredential(options);
}

builder.Services.AddDataProtection()
    .SetApplicationName("BlazorWebAppEntra")
    .PersistKeysToAzureBlobStorage(new Uri("{BLOB URI}"), credential)
    .ProtectKeysWithAzureKeyVault(new Uri("{KEY IDENTIFIER}"), credential);
You can pass any app name to SetApplicationName. Just confirm that all app deployments use the same value.
{MANAGED IDENTITY CLIENT ID}: The Azure Managed Identity Client ID (GUID).
{TENANT ID}: Tenant ID.
{BLOB URI}: Full URI to the key file. The URI is generated by Azure Storage when you create the key file. Do not use a SAS.
{KEY IDENTIFIER}: Azure Key Vault key identifier used for key encryption. An access policy allows the application to access the key vault with Get, Unwrap Key, and Wrap Key permissions. The version of the key is obtained from the key in the Entra or Azure portal after it's created. If you enable autorotation of the key vault key, make sure that you use a versionless key identifier in the app's key vault configuration, where no key GUID is placed at the end of the identifier (example: https://contoso.vault.azure.net/keys/data-protection).
Alternatively, you can configure the app to supply the values from app settings files using the JSON Configuration Provider. Add the following to the app settings file:
"DistributedTokenCache": {
  "DisableL1Cache": false,
  "L1CacheSizeLimit": 524288000,
  "Encrypt": true,
  "SlidingExpirationInHours": 1
},
"DataProtection": {
  "BlobUri": "{BLOB URI}",
  "KeyIdentifier": "{KEY IDENTIFIER}"
}
Example DataProtection section:
"DataProtection": {
  "BlobUri": "https://contoso.blob.core.windows.net/data-protection/keys.xml",
  "KeyIdentifier": "https://contoso.vault.azure.net/keys/data-protection"
}
Make the following changes in the Program file:
builder.Services.Configure<MsalDistributedTokenCacheAdapterOptions>(
    options =>
    {
+       var config = builder.Configuration.GetSection("DistributedTokenCache");

-       options.DisableL1Cache = false;
+       options.DisableL1Cache = config.GetValue<bool>("DisableL1Cache");

-       options.L1CacheOptions.SizeLimit = 500 * 1024 * 1024;
+       options.L1CacheOptions.SizeLimit = config.GetValue<long>("L1CacheSizeLimit");

-       options.Encrypt = true;
+       options.Encrypt = config.GetValue<bool>("Encrypt");

-       options.SlidingExpiration = TimeSpan.FromHours(1);
+       options.SlidingExpiration =
+           TimeSpan.FromHours(config.GetValue<int>("SlidingExpirationInHours"));
    });

- builder.Services.AddDataProtection()
-     .SetApplicationName("BlazorWebAppEntra")
-     .PersistKeysToAzureBlobStorage(new Uri("{BLOB URI}"), credential)
-     .ProtectKeysWithAzureKeyVault(new Uri("{KEY IDENTIFIER}"), credential);
Add the following code where services are configured in the Program file:
var config = builder.Configuration.GetSection("DataProtection");

builder.Services.AddDataProtection()
    .SetApplicationName("BlazorWebAppEntra")
    .PersistKeysToAzureBlobStorage(
        new Uri(config.GetValue<string>("BlobUri") ??
        throw new Exception("Missing Blob URI")),
        credential)
    .ProtectKeysWithAzureKeyVault(
        new Uri(config.GetValue<string>("KeyIdentifier") ??
        throw new Exception("Missing Key Identifier")),
        credential);
For more information on using a shared Data Protection key ring and key storage providers, see the following resources:
- Key storage providers in ASP.NET Core
- Configure ASP.NET Core Data Protection
- Use the Azure SDK for .NET in ASP.NET Core apps
- Host ASP.NET Core in a web farm: Data Protection
- Configure ASP.NET Core Data Protection
- Key storage providers in ASP.NET Core
- Azure Key Vault documentation
- Azure Storage documentation
- Provide access to Key Vault keys, certificates, and secrets with Azure role-based access control
YARP forwarder destination prefix
The Blazor Web App server project's YARP forwarder, where the user's access token is attached to the MinimalApiJwt web API call, specifies a destination prefix of https://weatherapi. This value matches the project name passed to AddProject in the Program file of the Aspire.AppHost project.
Forwarder in the Blazor Web App server project (BlazorWebAppEntra):
app.MapForwarder("/weather-forecast", "https://weatherapi", transformBuilder =>
{
    ...
}).RequireAuthorization();
Matching project name in the Program file of the Aspire App Host project (Aspire.AppHost):
var weatherApi = builder.AddProject<Projects.MinimalApiJwt>("weatherapi");
There's no need to change the destination prefix of the YARP forwarder when deploying the Blazor Web App to production. The Microsoft Identity Web Downstream API package uses the base URI passed via configuration to make the web API call from the ServerWeatherForecaster, not the destination prefix of the YARP forwarder. In production, the YARP forwarder merely transforms the request, adding the user's access token.
Redirect to the home page on logout
The LogInOrOut component (Layout/LogInOrOut.razor) sets a hidden field for the return URL (ReturnUrl) to the current URL (currentURL). When the user signs out of the app, the identity provider returns the user to the page from which they logged out. If the user logs out from a secure page, they're returned to the same secure page and sent back through the authentication process. This authentication flow is reasonable when users need to change accounts regularly.
Alternatively, use the following LogInOrOut component, which doesn't supply a return URL when logging out.
Layout/LogInOrOut.razor:
<div class="nav-item px-3">
    <AuthorizeView>
        <Authorized>
            <form action="authentication/logout" method="post">
                <AntiforgeryToken />
                <button type="submit" class="nav-link">
                    <span class="bi bi-arrow-bar-left-nav-menu" aria-hidden="true">
                    </span> Logout
                </button>
            </form>
        </Authorized>
        <NotAuthorized>
            <a class="nav-link" href="authentication/login">
                <span class="bi bi-person-badge-nav-menu" aria-hidden="true"></span>
                Login
            </a>
        </NotAuthorized>
    </AuthorizeView>
</div>
Weather data security
For more information on how this app secures its weather data, see Secure data in Blazor Web Apps with Interactive Auto rendering.
Troubleshoot
Logging
The server app is a standard ASP.NET Core app. See the ASP.NET Core logging guidance to enable a lower logging level in the server app.
To enable debug or trace logging for Blazor WebAssembly authentication, see the Client-side authentication logging section of ASP.NET Core Blazor logging with the article version selector set to ASP.NET Core in .NET 7 or later.
Common errors
- Debugger breaks on an exception during logout with Microsoft Entra External ID
The following exception stops the Visual Studio debugger during logout with Microsoft Entra External ID:Uncaught TypeError TypeError: Failed to execute 'postMessage' on 'Window': The provided value cannot be converted to a sequence.
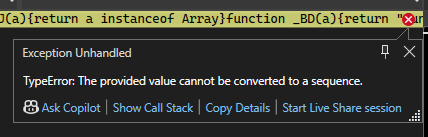
The exception is thrown from Entra JavaScript code, so this isn't a problem with ASP.NET Core. The exception doesn't impact app functionality in production, so the exception can be ignored during local development testing. - Misconfiguration of the app or Identity Provider (IP)
The most common errors are caused by incorrect configuration. The following are a few examples:- Depending on the requirements of the scenario, a missing or incorrect Authority, Instance, Tenant ID, Tenant domain, Client ID, or Redirect URI prevents an app from authenticating clients.
- Incorrect request scopes prevent clients from accessing server web API endpoints.
- Incorrect or missing server API permissions prevent clients from accessing server web API endpoints.
- Running the app at a different port than is configured in the Redirect URI of the IP's app registration. Note that a port isn't required for Microsoft Entra ID and an app running at a
localhostdevelopment testing address, but the app's port configuration and the port where the app is running must match for non-localhostaddresses.
Configuration coverage in this article shows examples of the correct configuration. Carefully check the configuration looking for app and IP misconfiguration.
If the configuration appears correct: - Analyze application logs.
- Examine the network traffic between the client app and the IP or server app with the browser's developer tools. Often, an exact error message or a message with a clue to what's causing the problem is returned to the client by the IP or server app after making a request. Developer tools guidance is found in the following articles:
* Google Chrome (Google documentation)
* Microsoft Edge
* Mozilla Firefox (Mozilla documentation)
The documentation team responds to document feedback and bugs in articles (open an issue from the This page feedback section) but is unable to provide product support. Several public support forums are available to assist with troubleshooting an app. We recommend the following:
- Stack Overflow (tag: blazor)
- ASP.NET Core Slack Team
- Blazor Gitter
The preceding forums are not owned or controlled by Microsoft.
For non-security, non-sensitive, and non-confidential reproducible framework bug reports, open an issue with the ASP.NET Core product unit. Don't open an issue with the product unit until you've thoroughly investigated the cause of a problem and can't resolve it on your own and with the help of the community on a public support forum. The product unit isn't able to troubleshoot individual apps that are broken due to simple misconfiguration or use cases involving third-party services. If a report is sensitive or confidential in nature or describes a potential security flaw in the product that cyberattackers may exploit, see Reporting security issues and bugs (dotnet/aspnetcore GitHub repository). - Unauthorized client for ME-ID
info: Microsoft.AspNetCore.Authorization.DefaultAuthorizationService[2] Authorization failed. These requirements were not met: DenyAnonymousAuthorizationRequirement: Requires an authenticated user.
Login callback error from ME-ID:- Error:
unauthorized_client - Description:
AADB2C90058: The provided application is not configured to allow public clients.
To resolve the error:
- In the Azure portal, access the app's manifest.
- Set the allowPublicClient attribute to
nullortrue.
- Error:
Cookies and site data
Cookies and site data can persist across app updates and interfere with testing and troubleshooting. Clear the following when making app code changes, user account changes with the provider, or provider app configuration changes:
- User sign-in cookies
- App cookies
- Cached and stored site data
One approach to prevent lingering cookies and site data from interfering with testing and troubleshooting is to:
- Configure a browser
- Use a browser for testing that you can configure to delete all cookie and site data each time the browser is closed.
- Make sure that the browser is closed manually or by the IDE for any change to the app, test user, or provider configuration.
- Use a custom command to open a browser in InPrivate or Incognito mode in Visual Studio:
- Open Browse With dialog box from Visual Studio's Run button.
- Select the Add button.
- Provide the path to your browser in the Program field. The following executable paths are typical installation locations for Windows 10. If your browser is installed in a different location or you aren't using Windows 10, provide the path to the browser's executable.
* Microsoft Edge:C:\Program Files (x86)\Microsoft\Edge\Application\msedge.exe
* Google Chrome:C:\Program Files (x86)\Google\Chrome\Application\chrome.exe
* Mozilla Firefox:C:\Program Files\Mozilla Firefox\firefox.exe - In the Arguments field, provide the command-line option that the browser uses to open in InPrivate or Incognito mode. Some browsers require the URL of the app.
* Microsoft Edge: Use-inprivate.
* Google Chrome: Use--incognito --new-window {URL}, where the{URL}placeholder is the URL to open (for example,https://localhost:5001).
* Mozilla Firefox: Use-private -url {URL}, where the{URL}placeholder is the URL to open (for example,https://localhost:5001). - Provide a name in the Friendly name field. For example,
Firefox Auth Testing. - Select the OK button.
- To avoid having to select the browser profile for each iteration of testing with an app, set the profile as the default with the Set as Default button.
- Make sure that the browser is closed by the IDE for any change to the app, test user, or provider configuration.
App upgrades
A functioning app may fail immediately after upgrading either the .NET Core SDK on the development machine or changing package versions within the app. In some cases, incoherent packages may break an app when performing major upgrades. Most of these issues can be fixed by following these instructions:
- Clear the local system's NuGet package caches by executing dotnet nuget locals all --clear from a command shell.
- Delete the project's
binandobjfolders. - Restore and rebuild the project.
- Delete all of the files in the deployment folder on the server prior to redeploying the app.
Note
Use of package versions incompatible with the app's target framework isn't supported. For information on a package, use the NuGet Gallery.
Start the solution from the correct project
Blazor Web Apps:
- For one of the Backend-for-Frontend (BFF) pattern samples, start the solution from the
Aspire/Aspire.AppHostproject. - For one of the non-BFF pattern samples, start the solution from the server project.
Blazor Server:
Start the solution from the server project.
Inspect the user
The following UserClaims component can be used directly in apps or serve as the basis for further customization.
UserClaims.razor:
@page "/user-claims"
@using System.Security.Claims
@using Microsoft.AspNetCore.Authorization
@attribute [Authorize]

<PageTitle>User Claims</PageTitle>

<h1>User Claims</h1>

@if (claims.Any())
{
    <ul>
        @foreach (var claim in claims)
        {
            <li><b>@claim.Type:</b> @claim.Value</li>
        }
    </ul>
}

@code {
    private IEnumerable<Claim> claims = Enumerable.Empty<Claim>();

    [CascadingParameter]
    private Task<AuthenticationState>? AuthState { get; set; }

    protected override async Task OnInitializedAsync()
    {
        if (AuthState == null)
        {
            return;
        }

        var authState = await AuthState;
        claims = authState.User.Claims;
    }
}
Additional resources
- Call a web API from an ASP.NET Core Blazor app: Microsoft identity platform for web API calls
- Microsoft identity platform documentation
- Web API documentation | Microsoft identity platform
- A web API that calls web APIs: Call an API: Option 2: Call a downstream web API with the helper class
- AzureAD/microsoft-identity-web GitHub repository: Helpful guidance on implementing Microsoft Identity Web for Microsoft Entra ID and Azure Active Directory B2C for ASP.NET Core apps, including links to sample apps and related Azure documentation. Currently, Blazor Web Apps aren't explicitly addressed by the Azure documentation, but the setup and configuration of a Blazor Web App for ME-ID and Azure hosting is the same as it is for any ASP.NET Core web app.
- AuthenticationStateProvider service
- Manage authentication state in Blazor Web Apps
- Service abstractions in Blazor Web Apps