Striped Maxi Dress Tutorial - Melly Sews (original) (raw)
Use this sewing pattern and DIY tutorial to make a maxi dress – you can even use jersey bedsheets for the fabric!
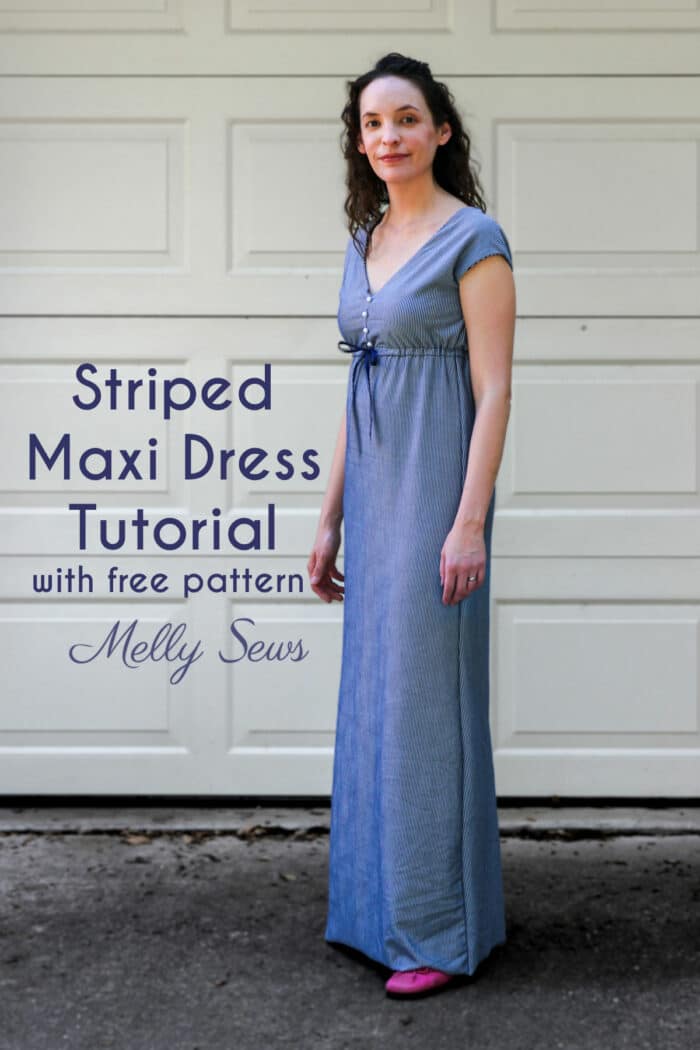
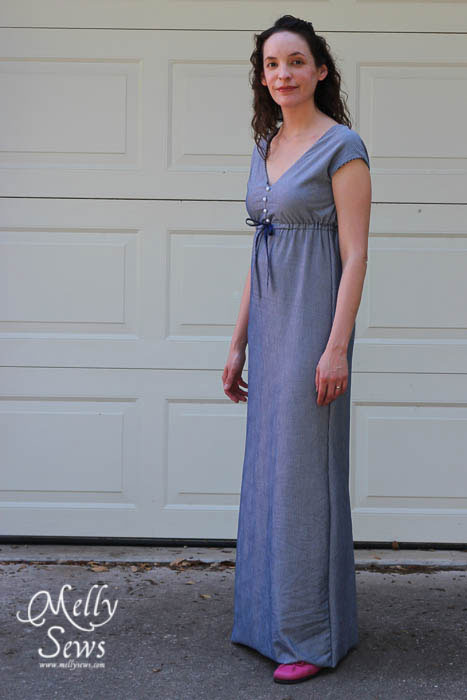
Hello lovely readers – today I’m sharing a maxi dress tutorial. This dress was originally sewn in 2013 and I wore it many times over multiple years. It was definitely a closet staple for me! Below is the same dress made in another fabric.

Variations on a Theme
I made the blue dress from jersey bedsheets from Target. That was also my fabric source for this dress, but I wasn’t thrilled with that jersey. It’s just not that soft. But the striped jersey sheets are very soft, and so far this dress is wearing very well – it’s now been to Salt Lake City for SNAP and Los Angeles for Fabric Weekend 2013. Bonus: I only used the fitted sheet, with the elastic cut out, of my full-size sheet set to make this dress, which means I have a whole flat sheet and pillowcase left to use!
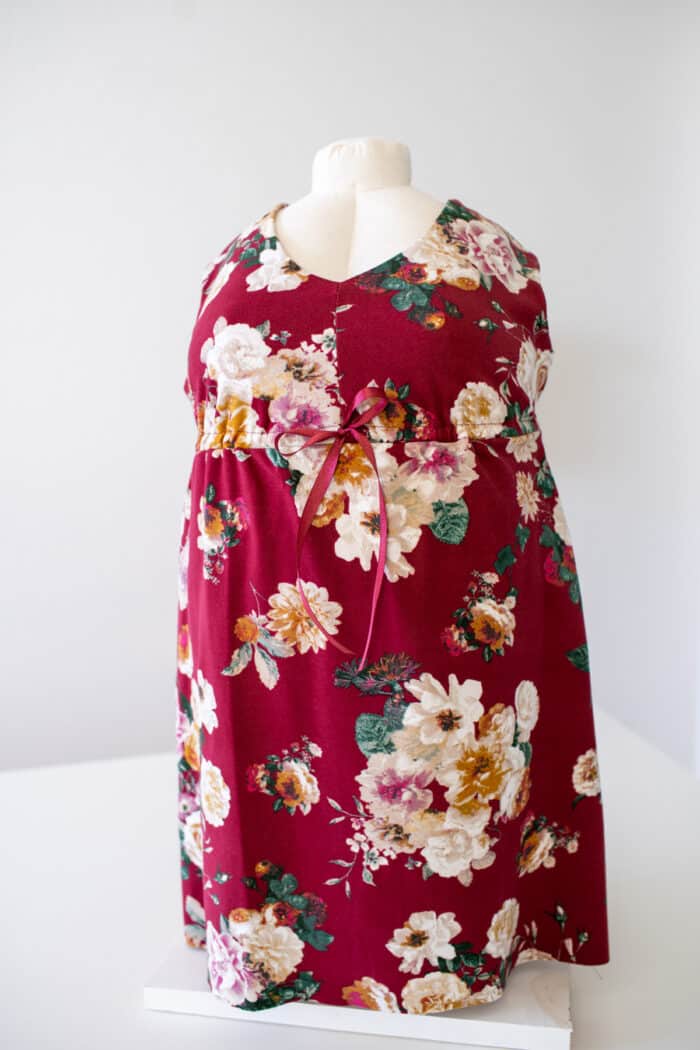
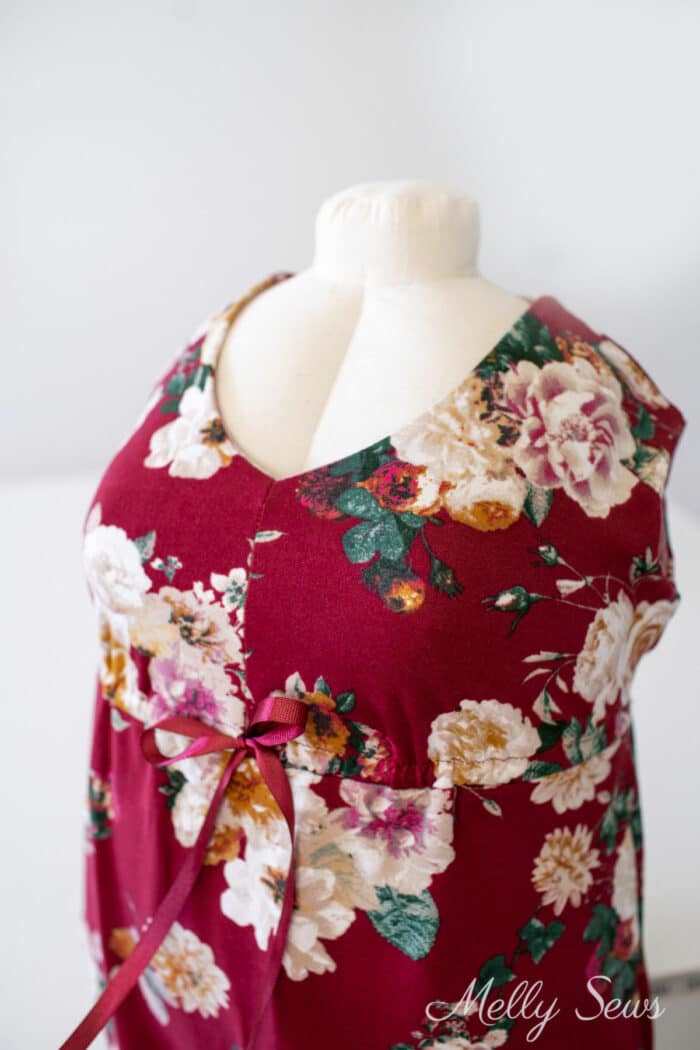
I sewed the pink dress with cotton spandex knit yardage. And I sewed the red version for my dress form below out of double brushed polyester.
Materials to Sew a Long Dress
So, want to make your own? You’ll need
- 3 yards of knit fabric, or a full size jersey bedsheet for the size small. For the 5x size you’ll need 3 1/2 yards
- 1/2″ elastic – 6 inches less than your under bust measurement
- 1/2″ wide ribbon – 1 (this applies to both sizes – the majority of the drawstring is comprised of the elastic above.
- The pattern, see below
How to Get the Free Maxi Dress Pattern
The pattern is ina women’s size S (34″ bust) and a women’s size 5x (60″ bust). It is important to note that the size 5x has only been tested on my dress form, so make sure to measure the pattern and compare to your body before cutting into your good fabric. More about figuring out fit before you cut in this post.
If you need to make the pattern bigger or smaller, check out this post. To get this pattern, click your preferred option from the buttons below as a newsletter subscriber or gallery access pass purchaser. Note that the free version of the pattern does not have printable instructions.
 |
 |
 |
|---|
Please note that all my free patterns are licensed for personal use only (no selling items made from this unless you purchase it) and by downloading you are agreeing to this license.
How to Sew a Maxi Dress
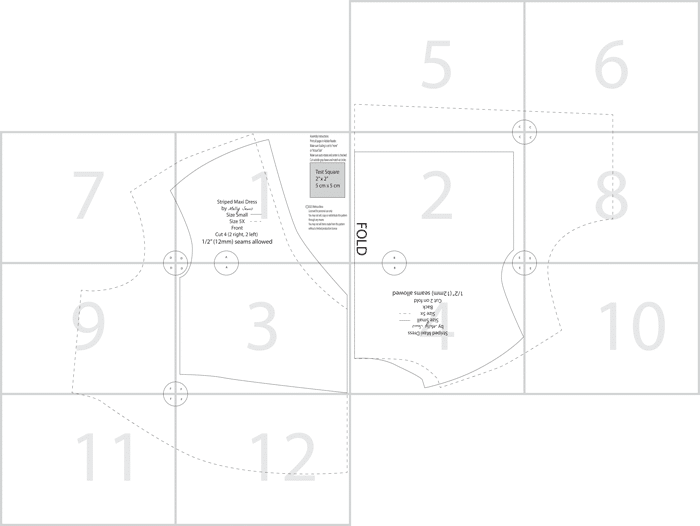
When you print the pattern, you’ll print pages 1-4 for the size small, and pages 1-12 for the larger size. Please see the diagram below for how to assemble your pattern. In addition, you can find more info about printing here. Note that only the bodice will print and you’ll need to draft your skirt as shown in the video below.
I made a video tutorial showing how to sew this dress, which you can watch below or on YouTube here. For written instructions scroll below the video.
If you need some tips and guidance about sewing with knits, read this post.
Written Sewing Instructions
To start, you need to cut out the bodice pieces as instructed by the pattern. For the skirt, you need to cut out two pieces on the fold with with the instructions from the video. For reference, the skirt I’m wearing is 43 inches long and I am 5’3″ tall.
1/2″ (12mm) seams are allowed on this dress.
Place your bodice fronts on your bodice back, right sides together. Sew across shoulders. Repeat with other bodice pieces.
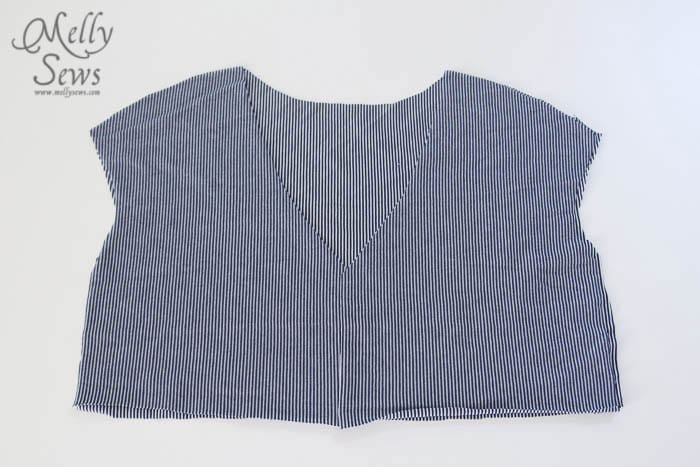
Lay your two bodices right sides together and pin along arm holes and neckline. Stitch. Turn this right side out.

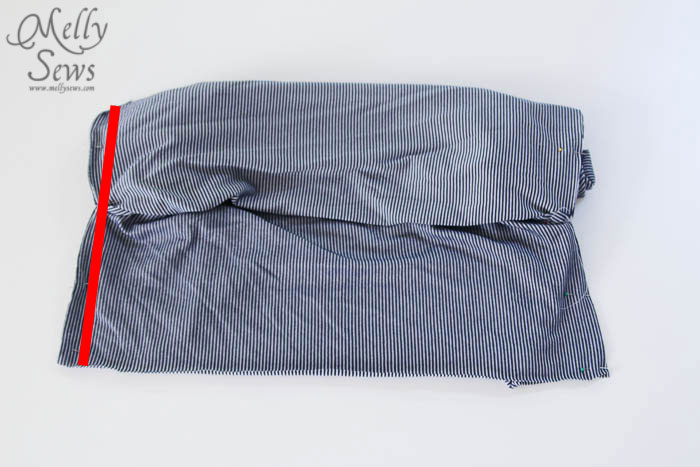
Match the front side seams to the back side seams on each piece. On top in the picture is the outside of the dress, below is the lining. Stitch on both sides (red line) and turn right side out again. Side seams should be enclosed and center front still open.
Now match the fronts to each other along the center front seam, matching at the neckline, in the same way you did the side seams. Stitch.
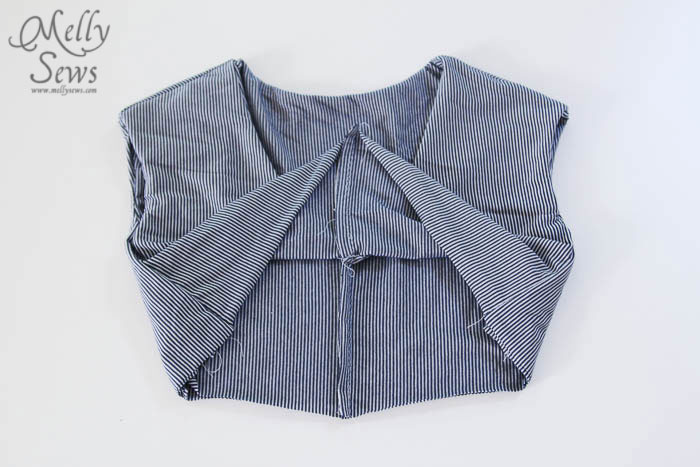
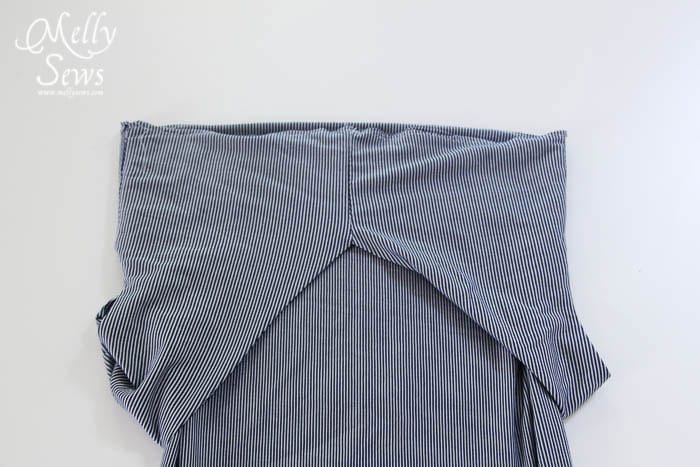
Now the bodice is fully lined with all raw edges inside.

Stitch the skirt side seams.
Place the bodice right sides together over the skirt, matching the side seams. Next you’ll stitch around the waistline USING A 3/4″ SEAM.
Press the waist seam open and then trim the seam allowance from the bodice down to 1/4″.
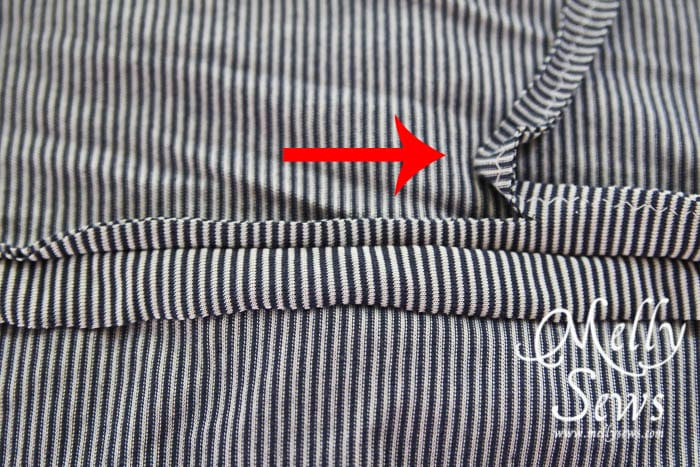
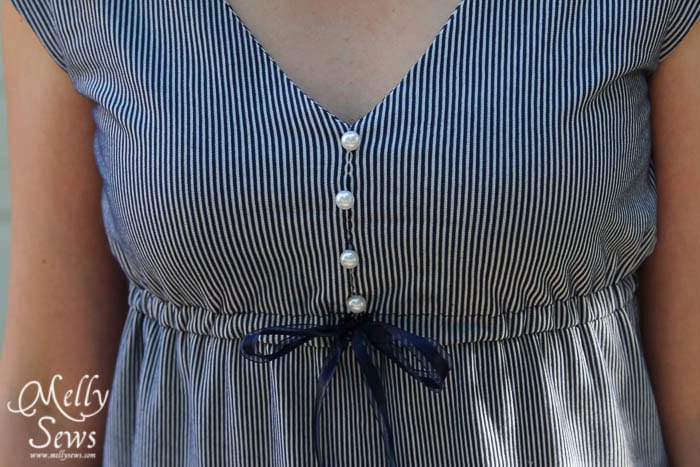
With the seam still pressed open, make 2 1/2″ buttonholes on the right side of the dress, on each side of the center front seam and above the waist seam.

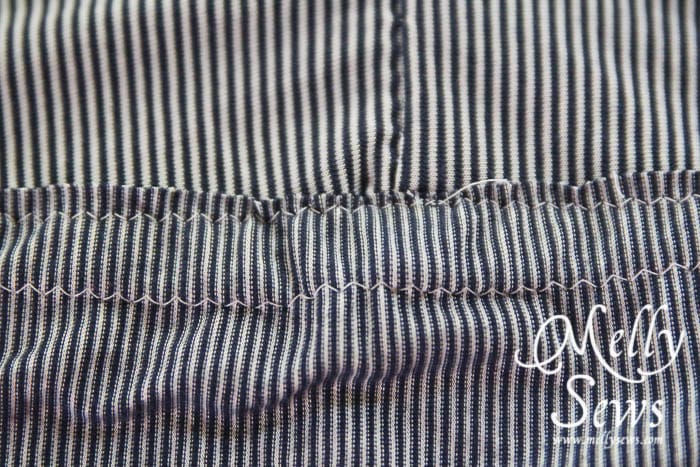
Flip the seam allowance for the skirt up, and stitch along the raw edge to form the casing for the elastic.
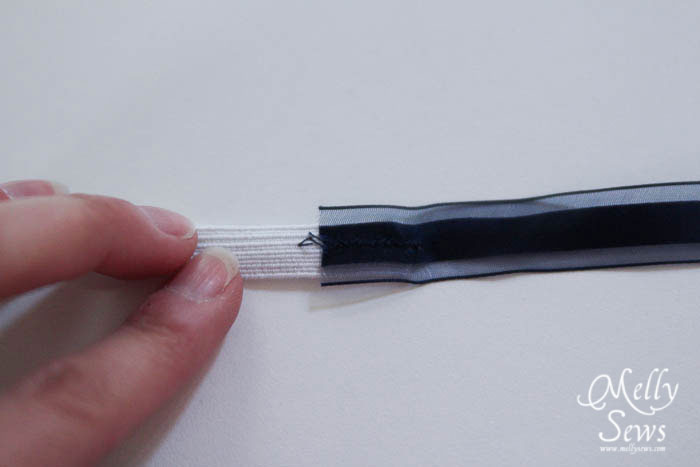
Cut your ribbon in half. After that, sew one piece to each end of your elastic to make a drawstring.
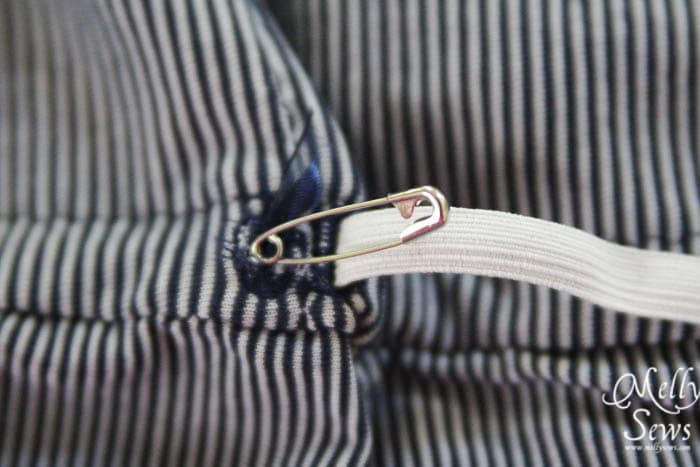
Now that the casing is sewn, use a safety pin to thread your elastic through the casing. Once that is done, burn, tie, or use fray check on your ribbon ends to seal them.
Next, if desired, sew buttons along center front seam for decoration. Sew the hem and then you’re done!

Melissa is an author, pattern designer, fabric designer, and sewing instructor with over 30 years of sewing experience.