Ebyte LoRa E32 device for Arduino, esp32 or esp8266: specs and basic use - 1 (original) (raw)

LoRa EBYTE E32-TTL-100 Arduino Basics
LoRa or Long Range wireless data telemetry is a technology pioneered by Semtech that operates at a lower frequency than NRF24L01 (433 MHz, 868 MHz, or 916 MHz against 2.4 GHz for the NRF24L01) but at thrice the distance (from 3000m to 8000m).
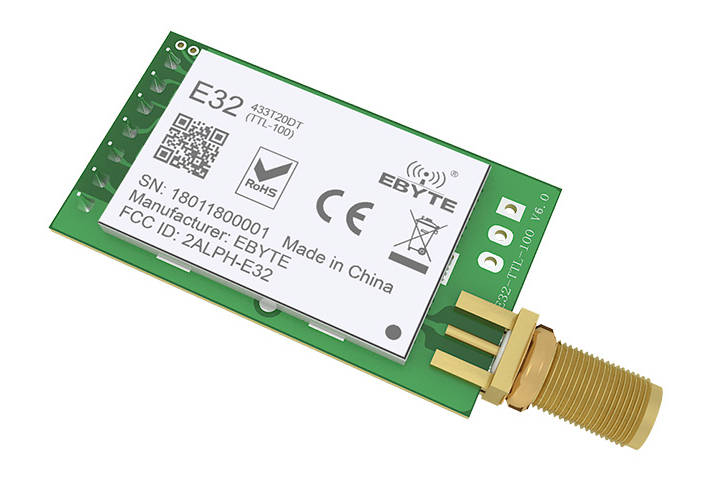
LoRa E32-TTL-100
You can find here AliExpress (433MHz 5Km) - AliExpress (433MHz 8Km) - AliExpress (433MHz 16Km) - AliExpress (868MHz 915MHz 5.5Km) - AliExpress (868MHz 915MHz 8Km)
We are going to test E32-TTL-100. It is a wireless transceiver module, operates at 410 441 MHz based on original RFIC SX1278 from SEMTECH, transparent transmission is available, TTL level. The module adopts LORA spread spectrum technology.
The module features FEC Forward Error Correction algorithm, which ensure its high coding efficiency & good correction performance. In the case of sudden interference, it can correct the interfered data packets automatically, so that the reliability and transmission range are improved correspondingly. But without FEC, those da te packets can only be dropped.
And with the rigorous encryption & decryption, data interception becomes pointless. The function of data compression can decrease the transmission time & probability of being interference, while improving the reliability & transmission efficiency.
Toggle
- Operating and transmission type
* Transmission
* Transparent transmission
* Fixed transmission
* Normal mode
* Wake-up mode and power-saving mode
* Program/sleep mode
* Specifications
* Pinout - Connecting Wemos D1 mini (esp8266) for a basic usage
- Connecting Arduino for a basic usage
- Connecting ESP-32 for a basic usage
- Connecting Arduino SAMD MKR WiFi 1010 for a basic usage
- Simple communication sketch
* Arduino sketch
* Wemos D1 mini sketch
* ESP32 sketch
* Arduino SAMD MKR WiFi 1010 - Library
- Thanks
Operating and transmission type
This device have some interesting function:
Transmission
![]()
LoRa E32 transmitting scenarios
Transparent transmission
This can be considered like a “Demo mode”, by default you can send message to all device of same configured address and channel.
Fixed transmission
This type of transmission you can specify an address and a channel where where you want send the message.
You can send message to a:
- Specified device with a predeterminated Address Low, Address High and Channel.

LoRa E32 Fixed message to a specified device
- Broadcast a message on predeterminated Channel.

Broadcast message to a set of channel devices
Normal mode
Simply send message.
Wake-up mode and power-saving mode
As you can intend if a device is in Wake-up mode can “wake” one or more devices that are in power-saving mode with a preamble communication.
Program/sleep mode
With this configuration you can change configuration of your device.
Specifications
Here’s the specifications for the module:
- Module size: 21*36mm
- Antenna type: SMA-K (50Ω impedance)
- Transmission distance: 3000m(max)
- Maximum power: 2dB(100mW)
- Air rates: 2.4Kbps (6 optional level (0.3, 1.2, 2.4, 4.8, 9.6, 19.2kbps)
- Emission length: 512Byte
- Receive length: 512Byte
- Communication Interface: UART – 8N1, 8E1, 8O1, Eight kinds of UART baud Rate, from 1200 to 115200bps (Default: 9600)
- RSSI support: No (Built-in intelligent processing)
- Working frequency: 410MHz-441MHz (Default 433MHz), Channel: 32
| Electronic parameter | Min. | Typ. | Max. | Unit |
|---|---|---|---|---|
| Power supply | 2.3 | 3.3 | 5.5 | V |
| Communication level | 3.0 | 3.3 | 3.6 | V |
| Transmitting current | 102 | 110 | 118 | mA |
| Receiving current | 12 | 15 | 18 | mA |
| Sleep current | 3 | 5 | 8 | μA |
| Operating temperature | -40 | 20 | +85 | ℃ |
| Operating humidity | 10 | 60 | 90 | % |
| Storage temperature | -40 | 20 | +125 | ℃ |
You must pay attention on communication level that differ from power supply, the second can receive voltage like 3.3v (esp8266 and esp32) and 5v (Arduino), but the first want a 3.3v, so to connecto to an Arduino you must use a Voltage divider (Voltage divider: calculator and application) to prevent damage to the device.
Pinout

sx1278 sx1276 wireless lora uart module serial 3000m arduino 433 rf
| Pin No. | Pin item | Pin direction | Pin application |
|---|---|---|---|
| 1 | M0 | Input(weak pull-up) | Work with M1 & decide the four operating modes.Floating is not allowed, can be ground. |
| 2 | M1 | Input(weak pull-up) | Work with M0 & decide the four operating modes.Floating is not allowed, can be ground. |
| 3 | RXD | Input | TTL UART inputs, connects to external (MCU, PC) TXD outputpin. Can be configured as open-drain or pull-up input. |
| 4 | TXD | Output | TTL UART outputs, connects to external RXD (MCU, PC) inputpin. Can be configured as open-drain or push-pull output |
| 5 | AUX | Output | To indicate module’s working status & wakes up the external MCU. During the procedure of self-check initialization, the pin outputs low level. Can be configured as open-drain output orpush-pull output (floating is allowed). |
| 6 | VCC | Power supply 2.3V~5.5V DC | |
| 7 | GND | Ground |
As you can see you can set various modes via M0 and M1 pins.
| Mode | M1 | M0 | Explanation |
|---|---|---|---|
| Normal | 0 | 0 | UART and wireless channel is good to go |
| Wake-Up | 0 | 1 | Same as normal but a preamble code is added to transmitted data for waking-up the receiver. |
| Power-Saving | 1 | 0 | UART is disable and wireless is on WOR(wake on radio) mode which means the device will turn on when there is data to be received. Transmission is not allowed. |
| Sleep | 1 | 1 | Used in setting parameters. Transmitting and receiving disabled. |
For the next simple test we are going to use Normal mode.
Connecting Wemos D1 mini (esp8266) for a basic usage
esp8266 have the advantage to have same voltage of communication interface so the connection schema is more simple than Arduino.

LoRa E32-TTL-100 Wemos D1 breadboard
It’s important to add pull-up resistor (4,7Kohm) to get good stability.
| M0 | GND (Set normal mode) |
|---|---|
| M1 | GND (Set normal mode) |
| RX | PIN D2 (PullUP 4,7KΩ) |
| TX | PIN D3 (PullUP 4,7KΩ) |
| AUX | Not connected |
| VCC | 3.3v |
| GND | GND |
Connecting Arduino for a basic usage
Arduino working voltage is 5v, so we need to add a voltage divider on RX pin of LoRa module to prevent damage, you can get more information here Voltage divider: calculator and application.
You can use a 2Kohm resistor to GND and 1Kohm from signal than put together on RX.

LoRa E32-TTL-100 Arduino breadboard
| M0 | GND (Set normal mode) |
|---|---|
| M1 | GND (Set normal mode) |
| RX | PIN D2 (PullUP 4,7KΩ & Voltage divider) |
| TX | PIN D3 (PullUP 4,7KΩ) |
| AUX | Not connected |
| VCC | 3.3v |
| GND | GND |
Connecting ESP-32 for a basic usage

Ebyte LoRa E22 device esp32 dev kit v1 breadboard transparent transmission (normal mode)
| M0 | GND (Set normal mode) |
|---|---|
| M1 | GND (Set normal mode) |
| RX | TX2 (PullUP 4,7KΩ) |
| TX | RX2 (PullUP 4,7KΩ) |
| AUX | Not connected |
| VCC | 3.3v-5v |
| GND | GND |
Connecting Arduino SAMD MKR WiFi 1010 for a basic usage

Ebyte LoRa Exx Arduino MKR WiFi 1010 normal mode connected breadboard
| M0 | GND (Set normal mode) |
|---|---|
| M1 | GND (Set normal mode) |
| TX | PIN 14 Tx (PullUP 4,7KΩ) |
| RX | PIN 13 Rx (PullUP 4,7KΩ) |
| AUX | PIN 1 (PullUP 4,7KΩ) |
| VCC | 5V |
| GND | GND |
Simple communication sketch
If you put 0 M1 and M0 pins, you enter “Normal” mode, and then you can receive and transmit all the data from device A to B; this modality is defined as “Transparent transmission”.
You can use 2 Arduinos or 2 Wemos D1 mini or one of a kind.
At the start, send a message, and if you write on a serial from one of the devices, the text is transferred to the other device. You can use 2 Arduinos or 2 Wemos or one and one, as you prefer.
Arduino sketch
/*
- LoRa E32-TTL-100
- Start device or reset to send a message
- https://mischianti.org
- E32-TTL-100----- Arduino UNO
- M0 ----- GND
- M1 ----- GND
- TX ----- PIN 2 (PullUP)
- RX ----- PIN 3 (PullUP & Voltage divider)
- AUX ----- Not connected
- VCC ----- 3.3v/5v
- GND ----- GND
- */
#include "Arduino.h"
#include <SoftwareSerial.h>
SoftwareSerial mySerial(2, 3); // e32 TX e32 RX
void setup() { Serial.begin(9600); delay(500);
Serial.println("Hi, I'm going to send message!");
mySerial.begin(9600); mySerial.println("Hello, world?"); }
void loop() { if (mySerial.available()) { Serial.write(mySerial.read()); } if (Serial.available()) { mySerial.write(Serial.read()); } }
Wemos D1 mini sketch
/*
- LoRa E32-TTL-100
- Start device or reset to send a message
- https://mischianti.org
- E32-TTL-100----- Wemos D1 mini
- M0 ----- GND
- M1 ----- GND
- TX ----- PIN D2 (PullUP)
- RX ----- PIN D3 (PullUP)
- AUX ----- Not connected
- VCC ----- 3.3v/5v
- GND ----- GND
- */
#include "Arduino.h" #include <SoftwareSerial.h>
SoftwareSerial mySerial(D2, D3); // e32 TX e32 RX
void setup() { Serial.begin(9600); delay(500);
Serial.println("Hi, I'm going to send message!");
mySerial.begin(9600); mySerial.println("Hello, world?"); }
void loop() { if (mySerial.available()) { Serial.write(mySerial.read()); } if (Serial.available()) { mySerial.write(Serial.read()); } }
ESP32 sketch
/*
- LoRa E32
- Start device or reset to send a message
- https://mischianti.org
- E32 ----- esp32
- M0 ----- GND
- M1 ----- GND
- TX ----- RX2 (PullUP)
- RX ----- TX2 (PullUP)
- AUX ----- Not connected
- VCC ----- 3.3v/5v
- GND ----- GND
- */
#include "Arduino.h"
void setup() { Serial.begin(9600); delay(500);
Serial.println("Hi, I'm going to send message!");
Serial2.begin(9600); Serial2.println("Hello, world?"); }
void loop() { if (Serial2.available()) { Serial.write(Serial2.read()); } if (Serial.available()) { Serial2.write(Serial.read()); } }
Arduino SAMD MKR WiFi 1010
/*
- LoRa E32
- Start device or reset to send a message
- https://mischianti.org
- E32 ----- Arduino MKR WiFi 1010
- M0 ----- 2 (or GND)
- M1 ----- 3 (or GND)
- RX ----- 14 (PullUP)
- TX ----- 13 (PullUP)
- AUX ----- 1 (PullUP)
- VCC ----- 3.3v/5v
- GND ----- GND
- */
#include "Arduino.h"
void setup() { Serial.begin(9600); delay(500);
Serial.println("Hi, I'm going to send message!");
Serial1.begin(9600); Serial1.println("Hello, world?"); }
void loop() { if (Serial1.available()) { Serial.write(Serial1.read()); } if (Serial.available()) { Serial1.write(Serial.read()); } }
But this basic usage is quite unusefully, so in the next chapter we are going to use my library and go in deep of device features.
Library
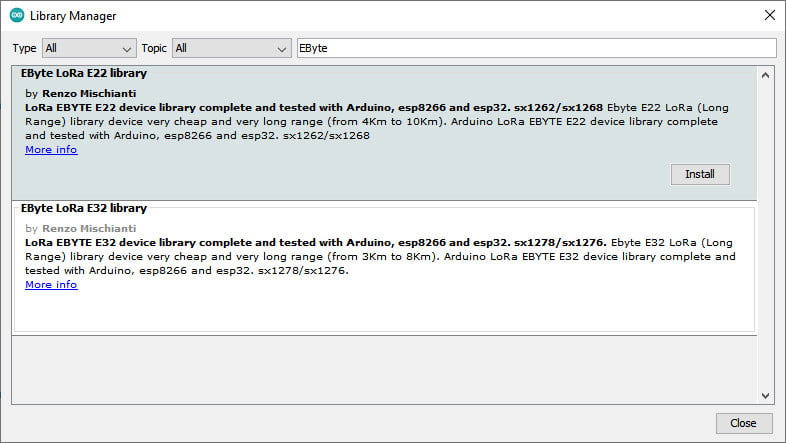
EByte LoRa E22 E32 Arduino library manager
Here the last example with my library:
Arduino sketch
/*
- LoRa E32-TTL-100
- Write on serial to transfer a message to other device
- https://mischianti.org
- E32-TTL-100----- Arduino UNO
- M0 ----- GND
- M1 ----- GND
- TX ----- PIN 2 (PullUP)
- RX ----- PIN 3 (PullUP & Voltage divider)
- AUX ----- Not connected
- VCC ----- 3.3v/5v
- GND ----- GND
- */
#include "Arduino.h" #include "LoRa_E32.h"
LoRa_E32 e32ttl100(2, 3); // e32 TX e32 RX
void setup() { Serial.begin(9600); delay(500);
Serial.println("Hi, I'm going to send message!");
// Startup all pins and UART e32ttl100.begin();
// Send message ResponseStatus rs = e32ttl100.sendMessage("Hello, world?"); // Check If there is some problem of successfully send Serial.println(rs.getResponseDescription()); }
void loop() { // If something available if (e32ttl100.available()>1) { // read the String message ResponseContainer rc = e32ttl100.receiveMessage(); // Is something goes wrong print error if (rc.status.code!=1){ rc.status.getResponseDescription(); }else{ // Print the data received Serial.println(rc.data); } } if (Serial.available()) { String input = Serial.readString(); e32ttl100.sendMessage(input); } }
Here the Wemos D1 (esp8266) sketch
/*
- LoRa E32-TTL-100
- Start device or reset to send a message
- https://mischianti.org
- E32-TTL-100----- Wemos D1 mini
- M0 ----- GND
- M1 ----- GND
- TX ----- PIN D2 (PullUP)
- RX ----- PIN D3 (PullUP)
- AUX ----- Not connected
- VCC ----- 3.3v/5v
- GND ----- GND
- */
#include "Arduino.h" #include "LoRa_E32.h"
LoRa_E32 e32ttl100(D2, D3); // e32 TX e32 RX
void setup() { Serial.begin(9600); delay(500);
Serial.println("Hi, I'm going to send message!");
// Startup all pins and UART e32ttl100.begin();
// Send message ResponseStatus rs = e32ttl100.sendMessage("Hello, world?"); // Check If there is some problem of successfully send Serial.println(rs.getResponseDescription()); }
void loop() { // If something available if (e32ttl100.available()>1) { // read the String message ResponseContainer rc = e32ttl100.receiveMessage(); // Is something goes wrong print error if (rc.status.code!=1){ rc.status.getResponseDescription(); }else{ // Print the data received Serial.println(rc.data); } } if (Serial.available()) { String input = Serial.readString(); e32ttl100.sendMessage(input); } }
ESP-32 sketch
/*
- EBYTE LoRa E32
- send a transparent message, you must check that the transmitter and receiver have the same
- CHANNEL ADDL and ADDH
- https://mischianti.org
- E32 ----- esp32
- M0 ----- 19 (or GND)
- M1 ----- 21 (or GND)
- RX ----- TX2 (PullUP)
- TX ----- RX2 (PullUP)
- AUX ----- 15 (PullUP)
- VCC ----- 3.3v/5v
- GND ----- GND
- */
#include "Arduino.h" #include "LoRa_E32.h"
// ---------- esp8266 pins -------------- //LoRa_E32 e32ttl(RX, TX, AUX, M0, M1); // Arduino RX <-- e22 TX, Arduino TX --> e22 RX //LoRa_E32 e32ttl(D3, D4, D5, D7, D6); // Arduino RX <-- e22 TX, Arduino TX --> e22 RX AUX M0 M1 //LoRa_E32 e32ttl(D2, D3); // Config without connect AUX and M0 M1
//#include <SoftwareSerial.h> //SoftwareSerial mySerial(D2, D3); // Arduino RX <-- e22 TX, Arduino TX --> e22 RX //LoRa_E32 e32ttl(&mySerial, D5, D7, D6); // AUX M0 M1 // -------------------------------------
// ---------- Arduino pins -------------- //LoRa_E32 e32ttl(4, 5, 3, 7, 6); // Arduino RX <-- e22 TX, Arduino TX --> e22 RX AUX M0 M1 //LoRa_E32 e32ttl(4, 5); // Config without connect AUX and M0 M1
//#include <SoftwareSerial.h> //SoftwareSerial mySerial(4, 5); // Arduino RX <-- e22 TX, Arduino TX --> e22 RX //LoRa_E32 e32ttl(&mySerial, 3, 7, 6); // AUX M0 M1 // -------------------------------------
// ------------- Arduino MKR WiFi 1010 ------------- // LoRa_E32 e220ttl(&Serial1, 1, 2, 3); // RX AUX M0 M1 // -------------------------------------------------
// ---------- esp32 pins -------------- LoRa_E32 e32ttl(&Serial2, 15, 21, 19); // RX AUX M0 M1
//LoRa_E32 e32ttl(&Serial2, 22, 4, 18, 21, 19, UART_BPS_RATE_9600); // esp32 RX <-- e22 TX, esp32 TX --> e22 RX AUX M0 M1 // -------------------------------------
void setup() { Serial.begin(9600); delay(500);
// Startup all pins and UART e32ttl.begin();
Serial.println("Hi, I'm going to send message!");
// Send message ResponseStatus rs = e32ttl.sendMessage("Hello, world?"); // Check If there is some problem of succesfully send Serial.println(rs.getResponseDescription()); }
void loop() { // If something available if (e32ttl.available()>1) { // read the String message ResponseContainer rc = e32ttl.receiveMessage();
// Is something goes wrong print error
if (rc.status.code!=1){
    Serial.println(rc.status.getResponseDescription());
}else{
    // Print the data received
    Serial.println(rc.status.getResponseDescription());
    Serial.println(rc.data);
}
} if (Serial.available()) { String input = Serial.readString(); e32ttl.sendMessage(input); } }
Arduino MKR WiFi 1010
/*
- EBYTE LoRa E32
- send a transparent message, you must check that the transmitter and receiver have the same
- CHANNEL ADDL and ADDH
- https://mischianti.org
- E32 ----- Arduino MKR
- M0 ----- 2 (or GND)
- M1 ----- 3 (or GND)
- RX ----- 14 (PullUP)
- TX ----- 13 (PullUP)
- AUX ----- 1 (PullUP)
- VCC ----- 3.3v/5v
- GND ----- GND
- */
#include "Arduino.h" #include "LoRa_E32.h"
// ---------- esp8266 pins -------------- //LoRa_E32 e32ttl(RX, TX, AUX, M0, M1); // Arduino RX <-- e22 TX, Arduino TX --> e22 RX //LoRa_E32 e32ttl(D3, D4, D5, D7, D6); // Arduino RX <-- e22 TX, Arduino TX --> e22 RX AUX M0 M1 //LoRa_E32 e32ttl(D2, D3); // Config without connect AUX and M0 M1
//#include <SoftwareSerial.h> //SoftwareSerial mySerial(D2, D3); // Arduino RX <-- e22 TX, Arduino TX --> e22 RX //LoRa_E32 e32ttl(&mySerial, D5, D7, D6); // AUX M0 M1 // -------------------------------------
// ---------- Arduino pins -------------- //LoRa_E32 e32ttl(4, 5, 3, 7, 6); // Arduino RX <-- e22 TX, Arduino TX --> e22 RX AUX M0 M1 //LoRa_E32 e32ttl(4, 5); // Config without connect AUX and M0 M1
//#include <SoftwareSerial.h> //SoftwareSerial mySerial(4, 5); // Arduino RX <-- e22 TX, Arduino TX --> e22 RX //LoRa_E32 e32ttl(&mySerial, 3, 7, 6); // AUX M0 M1 // -------------------------------------
// ------------- Arduino MKR WiFi 1010 ------------- LoRa_E32 e220ttl(&Serial1, 1, 2, 3); // RX AUX M0 M1 // -------------------------------------------------
// ---------- esp32 pins -------------- // LoRa_E32 e32ttl(&Serial2, 15, 21, 19); // RX AUX M0 M1
//LoRa_E32 e32ttl(&Serial2, 22, 4, 18, 21, 19, UART_BPS_RATE_9600); // esp32 RX <-- e22 TX, esp32 TX --> e22 RX AUX M0 M1 // -------------------------------------
void setup() { Serial.begin(9600); delay(500);
// Startup all pins and UART e32ttl.begin();
Serial.println("Hi, I'm going to send message!");
// Send message ResponseStatus rs = e32ttl.sendMessage("Hello, world?"); // Check If there is some problem of succesfully send Serial.println(rs.getResponseDescription()); }
void loop() { // If something available if (e32ttl.available()>1) { // read the String message ResponseContainer rc = e32ttl.receiveMessage();
// Is something goes wrong print error
if (rc.status.code!=1){
    Serial.println(rc.status.getResponseDescription());
}else{
    // Print the data received
    Serial.println(rc.status.getResponseDescription());
    Serial.println(rc.data);
}
} if (Serial.available()) { String input = Serial.readString(); e32ttl.sendMessage(input); } }
If you have already change configuration you must restore base parameter:
// If you have ever change configuration you must restore It ResponseStructContainer c; c = e32ttl100.getConfiguration(); Configuration configuration = (Configuration) c.data; Serial.println(c.status.getResponseDescription()); configuration.CHAN = 0x17; configuration.OPTION.fixedTransmission = FT_TRANSPARENT_TRANSMISSION; e32ttl100.setConfiguration(configuration, WRITE_CFG_PWR_DWN_SAVE);
but we are going to see It better in the next article.
Thanks
But this kind of usage is very very reductive, in the next articles we are going more in deep, and we start to use massively the library to simplify the complex configuration and settings.
- LoRa E32 device for Arduino, esp32 or esp8266: settings and basic usage
- LoRa E32 device for Arduino, esp32 or esp8266: library
- LoRa E32 device for Arduino, esp32 or esp8266: configuration
- LoRa E32 device for Arduino, esp32 or esp8266: fixed transmission
- LoRa E32 device for Arduino, esp32 or esp8266: power saving and sending structured data
- LoRa E32 device for Arduino, esp32 or esp8266: WOR (wake on radio) microcontroller and Arduino shield
- LoRa E32 device for Arduino, esp32 or esp8266: WOR (wake on radio) microcontroller and WeMos D1 shield
- EByte LoRa E32 device for Arduino, esp32 or esp8266: WOR (wake on radio) and new ESP32 shield
- Ebyte LoRa E32 with STM32: WOR (wake on radio) and new STM32 shield