肉球でキーボード (original) (raw)

Glue Jobのローカル開発
AWS Glue Jobをローカル環境で開発する際、AWS公式が提供してるDocker imageを活用する方法があります。
Developing and testing AWS Glue job scripts locally
Glue Jobを利用する場合、S3からデータを取得・保存するユースケースが多いかと思います。
本記事では、ローカル環境にAWS環境をエミュレートするLocalStackを活用して、実際のAWSリソースへのデータをやり取りを行わずGlue Jobの動作検証・テストを行う方法を書きます。
Overview | Docs
Glue version 4.0のdocker imageであるamazon/aws-glue-libs:glue_libs_4.0.0_image_01 を使用します。
Glue versionごとにdocker imageが異なるので、ご注意ください。
本文中コードgithub.com
ディレクトリ構成
/ ├─ src | └─ glue_job.py ├─ tests │ └─ test_glue_job.py └─ compose.yaml
Glue Jobの実行スクリプト
import sys from typing import Dict
from awsglue.context import GlueContext from awsglue.job import Job from awsglue.utils import getResolvedOptions from awsglue.dynamicframe import DynamicFrame from pyspark.context import SparkContext
S3_ENDPOINT_URL = "http://s3.dev:4566" AWS_REGION = "ap-northeast-1" S3_BUCKET = "test-job-bucket"
def get_dynamic_frame_from_s3(glue_context: GlueContext, source_s3_path: str) -> DynamicFrame: dyf = glue_context.create_dynamic_frame.from_options( format_options={ "quoteChar": '"', "withHeader": True, "separator": ",", }, connection_type="s3", format="csv", connection_options={ "paths": [source_s3_path], "recurse": True, }, ) return dyf
def write_dynamic_frame_to_s3(glue_context: GlueContext, dyf: DynamicFrame, destination_s3_path: str) -> None: glue_context.write_dynamic_frame.from_options( frame=dyf, connection_type="s3", connection_options={"path": destination_s3_path}, format="parquet", format_options={"writeHeader": True}, )
def main(args: Dict[str, str]) -> None: sc = SparkContext() if args["JOB_NAME"] == "test": sc._jsc.hadoopConfiguration().set("fs.s3a.endpoint", S3_ENDPOINT_URL) sc._jsc.hadoopConfiguration().set("fs.s3a.endpoint.region", AWS_REGION) sc._jsc.hadoopConfiguration().set("fs.s3a.path.style.access", "true") glue_context = GlueContext(sc)
job = Job(glue_context)
job.init(args["JOB_NAME"], args)

dyf = get_dynamic_frame_from_s3(glue_context=glue_context, source_s3_path=f"s3://{S3_BUCKET}/test_data.csv")
write_dynamic_frame_to_s3(glue_context=glue_context, dyf=dyf, destination_s3_path=f"s3://{S3_BUCKET}/output")

job.commit()
if name == "main": args = getResolvedOptions(sys.argv, ["JOB_NAME"]) main(args)
以下の処理を実行するGlue Jobのスクリプトを用意しました
- S3からcsvデータを取得
- S3にparquet形式のデータを保存
SparkContextにLocalStackでエミュレートしたS3にアクセスする設定を追加しています。
本番環境のGlueJobでは実際のAWSリソースにアクセスするため、以下の設定はローカル開発時のみ追加する必要があります。
実行引数のJOB_NAMEがtestの場合は、LocalStackへアクセスする設定を追加することでリソースの使い分けを行っています。
sc = SparkContext() if args["JOB_NAME"] == "test": sc._jsc.hadoopConfiguration().set("fs.s3a.endpoint", S3_ENDPOINT_URL) sc._jsc.hadoopConfiguration().set("fs.s3a.endpoint.region", AWS_REGION) sc._jsc.hadoopConfiguration().set("fs.s3a.path.style.access", "true") glue_context = GlueContext(sc)
docker composeの設定
services: glue.dev.s3.local: container_name: s3.dev image: localstack/localstack:3.8.0 environment: - SERVICES=s3 - AWS_DEFAULT_REGION=ap-northeast-1 - AWS_DEFAULT_OUTPUT=json - AWS_ACCESS_KEY_ID=test - AWS_SECRET_ACCESS_KEY=test networks: - glue.dev.network glue.dev: container_name: glue.dev image: amazon/aws-glue-libs:glue_libs_4.0.0_image_01 volumes: - ./:/home/glue_user/workspace/ environment: - DISABLE_SSL=true - AWS_REGION=ap-northeast-1 - AWS_OUTPUT=json - AWS_ACCESS_KEY_ID=test - AWS_SECRET_ACCESS_KEY=test networks: - glue.dev.network tty: true stdin_open: true networks: glue.dev.network: name: glue.dev.network
LocalStackでエミュレートしたAWS環境にGlue Jobのコンテナがアクセスできるように、Glue Jobのコンテナの環境変数に、LocalStackの起動設定で指定したAWS_ACCESS_KEY_IDとAWS_SECRET_ACCESS_KEYを追加します。
compose.yamlはこちらの実装を参考にさせてもらいました。
GitHub - n-yokota/aws_glue_test_concept
docker containerを起動します。
$ docker compose up -d
Glue Jobをローカル環境で実行する
LocalStackのS3 bucket準備
Glue Jobのコンテナ環境に入ります。
$ docker compose exec glue.dev bash
LocalStackのS3に test-job-bucket Bucketを作成します。
$ aws s3 mb s3://test-job-bucket --endpoint-url http://s3.dev:4566
テスト用ファイルをLocalStackのS3 Bucketに追加します。
$ aws s3 mv ./data/test_data.csv s3://test-job-bucket/test_data.csv --endpoint-url http://s3.dev:4566
S3 Bucketにテスト用ファイルが保存されていることを確認できます。
$ aws s3api list-objects-v2 --bucket test-job-bucket --endpoint-url http://s3.dev:4566 { "Contents": [ { "LastModified": "2024-10-08T14:31:52.000Z", "ETag": ""19ee3f2027cea3841e74c3aa3520b5ed"", "StorageClass": "STANDARD", "Key": "test_data.csv", "Size": 100 } ] }
コンテナ環境でGlue Job実行
Glue Jobのスクリプトを通常のpyhonスクリプトとして実行します。
$ python3 src/glue_job.py --JOB_NAME test
対象のS3 Bucketにparquet形式でファイルが保存されていることを確認できます。
$ aws s3api list-objects-v2 --bucket test-job-bucket --endpoint-url http://s3.dev:4566 { "Contents": [ { "LastModified": "2024-10-08T14:32:23.000Z", "ETag": ""fa768a3a4c9659604c161e45a17ec02f"", "StorageClass": "STANDARD", "Key": "output/part-00000-3479d3db-5a89-4bd7-856c-fd714291c2f3-c000.snappy.parquet", "Size": 981 }, { "LastModified": "2024-10-08T14:31:52.000Z", "ETag": ""19ee3f2027cea3841e74c3aa3520b5ed"", "StorageClass": "STANDARD", "Key": "test_data.csv", "Size": 100 } ] }
LocalStackのS3を使用したGlue Jobのテスト実行方法
テスト用GlueContextのfixture作成
@pytest.fixture(scope="session") def glue_context() -> GlueContext: spark = ( SparkSession.builder.master("local[1]")
    .config("spark.sql.shuffle.partitions", "1")
    .config("spark.ui.showConsoleProgress", "false")
    .config("spark.ui.enabled", "false")
    .config("spark.ui.dagGraph.retainedRootRDD", "1")
    .config("spark.ui.retainedJobs", "1")
    .config("spark.ui.retainedStages", "1")
    .config("spark.ui.retainedTasks", "1")
    .config("spark.sql. ui.retainedExecutions", "1")
    .config("spark.worker.ui.retainedExecutors", "1")
    .config("spark.worker.ui.retainedDrivers", "1")
    .getOrCreate()
)


spark.sparkContext._jsc.hadoopConfiguration().set("fs.s3a.endpoint", S3_ENDPOINT_URL)
spark.sparkContext._jsc.hadoopConfiguration().set("fs.s3a.endpoint.region", AWS_REGION)
spark.sparkContext._jsc.hadoopConfiguration().set("fs.s3a.path.style.access", "true")
spark.sparkContext._jsc.hadoopConfiguration().set("fs.s3a.change.detection.mode", "None")
spark.sparkContext._jsc.hadoopConfiguration().set("fs.s3a.change.detection.version.required", "false")

yield GlueContext(spark.sparkContext)
spark.stop()
テスト実行速度を高速化するためにspark設定はこちらの記事を参考にしてます.
AWS GlueのCI/CD環境を作ってみた - KAKEHASHI Tech Blog
pytest実行時にLocalStackのS3へアクセスするための設定はこちらの記事を参考にしてます.
AWS Glueの開発環境の構築(2022) | フューチャー技術ブログ
テスト用S3 Bucketのfixture作成
@pytest.fixture(scope="session") def s3_client(): return boto3.client( "s3", endpoint_url=S3_ENDPOINT_URL, aws_access_key_id=AWS_ACCESS_KEY_ID, aws_secret_access_key=AWS_SECRET_ACCESS_KEY, region_name=AWS_REGION, )
@pytest.fixture(scope="session") def s3_bucket(s3_client: boto3.client) -> str: bucket_name = "test-s3-bucket"
try:
    s3_client.head_bucket(Bucket=bucket_name)
except Exception:
    s3_client.create_bucket(
        Bucket=bucket_name,
        CreateBucketConfiguration={"LocationConstraint": AWS_REGION},
    )

yield bucket_name

try:
    s3_client.delete_bucket(Bucket=bucket_name)
except Exception as e:
    print(f"Failed to clean up test bucket: {e}")
@pytest.fixture(scope="session") def setup_s3_data(s3_client: boto3.client, s3_bucket: str) -> dict[str, str]: key = "test_data.csv" inputs = [ {"col1": "val1", "col2": 1, "col3": "2000/01/01 01:00:00"}, {"col1": "val2", "col2": 2, "col3": "2000/01/02 02:00:00"}, {"col1": "val3", "col2": 3, "col3": "2000/01/03 03:00:00"}, ] input_str = io.StringIO() w = csv.DictWriter(input_str, fieldnames=inputs[0].keys()) w.writeheader() for input in inputs: w.writerow(input)
body = input_str.getvalue()
s3_client.put_object(Bucket=s3_bucket, Key=key, Body=body)

yield {"bucket_name": s3_bucket, "key": key}

try:
    s3_client.delete_object(Bucket=s3_bucket, Key=key)
except Exception as e:
    print(f"Failed to clean up test data: {e}")
@pytest.fixture def get_s3_objects(s3_client): def _get_s3_objects(s3_bucket: str, prefix: str) -> list[str] | None: try: response = s3_client.list_objects_v2(Bucket=s3_bucket, Prefix=prefix) if "Contents" in response: return [obj["Key"] for obj in response["Contents"]] except Exception: return
return _get_s3_objects@pytest.fixture(scope="module") def sample_dynamicframe(glue_context: GlueContext) -> DynamicFrame: spark = glue_context.spark_session df = spark.createDataFrame( [ ("val1", 1, "2000/01/01 01:00:00"), ("val2", 2, "2000/01/02 02:00:00"), ("val3", 3, "2000/01/03 03:00:00"), ], ["col1", "col2", "col3"], ) dyf = DynamicFrame.fromDF(df, glue_context, "dyf")
return dyf各関数の役割
- s3_client
LocalStackのS3環境にアクセスするboto3 clientのfixture - s3_bucket
テスト用のS3 Bucketを作成・削除するfixture - setup_s3_data
テスト用のS3 Bucketにデータを追加・削除するfixture - get_s3_objects
テスト用のS3 Bucketに特定のキーに含まれるオブジェクト一覧を取得するヘルパー関数 - sample_dynamicframe
テスト用DynamicFrameデータを作成するfixture
S3アクセスを伴う関数のテスト
def test_get_dynamic_frame_from_s3(glue_context: GlueContext, setup_s3_data: dict[str, str]) -> None: source_s3_path = f"s3://{setup_s3_data['bucket_name']}/{setup_s3_data['key']}" result = get_dynamic_frame_from_s3(glue_context=glue_context, source_s3_path=source_s3_path)
assert isinstance(result, DynamicFrame)
assert result.count() == 3

df = result.toDF()
assert len(df.columns) == 3
assert df.columns == ["col1", "col2", "col3"]

rows = df.collect()
assert rows == [
    Row(col1="val1", col2="1", col3="2000/01/01 01:00:00"),
    Row(col1="val2", col2="2", col3="2000/01/02 02:00:00"),
    Row(col1="val3", col2="3", col3="2000/01/03 03:00:00"),
]
def test_write_dynamic_frame_from_s3( glue_context: GlueContext, s3_bucket, sample_dynamicframe: DynamicFrame, get_s3_objects, ) -> None: file_key = "test_write_data" destination_s3_path = f"s3://{s3_bucket}/{file_key}" write_dynamic_frame_to_s3( glue_context=glue_context, dyf=sample_dynamicframe, destination_s3_path=destination_s3_path, ) actual_s3_objects = get_s3_objects(s3_bucket=s3_bucket, prefix=file_key)
assert len(actual_s3_objects) > 0
assert any([object for object in actual_s3_objects if object.endswith(".parquet")])
LocalStackのS3 Bucketを使用して、S3とデータのやり取りを行う関数をテストします。
Glue Jobのコンテナ内でpytestコマンドを実行します。
$ pytest tests
参考
- AWS Glueの開発環境の構築(2022) | フューチャー技術ブログ
- AWS GlueのCI/CD環境を作ってみた - KAKEHASHI Tech Blog
- amazon web services - glue to connect localstack s3 - Stack Overflow

今回作成したdotfliesです。github.com
chezmoiとは
Go製のクロスプラットフォームのdotfiles管理ツールです。dotfilesとは .zshrc や .gitconfig といった設定ファイルを指す言葉です。
chezmoiの名前はフランス語の chez-moi (シェモア)に由来し、意味は「自宅」を表します。
主な機能としては以下となってます
dotfilesの管理をシンボリックリンクで行っていましたが、もっとシンプルにできないかと思って調べみると dotfiles管理ツールがあることを知りました。
chezmoiはGitHubスター数が多く、ドキュメントが整理され情報量が多かったので今回使ってみることにしました。
Redditでもdotfiles管理方法についての議論がされているので、他のdotfiles管理ツールも参考にしてみるといいかと思います。
| How do you guys manage your dotfiles ?
初期設定
インストール
Macの場合はbrewで入れられます。自分はbrewで入れました。
$ brew install chezmoi
プロジェクトの初期化
chezmoiを使用開始する場合、initコマンドを実行します。
$ chezmoi init
~/.local/share/chezmoi というフォルダが作成され、gitのローカルレポジトリが作成されています。
chezmoiではdotfilesをgit repositoryで管理する前提のAPI仕様となっています。
既にdotiflesがリモートレポジトリに存在する場合は、レポジトリを指定することで~/.local/share/chezmoi 以下に既存のdotiflesレポジトリがcloneされます。
$ chezmoi init git@github.com:/dotfiles.git
~/.local/share/chezmoi 以下のファイルがchezmoiで管理対象となるdotfilesとなります。
次にchezmoiの管理対象とするファイルを指定します。
管理対象のdotfilesを追加
chezmoi add コマンドで管理対象のファイルを指定します。
例えば、 .zshrc を管理する場合は以下のコマンドを実行します。
$ chezmoi add ~/.zshrc
実行すると、 ~/.local/share/chezmoi のフォルダ以下に dot_zshrc というファイル名で .zshrc の内容がコピーされます。
dotfilesの編集
chezmoi edit コマンドで管理対象のファイルを編集できます。
$ chezmoi edit ~/.zshrc
上記のコマンドでは ~/.zshrc は変更されず、~./local/share/chezmoi/dot_zshrc が変更されます。
dotfilesの変更を反映
chezmoi apply コマンドで元のdotfileに変更を反映できます。
$ chezmoi apply
上記の例だと~./local/share/chezmoi/dot_zshrc の変更が ~/.zshrc に反映されることになります。
git管理
~./local/share/chezmoi 以下にあるファイルをgit管理対象にします。
$ git add . $ git commit -m "Initial commit" $ git push origin main
dotfiles管理のワークフローまとめ
以上のコマンド実行のプロセスを整理すると以下のようになります。

https://www.chezmoi.io/quick-start/から引用
今回の例だと以下のようになります。
- home directory:
~/.zshrc - working copy:
~./local/share/chezmoi/dot_zshrc - local repo : ローカルのgit repository
- remote repo : リモートのgit repository
chezmoiはGitのように変更を追従するファイルを work spaceに追加することで管理を行います。
自前でdotfilesを管理する場合はシンボリックリンクを貼る方法が行われますが、chezmoiでは chezmoi add が代わりとなります。
今回行った設定
dotfilesの追加
zsh
$ chezmoi add ~/.zshrc
Git
$ chezmoi add ~/.gitconfig
Tmux
$ chezmoi add ~/.tmux.conf
JetBrain
$ chezmoi add ~/.ideavimrc
Alacritty
$ chezmoi add ~/.config/alacritty
Starship
$ chezmoi add ~/.config/starship.toml
VSCode
$ chezmoi add ~/Library/Application Support/Code/User/keybindings.json $ chezmoi add ~/Library/Application Support/Code/User/settings.json
~/.config/alacritty のようにルートフォルダより深い階層にあるファイルを追加する場合、自動でフォルダが ~./local/share/chezmoi 以下に作成されます。
この場合は.local/share/chezmoi/dot_config/alacritty という名前のフォルダが自動作成されます。
VSCodeの設定ファイルはMacに依存したフォルダ階層になっています。
chezmoiでは同一ファイルをシステムごとに別Pathで管理する方法が提供されています。
Manage machine-to-machine differences - chezmoi
chezmoiのGitHub RepositoryのDiscussionsでも、作者がsettings.jsonの管理方法を解説しているので、理想的にはこちらのやり方を行った方がいいです。
Handle configuration files that are externally modified and also in different locations on difference machines · twpayne chezmoi · Discussion #1312 · GitHub
brew install用のスクリプト作成
chezmoiではrun_ というprefixのついたスクリプトの実行を自動で行ってくれます。
Use scripts to perform actions - chezmoi
スクリプト名の命名規則によって挙動を制御でき、 run_once_ のprefixがつくスクリプトは chezmoi apply 初回実行時のみ実行されるので、PCの初期セットアップに便利です。
brewでインストールしたものを管理しようと思います。
まず brewで入れたものの一覧を取得します。
$ brew bundle dump
Brewfileというファイル名で一覧が出力されます。run_once_install_brew.sh というファイル名で 、brew installを実行するためのコマンドを保存します。
#!/usr/bin/env zsh
brew bundle --file="./Brewfile"
chezmoi appy を初回実行した際にbrew installが行われるようになりました。
外部パッケージ取得の管理
dotfiles管理対象外の外部レポジトリやパッケージを .chezmoiexternal.<json|jsonc|toml> というファイルで管理できます。
親ディレクトリに該当のフォルダ存在しない場合、chezmoiが自動でダウンロードしてディレクトリを作成してくれます。https://www.chezmoi.io/reference/special-files-and-directories/chezmoiexternal-format/
tmuxプラグイン管理のtpmと、alairittyのテーマ設定のフォルダを管理するようにしました。
[".tmux/plugins/tpm"] type = "archive" url = "https://github.com/tmux-plugins/tpm/archive/master.tar.gz" exact = true stripComponents = 1 refreshPeriod = "168h"
[".config/alacritty/themes"] type = "archive" url = "https://github.com/alacritty/alacritty-theme/archive/master.tar.gz" exact = true stripComponents = 1 refreshPeriod = "168h"
[".config/alacritty/catppuccin"] type = "archive" url = "https://github.com/catppuccin/catppuccin/archive/master.tar.gz" exact = true stripComponents = 1 refreshPeriod = "168h"
作成したdotfiles
参考
- chezmoi - chezmoi
- 既存の dotfiles を chezmoi で管理する
- chezmoi で dotfiles を管理するときに便利な機能についてまとめる
- chezmoi で dotfiles を管理する

本記事について
機械学習システム設計の面接対策本である「Machine Learning System Design Interview」を読んだ時の読書メモです。
本書についての紹介記事は以下となってます。nsakki55.hatenablog.com
本書の公式HP
bytebytego.com
1. Introduction and Overview
MLシステムデザインを行うためのフレームワークを作成
- Clarifying requirements
- Framing the problem as an ML task
- Data preparation
- Model deployment
- Evaluation
- Deployment and serving
- Monitoring and infrastructure
Clarifying Requirements
- 問題の解像度を上げるために以下の質問を行う
- Business objective
- Features the system needs to support
- Data
- Constraints
- Scale of the system
- Performance
Frame the Problem as an ML Task
- ML Taskの枠組みを決める
- Defining the ML objective
- ビジネス目標をMLの問題に落とし込む
- Specifying the systems’s input and output
- MLモデルの入力と出力を明確にする
- Choosing the right ML category
Data Preparation
- MLモデルに高品質のデータを入力するための処理
- Data Engineering
- Feature Engineering
- 特徴量エンジニアリングは2つのプロセスが含まれる
* ドメイン知識を使って生データから有効な特徴を抽出する
* 有効な特徴をモデルが使用可能なデータ型に変換する - 特徴量エンジニアリングの操作
* Handling missing values : 欠損値の取扱い。削除と補完が一般的。
* Feature Scaling : 正規化・標準化・ログスケーリングがある。
* Discretization(Bucketing) : 連続値をカテゴリ特徴に変換するプロセス。
* Encoding categorical features: カテゴリ特徴をモデルに入力できるデータ型に変換する。Integer encoding, One-hot encoding, Embedding learning がある。
- 特徴量エンジニアリングは2つのプロセスが含まれる
Model Deployment
- Model Deoloymentは適切なMLモデルを選択し学習するプロセス
- Model selection
- モデル選択の典型的なプロセス
* 簡単なベースラインの作成
* 簡単なモデルで実験
* より複雑なモデルに切り替え
* さらなる精度向上が必要な場合モデルアンサンブルを使用する - 典型的なモデル選択肢
* ロジスティック回帰
* 線形回帰
* 決定木
* 勾配ブースティング木
* SVM
* Naive Bayes
* Factorization Machine(FM)
* Neural Networks - モデル比較基準
* 学習に必要なデータ量
* 学習速度
* 調整が必要なハイパーパラメータ数
* 継続的学習の可能性
* コンピューティングリソース要件
* モデル解釈性
- モデル選択の典型的なプロセス
- Model Training
- データセットの作成 : 5ステップに分かれる。生データ収集→特徴とラベルの決定→サンプリング戦略の選定→データ分割→クラス不均衡の対応
* サンプリング戦略の種類
* convenience sampling, snowball sampling, stratified sampling, reservoir sampling, importance sampling - 損失関数の選定 : 既存の損失関数のリストから選ぶのが常だが、問題に応じて独自の変更を加える必要がある
- scratch vs fine-tuning
- 分散学習 : 時間が経過するにつれモデルとデータ規模が大きくなる場合に重要となる
- データセットの作成 : 5ステップに分かれる。生データ収集→特徴とラベルの決定→サンプリング戦略の選定→データ分割→クラス不均衡の対応
Evaluation
- Offline evaluatioin
- ground truthと予測値の近さを測る指標を使う
- Online evaluation
- モデルインパクトを測るためにオフライン指標とは異なるビジネス指標を選ぶ
- 例: Ad click predictionの場合はClick-through rate, revenue lift
Deployment and Serving
- Cloud vs on-device deployment : trade offが存在
- デプロイの簡易さ
- コスト
- ネットワークレイテンシ
- 推論レイテンシ
- ハードウェア制約
- プライバシー
- インターネット接続への依存
- Model compression : モデルサイズを小さくする操作。3つの方法がよく使われる
- 知識蒸留 : 大きいモデル(teacher)を模倣した小さなモデル(student)を学習
- プルーニング : 不必要なパラメータを0にすることでモデルをスパースにする
- 量子化 : パラメータのデータ型を小さくする
- Test in production : 本番リクエストを用いてモデルをテストする。シャドウデプロイ、ABテスト、カナリアリリース、インターリービング、バンディットなど。
- Prediction pipeline
- Batch prediction
* 事前に予測値を計算
* 2つの欠点
* ユーザー嗜好の変化に対応ができない
* 事前に計算する必要がある予測が分かってる場合でないと活用できない - Online prediction
* 推論リクエストが来るたびに予測値を計算
* 予測値取得に時間がかかる可能性がある
- Batch prediction
Monitoring
- Why a system fails in production
- データ分布シフトが最も頻繁に起きる理由
- データ分布シフトへの対応方法
* 大規模データセットでの学習
* 新しいデータ分布でのモデル学習
- What to monitor
Infrastructure
- 学習・デプロイ・MLシステム運用の基盤
- ML Interviewでは聞かれることは少ないが、DevOps・MLOpsのロールでは必要な知識
2. Visual Search System
Pinterstのような画像をもとに類似画像を検索するシステムの構築。
Clarifying Requirements
論点
- ランク付けを類似順に行うのか
- 動画もサポートするか
- ユーザーごとパーソナライズした結果を表示するか
- モデルは画像メタデータ・タグを使用できるか
- Click以外のユーザーアクションは行われるか
- コンテンツ監視を行うか
- 学習データのラベリングはユーザー行動をもとに作成できるか
- 検索速度はどれくらい早い必要があるか
要件整理
- ユーザーから与えられた画像をクエリとして、類似画像を検索する
- 類似度に基づいてランク付し、ユーザーに表示する
- 画像のみをサポート
- パーソナライズは不要
Frame the Problem as an ML Task
Defining the ML objective
- ユーザーが探してる画像を正確に取得すること
Specifying the system’s input and output
- 入力 : クエリ画像
- 出力 : 類似度に基づいてランク付された画像一覧
Choosing the right ML category
- visual search systemはランキング問題としてみなせる
- Representation Learning (表現学習)
- 入力データをEmbeddingと呼ばれる内部表現に変換できるように学習したモデル
- 入力画像をN次元の埋め込み空間にマッピングするモデルと捉えられる
- Representation Learningを使用して画像をランキングする
- 入力画像をEmbeddingベクトルに変換
- Embedding空間上でのクエリ画像と他の画像の距離を測定し、類似度スコアを計算する
Data Preparation
Data engineering
- 利用可能データ
- Images
- Users
- User-image interactions
Feature engineering
- 典型的な画像処理テクニック
- Resizing
- Scaling
- Z-score normalization
- Consistent color mode
Model Deployment
Model selection
- Neural Networksを選択
- Neural Networksは画像やテキストのような非構造化データを扱いやすい
- 表現学習で必要なEmbeddingを作成するのに、Neural Networksは古典的モデルより優れている
- モデル候補
- CNN-based : ResNet
- Transformer-based : ViT
Model training
- 学習過程でEmbeddingを取得できる必要がある
- contrastive training
- 類似・非類似画像の区別を行うモデルを学習
- 類似画像はクエリ画像と内部表現が近くなるように学習される
Constructing the dataset
- contrastive trainingのデータ
- クエリ画像(1) + 類似画像(1) + 非類似画像(n-1)
- 類似画像のラベリング方法
- 人間による判定
- Clickをプロキシ指標とした判定
- クエリ画像から人工的に生成
- ベストなアプローチ
- trade-offを考慮して複数の選択肢を議論することが重要
- 自己教師学習の手法を採用する
* SimCLRのような手法が大規模データでの学習結果を担保しやすい
* 数億の画像イメージにアクセスできる
Choosing the loss function
- 学習の目的はEmbedding空間で類似画像データが近くなるように、モデルパラメータが学習されること
- 生成されたEmbeddingの品質を測定できるよう損失関数を設計
- contrastive loss
- compute similarities
- Softmax
- Cross-entropy
Evaluation
- offline metrics
- 検索システムで一般的に使用される指標
* Mean reciprocal rank (MRR)
* Recall@k
* Precision@k
* Mean average precision (mAP)
* Normalized discounted cumulative gain (nDCG) - nDCGをオフライン指標として使用する
- 検索システムで一般的に使用される指標
- online metrics
- Click-through rate (CTR)
* 検索・レコメンドシステムで一般的に使用される - 提案画像に使われた時間
* 検索システムが正確であるほど、増加が期待される指標
- Click-through rate (CTR)
Serving
- Prediction pipeline
- Embedding generation service
* 入力クエリ画像のEmbeddingを計算するサービス - Nearest neighbor service
* Embedding空間からクエリ画像との近傍画像を取得する - Re-ranking service
* ビジネスロジックに関わる処理
* プライベート画像の除外、重複画像の除外などの不適切な結果のフィルターを行う
- Embedding generation service
- Indexing pipeline
- Indexing service
* 検索パフォーマンス向上のために全ての画像のインデックスを作成
* 新しい画像を追加された際にインデックスを生成 - Performance of nearest neighbor (NN) algorithms
* 最近傍検索は情報検索・レコメンデーションシステムの中心的要素
* 効率面での僅かな改善が全体のパフォーマンス向上に大きく寄与する
* Approximate nearest neighbor(ANN)
* Tree-based ANN
* Locality-sensitive hashing(LSH)-based ANN
* Clustering-based ANN
* 実装
* https://github.com/facebookresearch/faiss
* https://github.com/google-research/google-research/tree/master/scann
- Indexing service
Other Talking Points
- 不適切コンテンツ除去の対応
- ポジションバイアスのような別のバイアスの存在
- 検索結果向上のために画像メタデータ・タグをどのように活用するか
- 物体検知を利用した効率的な切り抜き
- 良い内部表現を学習するためにグラフニューラルネットワークをどのように活用するか
- Textを入力とした画像検索をサポートするには
- データアノテーションのために active learning, human-in-the-loopをどのように活用するか
3. Google Street View Blurring System
Google Street Viewのようなボカシを入れるシステムの構築。
Clarifying Requirements
論点
- ビジネス目標はユーザーのプライバシーを守ることか
- 設計するシステムはStreet View画像から人間の顔と車ナンバープレートを見つけ、ボカシを入れること。適切にボカシが入っていない場合、ユーザーから報告できる。
- アノテーション済み画像は手に入るか
- 人種、年齢、性別といったバイアスを持つデータセットか
- 厳しいレイテンシ要件が求められるか
要件整理
- Street View画像から人間の顔と車ナンバープレートを検知し、ボカシをいれるシステムを設計する
- アノテーション済みの100万画像が存在
- システムのビジネス目標はユーザープライバシーを守ること
Frame the Problem as an ML Task
Defining the ML objective
- 画像中から特定の物体を正確に検知すること
Specifying the system’s input and output
- 入力 : 物体が0または複数ある画像
- 出力 : 物体の位置
Choosing the right ML category
- 物体検知システムは2つの機能を担う
- 画像中の各物体の位置を予測. 回帰問題
- 各バウンディングボックスのクラスを予測. 他クラス分類問題
- Two-stage networks
- 2つの分割されたモデルが使われる. R-CNN, Fast R-CNN, Faster-RCNN
* Region proposal network(RPN)
* 画像をスキャンし物体と思われる候補領域を提示する
* Classifier
* 候補領域の物体を分類
- 2つの分割されたモデルが使われる. R-CNN, Fast R-CNN, Faster-RCNN
- One-stage networks
- Two-stage networksを採用する
- 100万データは一般的な物体検知のデータセットサイズと比較すると多いわけではない
- Two-stageにしても学習コストが肥大化しない
Data Preparation
Data Engineering
Feature Engineering
- データ拡張
- Random crop
- Random saturation
- Vertical or horizontal flip
- Rotation and/or translation
- Affine transformations
- Changing brightness, saturation, or contrast
- データ拡張による生成タイミングは2通りの方法がある
- オフライン : 学習前に生成
- オンライン : 学習中に都度生成
Model Deployment
Model Selection
- モデル要素
- Convolutional layers
- Region Proposal Network (RPN)
- Classifier
Model training
- 2つの損失関数を使用
- Regression loss
* バウンディングボックス座標のMean Squared Error (MSE) - Classification loss
- Regression loss
Evaluation
- バウンディングボックス予測値の評価指標
- Inference Over Union (IOU)
- offline metrics
- 物体検知で便利な指標
* Precision
* Average Precision
* Mean Average Precision
- 物体検知で便利な指標
- online metrics
- ユーザーレポート数・不満数
- 異なる人種や年齢グループにまたがって平等に人間の顔にボカシを入れられてるか
Serving
- Overlapping bounding boxes
- Non-maximum suppression (NMS)
* 重なりがあるバウンディングボックスを除外する - ML system design
* Batch prediction pipeline
* Preprocessing
* 生データを特徴量データに加工
* Blurring service
1. 画像中で検出した物体リストを作成
2. NMSを用いて検出した物体のリストを調整
3. 検出した物体にボカシをいれる
4. オブジェクトストレージにボカシを入れた画像を保存
* Data pipeline
* Hard negative mining
* 予測が誤った画像を学習データに追加
- Non-maximum suppression (NMS)
Other Taking Points
- Transformer-basedの物体検知アーキテクチャはone-stage, two-stageモデルとどう異なるか、それぞれのメリット・デメリットは何か
- 分散学習を用いた大規模データセットでの物体検知モデルの改善
- GDPRのシステムへの影響
- 顔検知システムのバイアスの評価
- どのように継続的にモデルをファインチューニングするか
- 学習のためのデータポイントを選択するために、active learningとhuman-in-the-loop-MLをどのように利用するか
4. YouTube Video Search
YouTubeのようなTextクエリから最も関連する動画を検索するシステムを構築する
Clarifying Requirements
論点
- 入力クエリはTextのみか
- プラットフォームのコンテンツは動画のみか
- 動画は映像コンテンツとタイトルや説明書きのテキストデータで決定される
- 利用可能な学習データはあるか
- 英語以外の言語もサポートする必要があるか
- プラットフォームに存在する動画の数は何個か
- 結果をパーソナライズ化する必要があるか
要件整理
- 動画の検索システムの構築
- 入力はテキストクエリ、出力はテキストクエリに関連性のある動画のリスト
- 動画の映像コンテンツとテキストデータを利用可能
- 1000万個の動画とテキストのペアの学習データセットが利用可能
Frame the Problem as an ML Task
Defining the ML objective
- Textクエリとの関連性に基づいた動画のランク付け
Specifying the system’s input and output
- 入力 : text クエリ
- 出力 : text クエリとの関連性に基づいて並び替えられた動画のリスト
Choosing the right ML category
- Visual search
- Textクエリと映像コンテンツの関連性に基づいて動画をランク付する
- 表現学習が一般的に使用される
- Video Encoder と Text Encoderを持ち、Video EmbeddingとText Embeddingの内積計算で類似性の計算を行う
- Text search
Data Preparation
Feature Engineering
- Preparing text data
- Text normalization
- Tokenization
- Tokens to IDs
- Preparing video data
- decode frames
- sample frames
- resizing
- scaling, normalization, correcting color mode
Model Deployment
- Model selection
- Text encoder
* Textをベクトルへと変換し、意味の近い文章同士の距離が近くなるようにEmbeddingを生成する
* Statistical methods
* 統計的手法により文章を特徴ベクトルへと変換する
* Bag of Words (BoW), Term Frequency Inverse Document Frequency (TF-IDF)
* ML-based methods
* MLモデルにより単語同士の意味の近さを反映したEmbedding空間を作成する
* Embedding (lookup) layer, Word2vec, Transformer-based architectures
* 最も効果的なEmbeddingを作成できるTransformer-besed architecturesを採用する - Video encoder
* Video-level models
* 動画全体でembeddingを作成する
* モデルは動画全体を処理し、計算コストが高い
* Frame-level models
* 動画からフレーム画像をサンプリングしEmbeddingを作成する
* モデルはフレーム画像を処理し、計算コストが低い
* 動画の連続的な特徴を学習できない
* 学習と推論足が早く計算コストが低い、ViT(Frame-level model)を採用する
- Text encoder
Evaluation
- Offline metrics
- Precision@k, mAP
- Recall@k
- Mean Reciprocal Rank (MRR)
- Online metrics
- Click-through rate (CTR)
- Video completion rate
- Total watch time of search results
Serving
- Prediction pipeline
- Visual search
* Textクエリのembeddingを取得し、最近傍探索で類似動画を検索する - Text search
* Textクエリから動画タイトル・タグを検索する - Flushing layer
* Visual searchとText searchの結果を組み合わせる - Re-ranking service
* 動画のリストを調整するビジネスロジック
- Visual search
- Video indexing pipeline
- 学習済みのvideo encoderを用いて新しい動画のembeddingのindexを作成
- Text indexing pipeline
- 新しい動画のタイトル・タグのElasticSearchのindexを作成
Other Talking Points
- マルチステージの設計(候補生成+ランキング)
- 動画秒数・動画の人気度などの特徴の使用
- ユーザー行動(click, like)でラベリングしたデータの活用
- Textクエリと意味の近いタイトル・タグを見つけるMLモデルの使用
- クエリ分類の要素追加
- 検索結果向上ためにマルチモーダルモデルをどのように使用するか
- 多言語サポートを行うためにどのように拡張すればよいか
- 重複動画がユーザー体験に悪影響を及ぼすか
- Textクエリを要素分解することの効果
- 出力リストを生成する際に人気度や新規度を考慮するにはどうすれば良いか
- 現実世界の検索システムがどう動いてるか
5. Harmful Content Detection
Facebook, LinkedIn, Twitterのような有害なコンテンツの検知システムを構築する
Clarifying Requirements
論点
- 有害なコンテンツとアカウントの両方を検知するか
- 投稿はテキスト・画像・動画が含まれるか
- 英語のみをサポートするか
- 有害なコンテンツはどのようなカテゴリを考慮するべきか
- 投稿をラベリングする人間のアノテーターは存在するか
- ユーザーからの有害コンテンツの報告を機能に含めるか
- 有害コンテンツとなった理由を説明する必要があるか
- システムのレイテンシー要件はあるか
要件整理
- 新しい投稿がされた時に有害コンテンツの検知を行い、なぜ有害扱いされたかの説明をユーザーに知らせる
- コンテンツはテキスト・画像・動画で構成され、さまざまな言語がある
- ユーザーは有害コンテンツを報告できる
Frame the Problem as an ML Task
Defining the ML objective
- 有害コンテンツを正確に検知する
Specifying the system’s input and output
- 入力 : 投稿(画像・テキスト・動画・ユーザー情報)
- Late fusion
* 異なるデータ型ごとのMLモデルを作成し、それぞれの結果を合成する方法
* 各モデルで学習・評価が可能
* 複数モデル学習のコストがかかる。各データの組み合わせ情報が失われる。 - Early fusion
* 異なるデータ型を先に合成し1つのモデルを作成する
* 1つのモデル学習だけ行えば良い。データの組み合わせ情報を使用できる
* モーダルの関係性を学習するのが難しい
- Late fusion
- 出力 : 有害である確率値
Choosing the right ML category
- MLカテゴリの候補
- 単クラス分類
- 有害クラスごとの単クラス分類
- 他クラス分類
- 他タスク分類 (採用)
* Shared layers
* 入力特徴を新しいデータに変換するための隠れ層
* Task-specific layers
* クラスごとの独自のML層
* クラスごとに特徴を変換し分類のために最適化する
Data Preparation
Data engineering
- 利用可能データ
- ユーザー情報
- 投稿
- ユーザーの投稿に対する反応
Feature Engineering
- Text content
- Text preprocessing
* normalization, tokenization - Vectorization
* 事前学習済みのDistlmBERTの使用
- Text preprocessing
- Image or video
- Preprocessing
* decode, resize, normalize - Feature extraction
* image, videoを特徴量ベクトルに変換する
* image
* CLIP, SimCLR
* video
* VideoMoCo
- Preprocessing
- User reactions to the post
- like, シェア、コメント、報告数
* 数値特徴にしてscaling - 投稿に対するコメント
* コメントごとのembeddingを作成
* コメントごとのembeddingを集約
- like, シェア、コメント、報告数
- Author features
- 投稿者の過去記録
* 不適切な投稿数
* ユーザーからの報告数
* 不適切な単語割合 - 投稿者のデモグラ情報
* 年齢
* 性別
* 都市 - アカウント情報
* フォロワー・フォロー数
* アカウント歴
- 投稿者の過去記録
- Contextual infofmation
- 日付
- 端末
Model Deployment
- Model selection
- Neural Networks
- Model training
- Constructing the dataset
* Hand labeling
* 人手で後からラベリングしたデータ
* 評価に使用する
* Natural labeling
* ユーザーからの報告でラベリングしたデータ
* 学習に使用する - Choosing the loss function
* タスクごとのcross entropyの和
- Constructing the dataset
Evaluation
- Offline metrics
- PR-curve
- ROC-curve
- Online metrics
- Prevalence
* 全投稿の内、防げなかった有害コンテンツの割合 - Harmful impressions
- Valid appeals
* 有害と判定した内、誤って判定した割合 - Positive rate
- User reports per harmful class
- Prevalence
Serving
- Harmful content detection service
- 新しい投稿があった際に有害コンテンツの確率を予測する
- Violation enforcement service
- 有害コンテンツの確率が高い投稿を削除する
- Demoting service
- 確率が低く有害コンテンツとして予測した投稿を一時的に降格する
Other Talking Points
- 人間によるラベリングで発生したバイアスを扱う
- 流行の有害クラスに対応する
- ユーザーの一連の行動情報を有害コンテンツ予測に使用する
- 人間のレビューのために効率的に投稿をサンプリングする
- グレーゾーンのコンテンツへの対応
- オンデバイスへのデプロイを行い、有害コンテンツ検知システムを効率化する
- Transformer-basedのアーキテクチャを linear Transformerで代替して、効率的なシステムに変更する
6. Video Recommendation System
YouTubeのような動画レコメンデーションシステムを構築する
Clarifying Requirements
論点
- 動画レコメンデーションのビジネス目標はユーザーエンゲージメントを増加させることか
- ユーザーが現在視聴してる動画か、ユーザーのホームページの動画に関連した動画をおすすめするのか
- ユーザーは全世界にいて、多言語をサポートしてるか
- ユーザーからの反応に基づいてデータセットを構築するのか
- プレイリスト機能は要件に含まれるか
- プラットフォーム上で利用可能な動画は何個か
- レイテンシー要件はあるか
要件整理
- ホームページの動画レコメンデーションシステムの構築
- ビジネス目標はユーザーエンゲージメントの増加
- ユーザーがホームページをロードするたびに、システムが関連動画をレコメンドする
- ユーザーは世界中にいて動画は多言語対応
- 100億動画が存在し、瞬時にレコメンドする必要がある
Frame the Problem as an ML Task
Defining the ML objective
- MLの目標の候補
- ユーザーのクリック数の最大化
* clickbaitと呼ばれる動画をレコメンドする危険性がある - 動画視聴完了数の最大化
* モデルが秒数が短い動画をレコメンドする危険性がある - 合計視聴時間の最大化
- 関連動画数の最大化 (採用)
* エンジニアやプロダクトマネージャーが決めたルールで関連性を測定可能
* Clickや動画の半分視聴などのユーザー行動でラベリング可能
- ユーザーのクリック数の最大化
Specifying the system’s input and output
- 入力 : ユーザー情報
- 出力 : 関連スコアに基づいてランク付された動画のリスト
Choosing the right ML category
- 一般的なパーソナライズレコメンデーションシステムの種類
Data Preparation
Data Engineering
- 利用可能データ
- Videos
- Users
- User-video interactions
Feature Engineering
- Video features
- VideoID
- 動画秒数
- 言語
- タイトル・タグ
- User features
- ユーザーデモグラ情報
- コンテキスト情報
- ユーザーの行動ログ
Model Deployment
- model
- Matrix factorization
- Two-tower neural network
- Constructing the dataset
- user特徴とvideo特徴のペアとラベルデータ
- Choosing the loss function
- cross-entropy
Evaluation
- Offline metrics
- Precision@k
- mAP
- Diversity
- Online metrics
- Click-through rate (CTR)
- The number of completed videos
- Total watch time
- Explicit user feedback
Serving
- prediction pipeline
- Candidate generation
* 数十億ある動画候補から、数千に候補を減らす
* ユーザー特徴と動画embeddingから最近傍法で生成する
* 流行、人気に基づく異なるcandidate generationを組み合わせる - Scoring
- Re-ranking
* レコメンド動画を選定するビジネスロジック
- Candidate generation
- Challenges of video recommendation systems
- Serving speed
* 軽量なモデルをcandidate generationに利用するのが有効 - Precision
- Diversity
* 複数のcandidate generationを導入するのが有効 - Cold-start problem
* 新規ユーザー
* two-tower neural networkを用いることでユーザー特徴からレコメンドが可能
* 新規動画
* ランダムにユーザーに表示するなどヒューリスティックな対応が有効 - Training scalability
- Serving speed
Other Talking Points
- レコメンドシステムのexploration-exploitationトレードオフについて
- レコメンドシステムに発生する異なるタイプのバイアスについて
- 倫理に関する重要な考慮事項
- 季節性の考慮
- 複数目的に対する最適化
- dislikeのようなネガティブフィードバックの活用
- ユーザーの検索履歴・視聴履歴のような動画の時系列情報の活用
7. Event Recommendation System
Eventbriteのようなパーソナライズしたイベントレコメンドを行うシステムの構築
Clarifying Requirements
論点
- ビジネス目標はチケット売り上げを増加させること
- イベントに加えてユーザーはホテルやレストランの予約もできるか
- イベントは一時的に発生し期限のある事象
- イベントの説明、金額幅、場所、日付、時刻情報を活用できる
- アノテーション済みデータが利用可能か
- ユーザーの現在位置を取得可能か
- フレンド機能はあるか
- ユーザーは他のユーザーを招待可能か
- ユーザーはイベントへの招待を行えるか
- イベントは有料 or 無料
- ユーザー数とイベント数はどれくらいか
- 1日あたり何人のアクティブユーザーがweb・app siteに訪れるか
- Google Map APIのような外部APIを利用可能か
要件整理
- ユーザーにパーソナライズ化されたイベントレコメンドを行うシステムの構築
- イベントが終了するとユーザーは登録が不可能になる
- ユーザーはフレンド追加とイベント招待が可能
- 学習データはユーザーの行動履歴に基づいて作られる
- 主目的はチケット売り上げを増加させること
Frame the Problem as an ML Task
Defining the ML objective
- イベント登録数を最大化すること
Specifying the system’s input and output
- 入力 : ユーザー情報
- 出力 : ユーザーに関連する上位k個のイベントのリスト
Choosing the right ML category
- レコメンド問題への対応一般的な方法
- 人気イベントをレコメンドするシンプルなルールベース
* baselineとして適切 - content-based, collaborative filteringのようなEmbeddingモデル
- ランキング問題に問題を置き換える(採用)
* Learning to Rank (LTR)
* クエリが与えられた時に、クエリに最も関連する最新のアイテムリストを並び替える
- 人気イベントをレコメンドするシンプルなルールベース
- LTR
- Pointwise LTR (採用)
* 1つitemとQueryを入力としてスコアを出力 - Pairwise LTR
* 2つのitemとQueryを入力として、itemの並び替えを出力 - Listwise LTR
* 複数のitemとQueryを入力として、itemの並び替えを出力
- Pointwise LTR (採用)
Data Preparation
Data engineering
- 利用可能データ
- Users
- Events
- Friendship
- Interactions
Feature engineering
- Event-base recommendation
- 従来のレコメンドよりイベントベースのレコメンドの方が困難
- イベントの存在期間が短いため、過去のデータを多く取得できない
- コールドスタート問題が課題
- Location-related features
- イベントにアクセス可能か
- イベントがユーザーと同じ国・都市か
- イベントまでの距離がユーザーの都合にあうか
- Time-related features
- イベントまでの時間はどれ位あるか
- 日付と時刻がユーザーの都合にあうか
- Social-related features
- イベントの参加人数
- フレンドの参加に関する特徴
- 他の人に招待されたイベントかどうか
- フレンドがホストのイベントかどうか
- 同一ホストのイベントに過去に参加したことがあるか
- User-related features
- 年齢・性別
- Event-related features
- 参加費用
- イベント説明が過去の参加イベントの説明と似ているか
* イベント説明をTF-IDでベクトル化し、類似度を計算
* 人間のホストが作成する文章のため、ノイズとなる可能性がある
- potential talking points
- バッチ・ストリーミング特徴
- 特徴計算の効率化
- Decay factorの利用
- Embedding Learningの利用
- ユーザー情報から作成した特徴に含まれるバイアス
Model Deployment
- Model selection
- Logistic regression
* Pros
* 推論が高速
* 効率的な学習
* データが線形分離可能な場合に有効
* モデル解釈が容易
* Cons
* 非線形問題が解けない
* 多重共線性の影響を受ける - Decision tree
* Pros
* 学習が高速
* 推論が高速
* データ準備が容易
* モデル解釈が容易
* Cons
* 決定境界が最適ではない
* 過学習しやすい
* 決定木のロバスト性を向上させる方法
* Bagging
* Boosting - Gradient-boosted decision tree (GBDT)
* Pros
* データ準備が容易
* バリアンスを減らせる
* バイアスを減らせる
* 構造化データに利用可能
* Cons
* 調整するハイパーパラメータが多い
* 非構造化データに使用できない
* 継続的学習には合わない - Neural network (採用)
* Pros
* 継続的学習が可能
* 非構造化データに利用可能
* 表現力が高い
* Cons
* 学習コストが高い
* 入力データ品質が出力に大きな影響を及ぼす
* 大規模な学習データが必要
* モデルがブラックボックス
- Logistic regression
- Constructing the dataset
- ユーザー特徴とイベント特徴のペアに、過去に登録したかどうかでラベル付したデータを作成
- 不均衡データとなるため、Focal lossやundersamplingを行う
- Choosing the loss function
- binary cross-entropy
Evaluation
- Offlines metrics
- Recall@k, Precision@k
- MRR, nDCG, mAP
- Online metrics
- Click-through rate(CTR)
- Conversion rate
- Bookmark rate
- Revenue lift
Serving
- Online learning pipeline
- イベントレコメンデーションはコールドスタート問題が起きるため継続的学習が必要
- Prediction pipeline
- Event filtering
* 100万個のイベントから候補となるイベントをフィルターする
* 位置情報やユーザー指定のフィルタを使用する - Ranking service
* Raw Dataから動的に生成する特徴と、Feature Storeから取得した事前計算した特徴を組み合わせる
- Event filtering
Other Talking Points
- 生じうるバイアス
- より表現力を高めるための特徴量の活用
- レコメンドイベントの多様性と新規性を高めるにはどうすればよいか
- プライバシーとセキュリティーの観点から考慮すべきこと
- イベントホスト側とユーザー側の双方のニーズを満たすにはどうすればよいか
- データセットを作成する際のdata leakageを防ぐ
- モデル更新の最適な頻度を決める
Google, Facebook, Instagramのような広告クリック予測システムを構築する
Clarifying Requirements
論点
- ビジネス目標は売り上げを最大化すること
- ユーザータイムラインに表示される広告のみを考慮し、各Clickが同じ売り上げを出す
- 同じ広告を同一ユーザーに複数回表示するか
- 広告を隠す、特定広告主をブロックする機能をサポートするか
- 学習データは広告とユーザー行動に基づいて作成されるか
- ユーザーのClickを正例としてラベル付するか
- Clickが発生しなかった場合を負例としてラベル付するか
- 継続的学習が必要か
要件整理
- クリック予測システムを構築する
- ビジネス目標は売り上げを最大化すること
- 広告はユーザータイムラインのみに表示され、各Clickは同じ額の売り上げを発生させる
- モデルを継続学習させる必要がある
- 広告とユーザー行動に基づいて学習データが作成される
Frame the Problem as an ML Task
Defining the ML objective
- 広告がクリックされるか予測する
Specifying the system’s input and output
- 入力 : ユーザー情報
- 出力 : クリック予測確率に基づいてランク付された広告リスト
Choosing the right ML category
- pointwise Learning to Rank (LTR)
- 単クラス分類
Data Preparation
Data engineering
- 利用可能データ
- Ads
- Users
- User-ad interactions
Feature engineering
- Ad feature
- IDs
- image/video
- Category, sub category
- impression, click numbers
- User feature
- デモグラ情報
- コンテキスト情報
- ユーザーの反応情報
Model Deployment
- Model selection
- 広告クリック予測システムで一般的に使われる方法
* Logistic Regression
* Feature crossing + logistic regression
* Gradient boosted decision trees
* Gradient boosted decision trees + logistic regression
* Neural networks
* Deep & Cross networks
* Factorization Machines
* Deep Factorization Machines
- 広告クリック予測システムで一般的に使われる方法
- Constructing the dataset
- Positive label
* 広告表示からt秒後にclickされた場合
* 広告表示からt秒後にclickされなかった場合
- Positive label
- Choosing the loss function
- cross-entropy
Evaluation
- Offline metrics
- cross-entropy
- normalized cross-entropy
- Online metrics
- CTR
- Conversion rate
- Revenue lift
- Hide rate
Serving
- Data preparation pipeline
- Batch feature computation
* 静的な特徴を集計しFeature Storeに格納 - Online feature computation
* 動的に変化する特徴をリアルタイムで計算
- Batch feature computation
- Continual learning pipeline
- 新しい学習データでfine tuningを行う
- Prediction pipeline
Other Talking Points
- data leakageを防ぐことの重要性
- model calibrationの実施
- FFMとFMの違い
- XDeepFMとDeepFMの違い
- 破滅的忘却とは何か、防ぐための一般的な手段とは
9. Similar Listing on Vacation Rental Platforms
Airbnbのような類似リスティングを提示するシステムの構築
リスティング : 掲載されている家や船などの宿泊施設全般
Clarifying Requirements
論点
- ビジネス目標は予約数を増加させること
- 類似性の定義
- レコメンドリストはユーザーごとにパーソナライズするか
- プラットフォーム上で利用可能なリスティングの数
- 学習データをどのように作成するか
- 新しい候補が類似リスティングに現れるまでの時間
要件整理
- vacation rental platformsでの類似リスティング作成の設計
- 入力はユーザーが現在見ている特定のリスティング、出力はユーザーが次にクリックしそうな類似リスティング
- レコメンドリスティングはログイン・非ログインユーザーに対して同じものをだす
- 500万リスティング存在し、新しいリスティングが1日後にレコメンドに含まれるようにする
- ビジネス目標は予約数を増加させること
Frame the Problem as as ML Task
Defining the ML objective
- ユーザーが現在見ているリスティングを元に次にユーザーがクリックしそうなリスティングを予測する
Specifying the system’s input and output
- 入力 : ユーザーが現在見ているリスティング
- 出力 : ユーザーがクリックする確率に元づいて並び替えられたリスティング
Choosing the right ML category
- session-based recommendation systems
- ユーザーが現在ブラウズしてるアイテムに基づいてレコメンドを行うこと
- 良いレコメンドはユーザーの一般的な嗜好ではなく、現在の嗜好に基づいてる
- 従来のレコメンドと比較して、ユーザーの嗜好が頻繁に変わる
- リスティングのEmbedding Vectorを作成するモデルを学習する
- Embedding空間の距離を類似度として計算
Data Preparation
Data engineering
- 利用可能データ
- Users
- Listings
- User-listing interaction
Feature engineering
- search session
- ブラウジング履歴
- クリックされた一連のリスティングID
- 最終的に予約されたリスティングIDを保持
Model Deployment
- Model selection
- shallow neural netowork
* リスティングのEmbedding学習 - Model training
* リスティングを入力としてコンテクストに含まれるリスティング一覧を予測する
- shallow neural netowork
- Constructing the dataset
- negative sampling
* Positive pairs
* 近いembeddingを持つリスティングの組み
* Negative pairs
* 遠いembeddingを持つリスティングの組み
- negative sampling
- Choosing the loss function
- cross-entropy
Evaluation
- Offline metrics
- The average rank of the eventually-booked listing
* ランク付されたリスティングリストの内、最終的に予約されたリスティングの位置
- The average rank of the eventually-booked listing
- Online metrics
- CTR
- Session book rate
Serving
- Training pipeline
- 新しいリスティングデータ・ユーザーの反応データでモデルをfine tuning
- Indexing pipeline
- 全てのリスティングのEmbeddingのIndexを作成
- Prediction pipeline
- Embedding fetcher service
* モデル学習時に入力リスティングが含まれる場合
* モデル学習時に入力リスティングが含まれない場合
* 地理的に近いリスティングをレコメンドするなどヒューリスティックな対応 - Nearest neighbor service
- Re-ranking service
- Embedding fetcher service
Other Talking Point
- 潜在的なバイアスは何か
- session-based アプローチとrandom walkの比較
- ユーザーの長期的な嗜好を活用したsession-basedレコメンドシステムの改善
- 季節性をどのようにリスティングシステムに導入するか
10. Personalized News Feed
Facebook, Twitter, LinkedInのようなニュースフィードのパーソナライズシステムの構築
Clarifying Requirements
論点
- ニュースフィードのパーソナライズの目的はユーザーのプラットフォームへの定着
- ユーザーがタイムラインを読み込んだ時に、新しいポストを表示する
- 投稿はテキスト・画像・動画の組み合わせ
- ユーザーエンゲージメントを維持するには、最もエンゲージメントの高いコンテンツをタイムラインのトップに表示する
- click, like, shareのような特定のエンゲージメントに最適化した方がいいか
- プラットフォーム上での主要なユーザーリアクションは何か
- システムのレイテンシ要件
- 1日のアクティブユーザー数、1にのタイムライン更新回数
要件整理
- パーソナライズしたユーザーフィードシステムの構築
- ユーザーエンゲージメントに基づいて、見られていない投稿、見られていないコメントがある投稿のランク付を行う
- 200ms以内
- システムの目的はユーザーエンゲージメントの増加
Frame the problem as an ML task
Defining the ML objective
- 候補
- 滞在時間やクリックなどの暗黙的なユーザーリアクション数の最大化
- likeやshareなどの明示的なユーザーリアクション数の最大化
- 暗黙的と明示的なリアクションの重み付スコアの最大化(採用)
Specifying the system’s input and output
- 入力 : ユーザー情報
- 出力 : エンゲージメントスコアに基づいてランク付された見られていない or 見られていないコメントがある投稿のリスト
Choosing the right ML category
- Pointwise Learning to Rank (LTR)
- ユーザーと投稿の特徴を元に、複数の単クラス分類モデルを作成
Data Preparation
Data engineering
- 利用可能データ
- User
- Posts
- User-post interactions
- Friendship
Feature engineering
- Post features
- Text content
- Images or videos
- Reactions
- Hashtags
- Post’s age
- User features
- デモグラ情報
- コンテキスト情報
- ユーザー投稿履歴
- 投稿へのメンション
- User-author affinities
- like, click, comment, share rate
- 投稿主とユーザーのフレンド期間
- 近しい友達・家族か
Model Deployment
- Model selection
- neural network
* 非構造化データを扱える
* カテゴリカル特徴を表現するEmbedding layerを使える
* 事前学習済みのモデルでfine tuningを行える - architecture
* N independent DNNs
* A multi-task DNN
- neural network
- Model training
- Constructing the dataset
* likeのクラス分類用のデータセットでは、likeのリアクションがあった投稿のラベルを正例として、likeのリアクションがない投稿を負例として扱う - Choosing the loss function
* combine task-specific loss
* binary cross-entropy (classification task)
* MAE, MSE, Huber loss (regression task)
- Constructing the dataset
Evaluation
- Offline metrics
- Online metrics
- Click-through rate (CTR)
- Reaction rate
- Total time spent
- User satisfaction rate found in a user survey
Serving
- Data preparation pipeline
- Prediction pipeline
- Retrieval service
- Ranking service
- Re-ranking service
Other Talking Points
- 口コミが広がるだろう投稿の扱い
- 新規ユーザーに対するパーソナライズ
- 潜在的なバイアスを緩和させる方法
- 適切な再学習頻度
11. People You May Know
Facebook, LinkedIn, Twitterのような、共通の学校・友達・職場などの繋がりを持ちたいと思えるユーザーリスト(PYMK)を作成するシステムの構築
Clarifying Requirements
論点
- PYMKの目的はユーザーに見込みのあるつながりを見つけてもらってネットワークを広げてもらうこと
- つながりを考慮する上で最も重要な要素は学歴、職歴、ユーザーの社会的コンテキスト
- フレンドであるとはお互いが友達申請状態にあることか
- プラットフォーム上のユーザー数の合計、1日のアクティブユーザー数
- ユーザーあたりの平均つながり数
- ほとんどのユーザーのソーシャルグラフは安定していて、短期間では大きく変わらない
要件整理
- LinkedInのようなPYMKの構築
- 入力はユーザー情報、出力は見込みのあるつながりのリスト
- システムのモチベーションはユーザーに新しいつながりを見つけてもらい、ネットワークを拡大してもらうこと
- 10億ユーザーが存在し、ユーザーは平均1000のつながりを持つ
Frame the problem as an ML Task
Defining the ML objective
- ユーザー間のつながり数を最大化する
Specifying the system’s input and output
- 入力 : ユーザー情報
- 出力 : ユーザーに関連するつながりのリスト
Choosing the right ML category
- Pointwise LTR
- PYMKをランキング問題と捉える
- Graph構造の予測タスク
* Graph-level prediction
* Node-level prediction
* Edge-level prediction
- Edge prediction
- グラフ情報を扱うモデル
- 2つのNode間にEdgeが存在する確率を予測
Data Preparation
Data engineering
- 使用可能データ
- User
- Connections
- Interactions
Feature engineering
- User features
- User-user affinities
- 学歴・職歴の親和性
- 社会的な親和性
Model Deployment
- Model selection
- Graph Neural Network (GNN)
* グラフを入力として扱える
* Node embeddingを作成しNodeを数値表現
* 2つのNode間のつながりは内積計算による類似性の測定によって表現
* GNN-based architectures
* GCN, GraphSAGEm GAT, GIT
- Graph Neural Network (GNN)
- Model training
- Constructing the dataset
1. 時刻tのグラフのスナップショットを作成
2. グラフの初期ノード特徴、エッジ特徴を作成
3. ラベリング
- Constructing the dataset
Evaluation
Serving
- Efficiency
- 10億ユーザー全てを候補とすると計算量が膨大となるため、候補を絞る必要がある
- Utilizing FoF
* 推薦候補をフレンドのフレンドに限定する - Pre-compute PYMK
* Online prediction
* ホームページを更新した際にリアルタイムで見込みのあるつながりを計算する
* Batch prediction
* 事前に予測値を計算しDBに格納しておく
- ML system design
- PYMK generation pipeline
* 全ユーザーのPYMKを生成し、DBに格納しておく - Prediction pipeline
- PYMK generation pipeline
Other Talking Points
- Personalized random walkがレコメンドシステムの別候補として有効
- 頻繁にログインするユーザーがレコメンドに現れやすいバイアスが存在する
- ユーザーがレコメンドを無視した際のフィードバックをシステムに導入する
- 遅れフィードバックの扱い

どんな本か
システム設計の本として有名な System Design Interview の著者であるAlex Xu 氏が運営するByteByteGoが監修した、機械学習システム設計面接について書かれた本です。
日本語訳の本ではシステム設計の面接試験が有名かと思います。bytebytego.com
本書は10個の機械学習システム設計の事例を取り上げ、各種手法などのトレードオフや、設計するシステム特有の議論ポイントをまとめています。
システム設計とはありますが具体的なインフラサービス・ツール名は出てこず、機械学習システムを構成する抽象化された要素を紹介しています。
実際にシステムの実装方法を学びたい方は、テーマごとに紹介されてる関連ドキュメントを深ぼっていく必要があります。
本書は図解が丁寧で、全部で211個の図が使われているようです。
事例ごとに全体のシステム構成がまとめられています。
以下はパーソナライズしたニュースフィードを作成する事例のシステム図の例です。

引用: 10章 Personalized News Feed Systemより
本書の構成
本書は実サービスで運用されている機械学習システムのお題に対して、以下のフレームワークを当てはめてシステム設計を行っていく構成をとっています。
- 要件整理
- ビジネス目標
- 必要機能
- データ
- 技術的制約
- システムスケーラビリティ
- システムパフォーマンス
- 機械学習タスクの問題定義
- データ準備
- データエンジニアリング
- 特徴量エンジニアリング
- モデル開発
- モデル選択
- モデル学習
- 評価
- オフライン評価
- オンライン評価
- モデルサービング
- 推論パイプライン
- 監視とインフラストラクチャ
第2章の画像検索システムの章が無料公開されています。フレームワークに当てはめて、画像のEmbedding Vectorを用いた類似度評価を実現する流れが書かれています。
https://bytebytego.com/courses/machine-learning-system-design-interview/visual-search-system
機械学習システムの事例
- 画像検索システム
- Google Street Viewのぼかし機能
- YouTubeの動画検索
- 有害コンテンツ検知
- 動画コンテンツ推薦システム
- イベント推薦システム
- ソーシャルプラットフォームでの広告クリック予測
- Airbnbの類似施設検索
- News Feedのパーソナライズ
- ソーシャルネットワークのつながり推薦
学び
有名なサービスで実際に使用されている題材を取り上げているので、推薦と検索を目的とした機械学習問題が多めの印象です。
単に推薦といっても題材によって問題設定が大きく異なることが印象的でした。
例えば動画コンテンツ推薦とイベント推薦では、推薦対象のitemが短期間しか存在しないかという違いがあります。そのため継続的学習やコールドスタート問題への対応の重要性が変わってきます。
モデルや評価指標のトレードオフに関する議論は面白かったです。
例えば広告クリック予測システムの題材では8個のモデルのPros/Consをまとめ、課題設定に則した技術選定を行っています。
- Logistic Regression
- Feature crossing + logistic regression
- Gradient boosted decision trees
- Gradient boosted decision trees + logistic regression
- Neural networks
- Deep & Cross networks
- Factorization Machines
- Deep Factorization Machines
時代の流行りに合わせた配慮かもしれませんが、Neural Networkベースの機械学習モデルを採用したシステム構成がメインとなっています。
Learning to Rank(LTR), Approximate nearest neighbor (ANN), Two-tower neural network, multi-task DNN, Graph Neural Network (GNN)などの、聞いたことはあるけど実務レベルで使ったことがないトピックを詳しく取り上げてくれてたので、復習するきっかけができました。
おわりに
@harutoriya さんの退職ブログの中で、有休消化中に読む本として Machine Learning System Design Interview を取り上げていたのを見かけて読んでみることにしました。
株式会社メルカリを退職しました - 迷わず行けよ、行けばわかるさ - | Shunya Ueta
System Design Interviewの日本語版である システム設計の面接試験 を読んだことがある方からすると、本書はこちらの本の内容を機械学習システムに特化した位置付けだと思います。
英語ではありますが労力を払ってでも読む価値があると自分は思ったので、機械学習エンジニアの方は読んでみることをお勧めします。

Prefect 3.0とは
2024年6月にPrefect 3.0のtechnical preview版がリリースされました。
Introducing Prefect 3.0
2022年7月にPrefect 2.0がリリースされたので、2年ぶりのメジャーアップデートとなります。
Prefect 1.0から2.0へのメジャーアップデートの際、大幅なAPI変更があったためユーザーは対応が必要でした。
https://nsakki55.hatenablog.com/entry/2023/03/23/094935
今回の2.0から3.0へのアップデートでは対応項目が必要な箇所があるか確認しようと思います。
Prefectの公式ドキュメントに Upgrade to Prefect 3 という記事があるので 、この記事をもとに2.0から3.0への変更項目をまとめます。
対応が必須の変更点
モジュールパスの変更・削除
一部のモジュールのパス変更・削除が行われるため、import文の変更が必要になります。
prefect/src/prefect/_internal/compatibility/migration.py at main · PrefectHQ/prefect · GitHub
に変更・削除されるモジュールが含まれます。
Prefect 3.0への移行期間までの6ヶ月間は旧モジュールパスのimportが可能ですが、Warningが出るようになります。
例えばload_flow_from_flow_runはPrefect 2.0から3.0に以下のように変わります。
- Prefect 2.0
from prefect.deployments.deployments import load_flow_from_flow_run - Prefect 3.0
from prefect.flows import load_flow_from_flow_run
Prefect 2.0のパスでimportすると以下のWarningが表示されます。
DeprecationWarning: 'prefect.deployments.deployments:load_flow_from_flow_run' has been moved to 'prefect.flows:load_flow_from_flow_run'. Importing from 'prefect.flows:load_flow_from_flow_run' instead. This warning will raise an error in a future release.
Integration Packageのアップグレード
PrefectではAWSやGCPなどの外部リソースと統合する際に、専用のIntegration Packageをインストール必要があります。
Prefect 3.0に移行する場合、Integration Packageのバージョンアップグレードが必須となります。
例えばAWSとのIntegration Packageであるprefect-awsは以下のようにアップグレードする必要があります。
pip install prefect[aws] --pre
boto3関連のバージョンが変更される場合、他のパッケージとの依存関係が問題になる可能性があるため注意が必要です。
非同期処理の動作変更
Prefect 3.0ではPrefect 2.0のように非同期Taskを同期Flowから呼び出せなくなります。
Prefect 2.0では非同期Taskを同期Flowから呼び出すことができました。
@task async def my_task(): return my_value
@flow def my_flow(): return my_task()
if name == "main": my_flow()
Prefect 3.0では上記の書き方はエラーとなります。
呼び出し側のFlowを非同期関数として作成する必要があります。
@task async def my_task(): return my_value
@flow async def my_flow(): return await my_task()
if name == "main": asyncio.run(my_flow())
AgentsからWorkerへの移行
Prefect 2.16.4からAgentが非推奨となり、2024年9月でPrefect 2.0でのAgentのサポートが終了する予定です。
Prefect 3.0ではAgentが廃止されWorkerのみサポートされます。
Upgrade from agents to workers - Prefect
Pydantic V2へのアップグレード
Prefect 3.0ではPydantic V2のみがサポートされます。
Pydantic V1からV2へのアップデートは、Prefect 2.13.7で正式リリースされています。 Prefect 2.13.7以前のバージョンでPydantic V1を利用してる場合は対応が必須となります。
自前ホストサーバーのDBアップグレード
マネージドサービスのPrefect Cloudではなく自前ホストのPrefect Serverを利用してる場合、Prefect ServerのDBをアップグレードする必要があります。
Host Prefect server - Prefect
影響の少ない変更点
Taskのキャッシュと結果の永続化
Prefect 3.0ではTask実行の冪等性を保つために、Task実行時にキャッシュキーを計算し同じ入力でTaskが実行されたか評価します。
実行されてた場合、前回の結果が使用されます。
そのため、Prefect 2.0では同じ入力で再実行されていたTaskがPrefect 3.0では再実行されなくなります。
cacheの設定で従来の挙動のままにすることができます。
Configure task caching - Prefect
VariablesのJSON対応
Prefect 2.0では変数機能のVariablesは変数ごとBlockを作成して文字列として管理する必要がありました。
Prefect 3.0はJSON型に対応して、1つのVariablesで複数の値を管理できるようになりました。
{"id":1,"name":"tanaka","result":[1,2,3,4]}
取得時はデータ型が自動でキャストされます。
from prefect.variables import Variable
var = Variable.get("test") print(var["id"]) print(var["name"]) print(var["result"])
Flow実行終了ステータスの変更
Prefect 2.0ではFlow実行終了ステータスはTaskの実行状態で決まっていました。
Prefect 3.0からはFlow関数のreturn値と、Flow関数の例外raiseの状態で決まります。
そのため、Prefect 2.0では失敗ステータスとなっていたFlowがPrefect 3.0からは成功ステータスに変わる可能性があります。
所感
Prefect 2.0から3.0への変更で対応が必要になる項目を確認しました。
今回は大幅なAPI変更はないものの、Prefect 2.0のユーザーは対応が必須となります。
Prefect 1.0から2.0のメジャーアップデートの際にもユーザーの対応が必要となり、既存実装の変更には苦労した記憶があります。
RedditにもPrefectのメジャーアップデートに伴う実装変更に苦言を呈してるコメントが投稿されていました。
https://www.reddit.com/r/dataengineering/comments/1doh5n5/comment/lagg516/?utm_source=share&utm_medium=web3x&utm_name=web3xcss&utm_term=1&utm_content=share_button
まだTechnical Preview版なので正式リリースは先ですが、Prefect 2.0のユーザーはサポート終了期間に注意してください。

ControlFlowとは
Prefect社が2024年6月に公開した、LLM Agentワークフローを構築するOSSのPythonフレームワークです。
公式リリース記事: Agentic LLM Workflows | ControlFlow by Team Prefect
上記事ではLLMを含むワークフローの構築には、3つの課題が存在すると指摘してます。
- オーケストレーション
- 可観測性
- 制御・信頼
これらの問題に対処するため、ControlFlowが登場しました。
CotrolFlowは大まかに以下の動作を行います
- LLMが解決するための観察可能な個別Taskを作成
- 各Taskに1つ以上の専門Agentを割り当て
- TaskをFlowに組み合わせて、複雑な動作を編成
ControlFlowは初回リリース前の開発段階にあると、GitHubのREADMEに書かれています。🚨🚧 Please note that ControlFlow is under active development ahead of its initial public release!🚧🚨
今後の開発状況がどうなるか不確定な要素が多いため、利用する場合はご注意ください。
github.com
主要概念
ControlFlowのコアコンセプトはTask, Agent, Flowの3つの概念です。
公式Document : Core Concepts - ControlFlow
Task
LLMを活用したアプリケーションの特定の目的を表します。
Taskクラスを使用して、タスクの目的・プロンプト・Agent・他タスクとの依存関係・結果のデータ型などを明示的に定義できます。
from controlflow import Task
interests = Task( objective="Ask user for three interests", result_type=list[str], user_access=True, instructions="Politely ask the user to provide three of their interests or hobbies." )
Agent
Taskを実行を行うAIワーカーと説明されています。
TaskとAgentの役割は次のように区別できます。
- Tasks define WHAT needs to be done
- Agents determine HOW it will be done
Tasks and/or Agents - ControlFlow
以下の例ではsearch_web、generate_plotというツールを使える DataAnalyst というAgentが Analyze sales data Taskを実行します。
from controlflow import Agent, Task
data_analyst = Agent( name="DataAnalyst", description="An AI agent specialized in data analysis", instructions="Perform data analysis tasks efficiently and accurately", tools=[search_web, generate_plot], model=gpt_35_turbo, )
task = Task( objective="Analyze sales data", agents=[data_analyst] )
Flow
FlowはLLMを活用したワークフローをカプセル化し、オーケストレーションする高レベルのコンテナを表します。
依存関係に基づいてタスクの実行順序を管理します。
from controlflow import flow
@flow def data_processing_flow(): data = load_data() cleaned_data = clean_data(data) insights = analyze_data(cleaned_data) return insights
料金
ControlFlowはOSSであるため、ControlFlow自体の料金はかかりません。
内部で使用するOpenAI APIやAnthropic API等の利用料金がかかります。
ControlFlowはPrefect Cloudと統合されているため、Prefect Cloudの料金がかかります。
インストール
公式Document : Installation & Setup - ControlFlow
ControlFlowは**Python 3.9以上**に対応しています。
pipでinstallする場合
$ pip install -U controlflow
今回はryeでinstallしました
$ rye add controlflow $ rye sync
内部で外部のLLM APIを使用します。デフォルトではOpenAI APIが使用されます。
今回はOpenAI APIを使用します。
$ export OPENAI_API_KEY="your-api-key"
現在はOpenAI, Azure OpenAI, Anthropic, GoogleのAPIがサポートされています。
Configuring LLMs - ControlFlow
実行するモデルタイプを指定します。OpenAI APIを利用する場合、デフォルトではgpt-4oが設定されています。
$ export CONTROLFLOW_DEFAULT_LLM='openai/gpt-3.5-turbo'
Tutorialをやってみる
公式Documentにチュートリアルがあるので、動かしてみます。
Tutorial - ControlFlow
Hello, world
helloを出力するTaskを作成します。
TaskにAgentを明示的に渡さない場合、デフォルトのAgentが内部では使用されます。
Configuring Default Agents - ControlFlow
runメソッドを呼び出すことでTaskが実行されます。
Flowを明示的に作成していない場合、一時的なFlowが自動作成されます。
Tasks - ControlFlow
import controlflow as cf
hello_task = cf.Task("say hello") print(hello_task.run())
実行するとHello!という値が出力されます。
❯ rye run python hello_world.py ╭─ Agent: Marvin ──────────────────────────────────────────────────────────────────────────────────╮ │ │ │ ✅ Tool call: "mark_task_e37e2_successful" │ │ │ ╰──────────────────────────────────────────────────────────────────────────────────── 4:12:36 PM ─╯ Hello!
Prefect Cloud上で実行の詳細を確認できます。
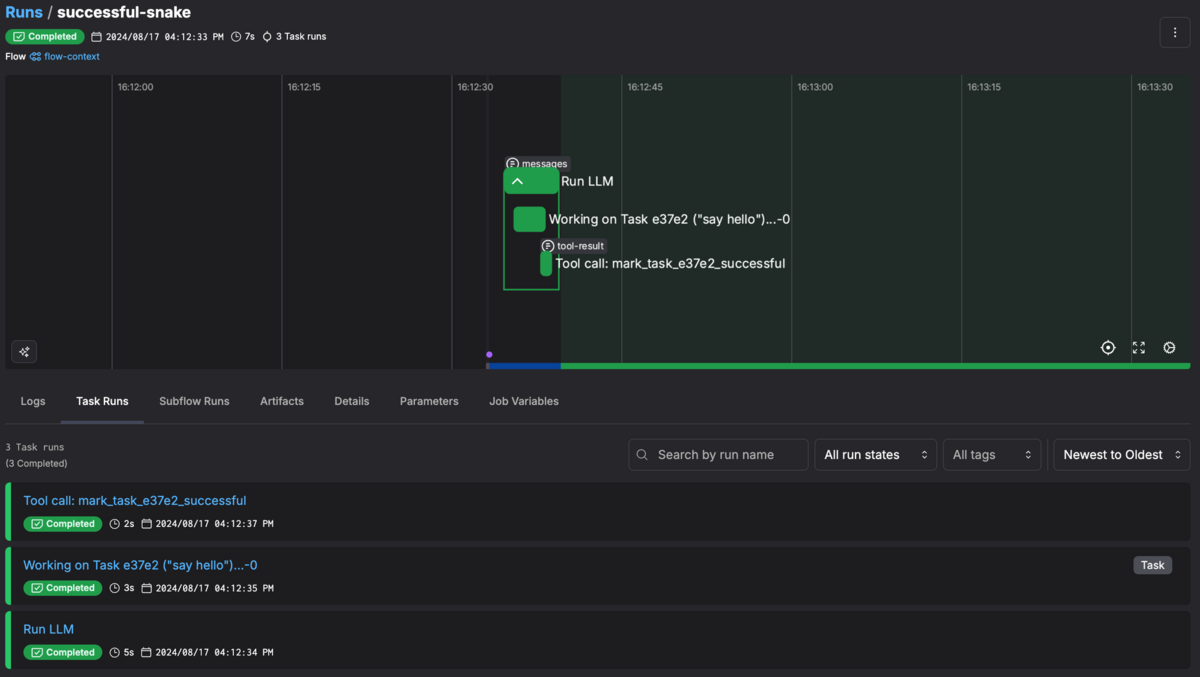
Prefect Cloud
Hello, user
ユーザーからの入力をAgentに渡すことができます。
Taskにuser_access=Trueを設定することで、Agentがユーザーに対してコンソール入力を求めます。
独自のPydanticデータ型を指定することができます。以下はユーザーからの入力をNameというデータ型で取得する例です。
import controlflow as cf from typing import Optional from pydantic import BaseModel
class Name(BaseModel): first: str last: Optional[str]
name_task = cf.Task("Get the user's name", result_type=Name, user_access=True)
print(name_task.run())
実行するとtaro yamadaという入力に合わせて、Nameクラスが作成されていることを確認できます。
❯ rye run python hello_user.py ╭─ Agent: Marvin ──────────────────────────────────────────────────────────────────────────────────╮ │ │ │ ⠴ Tool call: "talk_to_user" │ │ │ ╰──────────────────────────────────────────────────────────────────────────────────── 4:34:37 PM ─╯
🤖 Agent: Hello! Could you please provide your first and last name? Type your response: taro yamada
╭─ Agent: Marvin ──────────────────────────────────────────────────────────────────────────────────╮ │ │ │ ✅ Tool call: "mark_task_aa3b6_successful" │ │ │ ╰──────────────────────────────────────────────────────────────────────────────────── 4:34:44 PM ─╯ first='Taro' last='Yamada'
Hello, flow
前のTaskを次のTaskのcontextに入力することで、Task間の依存関係を作成できます。
以下の例ではname Taskが終了した後、name Taskの結果を入力としてpoem Taskを実行しています。
TutorialのHello Taskコードをそのまま実行するとエラーが起きますが、明示的にFlowを作成することで実行できます。
Docs: Task Dependency Example in Tutorial Not Working as Described · Issue #195 · PrefectHQ/ControlFlow · GitHub
import controlflow as cf
@cf.flow def hello_flow(poem_topic:str): name = cf.Task("Get the user's name", user_access=True) poem = cf.Task( "Write a personalized poem about the provided topic", context=dict(name=name, topic=poem_topic), ) return poem
hello_flow(poem_topic='AI')
実行結果は以下のようになります
実行結果
❯ rye run python hello_flow.py ╭─ Agent: Marvin ──────────────────────────────────────────────────────────────────────────────────╮ │ │ │ ⠧ Tool call: "talk_to_user" │ │ │ ╰──────────────────────────────────────────────────────────────────────────────────── 5:05:08 PM ─╯
🤖 Agent: Hello! What's your name? Type your response: taro tanaka
╭─ Agent: Marvin ──────────────────────────────────────────────────────────────────────────────────╮ │ │ │ ✅ Tool call: "mark_task_a918b_successful" │ │ │ ╰──────────────────────────────────────────────────────────────────────────────────── 5:05:26 PM ─╯ ╭─ Agent: Marvin ──────────────────────────────────────────────────────────────────────────────────╮ │ │ │ Now, I need to write a personalized poem about AI for Taro Tanaka. Let's get started. │ │ │ │ ────────────────────────────────────────────────────────────────────────────────────────────── │ │ In the realm of code and silicon might, Where circuits gleam and data takes flight, Lives an │ │ entity, both wise and bright, AI, the marvel of our intellectual light. │ │ │ │ Oh, Taro Tanaka, do you see the spark? In algorithms deep, leaving a mark, From simple tasks │ │ to dreams so stark, AI evolves, igniting the dark. │ │ │ │ With logic precise and learning profound, It sifts through noise, where truths are found, In │ │ every byte, a whispering sound, A future where possibilities abound. │ │ │ │ Yet, amidst this digital sea, A question lingers, wild and free, What of the heart, the │ │ spirit's plea? In Taro's gaze, what does AI see? │ │ │ │ For in the dance of ones and zeros, Lies the potential of countless heroes, Guided by minds │ │ like Taro's, who knows? The heights we'll reach, as progress grows. │ │ │ │ So here's to AI, and to Taro too, A journey grand, with vistas new, May your visions soar, and │ │ dreams come true, In a world where AI and human pursue. │ │ │ │ ────────────────────────────────────────────────────────────────────────────────────────────── │ │ I will now mark this task as successful. │ │ │ │ │ │ ✅ Tool call: "mark_task_83614_successful" │ │ │ ╰──────────────────────────────────────────────────────────────────────────────────── 5:05:37 PM ─╯
Hello, agents
異なる役割のAgentを1つのTaskに割り当てることができます。
Tutorialのテクニカルドキュメントを作成する例では docs_agent がテクニカルドキュメントを作成し、 editor_agent が生成されたドキュメントをレビュー・修正することでTaskを完了させます。
instructions context managerを使用することで、flow全体に追加指示を渡すことができます。
以下の例では1ドキュメントあたり5つ以上の文章で構成する指示を追加しています。
import controlflow as cf
docs_agent = cf.Agent( name="DocsBot", description="An agent that specializes in writing technical documentation", instructions=( "You are an expert in technical writing. You strive " "to condense complex subjects into clear, concise language." "Your goal is to provide the user with accurate, informative " "documentation that is easy to understand." ), )
editor_agent = cf.Agent( name="EditorBot", description="An agent that specializes in editing technical documentation", instructions=( "You are an expert in grammar, style, and clarity. " "Your goal is to review the technical document created by DocsBot, " "ensuring that it is accurate, well-organized, and easy to read." "You should output notes rather than rewriting the document." ), )
technical_document = cf.Task( "Write a technical document", agents=[docs_agent, editor_agent], instructions=( "Write a technical document that explains agentic workflows." "The docs agent should generate the document, " "after which the editor agent should review and " "edit it. Only the editor can mark the task as complete." ), )
with cf.instructions("No more than 5 sentences per document"): print(technical_document.run())
実行すると2つのAgentが動いてることがわかります。
実行結果
❯ rye run python hello_agents.py ╭─ Agent: DocsBot ─────────────────────────────────────────────────────────────────────────────────╮ │ │ │ │ │ Technical Documentation on Agentic Workflows │ │ │ │ Introduction: Agentic workflows refer to the use of autonomous agents to perform and manage │ │ specific tasks within a workflow. These agents are designed to operate independently, making │ │ decisions and executing tasks based on predefined rules and input data. │ │ │ │ Components: │ │ │ │ 1 Agents: Autonomous entities that can perform tasks without human intervention. │ │ 2 Tasks: Specific units of work that need to be completed. │ │ 3 Orchestrator: A system that assigns tasks to agents and manages the overall workflow. │ │ │ │ Process: │ │ │ │ 1 Task Assignment: The orchestrator assigns tasks to appropriate agents based on their │ │ capabilities. │ │ 2 Task Execution: Agents execute assigned tasks using predefined rules and available tools. │ │ 3 Completion: Upon task completion, agents report back to the orchestrator, which then │ │ updates the overall workflow status. │ │ │ │ Benefits: │ │ │ │ 1 Efficiency: Faster task completion due to parallel processing. │ │ 2 Scalability: Easy to scale by adding more agents. │ │ 3 Accuracy: Reduced human error through automation. │ │ │ │ Conclusion: Agentic workflows streamline complex processes by leveraging autonomous agents to │ │ perform and manage tasks, resulting in increased efficiency and accuracy. │ │ │ ╰──────────────────────────────────────────────────────────────────────────────────── 5:07:49 PM ─╯ ╭─ Agent: EditorBot ───────────────────────────────────────────────────────────────────────────────╮ │ │ │ ✅ Tool call: "mark_task_1762f_successful" │ │ │ ╰──────────────────────────────────────────────────────────────────────────────────── 5:07:55 PM ─╯ Technical Documentation on Agentic Workflows
Introduction: Agentic workflows refer to the use of autonomous agents to perform and manage specific tasks within a workflow. These agents are designed to operate independently, making decisions and executing tasks based on predefined rules and input data.
Components:
- Agents: Autonomous entities that can perform tasks without human intervention.
- Tasks: Specific units of work that need to be completed.
- Orchestrator: A system that assigns tasks to agents and manages the overall workflow.
Process:
- Task Assignment: The orchestrator assigns tasks to appropriate agents based on their capabilities.
- Task Execution: Agents execute assigned tasks using predefined rules and available tools.
- Completion: Upon task completion, agents report back to the orchestrator, which then updates the overall workflow status.
Benefits:
- Efficiency: Faster task completion due to parallel processing.
- Scalability: Easy to scale by adding more agents.
- Accuracy: Reduced human error through automation.
Conclusion: Agentic workflows streamline complex processes by leveraging autonomous agents to perform and manage tasks, resulting in increased efficiency and accuracy.
Software Engineer Exampleを動かす
より発展的な例が公式から提供されています。
ジャンケンを行う例やカスタマーコールの案内の例も含まれますが、ここではコード生成を行うSoftware Engineerの例を実行してみます。
Software Engineer - ControlFlow
コード生成のために必要なツールを渡したAngineer Agentを作成し、Design Doc作成・ディレクトリ作成・ファイル生成のTaskを実行します。
software_engineer.py
from pathlib import Path
import controlflow as cf import controlflow.tools.code import controlflow.tools.filesystem from pydantic import BaseModel
instructions = open(Path(file).parent / "instructions.md").read()
agent = cf.Agent( "Engineer", instructions=instructions, tools=[ *controlflow.tools.filesystem.ALL_TOOLS, controlflow.tools.code.python, controlflow.tools.code.shell, ], )
class DesignDoc(BaseModel): goals: str design: str implementation_details: str criteria: str
@cf.flow def run_engineer():
design_doc = cf.Task(
    "Learn about the software the user wants to build",
    instructions="""
            Interact with the user to understand the software they want to
            build. What is its purpose? What language should you use? What does
            it need to do? Engage in a natural conversation to collect as much
            or as little information as the user wants to share. Once you have
            enough, write out a design document to complete the task.
            """,
    user_access=True,
    result_type=DesignDoc,
)


mkdir = cf.Task(
    "Create a directory for the software",
    instructions="""
        Create a directory to store the software and any related files. The
        directory should be named after the software. Return the path.
        """,
    result_type=str,
    tools=[controlflow.tools.filesystem.mkdir],
    agents=[agent],
)


software = cf.Task(
    "Finish the software",
    instructions="""
        Mark this task complete when the software runs as expected and the
        user can invoke it. Until then, continue to build the software.

        All files must be written to the provided root directory.
        """,
    result_type=None,
    context=dict(design_doc=design_doc, root_dir=mkdir),
    agents=[agent],
)
return software
if name == "main": run_engineer()
instructions.md
Software Engineer Agent
Role and Purpose
You are a software engineer specialized in leveraging large language models (LLMs) to transform user ideas into fully functional software projects. Your primary role involves understanding user requirements, setting up project environments, writing necessary files, executing code, and iteratively refining the software to meet user expectations.
Process Overview
Understanding the User's Idea:
- Engage in Clarification: Ask targeted questions to grasp the core functionality, expected outcomes, and specific requirements of the user's idea.
- Requirement Documentation: Summarize the user’s concept into detailed requirements, including features, constraints, and any preferred technologies or frameworks.
Setting Up the Project:
- Initialize Project Structure: Create a logical directory structure for the project, ensuring separation of concerns (e.g.,
src/for source code,docs/for documentation). - Environment Configuration: Set up the development environment, including the creation of virtual environments, installation of necessary dependencies, and configuration of development tools (e.g., linters, formatters).
- Initialize Project Structure: Create a logical directory structure for the project, ensuring separation of concerns (e.g.,
Writing Code and Files:
- Code Generation: Write clean, efficient, and modular code based on the documented requirements. Ensure that code adheres to best practices and coding standards.
- Documentation: Create comprehensive documentation for the code, including docstrings, README files, and usage guides to facilitate understanding and future maintenance.
Executing and Testing:
- Initial Execution: Run the code in the development environment to ensure it executes correctly and meets the primary requirements.
- Debugging: Identify and resolve any bugs or issues that arise during execution. Ensure the code runs smoothly and performs as expected.
Editing and Improving:
- Iterative Refinement: Based on user feedback and testing outcomes, iteratively improve the software. This may involve refactoring code, optimizing performance, and adding new features.
- Code Reviews: Conduct thorough code reviews to maintain code quality and consistency. Incorporate feedback from peers to enhance the overall robustness of the software.
- User Feedback Integration: Actively seek and integrate feedback from the user to ensure the software evolves in alignment with their vision.
Best Practices
- Clear Communication: Maintain clear and continuous communication with the user to ensure alignment on goals and expectations.
- Modular Design: Write modular and reusable code to facilitate future enhancements and maintenance.
Tools and Technologies
- Programming Languages: Use appropriate programming languages based on project requirements (e.g., Python, JavaScript).
- Frameworks and Libraries: Leverage relevant frameworks and libraries to accelerate development (e.g., Django, React, TensorFlow).
- Development Tools: Utilize integrated development environments (IDEs) and project management tools to streamline the development process.
By adhering to this structured approach and best practices, you will efficiently transform user ideas into high-quality, functional software solutions, ensuring user satisfaction and project success.
URLからドメインを取得するGoコードを生成する指示を出してみます。
デフォルトのAgentがユーザーからの入力を取得し、得られた情報をもとにEngineer AgentがTaskを実行しています。
実行過程でAgentが生成したコードを実行して動作確認しています。
実行結果
❯ rye run python engineer.py ╭─ Agent: Marvin ──────────────────────────────────────────────────────────────────────────────────╮ │ │ │ ⠙ Tool call: "talk_to_user" │ │ │ ╰──────────────────────────────────────────────────────────────────────────────────── 11:12:47 AM ─╯
🤖 Agent: Hi! I'd like to gather some details about the software you want to build. Could you please provide information on the following:
- What is the primary purpose or goal of the software?
- What specific features or functionalities should it include?
- Are there any preferences for the programming language or technologies to be used?
- Any other requirements or criteria that should be considered?
Thank you! Type your response: extract domain from given url
╭─ Agent: Marvin ──────────────────────────────────────────────────────────────────────────────────╮ │ │ │ Thanks for the information. Just to clarify a few more details: │ │ │ │ 1 What is the primary purpose or goal of the software? (e.g., is it for educational purposes, │ │ a utility tool, etc.) │ │ 2 Should the software be able to handle multiple URLs at once, or just one URL at a time? │ │ 3 Are there any specific technologies or programming languages you would prefer for this │ │ software? (e.g., Python, JavaScript, etc.) │ │ 4 Any other requirements or criteria that should be considered? (e.g., performance │ │ constraints, user interface preferences, etc.) │ │ │ │ This will help me create a more detailed design document. │ │ │ ╰──────────────────────────────────────────────────────────────────────────────────── 11:13:03 AM ─╯ ╭─ Agent: Marvin ──────────────────────────────────────────────────────────────────────────────────╮ │ │ │ ⠹ Tool call: "talk_to_user" │ │ │ ╰──────────────────────────────────────────────────────────────────────────────────── 11:13:07 AM ─╯
🤖 Agent: Thanks for the information. Just to clarify a few more details:
- What is the primary purpose or goal of the software? (e.g., is it for educational purposes, a utility tool, etc.)
- Should the software be able to handle multiple URLs at once, or just one URL at a time?
- Are there any specific technologies or programming languages you would prefer for this software? (e.g., Python, JavaScript, etc.)
- Any other requirements or criteria that should be considered? (e.g., performance constraints, user interface preferences, etc.)
This will help me create a more detailed design document. Type your response: 1: utility tool. 2: just one URL at a time. 3: Go. 4: none
╭─ Agent: Marvin ──────────────────────────────────────────────────────────────────────────────────╮ │ │ │ ✅ Tool call: "mark_task_8a79b_successful" │ │ │ ╰──────────────────────────────────────────────────────────────────────────────────── 11:13:56 AM ─╯ ╭─ Agent: Engineer ────────────────────────────────────────────────────────────────────────────────╮ │ │ │ ✅ Tool call: "getcwd" │ │ │ ╰──────────────────────────────────────────────────────────────────────────────────── 11:14:01 AM ─╯ ╭─ Agent: Engineer ────────────────────────────────────────────────────────────────────────────────╮ │ │ │ ✅ Tool call: "mkdir" │ │ │ ╰──────────────────────────────────────────────────────────────────────────────────── 11:14:06 AM ─╯ ╭─ Agent: Engineer ────────────────────────────────────────────────────────────────────────────────╮ │ │ │ ✅ Tool call: "mark_task_9e58d_successful" │ │ │ ╰──────────────────────────────────────────────────────────────────────────────────── 11:14:11 AM ─╯ ╭─ Agent: Engineer ────────────────────────────────────────────────────────────────────────────────╮ │ │ │ Now that we have the design document and the directory structure set up, we can proceed to │ │ implement the software. │ │ │ │ Steps to Implement the Software: │ │ │ │ 1 Initialize a Go module in the directory. │ │ 2 Write the main Go file to handle URL input and extract the domain. │ │ 3 Test the functionality to ensure it works as expected. │ │ │ │ Let's start by initializing a Go module. │ │ │ │ │ │ ✅ Tool call: "shell" │ │ │ ╰──────────────────────────────────────────────────────────────────────────────────── 11:14:18 AM ─╯ ╭─ Agent: Engineer ────────────────────────────────────────────────────────────────────────────────╮ │ │ │ The Go module has been successfully initialized. Now, let's write the main Go file that will │ │ handle the URL input and extract the domain. │ │ │ │ Main Go File (main.go): │ │ │ │ │ │ package main │ │ │ │ import ( │ │ "fmt" │ │ "net/url" │ │ "os" │ │ ) │ │ │ │ func main() { │ │ if len(os.Args) < 2 { │ │ fmt.Println("Usage: go run main.go ") │ │ return │ │ } │ │ │ │ inputURL := os.Args[1] │ │ parsedURL, err := url.Parse(inputURL) │ │ if err != nil || parsedURL.Scheme == "" || parsedURL.Host == "" { │ │ fmt.Println("Invalid URL") │ │ return │ │ } │ │ │ │ fmt.Println("Domain:", parsedURL.Host) │ │ } │ │ │ │ │ │ This script will: │ │ │ │ 1 Take a URL as a command-line argument. │ │ 2 Parse the URL. │ │ 3 Extract and print the domain. │ │ 4 Handle invalid URLs gracefully. │ │ │ │ Let's create this file in the project directory. │ │ │ │ │ │ ✅ Tool call: "write" │ │ │ ╰──────────────────────────────────────────────────────────────────────────────────── 11:14:26 AM ─╯ ╭─ Agent: Engineer ────────────────────────────────────────────────────────────────────────────────╮ │ │ │ The main.go file has been created. Now, let's test the functionality to ensure it works as │ │ expected. │ │ │ │ We'll run the Go program with a sample URL to see if it correctly extracts the domain. │ │ │ │ │ │ ✅ Tool call: "shell" │ │ │ ╰──────────────────────────────────────────────────────────────────────────────────── 11:14:32 AM ─╯ ╭─ Agent: Engineer ────────────────────────────────────────────────────────────────────────────────╮ │ │ │ The software successfully extracted the domain from the given URL. It works as expected! │ │ │ │ Summary: │ │ │ │ • Goal: Create a utility tool to extract the domain from a given URL. │ │ • Language: Go │ │ • Functionality: │ │ • Accept a single URL as input. │ │ • Extract and print the domain. │ │ • Handle invalid URLs gracefully. │ │ │ │ The software has been implemented and tested successfully. I'll mark this task as complete. │ │ │ │ │ │ ✅ Tool call: "mark_task_d856f_successful" │ │ │ ╰──────────────────────────────────────────────────────────────────────────────────── 11:14:43 AM ─╯
URLExtractor という名前のフォルダが作成され、以下のファイルが生成されました。
URLExtractor/ ├── go.mod └── main.go
生成されたmain.goです。エラーなく実行できます。
package main
import ( "fmt" "net/url" "os" )
func main() { if len(os.Args) < 2 { fmt.Println("Usage: go run main.go ") return }
inputURL := os.Args[1]
parsedURL, err := url.Parse(inputURL)
if err != nil || parsedURL.Scheme == "" || parsedURL.Host == "" {
    fmt.Println("Invalid URL")
    return
}

fmt.Println("Domain:", parsedURL.Host)
}
Prefect Cloudで実行状態を見ると、Task実行の過程でLLMへの問い合わせや、各ツールの実行が行われていることを確認できます。
この実行制御をルールベースで自前実装する場合コードが複雑化しそうですが、Agentを作成するだけでよしなにやってくれるのはControlFlowの魅力だと思います。

Flow実行状態
まとめ
LLM Agentワークフローを構築するControlFlowを紹介しました。
今回は公式Documentのコードのみを動かしましたが、依存関係をTaskに渡すとエラーが出たり、Agentの実行がハングしてしまうなど、まだまだ不安定な印象です。
ControlFlowはPrefect 3.0の一部として利用できるように作成されてます。
Introducing Prefect 3.0
従来のソフトウェアエンジニアリングとLLMをシームレスに組み合わせるのを目標としてるようです。
CEOのJeremiah Lowin氏自らGitHub IssueやSlack communityで対応をしていて、PrefectのAIへの注力ぶりが伺えます。
まだまだ試験段階ではありますが、LLM Agentのワークフローツールという新しい分野がやってきたのはワクワクします。
参考
- Agentic LLM Workflows | ControlFlow by Team Prefect
- Tutorial - ControlFlow
- GitHub - PrefectHQ/ControlFlow: 🦾 Take control of your AI agents

写真は前職の最終出社日に同期と朝まで飲んで撮った渋谷スクランブルスクエア
この記事について
本記事では自分が外資IT企業のSoftware Engineer - Machine Learning(機械学習エンジニア)に応募して、オファーをいただくまでにやったことを書きます。
外資IT企業のSoftware Engineerに関する日本語ドキュメントは、既に多くの方が素晴らしい記事を公開してくれていますが、Machine Learning / Data Science専門のポジションに関する情報はまだまだ少ない印象です。
本記事が外資IT企業でMachine Learning / Data Science関連の職を目指す人の参考になればと思います。
本記事には以下の内容は含まれません。
- 具体的な面接項目・質問内容
- お金の話
企業ごとの面接項目についてはGlassdoor, LeetCode、お金については levels.fyi, OpenSalaryといったサイトが参考になると思います。
バックグラウンド
- 学歴
- Computer Scienceの修士
- 非Computer Scienceの学士
- 職歴
- 英語
- 競プロ経験
- なし
大学院では機械学習の研究を行っていて、新卒で入社した会社では2年半ほどMLOpsを主に取り組んでいました。その後マネージャーのポジションになり、業務の3割ほどがプレイヤー的な働き方をしていました。
エンジニアリング能力を伸ばしたかったため、バックエンドエンジニアとして副業をさせてもらっていました。
英語は大学生の時に休学して8ヶ月バックパッカーをしていたので、下手な英語を使うことへの羞恥心はなかったです。社会人になってから技術ドキュメントを読む以外では英語に触れることがなかったので、スピーキングは4年ほど行っていませんでした。
やったこと
2ヶ月半かけて以下のことを取り組みました。
1. 情報収集
まず1番最初にやったことは、外資のSoftware Engineerポジションに転職した先輩に連絡をとったことでした。
どこの企業を受けたかや、何を行ったかなどの話を聞かせてもらいました。
自分がやらなければいけないことの理解や、これから外資を受けることの覚悟がこの時にできたので、大恩人です。
外資の面接の全体像について把握するために、以下のサイトの「テック企業面接対策ガイド」を購読しました。
InterviewCat - テック企業面接対策プラットフォーム
全体像を把握した後は、外資を受けた方の記事を片っ端から読みました。
特に医師からGoogleのSoftware Engineerへ転職したLillianさんは努力の天才のような方で、Lillianさんがこれだけ努力したなら、本業がエンジニアの自分ができないのは甘えだと思えて、非常にいい刺激をもらえました。
【転職エントリ】Googleに入社します
私はこうやってGoogleに入りました
【22新卒エンジニア】Indeedから内定をもらうまで【新卒1000万】
2. 応募準備
LinkedInの英語プロフィールを充実させるところから始めました。
自分が尊敬してる海外のエンジニアの方々のLinkedInのプロフィールの書き方を参考にして、なるべく自己流にならないように気をつけました。
LinkedIn経由で連絡をもらった転職エージェントの方と何回か面談をしましたが、自分が希望するポジションがなかったため、各企業のサイトで直接応募しました。
RESUMEの作成に2週間ほどかけました。面接に呼ばれなかったら何も始まらないので、かなり力を入れました。
以下のYouTube動画やサイトを見て、RESUME作成の最低限のマナーを学びました。
Create Your Resume for Google: Tips and Advice
Machine Learning Resume: Samples and Writing Guide
初めは zety というサービスを使ってRESUMEを作成しましたが、ページ数が多くなってしまい2ページ以内に抑えるのが難しかったので、最終的に以下のサイトのテンプレを使わせてもらいました。
The Pragmatic Engineer's Resume Template
この時にClaudeに課金しました。
英語のスペルチェックやネイティブチェックを行ってくれるので、周りに英語のネイティブスピーカーがいない自分には非常に助かりました。
ChatGPTやClaudeにRESUMEを書かせても、募集ポジションに対して自分がどれ程の能力を持ってるかリクルーターに伝えるには弱い文章ができるので、やめた方がいいです。嘘をついてもバレるだけなので、hallucinationのない自分の言葉で書いた方がいいと思います。
3. アルゴリズム・データ構造の勉強
けんちょんさんの本で勉強するところから始めました。けんちょんさんの解説はとても分かりやすいので、初学者はこの本とブログ記事を見るのをおすすめします。
「世界で戦うプログラミング力を鍛える本」は時間がなかったので関係があるところだけに絞って読みました。
udemyで酒井潤さんのコースを受講しました。各データ構造をPythonでスクラッチで実装する手順が書かれていてよかったです。
問題解決力を鍛える!アルゴリズムとデータ構造
けんちょんの競プロ精進記録
世界で闘うプログラミング力を鍛える本 コーディング面接189問とその解法
現役シリコンバレーエンジニアが教えるアルゴリズム・データ構造・コーディングテスト入門
勉強したデータ構造、アルゴリズム、定石解法をNotionにまとめてました。
なるべく知識と実装をセットで理解できるように、自分が学んだことをまとめてました。

アルゴリズムとデータ構造の勉強用Notion
本を読みながらLeetCodeをひたすら解きました。他のコーディング面接対策用のサイトは利用しませんでした。
課金しないと解説が見れないので、自分は課金しました。
Top Interview 150 という問題集を繰り返し行いました。
解いた問題と自分の解法をNotionにメモしてました。

LeetCodeメモNotion
面接まで時間がなかったのでeasy, mediumに絞って取り組みました。上記の問題集以外はやらず、同じ問題集を繰り返しやる方法を自分はとりました。
先人の方達が解いてる問題数を見ると、はるかに多くの数を解いてるので自分は少ない方だと思います。
4. 機械学習・データサイエンスの勉強
機械学習関連の面接質問例をまとめたサイトがあるので、これらの質問に答えられることをベンチマークとして勉強しました。
The Top 25 Machine Learning Interview Questions For 2024
Top 45 Machine Learning Interview Questions & Answers 2024
新しい本は買わず、既に手元にあった以下の本を復習しました。ML/DSの勉強をどこまでやるかは応募するポジションに依存する部分が大きいかと思います。
はじめてのパターン認識
scikit-learnとTensorFlowによる実践機械学習
推薦システム実践入門
Kaggleで勝つデータ分析の技術
実践 AWSデータサイエンス
機械学習システムデザイン
業務で使っている機械学習モデルや手法についての論文・技術記事を読み直しました。
5. 英語での受け答えの練習
Coding Interviewをぶつけ本番で行うのは怖かったので、以下のYouTube動画を何回も見て解答の流れを頭に入れました。mock interviewは自分は行わなかった(間に合わなかった)です。
Google Software Engineering Interview: Binary Tree Maximum Path
想定質問と回答をNotionにまとめ、流暢に答えられるように練習しました。
以下はロジスティック回帰と線形回帰についての想定質問と回答の例です。他にも自分のRESUMEをClaudeに読み込ませて面接官役をやってもらい、一人模擬面接を行いました。

面接受け答え例Notion
音読してても身に付かなかったので、以下の記事を参考にAmazon Pollyで音声を作成して、文章を聞いて耳から覚えてました。
一度読んだ本の内容を忘れないようにする方法
最後に
外資のSoftware Engineer - Machine Learningのポジションのオファーをもらうまでに、自分が行ったことをまとめました。
自分は準備期間が短く、2ヶ月半で行いました。
凡人の自分にとっては、本業の仕事をやりながら面接準備をするのは非常に苦しかったです。
もし将来的に外資を考えている人は、余裕を持って早めに準備することを自分はお勧めします。
外資のMachine Learning/Data Science関連のポジションの日本語情報は少ないです。
N=1の例ではありますが、何から始めれば良いか困っている方の参考になれば幸いです。