Contributing to the code base — pandas 2.3.0 documentation (original) (raw)
Table of Contents:
- Code standards
- Pre-commit
- Optional dependencies
- Backwards compatibility
- Type hints
- Testing with continuous integration
- Test-driven development
- Running the test suite
- Running the performance test suite
- Documenting your code
Code standards#
Writing good code is not just about what you write. It is also about how you write it. During Continuous Integration testing, several tools will be run to check your code for stylistic errors. Generating any warnings will cause the test to fail. Thus, good style is a requirement for submitting code to pandas.
There are a couple of tools in pandas to help contributors verify their changes before contributing to the project
./ci/code_checks.sh: a script validates the doctests, formatting in docstrings, and imported modules. It is possible to run the checks independently by using the parametersdocstrings,code, anddoctests(e.g../ci/code_checks.sh doctests);pre-commit, which we go into detail on in the next section.
In addition, because a lot of people use our library, it is important that we do not make sudden changes to the code that could have the potential to break a lot of user code as a result, that is, we need it to be as _backwards compatible_as possible to avoid mass breakages.
Pre-commit#
Additionally, Continuous Integration will run code formatting checks like black, ruff,isort, and clang-format and more using pre-commit hooks. Any warnings from these checks will cause the Continuous Integration to fail; therefore, it is helpful to run the check yourself before submitting code. This can be done by installing pre-commit (which should already have happened if you followed the instructions in Setting up your development environment) and then running:
from the root of the pandas repository. Now all of the styling checks will be run each time you commit changes without your needing to run each one manually. In addition, using pre-commit will also allow you to more easily remain up-to-date with our code checks as they change.
Note that if needed, you can skip these checks with git commit --no-verify.
If you don’t want to use pre-commit as part of your workflow, you can still use it to run its checks with one of the following:
pre-commit run --files pre-commit run --from-ref=upstream/main --to-ref=HEAD --all-files
without needing to have done pre-commit install beforehand.
Finally, we also have some slow pre-commit checks, which don’t run on each commit but which do run during continuous integration. You can trigger them manually with:
pre-commit run --hook-stage manual --all-files
Note
You may want to periodically run pre-commit gc, to clean up repos which are no longer used.
Note
If you have conflicting installations of virtualenv, then you may get an error - see here.
Also, due to a bug in virtualenv, you may run into issues if you’re using conda. To solve this, you can downgradevirtualenv to version 20.0.33.
Note
If you have recently merged in main from the upstream branch, some of the dependencies used by pre-commit may have changed. Make sure toupdate your development environment.
Optional dependencies#
Optional dependencies (e.g. matplotlib) should be imported with the private helperpandas.compat._optional.import_optional_dependency. This ensures a consistent error message when the dependency is not met.
All methods using an optional dependency should include a test asserting that anImportError is raised when the optional dependency is not found. This test should be skipped if the library is present.
All optional dependencies should be documented inOptional dependencies and the minimum required version should be set in the pandas.compat._optional.VERSIONS dict.
Backwards compatibility#
Please try to maintain backward compatibility. pandas has lots of users with lots of existing code, so don’t break it if at all possible. If you think breakage is required, clearly state why as part of the pull request. Also, be careful when changing method signatures and add deprecation warnings where needed. Also, add the deprecated sphinx directive to the deprecated functions or methods.
If a function with the same arguments as the one being deprecated exist, you can use the pandas.util._decorators.deprecate:
from pandas.util._decorators import deprecate
deprecate('old_func', 'new_func', '1.1.0')
Otherwise, you need to do it manually:
import warnings from pandas.util._exceptions import find_stack_level
def old_func(): """Summary of the function.
.. deprecated:: 1.1.0
   Use new_func instead.
"""
warnings.warn(
    'Use new_func instead.',
    FutureWarning,
    stacklevel=find_stack_level(),
)
new_func()
def new_func(): pass
You’ll also need to
- Write a new test that asserts a warning is issued when calling with the deprecated argument
- Update all of pandas existing tests and code to use the new argument
See Testing a warning for more.
Type hints#
pandas strongly encourages the use of PEP 484 style type hints. New development should contain type hints and pull requests to annotate existing code are accepted as well!
Style guidelines#
Type imports should follow the from typing import ... convention. Your code may be automatically re-written to use some modern constructs (e.g. using the built-in list instead of typing.List) by the pre-commit checks.
In some cases in the code base classes may define class variables that shadow builtins. This causes an issue as described in Mypy 1775. The defensive solution here is to create an unambiguous alias of the builtin and use that without your annotation. For example, if you come across a definition like
class SomeClass1: str = None
The appropriate way to annotate this would be as follows
str_type = str
class SomeClass2: str: str_type = None
In some cases you may be tempted to use cast from the typing module when you know better than the analyzer. This occurs particularly when using custom inference functions. For example
from typing import cast
from pandas.core.dtypes.common import is_number
def cannot_infer_bad(obj: Union[str, int, float]):
if is_number(obj):
    ...
else:  # Reasonably only str objects would reach this but...
    obj = cast(str, obj)  # Mypy complains without this!
    return obj.upper()
The limitation here is that while a human can reasonably understand that is_number would catch the int and float types mypy cannot make that same inference just yet (see mypy #5206. While the above works, the use of cast is strongly discouraged. Where applicable a refactor of the code to appease static analysis is preferable
def cannot_infer_good(obj: Union[str, int, float]):
if isinstance(obj, str):
    return obj.upper()
else:
    ...
With custom types and inference this is not always possible so exceptions are made, but every effort should be exhausted to avoid cast before going down such paths.
pandas-specific types#
Commonly used types specific to pandas will appear in pandas._typing and you should use these where applicable. This module is private for now but ultimately this should be exposed to third party libraries who want to implement type checking against pandas.
For example, quite a few functions in pandas accept a dtype argument. This can be expressed as a string like "object", a numpy.dtype like np.int64 or even a pandas ExtensionDtype like pd.CategoricalDtype. Rather than burden the user with having to constantly annotate all of those options, this can simply be imported and reused from the pandas._typing module
from pandas._typing import Dtype
def as_type(dtype: Dtype) -> ...: ...
This module will ultimately house types for repeatedly used concepts like “path-like”, “array-like”, “numeric”, etc… and can also hold aliases for commonly appearing parameters like axis. Development of this module is active so be sure to refer to the source for the most up to date list of available types.
Validating type hints#
pandas uses mypy and pyright to statically analyze the code base and type hints. After making any change you can ensure your type hints are consistent by running
pre-commit run --hook-stage manual --all-files mypy pre-commit run --hook-stage manual --all-files pyright pre-commit run --hook-stage manual --all-files pyright_reportGeneralTypeIssues
the following might fail if the installed pandas version does not correspond to your local git version
pre-commit run --hook-stage manual --all-files stubtest
in your python environment.
Warning
- Please be aware that the above commands will use the current python environment. If your python packages are older/newer than those installed by the pandas CI, the above commands might fail. This is often the case when the
mypyornumpyversions do not match. Please see how to setup the python environment or select a recently succeeded workflow, select the “Docstring validation, typing, and other manual pre-commit hooks” job, then click on “Set up Conda” and “Environment info” to see which versions the pandas CI installs.
Testing type hints in code using pandas#
Warning
- Pandas is not yet a py.typed library (PEP 561)! The primary purpose of locally declaring pandas as a py.typed library is to test and improve the pandas-builtin type annotations.
Until pandas becomes a py.typed library, it is possible to easily experiment with the type annotations shipped with pandas by creating an empty file named “py.typed” in the pandas installation folder:
python -c "import pandas; import pathlib; (pathlib.Path(pandas.path[0]) / 'py.typed').touch()"
The existence of the py.typed file signals to type checkers that pandas is already a py.typed library. This makes type checkers aware of the type annotations shipped with pandas.
Testing with continuous integration#
The pandas test suite will run automatically on GitHub Actionscontinuous integration services, once your pull request is submitted. However, if you wish to run the test suite on a branch prior to submitting the pull request, then the continuous integration services need to be hooked to your GitHub repository. Instructions are here for GitHub Actions.
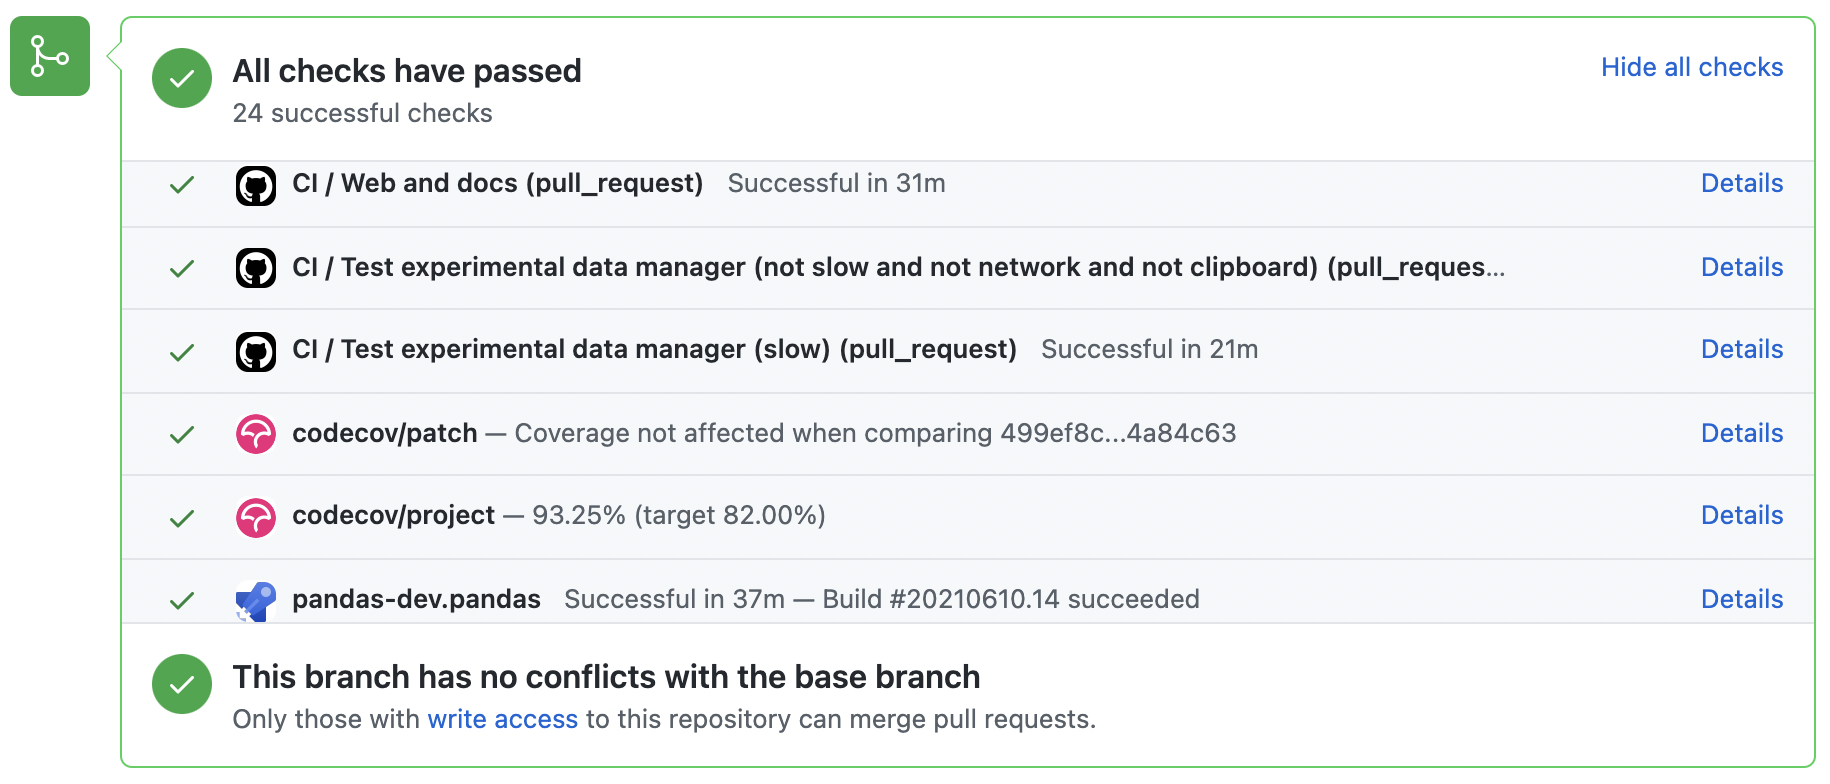
A pull-request will be considered for merging when you have an all ‘green’ build. If any tests are failing, then you will get a red ‘X’, where you can click through to see the individual failed tests. This is an example of a green build.
Test-driven development#
pandas is serious about testing and strongly encourages contributors to embracetest-driven development (TDD). This development process “relies on the repetition of a very short development cycle: first the developer writes an (initially failing) automated test case that defines a desired improvement or new function, then produces the minimum amount of code to pass that test.” So, before actually writing any code, you should write your tests. Often the test can be taken from the original GitHub issue. However, it is always worth considering additional use cases and writing corresponding tests.
Adding tests is one of the most common requests after code is pushed to pandas. Therefore, it is worth getting in the habit of writing tests ahead of time so this is never an issue.
Writing tests#
All tests should go into the tests subdirectory of the specific package. This folder contains many current examples of tests, and we suggest looking to these for inspiration.
As a general tip, you can use the search functionality in your integrated development environment (IDE) or the git grep command in a terminal to find test files in which the method is called. If you are unsure of the best location to put your test, take your best guess, but note that reviewers may request that you move the test to a different location.
To use git grep, you can run the following command in a terminal:
git grep "function_name("
This will search through all files in your repository for the text function_name(. This can be a useful way to quickly locate the function in the codebase and determine the best location to add a test for it.
Ideally, there should be one, and only one, obvious place for a test to reside. Until we reach that ideal, these are some rules of thumb for where a test should be located.
- Does your test depend only on code in
pd._libs.tslibs? This test likely belongs in one of:- tests.tslibs
Note
No file intests.tslibsshould import from any pandas modules outside ofpd._libs.tslibs - tests.scalar
- tests.tseries.offsets
- tests.tslibs
- Does your test depend only on code in pd._libs? This test likely belongs in one of:
- tests.libs
- tests.groupby.test_libgroupby
- Is your test for an arithmetic or comparison method? This test likely belongs in one of:
- tests.arithmetic
Note
These are intended for tests that can be shared to test the behavior of DataFrame/Series/Index/ExtensionArray using thebox_with_arrayfixture. - tests.frame.test_arithmetic
- tests.series.test_arithmetic
- tests.arithmetic
- Is your test for a reduction method (min, max, sum, prod, …)? This test likely belongs in one of:
- tests.reductions
Note
These are intended for tests that can be shared to test the behavior of DataFrame/Series/Index/ExtensionArray. - tests.frame.test_reductions
- tests.series.test_reductions
- tests.test_nanops
- tests.reductions
- Is your test for an indexing method? This is the most difficult case for deciding where a test belongs, because there are many of these tests, and many of them test more than one method (e.g. both
Series.__getitem__andSeries.loc.__getitem__)- Is the test specifically testing an Index method (e.g.
Index.get_loc,Index.get_indexer)? This test likely belongs in one of:- tests.indexes.test_indexing
- tests.indexes.fooindex.test_indexing
Within that files there should be a method-specific test class e.g.TestGetLoc.
In most cases, neitherSeriesnorDataFrameobjects should be needed in these tests.
- Is the test for a Series or DataFrame indexing method other than
__getitem__or__setitem__, e.g.xs,where,take,mask,lookup, orinsert? This test likely belongs in one of:- tests.frame.indexing.test_methodname
- tests.series.indexing.test_methodname
- Is the test for any of
loc,iloc,at, oriat? This test likely belongs in one of:- tests.indexing.test_loc
- tests.indexing.test_iloc
- tests.indexing.test_at
- tests.indexing.test_iat
Within the appropriate file, test classes correspond to either types of indexers (e.g.TestLocBooleanMask) or major use cases (e.g.TestLocSetitemWithExpansion).
See the note in section D) about tests that test multiple indexing methods.
- Is the test for
Series.__getitem__,Series.__setitem__,DataFrame.__getitem__, orDataFrame.__setitem__? This test likely belongs in one of:- tests.series.test_getitem
- tests.series.test_setitem
- tests.frame.test_getitem
- tests.frame.test_setitem
If many cases such a test may test multiple similar methods, e.g.
import pandas as pd
import pandas._testing as tm
def test_getitem_listlike_of_ints():
ser = pd.Series(range(5))
result = ser[[3, 4]]
expected = pd.Series([2, 3])
tm.assert_series_equal(result, expected)
result = ser.loc[[3, 4]]
tm.assert_series_equal(result, expected)
- Is the test specifically testing an Index method (e.g.
In cases like this, the test location should be based on the _underlying_method being tested. Or in the case of a test for a bugfix, the location of the actual bug. So in this example, we know that
Series.__getitem__callsSeries.loc.__getitem__, so this is really a test forloc.__getitem__. So this test belongs intests.indexing.test_loc. 6. Is your test for a DataFrame or Series method?
- Is the method a plotting method? This test likely belongs in one of:
- tests.plotting
- Is the method an IO method? This test likely belongs in one of:
- tests.io
Note
This includesto_stringbut excludes__repr__, which is tested intests.frame.test_reprandtests.series.test_repr. Other classes often have atest_formatsfile.
- tests.io
- Otherwise This test likely belongs in one of:
- tests.series.methods.test_mymethod
- tests.frame.methods.test_mymethod
Note
If a test can be shared between DataFrame/Series using theframe_or_seriesfixture, by convention it goes in thetests.framefile.
- Is your test for an Index method, not depending on Series/DataFrame? This test likely belongs in one of:
- tests.indexes
- Is your test for one of the pandas-provided ExtensionArrays (
Categorical,DatetimeArray,TimedeltaArray,PeriodArray,IntervalArray,NumpyExtensionArray,FloatArray,BoolArray,StringArray)? This test likely belongs in one of:- tests.arrays
- Is your test for all ExtensionArray subclasses (the “EA Interface”)? This test likely belongs in one of:
- tests.extension
Using pytest#
Test structure#
pandas existing test structure is mostly class-based, meaning that you will typically find tests wrapped in a class.
class TestReallyCoolFeature: def test_cool_feature_aspect(self): pass
We prefer a more functional style using the pytest framework, which offers a richer testing framework that will facilitate testing and developing. Thus, instead of writing test classes, we will write test functions like this:
def test_really_cool_feature(): pass
Preferred pytest idioms#
- Functional tests named
def test_*and only take arguments that are either fixtures or parameters. - Use a bare
assertfor testing scalars and truth-testing - Use
tm.assert_series_equal(result, expected)andtm.assert_frame_equal(result, expected)for comparing Series and DataFrame results respectively. - Use @pytest.mark.parameterize when testing multiple cases.
- Use pytest.mark.xfail when a test case is expected to fail.
- Use pytest.mark.skip when a test case is never expected to pass.
- Use pytest.param when a test case needs a particular mark.
- Use @pytest.fixture if multiple tests can share a setup object.
Warning
Do not use pytest.xfail (which is different than pytest.mark.xfail) since it immediately stops the test and does not check if the test will fail. If this is the behavior you desire, use pytest.skip instead.
If a test is known to fail but the manner in which it fails is not meant to be captured, use pytest.mark.xfail It is common to use this method for a test that exhibits buggy behavior or a non-implemented feature. If the failing test has flaky behavior, use the argument strict=False. This will make it so pytest does not fail if the test happens to pass. Using strict=False is highly undesirable, please use it only as a last resort.
Prefer the decorator @pytest.mark.xfail and the argument pytest.paramover usage within a test so that the test is appropriately marked during the collection phase of pytest. For xfailing a test that involves multiple parameters, a fixture, or a combination of these, it is only possible to xfail during the testing phase. To do so, use the request fixture:
def test_xfail(request): mark = pytest.mark.xfail(raises=TypeError, reason="Indicate why here") request.applymarker(mark)
xfail is not to be used for tests involving failure due to invalid user arguments. For these tests, we need to verify the correct exception type and error message is being raised, using pytest.raises instead.
Testing a warning#
Use tm.assert_produces_warning as a context manager to check that a block of code raises a warning.
with tm.assert_produces_warning(DeprecationWarning): pd.deprecated_function()
If a warning should specifically not happen in a block of code, pass False into the context manager.
with tm.assert_produces_warning(False): pd.no_warning_function()
If you have a test that would emit a warning, but you aren’t actually testing the warning itself (say because it’s going to be removed in the future, or because we’re matching a 3rd-party library’s behavior), then use pytest.mark.filterwarnings to ignore the error.
@pytest.mark.filterwarnings("ignore:msg:category") def test_thing(self): pass
Testing an exception#
Use pytest.raises as a context manager with the specific exception subclass (i.e. never use Exception) and the exception message in match.
with pytest.raises(ValueError, match="an error"): raise ValueError("an error")
Testing involving files#
The tm.ensure_clean context manager creates a temporary file for testing, with a generated filename (or your filename if provided), that is automatically deleted when the context block is exited.
with tm.ensure_clean('my_file_path') as path: # do something with the path
Testing involving network connectivity#
A unit test should not access a public data set over the internet due to flakiness of network connections and lack of ownership of the server that is being connected to. To mock this interaction, use the httpserver fixture from thepytest-localserver plugin. with synthetic data.
@pytest.mark.network @pytest.mark.single_cpu def test_network(httpserver): httpserver.serve_content(content="content") result = pd.read_html(httpserver.url)
Example#
Here is an example of a self-contained set of tests in a file pandas/tests/test_cool_feature.pythat illustrate multiple features that we like to use. Please remember to add the GitHub Issue Number as a comment to a new test.
import pytest import numpy as np import pandas as pd
@pytest.mark.parametrize('dtype', ['int8', 'int16', 'int32', 'int64']) def test_dtypes(dtype): assert str(np.dtype(dtype)) == dtype
@pytest.mark.parametrize( 'dtype', ['float32', pytest.param('int16', marks=pytest.mark.skip), pytest.param('int32', marks=pytest.mark.xfail( reason='to show how it works'))]) def test_mark(dtype): assert str(np.dtype(dtype)) == 'float32'
@pytest.fixture def series(): return pd.Series([1, 2, 3])
@pytest.fixture(params=['int8', 'int16', 'int32', 'int64']) def dtype(request): return request.param
def test_series(series, dtype): # GH result = series.astype(dtype) assert result.dtype == dtype
expected = pd.Series([1, 2, 3], dtype=dtype)
tm.assert_series_equal(result, expected)
A test run of this yields
((pandas) bash-3.2$ pytest test_cool_feature.py -v =========================== test session starts =========================== platform darwin -- Python 3.6.2, pytest-3.6.0, py-1.4.31, pluggy-0.4.0 collected 11 items
tester.py::test_dtypes[int8] PASSED tester.py::test_dtypes[int16] PASSED tester.py::test_dtypes[int32] PASSED tester.py::test_dtypes[int64] PASSED tester.py::test_mark[float32] PASSED tester.py::test_mark[int16] SKIPPED tester.py::test_mark[int32] xfail tester.py::test_series[int8] PASSED tester.py::test_series[int16] PASSED tester.py::test_series[int32] PASSED tester.py::test_series[int64] PASSED
Tests that we have parametrized are now accessible via the test name, for example we could run these with -k int8 to sub-select only those tests which match int8.
((pandas) bash-3.2$ pytest test_cool_feature.py -v -k int8 =========================== test session starts =========================== platform darwin -- Python 3.6.2, pytest-3.6.0, py-1.4.31, pluggy-0.4.0 collected 11 items
test_cool_feature.py::test_dtypes[int8] PASSED test_cool_feature.py::test_series[int8] PASSED
Using hypothesis#
Hypothesis is a library for property-based testing. Instead of explicitly parametrizing a test, you can describe all valid inputs and let Hypothesis try to find a failing input. Even better, no matter how many random examples it tries, Hypothesis always reports a single minimal counterexample to your assertions - often an example that you would never have thought to test.
See Getting Started with Hypothesisfor more of an introduction, then refer to the Hypothesis documentation for details.
import json from hypothesis import given, strategies as st
any_json_value = st.deferred(lambda: st.one_of( st.none(), st.booleans(), st.floats(allow_nan=False), st.text(), st.lists(any_json_value), st.dictionaries(st.text(), any_json_value) ))
@given(value=any_json_value) def test_json_roundtrip(value): result = json.loads(json.dumps(value)) assert value == result
This test shows off several useful features of Hypothesis, as well as demonstrating a good use-case: checking properties that should hold over a large or complicated domain of inputs.
To keep the pandas test suite running quickly, parametrized tests are preferred if the inputs or logic are simple, with Hypothesis tests reserved for cases with complex logic or where there are too many combinations of options or subtle interactions to test (or think of!) all of them.
Running the test suite#
The tests can then be run directly inside your Git clone (without having to install pandas) by typing:
Note
If a handful of tests don’t pass, it may not be an issue with your pandas installation. Some tests (e.g. some SQLAlchemy ones) require additional setup, others might start failing because a non-pinned library released a new version, and others might be flaky if run in parallel. As long as you can import pandas from your locally built version, your installation is probably fine and you can start contributing!
Often it is worth running only a subset of tests first around your changes before running the entire suite (tip: you can use the pandas-coverage app) to find out which tests hit the lines of code you’ve modified, and then run only those).
The easiest way to do this is with:
pytest pandas/path/to/test.py -k regex_matching_test_name
Or with one of the following constructs:
pytest pandas/tests/[test-module].py pytest pandas/tests/[test-module].py::[TestClass] pytest pandas/tests/[test-module].py::[TestClass]::[test_method]
Using pytest-xdist, which is included in our ‘pandas-dev’ environment, one can speed up local testing on multicore machines. The -n number flag then can be specified when running pytest to parallelize a test run across the number of specified cores or auto to utilize all the available cores on your machine.
Utilize 4 cores
pytest -n 4 pandas
Utilizes all available cores
pytest -n auto pandas
If you’d like to speed things along further a more advanced use of this command would look like this
pytest pandas -n 4 -m "not slow and not network and not db and not single_cpu" -r sxX
In addition to the multithreaded performance increase this improves test speed by skipping some tests using the -m mark flag:
- slow: any test taking long (think seconds rather than milliseconds)
- network: tests requiring network connectivity
- db: tests requiring a database (mysql or postgres)
- single_cpu: tests that should run on a single cpu only
You might want to enable the following option if it’s relevant for you:
- arm_slow: any test taking long on arm64 architecture
These markers are defined in this toml file, under [tool.pytest.ini_options] in a list called markers, in case you want to check if new ones have been created which are of interest to you.
The -r report flag will display a short summary info (see pytest documentation) . Here we are displaying the number of:
- s: skipped tests
- x: xfailed tests
- X: xpassed tests
The summary is optional and can be removed if you don’t need the added information. Using the parallelization option can significantly reduce the time it takes to locally run tests before submitting a pull request.
If you require assistance with the results, which has happened in the past, please set a seed before running the command and opening a bug report, that way we can reproduce it. Here’s an example for setting a seed on windows
set PYTHONHASHSEED=314159265 pytest pandas -n 4 -m "not slow and not network and not db and not single_cpu" -r sxX
On Unix use
export PYTHONHASHSEED=314159265 pytest pandas -n 4 -m "not slow and not network and not db and not single_cpu" -r sxX
For more, see the pytest documentation.
Furthermore one can run
with an imported pandas to run tests similarly.
Running the performance test suite#
Performance matters and it is worth considering whether your code has introduced performance regressions. pandas is in the process of migrating toasv benchmarksto enable easy monitoring of the performance of critical pandas operations. These benchmarks are all found in the pandas/asv_bench directory, and the test results can be found here.
To use all features of asv, you will need either conda orvirtualenv. For more details please check the asv installation webpage.
To install asv:
pip install git+https://github.com/airspeed-velocity/asv
If you need to run a benchmark, change your directory to asv_bench/ and run:
asv continuous -f 1.1 upstream/main HEAD
You can replace HEAD with the name of the branch you are working on, and report benchmarks that changed by more than 10%. The command uses conda by default for creating the benchmark environments. If you want to use virtualenv instead, write:
asv continuous -f 1.1 -E virtualenv upstream/main HEAD
The -E virtualenv option should be added to all asv commands that run benchmarks. The default value is defined in asv.conf.json.
Running the full benchmark suite can be an all-day process, depending on your hardware and its resource utilization. However, usually it is sufficient to paste only a subset of the results into the pull request to show that the committed changes do not cause unexpected performance regressions. You can run specific benchmarks using the -b flag, which takes a regular expression. For example, this will only run benchmarks from a pandas/asv_bench/benchmarks/groupby.py file:
asv continuous -f 1.1 upstream/main HEAD -b ^groupby
If you want to only run a specific group of benchmarks from a file, you can do it using . as a separator. For example:
asv continuous -f 1.1 upstream/main HEAD -b groupby.GroupByMethods
will only run the GroupByMethods benchmark defined in groupby.py.
You can also run the benchmark suite using the version of pandasalready installed in your current Python environment. This can be useful if you do not have virtualenv or conda, or are using thesetup.py develop approach discussed above; for the in-place build you need to set PYTHONPATH, e.g.PYTHONPATH="$PWD/.." asv [remaining arguments]. You can run benchmarks using an existing Python environment by:
or, to use a specific Python interpreter,:
asv run -e -E existing:python3.6
This will display stderr from the benchmarks, and use your localpython that comes from your $PATH.
Information on how to write a benchmark and how to use asv can be found in theasv documentation.
Documenting your code#
Changes should be reflected in the release notes located in doc/source/whatsnew/vx.y.z.rst. This file contains an ongoing change log for each release. Add an entry to this file to document your fix, enhancement or (unavoidable) breaking change. Make sure to include the GitHub issue number when adding your entry (using :issue:`1234` where 1234 is the issue/pull request number). Your entry should be written using full sentences and proper grammar.
When mentioning parts of the API, use a Sphinx :func:, :meth:, or :class:directive as appropriate. Not all public API functions and methods have a documentation page; ideally links would only be added if they resolve. You can usually find similar examples by checking the release notes for one of the previous versions.
If your code is a bugfix, add your entry to the relevant bugfix section. Avoid adding to the Other section; only in rare cases should entries go there. Being as concise as possible, the description of the bug should include how the user may encounter it and an indication of the bug itself, e.g. “produces incorrect results” or “incorrectly raises”. It may be necessary to also indicate the new behavior.
If your code is an enhancement, it is most likely necessary to add usage examples to the existing documentation. This can be done following the section regarding documentation. Further, to let users know when this feature was added, the versionaddeddirective is used. The sphinx syntax for that is:
This will put the text New in version 2.1.0 wherever you put the sphinx directive. This should also be put in the docstring when adding a new function or method (example) or a new keyword argument (example).