Scheduling posts (original) (raw)
In this article:
Video: Scheduling posts in Buffer
Watch the video below to learn more about scheduling posts in Buffer.
Scheduling posts
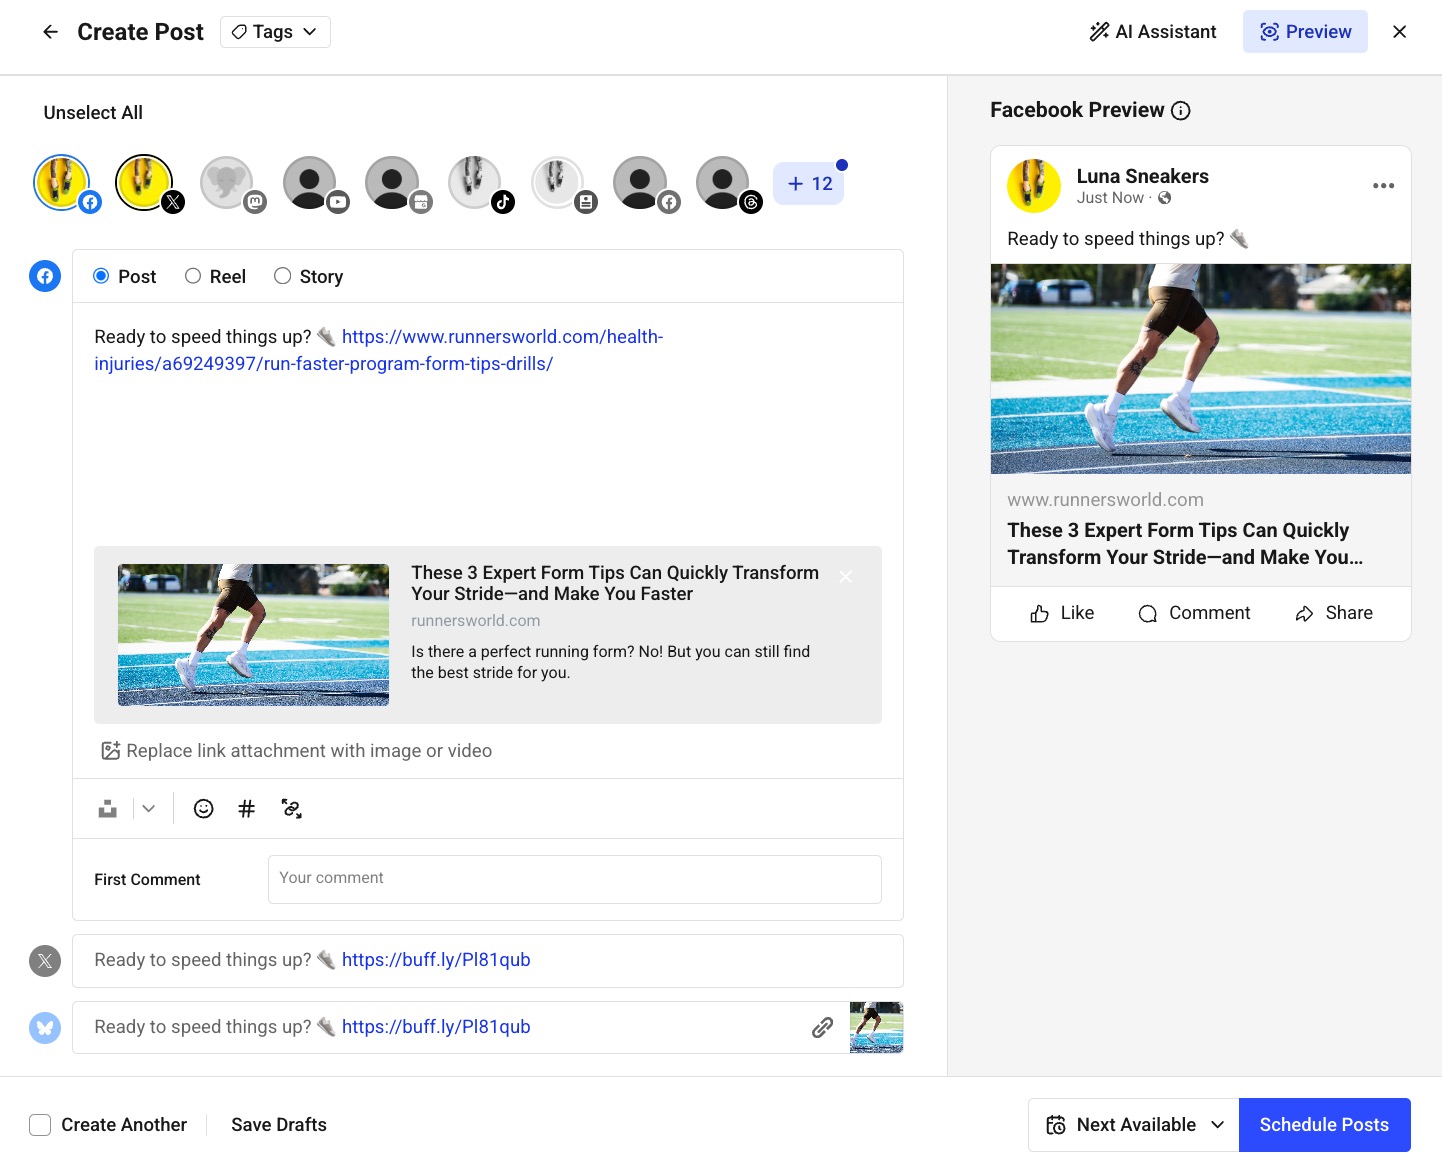
- To get started, click the + New button in the top navigation bar and select Post. This will open up the composer, which is where you can craft your post.
- From there, select the social channels you'd like to include by clicking on the avatars at the top of the composer.
📝 Please note, it's only possible to select one X/Twitter account at a time, due to X's/Twitter's guidelines.

- If you'd like to add a tag to the post, choose the appropriate one at the top of the composer. Learn more about creating and managing tags (campaigns) here.
- You're able to customize your post for each social network that you're sharing to. If the message is going to be similar for each one, we would recommend starting with a base for your posts, which you can type in or copy and paste.
- From there, click Customize for each network. A separate box will appear for each type of social network that you've selected. For example if you're sharing to Facebook, X/Twitter, and LinkedIn, you'll have three boxes available. If you're sharing to multiple social channels of the same network, e.g. multiple Facebook accounts, you'd still only have one box per social network.
- You can then modify the text for each one however you'd like. When it comes to adding media to your posts, the options you'll see will vary depending on the social network you're sharing to. Please refer to this table to find more information about the options for each social network.
Did you know you can copy/paste images into the web composer? You can also drag and drop images to reorder them. Try it out!
- For multi-image posts, images that you attach to your post will appear in the order that you uploaded them. You can rearrange the images by clicking the X on the images. The images will then appear in the “Suggested Media” area below. You can then click on each image in the order you would like them to appear and they will be attached in that order.
✨Pro tips for scheduling posts
Now that you know the basics, feel free to watch this video, showing a number of other features within our composer.
Notes
- Carousel posts for Instagram and Facebook: Please note that you can upload and schedule up to 10 images for Instagram and Facebook. However, if you'd like to schedule a post to multiple social accounts at once and click the Customize for each network button, only the number of images permitted for that social channel will populate. For example, if you're scheduling both Instagram and LinkedIn posts and upload 10 images when you click Customize for each network, you will see that only nine of your images shows within your LinkedIn composer while all 10 display for your Instagram composer. This is because it is only possible to publish nine images at a time through LinkedIn.
- LinkedIn Document Scheduling: We are able to schedule PDFs on LinkedIn (one per post with a maximum file size of 100MB and 300 pages).
- Link shortening: On the Free plan, all links will set to No Shortening by default. On our paid plans, you're able to decide which link shortener to use by heading to Settings. Pinterest does not allow link shortening, so be sure to use a full URL in the destination URL box.
- Facebook page and X/Twitter mentions: To mention a Facebook page or X/Twitter profile, simply type the @ symbol and start typing the first few letters of the page or profile you'd like to mention. Matching results will be returned and you can select the one you'd like to include. Learn more here.
- Image descriptions: Descriptions added to images that are shared on X/Twitter, Mastodon, LinkedIn, Pinterest, and Facebook are added as "alternative text", which is read aloud by software that users with visual impairments use to navigate the web. To add alt text to your image being shared to these channels, click on the image to expand it and then add your image description in the text box. Learn more here about adding alt text.
- TikTok mentions and hashtags: Any mentions or hashtags in a caption will display as plain-text and not a clickable hyperlink. Mentions of mutual followers is only supported at this time. Additionally, captions have a maximum length of 150 characters.
- Hashtags: You're able to include hashtags in your posts for any social network (except Pinterest) and they will be hyperlinked once published.
- First comment: On our paid plans, you're able to schedule a first comment for LinkedIn
- Threads: Threaded posts are available on X/Twitter, Threads, Mastodon, and Bluesky.
Previewing posts
As you create and customize your post, Buffer will generate a preview to show you what your post will look like once it's published on each channel.*
*Link previews aren't currently available for posts over 280 characters on X/Twitter due to API limitations.
Focus mode
If you ever just want a calm space to write, Focus Mode can help. It hides previews and extra panels so you can zero in on your caption without distractions — perfect for longer posts or when you’re fine-tuning your wording.
Just click Preview to turn Focus Mode on. When you’re ready to see how your post will look, click Preview again to bring the preview back.
Scheduling Options
Once your posts are ready, you'll have a few scheduling options:
- Next Available: Your post will go out after any other queued posts.
- Prioritize: Your post will be bumped to the top of the queue
- Set Date and Time: Choose a custom day and time for your post to publish.
- Now: Your post will be published immediately
Once you've chosen when to publish your post, you can click Schedule Post or if you'd like to schedule your post and keep the composer open to create your next post, select the Create Another checkbox.
📝 Note: To use Next available or Prioritize when scheduling, make sure all selected channels have posting times set. These options won’t appear if even one channel is missing posting times.
Setting a posting default
Our new scheduling options also include the ability to set a posting default from your Account Preferences. If you use one option more than others, setting it as your default will allow you to skip choosing a scheduling option and, instead, simply click the Schedule Post button to add your post to the queue.

⭐ Free users can have up to 10 scheduled posts queued at a time. Paid users can have up to 5,000 scheduled posts queued at a time.
FAQ
How can I delete a scheduled post from my queue?
Click the three dots and then choose Delete on any scheduled post and it will be deleted from your queue. Please note that once a post has been deleted, it cannot be recovered.

Can I view all of my scheduled posts in one place?
Yes, you can view all of your scheduled posts in one list using the All Channels view. This view allows you to filter your scheduled posts by channel and tag. Learn more about How to use the All Channels view in Buffer here.
How can I delete or edit a published post?
At this time, we are unable to edit or delete a post once it's been published through Buffer. Instead, you'll need to edit or delete the published post directly on the social network. You can find a history of your published posts within the Sent tab of the Publish dashboard.
At this time, it is not possible to create a post once and have it repeat indefinitely. However, you can use our Duplicate feature to repeat a post.
Do you support bulk scheduling? Can I upload my posts in bulk? Can I import my posts in bulk?
Yes, you can upload your posts in bulk with Buffer. Learn more about how bulk uploads work in Buffer here.
How do I schedule a post for multiple channels?
In the composer, choose the channels you want to post to by selecting them individually (selected channels will appear in color).
If you frequently post to the same set of channels, you can also create a channel group to easily select multiple channels at once.
If you're creating a post for multiple channels and planning to add @ mentions, you'll want to click Customize for each network before adding the @ mentions, as each social network handles mentions differently. Learn more about adding mentions (tags) to your posts here.

Can I group channels together when scheduling posts?
Yes! You can use channel groups to organize multiple social media channels and schedule posts to them at once. This is especially helpful if you frequently post the same content across several platforms or manage multiple brand accounts.
I've created a post for multiple channels and need to edit my post. Can I edit scheduled posts in bulk?
At this time, we don't have a way to edit posts in bulk. If you're creating the same post for multiple channels, once it's been scheduled, we consider each post to be its own separate post. Therefore, you'll have to edit each post separately. If you'd like to see us support bulk editing in the future, you can upvote this idea on our suggestions board.
No. We are not able to automatically repost content for you. The Buffer extension allows you to select individual X/Twitter posts to repost (retweet), but it is not automatic.
Buffer can only publish to channels that are connected to Buffer and have been selected in the composer when you create your post. Once your content is posted through Buffer, it will not be automatically posted to other social networks, even if you have settings enabled to allow this to happen when posting natively.
- For example, Instagram posts sent through Buffer will not automatically publish to Facebook, even if the setting is turned on within the Instagram app. This is due to API limitations. To publish a post to both Instagram and Facebook, both channels will need to be connected to Buffer and you will need to select both channels in the composer when you create your post.
Are there tools to help me consistently schedule and publish posts using Buffer?
Yes! Our streaks feature tracks how many weeks you've consistently published content through Buffer. Keep your streak going by publishing content each week and watch the number grow.
You can also create posting goals for the number of times you'd like to post per channel per week. You can easily track your goal progress right from the channel's queue.
Can I use custom fonts or formatted text in my scheduled posts?
Buffer does not have a formatting text option within our composer. To add rich text or formatted text to your scheduled posts, you can use an online text formatting tool such as YayText to format your text and then paste it into the Buffer composer and schedule your post.