Sync SharePoint and Teams files with your computer (original) (raw)
Sync SharePoint and Teams files with your computer
Applies ToOneDrive for Business SharePoint Server Subscription Edition SharePoint Server 2019 SharePoint in Microsoft 365 Microsoft 365 admin Office 365 operated by 21Vianet Office 365 operated by 21Vianet - Admin OneDrive (work or school) OneDrive (work or school) operated by 21Vianet OneDrive for Windows SharePoint admin center SharePoint operated by 21Vianet
Important: Support for the old OneDrive for Business sync app with SharePoint Online has ended. If you see this 
If your organization has a Microsoft 365 work or school subscription or uses SharePoint Server 2019 and Teams, you can sync your Microsoft SharePoint and Teams files to a folder on your computer. This lets you work directly in File Explorer and access files even when you're offline. And when you go back online, any changes made to those files will sync automatically.
You have two options when syncing files in SharePoint libraries and Teams. You can either add shortcuts to libraries and folders to OneDrive or use the Sync button in the document library.
Both options allow essentially the same thing—users can access files on their local computer in Explorer or Finder. However, adding OneDrive shortcuts allows content to be accessed on all devices, whereas sync is related to a specific device. Additionally, OneDrive shortcuts offer improved performance versus using the sync button.
We recommend using OneDrive shortcuts as the more versatile option when available.
Set up syncing
- Near the upper left corner of the browser page, select the Microsoft 365 app launcher:
- From the menu that opens, select SharePoint or Teams, and then select the site with the files you want to sync.
- Select Documents or navigate to the subfolder you want to sync.
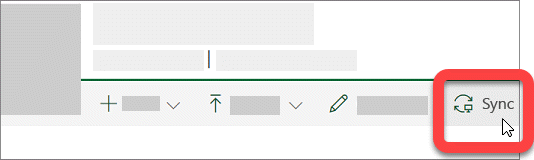
- Select Sync. (You only need to do this once on a computer to set up syncing on that computer. After you set up syncing, the files sync automatically.)
- If your browser requests permission to use "Microsoft OneDrive," confirm that this is okay.

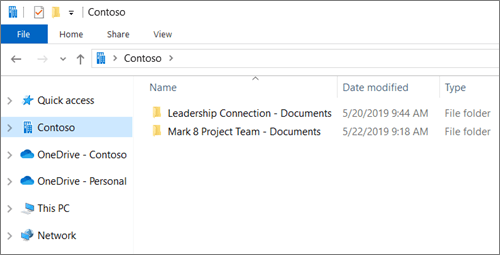
The files then sync to a folder on your PC that has the name of your organization (for example, %userprofile%\Contoso). This folder is automatically added to the left pane in File Explorer. You can't select to sync to a different location.
5. To sync the files on another computer, go to that computer, and follow these steps again.
Notes:
- You can now sync IRM-protected SharePoint, Teams, and OneDrive files in your work or school account. If you're currently syncing an IRM-protected location using the Transition from the previous OneDrive sync app, stop syncing it with that sync app first. Then, install the Rights Management Service (RMS) client. When that finishes, open the SharePoint or Teams location or OneDrive in your browser, and to begin syncing it with the sync app, select Sync.
- If you see a lock icon on synced files in File Explorer, it means the files are synced read-only. You might not have permission to edit the files, or the library might require checkout or have required columns or metadata. If you change the files on your computer, the changes won't sync. For permissions, contact your admin.
- You can't move OneNote notebooks from one site to another on your computer, and if you move other Office files between sites, version history will be lost. To move Office files, go to the site, and use the Move to or Copy to command.
- If a site name includes a character such as ":" that isn't supported in folder names in Windows, files on the site can't be synced.
- If you used the previous OneDrive for work or school sync app the folder structure for your synced folders might change when you begin syncing with the sync app. On computers with older versions of Windows where you used the previous OneDrive sync app, you may see an old "SharePoint" or "Teams" folder under Favorites in File Explorer. To remove the extra "SharePoint" or "Teams" folder, right-click and select Remove.
Change sync settings
To change the folders that sync for a site, or to stop syncing all files on a site, follow these steps:
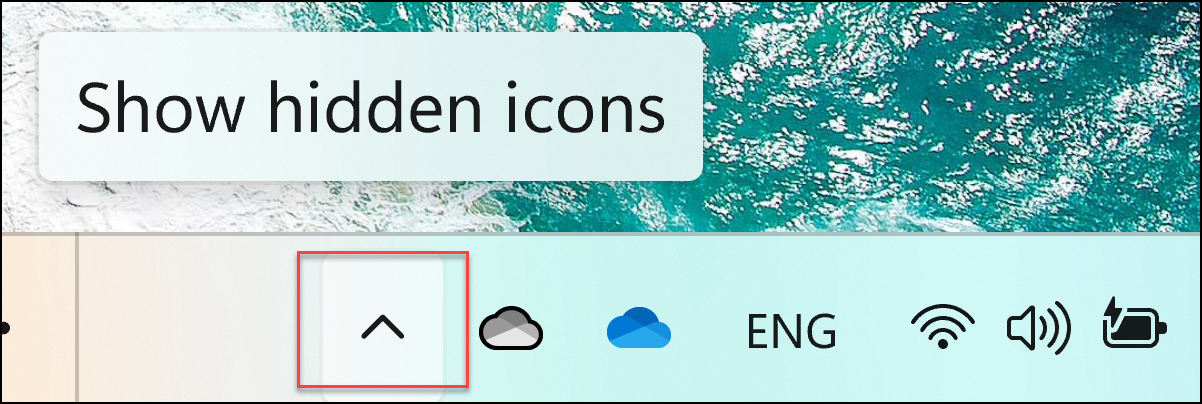
- Select the blue OneDrive cloud icon in the Windows taskbar notification area.
(You may need to select the Show hidden icons arrownext to the notification area for the OneDrive icon to appear. If the icon doesn't appear in the notification area, OneDrive might not be running. Select Start, enter OneDrive in the search box, and then select OneDrive in the search results.)
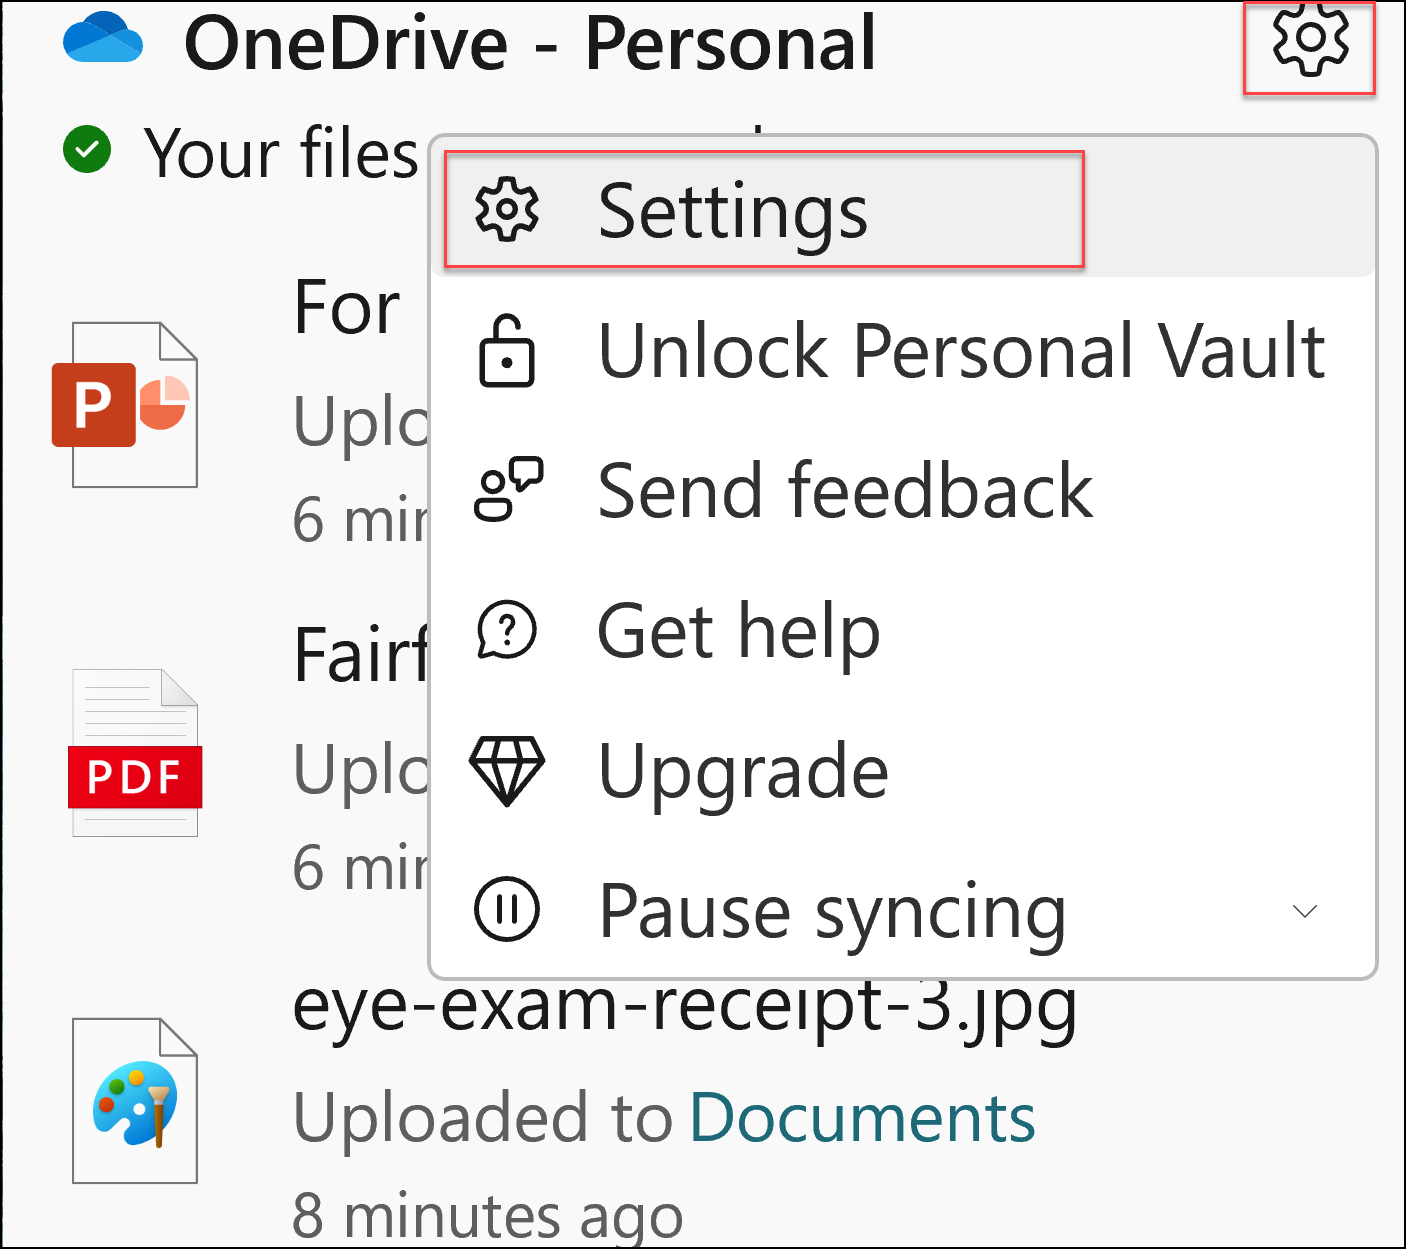
- Select
> Settings.
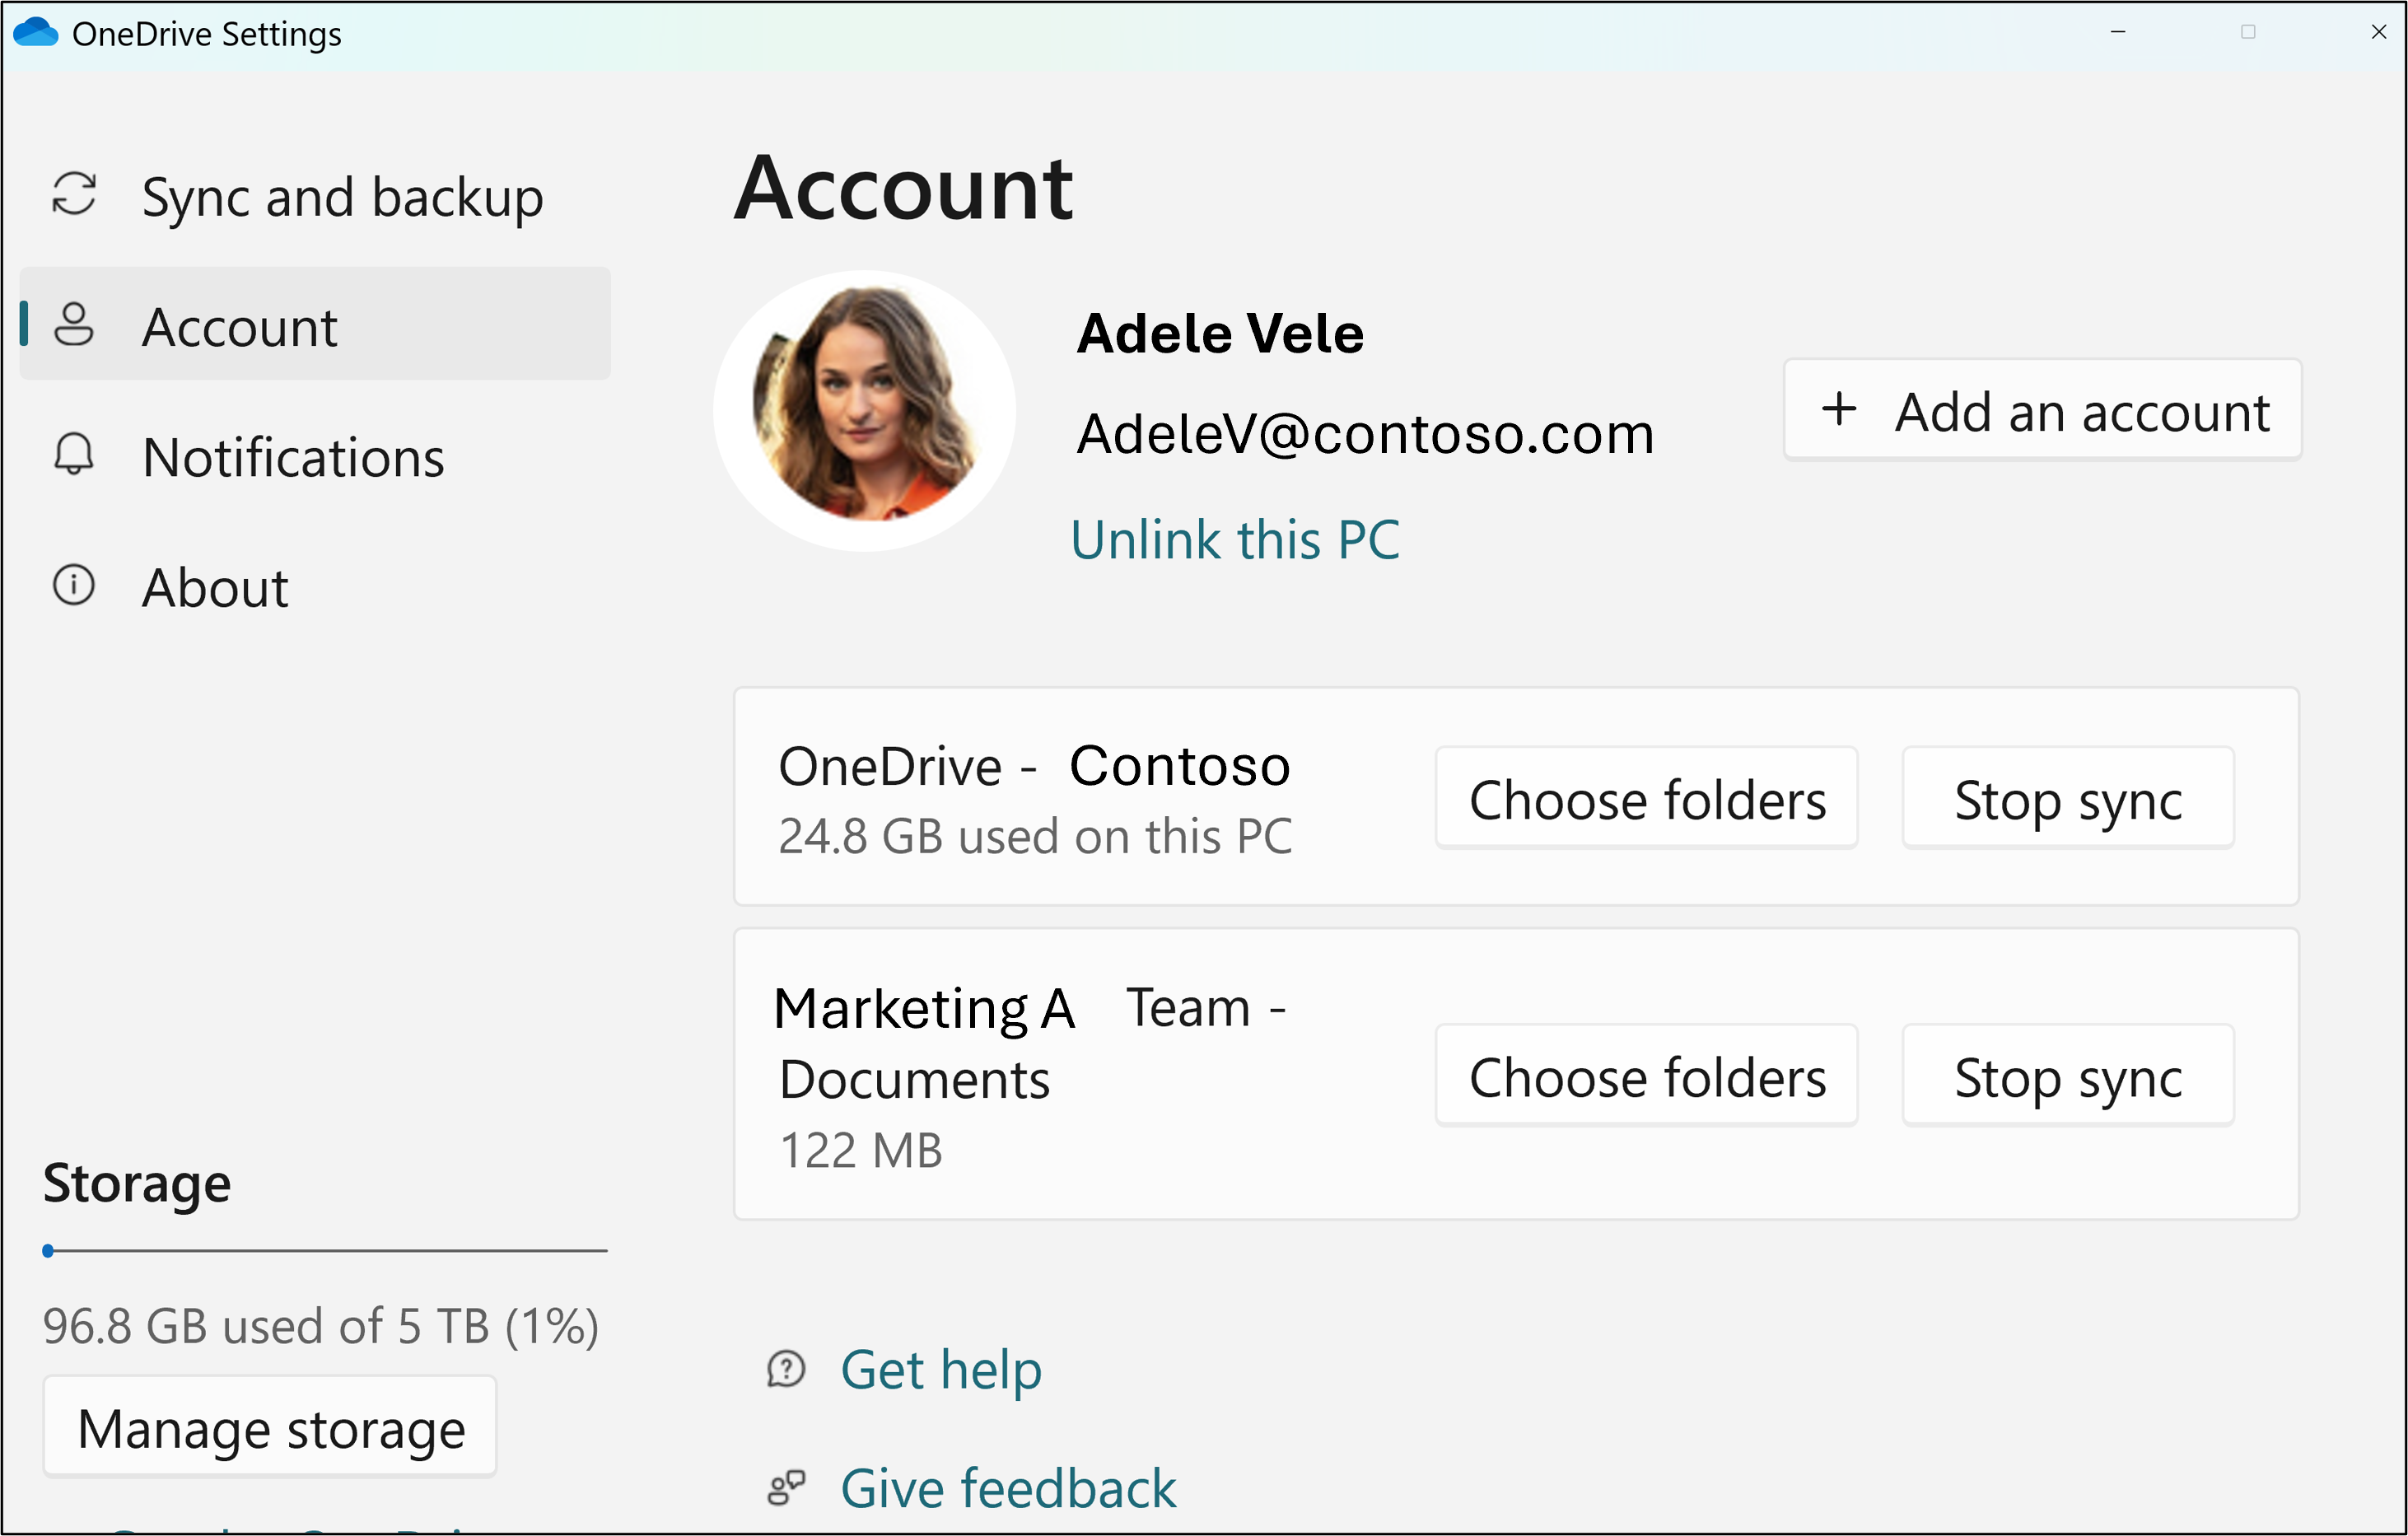
- To see a list of all your syncing sites, select the Account tab.
- To change the folders that you're syncing, select Choose folders for that library, and then select the folders that you want to sync. To stop syncing a site, select Stop sync next to the site. (Copies of the files remain on your computer. You can delete them if you want.)

Learn More
Need more help?
Need more help?
Want more options?
Explore subscription benefits, browse training courses, learn how to secure your device, and more.