2011. From Lanka Eastwards; The Ramayana in the Literature and Visual Arts of Indonesia (original) (raw)
Abstract
The Kakawin Ramayana, arguably the oldest Old Javanese epic text in Indic metres (circa 9th century AD), holds a unique position in the literary heritage of Indonesia. The poem has retained a remarkable vitality through the centuries in the Archipelago, inspiring many forms of artistic expression not only in the domain of literature but also in the visual and performing arts, from the reliefs of the majestic Central Javanese temples to modern puppet-show performances. Displaying a virtuoso array of metrical patterns, the Kakawin Ramayana is among the very few Old Javanese texts for which a specific Sanskrit prototype has been identified, namely the difficult poem Bhattikavya (circa 7th century AD), itself a version of the great Ramayana epic ascribed to Valmiki (circa 6th–1st century BC). The Old Javanese poem is an original and skillful work of re-elaboration that documents a fascinating interaction between cultural elements of the Sanskritic tradition with those indigenous to the Javanese setting. The studies included in this volume, written by experts in a wide range of disciplines, focus on disparate aspects of the Kakawin Ramayana and the constellation of cultural phenomena revolving around it, providing the reader with a key to the understanding of the rich Old Javanese textual heritage and the transcultural intellectual dynamics that contributed to shaping the cultural heritage of Indonesia up to the present. With contributions from Andrea Acri, Helen Creese, Arlo Griffiths, Thomas Hunter, Roy Jordaan, Lydia Kieven, Cecelia Levin, Wesley Michel, Stuart Robson and Adrian Vickers, this book is the result of a workshop held at the KITLV branch in Jakarta on May 26th–28th 2009 and supported by the Australia-Netherlands Research Collaboration, the École française d’Extrême-Orient, and the Stichting J. Gonda Fonds. http://www.kitlv.nl/book/show/1314
Figures (50)


When we turn from formal to figural aspects of Bhatti’s use of yamaka, we ca so profit from Tubb’s insights. Like Bronner (1999), Tubb is interested in di veloping a critical understanding of figures like yamaka and Slesa that depen sither on differing interpretations of repeated phonological sequences (yam« ca), or the overlay of two differing meanings on identical sequences (slesa While the advent of the ‘school of suggestion (dhvani) appears to have led to le-emphasis on ‘figures of sound’ (sabdalamkara) like yamaka in South Asi lesa continued to grow in popularity to the extent that entire works might t superimposed one upon the other in Kavya like the Raghavapandaviya that he focus of the dissertation work of Bronner (1999). Tubb focuses his analysis of the literary effects of extended passages of yc
![[...] It is clear that here some sort of celebration is taking place. The dancing girls, the musicians and the priests leave no doubt about it. [...] The dance of the woman is typically tantrik, as we can see in the Buddhist iconography of the Dakini's and other creatures of the ferocious type. It is a dance which can be seen till today as a religious dance in Tibet. Perhaps it would be good, if we consider the dance on our relief as belonging to the celebration and not just meant for the pleasure of the audience. [...] The smaller drums are damarus, as they are often to be seen even today with snake-charmers, but seldom used for ceremonies. But I must, however, point to the non-Indonesian character of the ensemble.](https://figures.academia-assets.com/34391064/figure_003.jpg) ](
]([...] It is clear that here some sort of celebration is taking place. The dancing girls, the musicians and the priests leave no doubt about it. [...] The dance of the woman is typically tantrik, as we can see in the Buddhist iconography of the Dakini's and other creatures of the ferocious type. It is a dance which can be seen till today as a religious dance in Tibet. Perhaps it would be good, if we consider the dance on our relief as belonging to the celebration and not just meant for the pleasure of the audience. [...] The smaller drums are damarus, as they are often to be seen even today with snake-charmers, but seldom used for ceremonies. But I must, however, point to the non-Indonesian character of the ensemble.

Figure 3: Another dancing Brahman? (Can- di Sari, Prambanan, circa ninth century AD) (photo Kassian Cephas, OD 044446, Leiden University Library, Kern Institute)


Figure 2a: Arca Ganesa at Sumberwatu (photo Marijke Klokke, July 2009)

Figure 2b: Arca Ganesa at Sumberwatu (photo Marijke Klokke, July 2009)

Figure 3: The inscription Ratu Baka F (Photo OD/DP 19471, LUB)


Figure 3: The Preparations for Ravana’s Cremation. Episode from the Yuddhakanda. Candi Brahma Relief 12 (photo C. Levin)

Figure 4: Agastya at the Court of Ayodhya. Episode from the UtK. Candi Brahma Relief 13 (photo C. Levin)

Figure 5: Rama and Sita at Court in Ayodhya. Episode from the UtK. Candi Brahma Relief 14 (photo C. Levin)
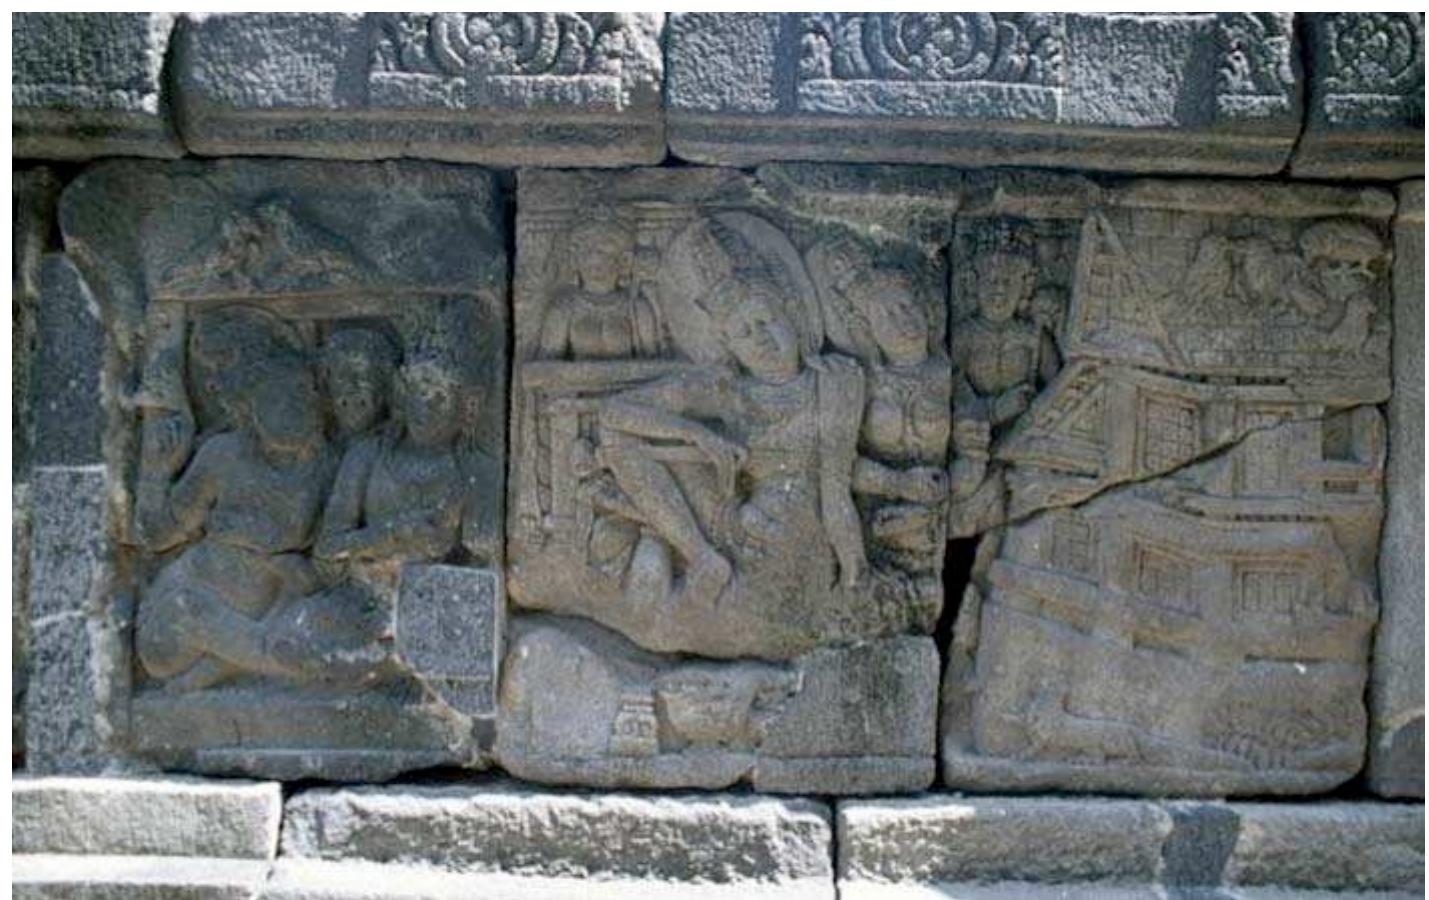
Figure 6: Rama and Sita at Court in Ayodhya. Episode from the UtK. Candi Brahma Relief 15 (photo C. Levin) Figure 6: Rama and Sita at Court in Ayodhya. Episode from

Figure 7: Rama and Sita at Court in Ayodhya. Episode from the UtK. Candi Brahma Relief 16 (photo C. Levin)

Figure 8: Laksmana Brings Sita to the Banks of the Ganges. Episode from the UtK. Candi Brahma Relief 17 and diagram of its placement on the Loro Jonggrang Temple Complex (photo and diagram C. Levin)

Figure 9: Laksmana Tells Sita that Rama has Repudiated Her. Episode from the UtK. Candi Brahma Relief 18 (photo C. Levin)

Figure 10: Sita Alone in the Forest. Episode from the UtK. Candi Brahma Relief 19 (photo C. Levin) Figure 10: Sita Alone in the Forest. Episode from the

Figure 11: Sita Appears Before Valmiki. Episode from the UtK. Candi Brahma Relief 20 (photo C. Levin)

Figure 12: The Birth of Lava. Episode from the UtK. Candi Brahma Relief 21 (photo C. Levin)

Figure 13: Satrughna Spends the Night at the Hermitage of Valmiki. Episode from the UtK. Candi Brahma Relief 22 (photo C. Levin)

Figure 14: Sita and Lava Return to the Hermitage. Episode from the UtK. Candi Brahma Relief 23 (photo C. Levin)
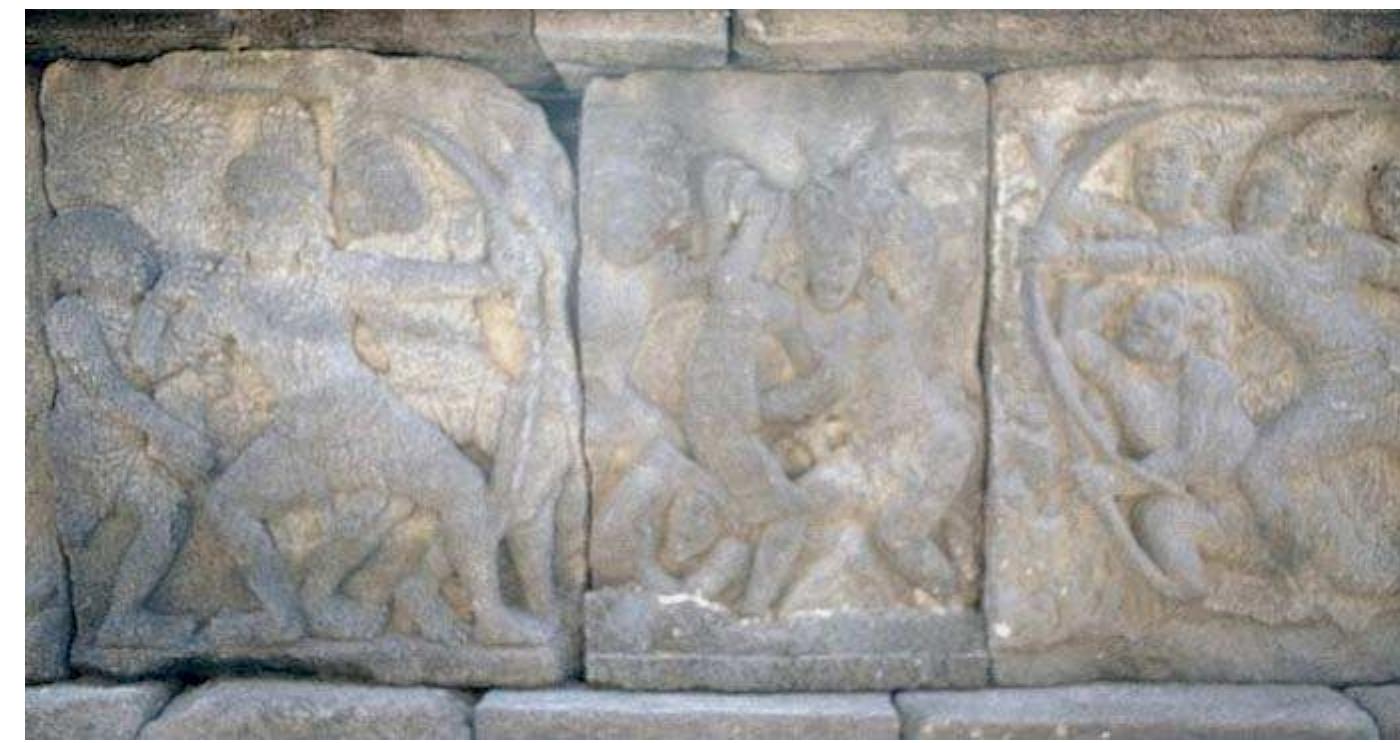
Figure 15: Rama’s Brothers Defeat the Raksasas. Episode from the UtK. Candi Brahma Relief 24 (photo C. Levin)

Figure 16: Rama Learns of the Discovery of Kuga and Lava. Episode from the UtK. Candi Brahma Relief 25 (photo C. Levin)

Figure 18: Kusa and Lava are Brought to the Court of Ayodhya. Episode from the UtK. Candi Brahma Relief 27 (photo C. Levin)

Figure 17: Rama Confronts Kuga and Lava. Episode from the UtK. Candi Brahma Relief 26 (photo C. Levin)

Figure 19: Sita and Valmiki Appear Before Rama at the Court of Ayodhya. Episode from the UtK. Candi Brahma Relief 28 (photo C. Levin)

Figure 20: Kusa and Lava Recite the Ramayana for Rama. Episode from the UtK. Candi Brahma Relief 29 (photo C. Levin)

Figure 21: The Brahmans Take Part in a Celebration at the Court of Ayodhya. Episode from the UtK. Candi Brahma Relief 30 (photo C. Levin)

Figure 22: Sita is Reunited with Rama and her Sons at the Court of Ayodhya. Episode from the UtK. Candi Wisnu Relief 1 (photo C. Levin)

Figure 1: The causeway episode of the Prambanan Ramayana (from Kats 1925)


Figure 3: Relief panel xvi of the Brahma temple (photo OD 11348, LUB)


Figure 5: Monkey army building the bridge and Vibhisana seeking Rama’s protection (photo Gerard M.M. Foekema, P-021260, Leiden University Library, Kern Institute)

Figure 5a: Detail of Figure 5

Map 1: Candi Panataran, from Satyawati Suleiman 1978

Panel numbers (105-210) following Stutterheim (1989)
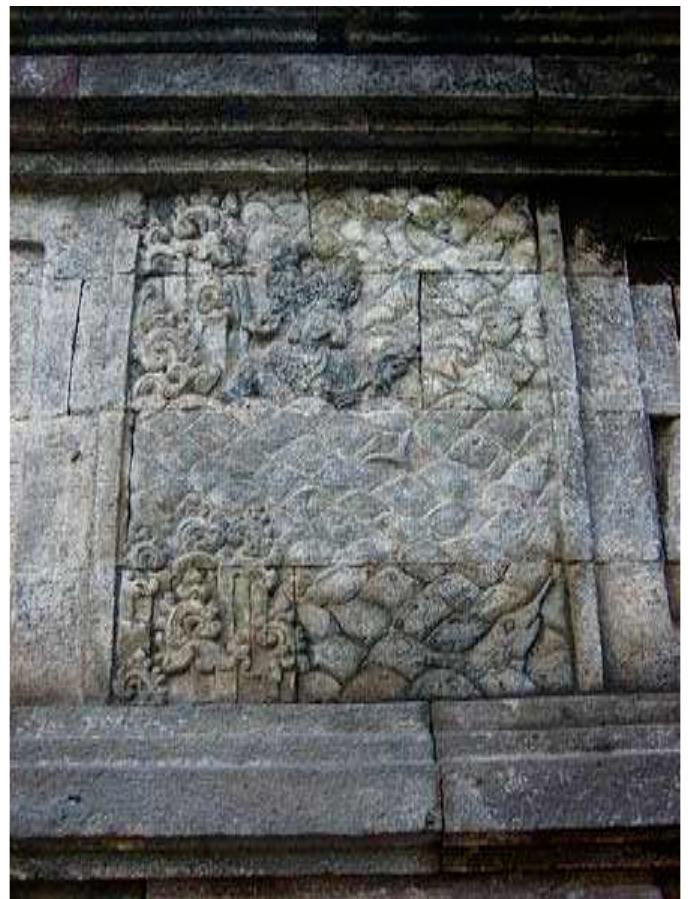
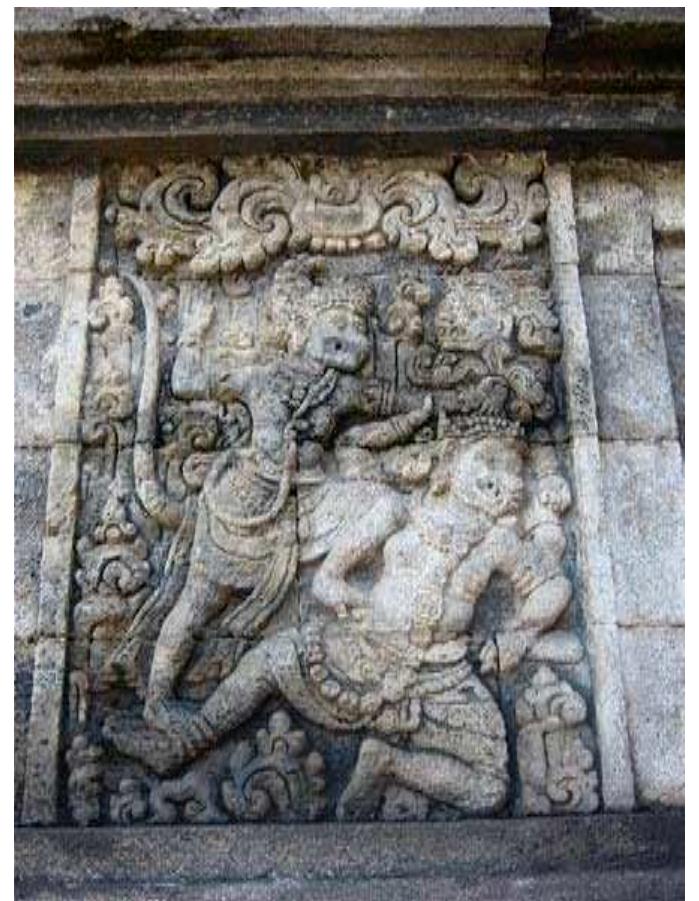

Figure 1: Hanuman vanquishes a demon commander (front side) (photo L. Kieven) Figure 3: Hanuman bathes in the sea after the fight against Aksa (south side) (photo L. Kieven) Figure 2: Hanuman rushes to the sea after the fight against Aksa (south side) (photo L. Kieven)

Figure 4: Hanuman destroys Rawana’s gar- den (south side) (photo L. Kieven) Figure 5: Hanuman (right) and Sugriwa (left) throwing stones into the sea to build the causeway (rear side) (photo L. Kieven)
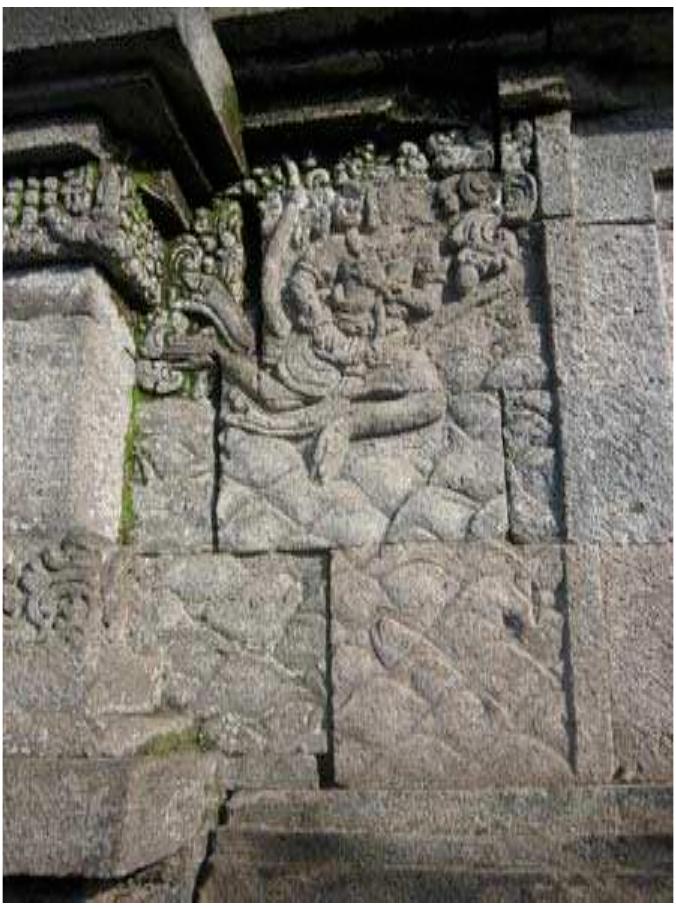
Figure 6: Hanuman’s flight over the ocean back to Rama’s realm (photo L. Kieven)


Loading Preview
Sorry, preview is currently unavailable. You can download the paper by clicking the button above.