How to Make a DIY Shower Curtain (original) (raw)
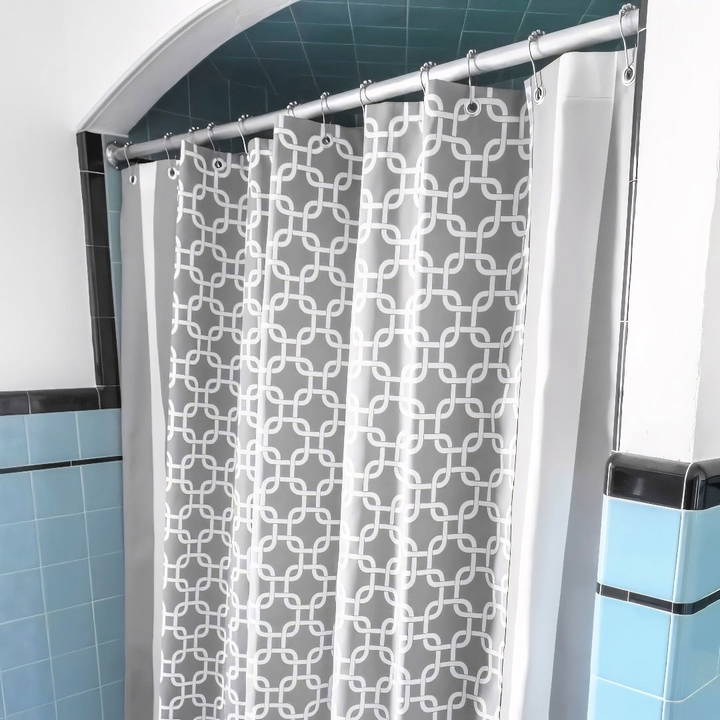
Making your own DIY shower curtain can be a fun and fulfilling project, giving you the freedom to choose your desired fabric, pattern, and style. In this guide, I will walk you through the step-by-step process of making a custom shower curtain, sharing my personal experiences, tips, and insights along the way. Whether you’re looking for something unique or need a non-standard size, crafting a shower curtain yourself can be a practical and creative solution.
Choosing the Right Fabric
When it comes to choosing fabric for a shower curtain, the bathroom environment plays a crucial role in the decision-making process. Bathrooms are usually damp, so the fabric needs to be durable and resistant to mold and mildew. I learned that outdoor fabric is an excellent choice because it is designed to withstand moisture and resist the growth of mold and mildew. You can use almost any fabric, but outdoor fabric provides that extra layer of protection.
- My Tip: Choose a fabric that matches your bathroom decor. I opted for a coordinating striped fabric for the side panels to complement the main fabric. This allowed me to add a bit of visual interest and texture to the overall look of my shower curtain.
Gathering Your Materials
Here’s a list of the materials you’ll need:
- Fabric: 5 yards or 2.5 yards each of two coordinating fabrics
- Ruler and Fabric Marker: For precise measurements and markings
- Hammer (if using grommets), Scissors, Thread, Pins, and Iron: Essential sewing tools
- Grommets or Eyelets (Optional): For a professional finish to hang the curtain
- Sewing Machine: A reliable machine for stitching everything together
I found that having all my tools and materials ready before starting made the whole process much smoother and prevented any unnecessary interruptions.
Step by Step Instructions
Learn how to make a DIY shower curtain with step-by-step instructions, from cutting fabric to adding grommets or buttonholes. Perfect for any bathroom!
Cutting the Fabric to Size
A standard shower curtain measures 72 by 72 inches. Most fabrics aren’t this wide, so you’ll probably have to join two or more pieces together. Here’s where my choice of fabric came in handy. I wanted to use a main fabric for the center and a coordinating stripe for the sides.
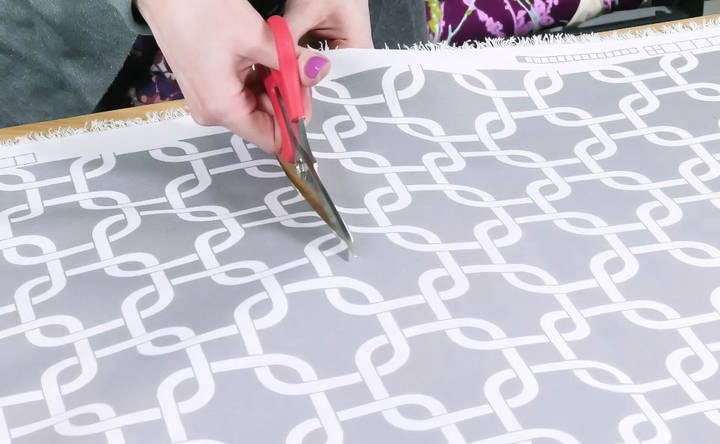
- Measure and Cut: I started by cutting the fabric to be 12 inches longer than the height of my shower curtain. For a standard size, this would be 84 inches. However, I opted for a slightly shorter length, cutting mine to 81 inches. Make sure all pieces are cut to the same length.
- Matching Patterns: If you’re working with a patterned fabric like I was, you’ll need to line up the pattern before cutting to ensure it matches when seamed together. It’s a small detail, but it makes a big difference in the final appearance.
- Calculate Side Panels: If you’re adding side panels, calculate their width by subtracting the width of your fabric from the finished width of the curtain. Divide the remaining width by two to get the width of each side panel. Then, add an inch for the hem and half an inch for the seam allowance.
My Experience: When cutting the side panels, I wanted to ensure that three stripes were visible on my fabric. To achieve this, I adjusted the hem allowance to make sure everything lined up perfectly.
Sewing the Sides and Seams
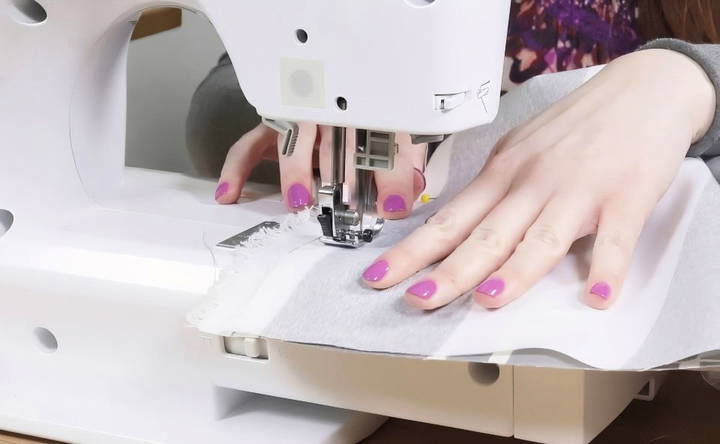
Sewing the sides of the curtain first makes it easier to handle. I used the polyester setting on my iron because I was working with polyester outdoor fabric.
- Hem the Sides: Fold the fabric over by half an inch and iron it flat. Fold it over again by another half inch and press. Sew close to the inner fold all the way down each side. Repeat for both side panels.
- Join Panels Together: With the right sides of the fabric facing each other, line up the edges of the center panel and one side panel. Pin them together to keep everything aligned. I used a slightly larger seam allowance to ensure the selvage and the edge of the stripe were hidden.
My Tip: If you’re matching a pattern, take extra care to align it correctly before sewing. This might take a bit more time, but it’s well worth it in the end.
- Finish the Edges: To prevent fraying, you can use a serger or a zig-zag stitch. However, I chose a flat felled seam for a cleaner look, especially since my curtain would be visible through a clear liner. This method involves trimming one edge down, folding the other edge over it, and sewing along the fold to encase both edges.
Adding Weight with a Bottom Hem
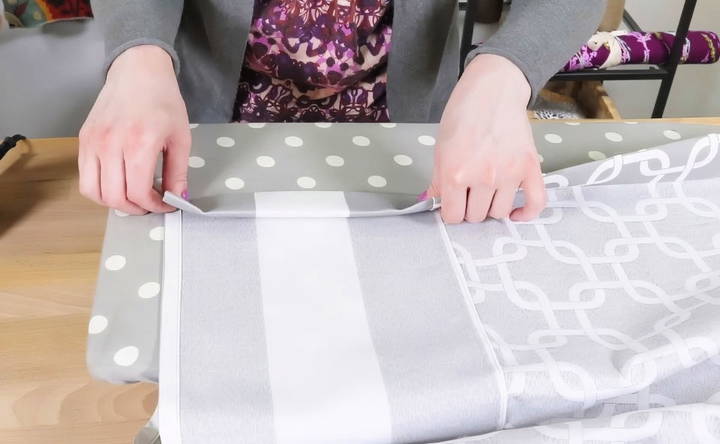
A well-made shower curtain needs a bit of weight at the bottom to hang nicely and stay in place. I added a 4-inch double-folded hem at the bottom to achieve this effect.
- Iron the Hem: Fold the bottom of the fabric up by 4 inches and iron it flat. Fold it up another 4 inches and iron again. Fold the corners under and pin them securely.
- Sew the Hem: Sew up the side, across the inner fold, all the way across, and then back down the other side. This will give your curtain a nice, finished look and add the desired weight.
My Tip: A heavier bottom hem not only improves the look but also prevents the curtain from billowing when the shower is running.
Finishing the Top with Grommets or Buttonholes
For the top of the curtain, you have the option of using grommets or making buttonholes for the shower rings. I opted for grommets for a more professional finish and durability.
- Mark the Placement of Holes: Space out 12 holes evenly, about 6 inches apart. Start a couple of inches from each side and about an inch from the top.
- Insert Grommets: Center the grommet on each mark and trace around the inside. Cut a hole for each grommet. Insert the grommet barrel from the right side of the fabric, place the anvil on a hard surface (I used a piece of quartz), position the grommet, and hammer it into place. Repeat for all the holes.
- Alternative: If you have an automatic buttonhole feature on your sewing machine, making buttonholes is another easy option.
- My Insight: Grommets add a touch of professionalism and hold up better over time compared to buttonholes, especially in a damp bathroom environment.
Customization Ideas
Customizing your DIY shower curtain can add a personal touch to your bathroom decor. Here are some easy and creative ideas to make your shower curtain unique:
Embroidery
- Simple Designs: Start with basic patterns like flowers, leaves, or geometric shapes. Use embroidery hoops to keep the fabric taut.
- Personal Touch: Add initials, names, or meaningful quotes to make it special.
Fabric Paint
- Stencils: Use stencils to make consistent patterns. You can find stencils in various designs at craft stores or make your own.
- Freehand Painting: If you’re confident with a brush, try freehand painting. Abstract designs or nature-inspired themes work well.
Stencils and Stamps
- Stencils: Secure the stencil on the fabric and use fabric paint to fill in the design. This method is great for repeating patterns.
- Stamps: Use fabric stamps to make unique prints. You can buy stamps or carve your own from potatoes or sponges.
Adding Trims
- Lace or Ribbon: Sew lace or ribbon along the edges or in vertical stripes. This adds a delicate and elegant touch.
- Pom-Poms or Tassels: Attach pom-poms or tassels to the bottom edge for a fun and playful look.
Appliqué
- Fabric Shapes: Cut out shapes from different fabrics and sew them onto the curtain. This can make a layered, textured effect.
- Themes: Choose a theme like under the sea, floral, or geometric, and make appliqués that match.
Tie-Dye
- Classic Tie-Dye: Use rubber bands to make patterns and dye the fabric in your favorite colors. This gives a vibrant, boho look.
- Ombre Effect: Dip the bottom of the curtain in dye and gradually lift it out to make a gradient effect.
Iron-On Transfers
- Pre-Made Transfers: Purchase iron-on transfers with designs you love. Follow the instructions to apply them to your curtain.
- Custom Transfers: Print your own designs on transfer paper and iron them onto the fabric.
Mix and Match Fabrics
- Patchwork: Sew together different fabric pieces to make a patchwork curtain. This is a great way to use up fabric scraps.
- Contrasting Panels: Use a different fabric for the top or bottom panel to add contrast and interest.
Decorative Buttons
- Button Rows: Sew rows of decorative buttons along the edges or in patterns. This adds a charming, vintage feel.
- Button Clusters: Group buttons together to make focal points on the curtain.
Fabric Markers
- Doodle Designs: Use fabric markers to doodle or write on the curtain. This is a quick and easy way to add a personal touch.
- Coloring Book Style: Draw outlines and let kids color them in with fabric markers for a fun family project.
By incorporating these customization ideas, you can make a shower curtain that truly reflects your style and creativity.
Troubleshooting Common Issues
Making a DIY shower curtain can be a fun and rewarding project, but sometimes things don’t go as planned. Here are some common issues you might encounter and how to solve them:
Uneven Hems
- Problem: The bottom edge of the curtain is not straight.
- Solution: Use a measuring tape and a fabric marker to mark a straight line across the bottom. Cut along the line and hem the edge. For extra precision, use a ruler or a straight edge.
Fabric Shrinkage
- Problem: The fabric shrinks after washing, making the curtain too short.
- Solution: Pre-wash and dry the fabric before starting your project. This will allow the fabric to shrink before you cut and sew it.
Color Fading
- Problem: The colors of the fabric fade after a few washes.
- Solution: Use fabric that is labeled as colorfast. Wash the curtain in cold water and avoid using harsh detergents. Adding a cup of vinegar to the wash can help set the colors.
Mold and Mildew
- Problem: Mold and mildew develop on the curtain.
- Solution: Use mildew-resistant fabric or treat the fabric with a mildew-resistant spray. Ensure the bathroom is well-ventilated and the curtain is fully extended to dry after each use.
Tears and Rips
- Problem: The curtain tears or rips easily.
- Solution: Choose a durable fabric, such as polyester or a heavy cotton blend. Reinforce the edges and seams with double stitching. If a tear occurs, patch it with a piece of matching fabric.
Uneven Paint or Dye
- Problem: Paint or dye is applied unevenly, resulting in blotchy areas.
- Solution: Use a fabric medium with paint to ensure even application. For dye, follow the instructions carefully and ensure the fabric is evenly saturated. Practice on a scrap piece of fabric first.
Stiff Fabric
- Problem: The fabric is too stiff and doesn’t drape well.
- Solution: Wash the fabric with fabric softener to make it more pliable. Choose softer fabrics like cotton or linen blends for better draping.
Rusting Grommets
- Problem: Metal grommets rust over time.
- Solution: Use plastic or rust-resistant metal grommets. Ensure they are securely attached to prevent water from seeping in and causing rust.
Misaligned Patterns
- Problem: Patterns on the fabric don’t line up correctly.
- Solution: Carefully measure and cut the fabric to ensure patterns align. Use pins to hold the fabric in place before sewing. Double-check alignment before making any cuts.
Slipping Curtain Rings
- Problem: Curtain rings slip off the rod easily.
- Solution: Use rings with clips or hooks that securely attach to the curtain. Ensure the rod is the correct size for the rings and that it is installed level.
By addressing these common issues, you can ensure your DIY shower curtain project is a success.
FAQs About DIY Shower Curtains
Discover answers to FAQs about DIY shower curtains, including materials, care tips, and design ideas to make the perfect shower curtain for your bathroom.
1. How do I measure and cut the fabric for my shower curtain?
Follow these steps to measure and cut your fabric:
Measure the shower area: Determine the width and height of the space where the curtain will hang.
Add extra length: Add about 10-12 inches to the height for hemming and making a header for the hooks.
Cut the fabric: Use a measuring tape and scissors to cut the fabric to the desired dimensions.
2. How can I customize my DIY shower curtain?
You can personalize your shower curtain in many ways:
Paint or stencil designs: Use fabric paint to add patterns or images.
Add decorative trim: Sew on lace, ruffles, or other trims to the edges.
Use unique fabrics: Combine different fabrics for a patchwork look or use a bold, patterned fabric.
3. How do I maintain and clean my DIY shower curtain?
To keep your DIY shower curtain in good condition:
Regular cleaning: Wash the curtain regularly according to the fabric’s care instructions. Most can be machine washed on a gentle cycle.
Prevent mold and mildew: Ensure the curtain dries completely after each use. You can also use a liner to protect the fabric.
4. Can I make a shower curtain without sewing?
Yes, you can make a no-sew shower curtain! Here’s how:
Use fabric glue or iron-on hem tape: These can be used to hem the edges of your fabric.
Grommet kit: Use a grommet kit to make holes for the hooks without sewing.
Adhesive hooks: Attach adhesive hooks to the top of the curtain if you don’t want to use grommets.
5. What are some eco-friendly options for DIY shower curtains?
If you’re looking to make an eco-friendly shower curtain, consider these options:
Organic cotton or hemp fabric: These materials are sustainable and biodegradable.
Recycled materials: Use fabric made from recycled plastic bottles or repurpose old linens.
Natural dyes: Use plant-based dyes to color your fabric instead of synthetic ones.
Reflecting on the Process
Making your own shower curtain is more than just a practical project; it’s an opportunity to personalize your space with your choice of fabric and design. I enjoyed the process of carefully selecting materials, planning the layout, and sewing each section together. It was satisfying to see the final product hanging in my bathroom, perfectly fitting my style and needs.
Making a shower curtain can be a wonderful project for both novice and experienced sewers alike. With a bit of patience and creativity, you can craft something unique and functional that enhances your bathroom decor.
Additional Tips for Success
- Use Quality Materials: Quality thread, fabric, and tools will make a big difference in the durability and appearance of your shower curtain.
- Measure Twice, Cut Once: Always double-check measurements before cutting your fabric to avoid costly mistakes.
- Take Your Time with Seams: Neat seams and hems elevate the look of your finished curtain.
- Experiment with Design: Don’t be afraid to mix and match fabrics or try different patterns to make a statement piece.
By sharing my experience, I hope you feel inspired and confident to try making your own shower curtain.