Free DIY Teddy Bear Sewing Pattern (original) (raw)
Sewing a teddy bear can seem like a big challenge if you're new to the craft, but it's easier than you might think! I'm going to walk you through the process, using a simple pattern that's perfect for beginners. This guide is based on my own experience sewing a teddy bear for my daughter when I was pregnant. Not only will you have a finished product that's adorable, but you'll also have the satisfaction of making a personal, handmade gift. Let's get started!
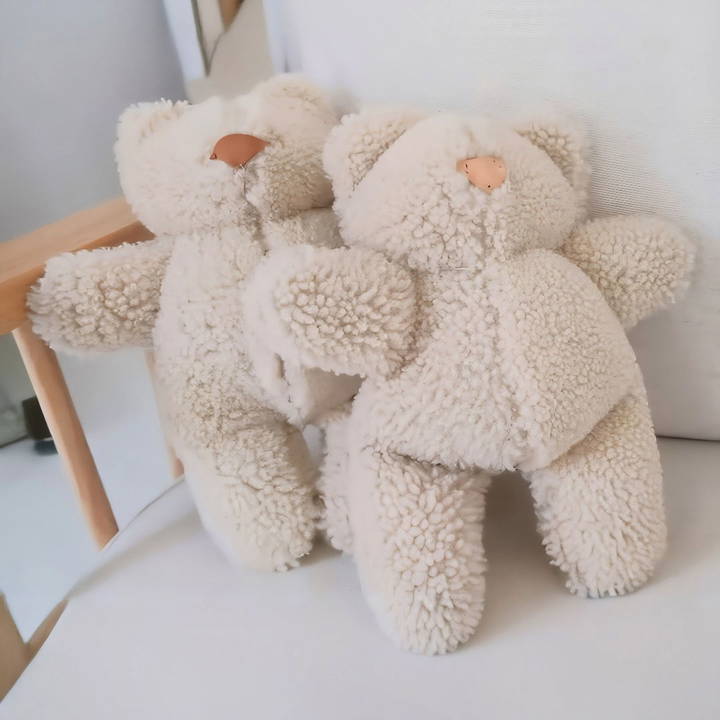
Materials You'll Need
Here's what you'll need to make your teddy bear:
- Bear pattern (you can download a basic bear pattern or find one linked below)
- Fabric: You can use different types of fabric depending on your preference. Leather or sherpa works great, but faux fur is a fantastic option because it hides seams very well.
- Scissors for cutting your fabric
- Sewing machine (though you can also sew by hand if you don't have one)
- Needle and thread (for finishing touches)
- Stuffing: You'll need some stuffing for the bear's body. Cotton, polyester, or even repurposed materials can work well.
- Optional accessories: Eyes, nose, or small embellishments if you want to customize the bear's face.
Step by Step Instructions
Learn how to sew a DIY teddy bear with our step-by-step instructions. Easy sewing guide from pattern prep to adding finishing touches. Perfect craft project!
Step 1: Prepare Your Pattern and Fabric
Start by selecting your fabric. This is the fun part where you can choose how you want your teddy bear to look. For my bear, I used sherpa fabric, but if you're a beginner, faux fur might be easier because it helps hide any imperfect seams.
Tip: If you're using thicker fabric like leather or sherpa, be mindful that the edges can get bulky. Trim them carefully before sewing to make things easier.
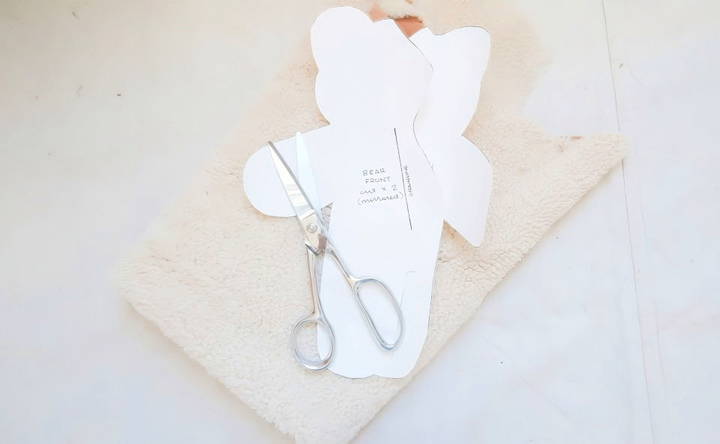
- Print or trace your bear pattern. Lay your fabric out flat and position the pattern pieces on the fabric. Be sure to mirror the pattern when cutting, so you have the correct pieces for the front and back of the bear.
- Carefully cut out the front and back pieces of the bear. It's important that they're as symmetrical as possible for a nice, even finish.
Step 2: Sew the Front and Back Pieces
Now, you're going to start stitching your bear together!
- Lay the front pattern pieces with their right sides together, meaning the sides you want to show on the outside should be facing in.
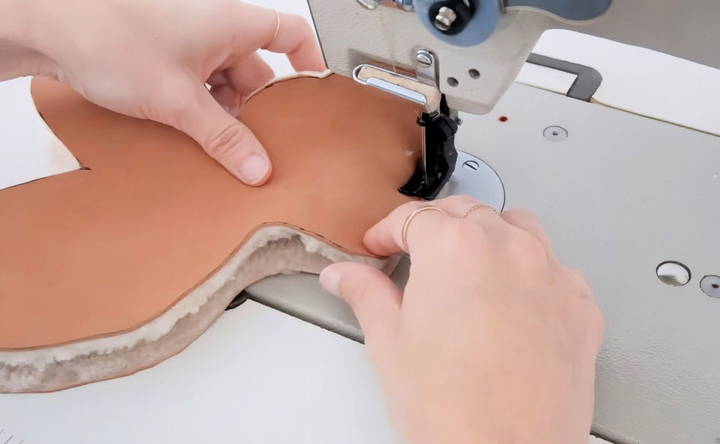
- Sew around the bear's head and along the body, stopping at the top of the legs. Use about a quarter-inch seam allowance.
If you're working with thicker materials like sherpa or leather, like I did, it can be a bit tricky to manage the seams. Take it slow, and trim any excess bulk if necessary to avoid it getting too thick.
- Note: You don't need a special sewing machine to do this. A regular home sewing machine works fine, but go slowly if your fabric is on the thicker side.
Step 3: Sew the Back Pieces and Leave an Opening
- Next, take the back pieces of the bear and lay them together with the right sides facing.
- Sew around the bear, but be sure to leave a 3 to 4-inch gap in the stomach area. This gap is essential because you'll need it to turn the bear right side out later and add stuffing.
For ease, sew from the top of the bear's head down to just above the stomach, and then leave a gap before sewing again from below the stomach down to the legs.
Step 4: Join the Front and Back
Once you've finished sewing the individual front and back pieces, you're ready to sew them together!
- Lay the front and back pieces on the right sides together. Pin them in place to prevent them from shifting while you're sewing.
- Carefully sew around the entire bear, maintaining that quarter-inch seam allowance. This part requires some patience, especially when working around curves like the ears, legs, and arms. Slow and steady wins here!
Step 5: Turn and Stuff the Bear
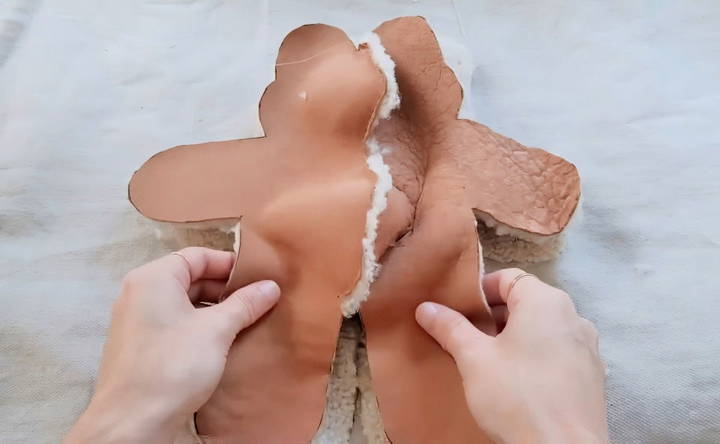
Now that your bear is sewn together, it's time to flip it right side out. This is where the gap you left in the back comes in handy.
- Gently pull the fabric through the gap until the bear is turned completely inside out.
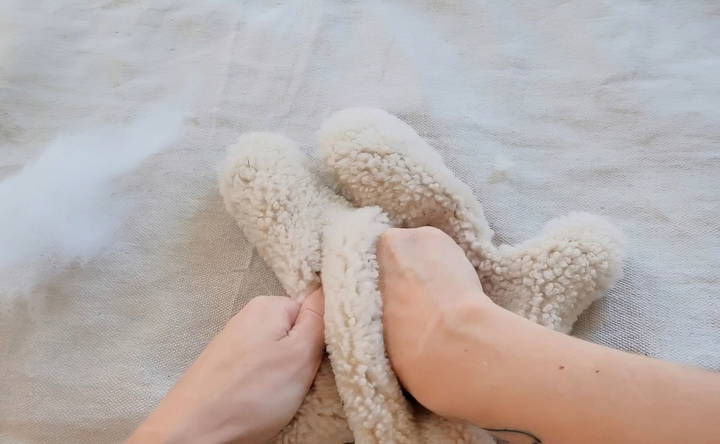
- Once the bear is flipped, it's time to stuff it. Use your stuffing to fill the bear evenly. You can make it as soft or firm as you like, depending on how full you stuff it.
Optional: For a more defined look, you can stuff the arms and legs first, then sew a straight line across them. This will give the bear more prominent limbs, but it's entirely up to you whether you prefer this look.
Step 6: Add Facial Features and Accessories
Before fully closing the bear, this is the best time to add any facial features or embellishments.
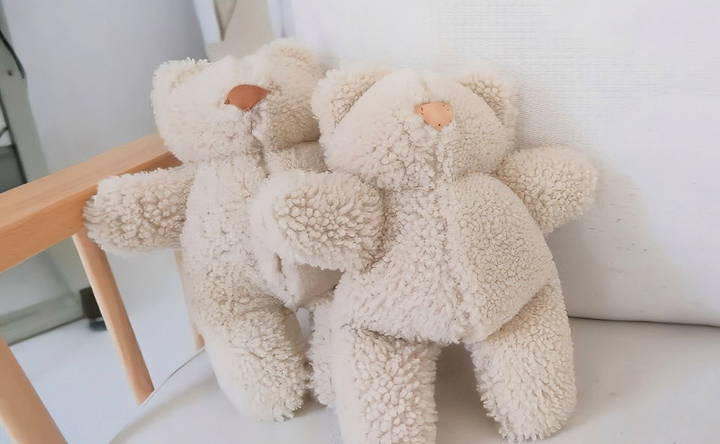
- I made a small nose out of leather by cutting a little triangle from the same material as the bear's body. You can sew or glue this on, depending on what's easiest for you.
- You can also add eyes (either plastic ones or stitched-on eyes) or embroider a small mouth. Feel free to get creative and customize your bear however you want!
Step 7: Close the Opening
Once your bear is fully stuffed and you've added any accessories, it's time to close that opening in the back.
- Using a needle and thread, hand-sew the gap closed. Make sure to knot it tightly at the end so it doesn't come undone over time.
- If you want to give the bear a more defined shape, especially around the head and neck, you can use a bit of yarn to tie around the neck. This will cinch the fabric slightly and make the head more prominent. If you're using faux fur, the yarn will be hidden by the fabric.
Personalization Ideas
Personalizing your DIY teddy bear can make it extra special and unique. Here are some simple and creative ideas to help you add a personal touch to your teddy bear:
Embellishments
- Embroidery: Add your name, initials, or a special date using embroidery. This can be done by hand or with an embroidery machine.
- Buttons and Beads: Use colorful buttons or beads to make eyes, noses, or decorative patterns on the teddy bear.
- Fabric Paint: Use fabric paint to draw designs, patterns, or even write messages on the teddy bear. Make sure the paint is non-toxic and safe for children.
Sentimental Touches
- Old Clothing: Use fabric from old clothes that hold sentimental value, like a baby blanket or a favorite shirt. This can make the teddy bear a cherished keepsake.
- Memory Bears: Make a memory bear using fabric from a loved one's clothing. This is a wonderful way to remember someone special.
Accessories
- Clothing: Sew tiny clothes for your teddy bear. You can make dresses, shirts, pants, or even costumes for different occasions.
- Hats and Scarves: Knit or crochet small hats and scarves to keep your teddy bear warm and stylish.
- Jewelry: Add small pieces of jewelry like necklaces or bracelets. Make sure they are securely attached to avoid any choking hazards for children.
Custom Features
- Unique Patterns: Experiment with different fabric patterns and textures. Mix and match to make a one-of-a-kind teddy bear.
- Personal Messages: Write a small note or message and place it inside the teddy bear before sewing it up. This can be a sweet surprise for the recipient.
Safety Considerations
- Child-Safe Materials: Ensure all materials used are safe for children. Avoid small parts that can be swallowed.
- Secure Attachments: Make sure all embellishments and accessories are securely attached to prevent them from coming off.
Final Touches
- Scented Bears: Add a few drops of essential oil to the stuffing for a pleasant scent. Lavender is a popular choice for its calming properties.
- Softness: Use high-quality stuffing to ensure the teddy bear is soft and cuddly.
By incorporating these personalization ideas, you can make a teddy bear that is not only unique but also holds special meaning. This makes the teddy bear a perfect gift or a treasured keepsake.
Troubleshooting Common Issues
Making a DIY teddy bear can be a fun and rewarding project, but sometimes, things don't go as planned. Here are some common issues you might encounter and how to fix them:
Uneven Stitching
- Problem: Your stitches are uneven, making the teddy bear look untidy.
- Solution: Practice makes perfect. Try to keep your stitches small and consistent. Use a fabric marker to draw a line where you want to stitch. This can help guide your needle and keep your stitches straight.
Stuffing Lumps
- Problem: The stuffing inside the teddy bear is lumpy or uneven.
- Solution: Use small amounts of stuffing at a time and distribute it evenly. Make sure to push the stuffing into all the nooks and crannies, especially the arms and legs. You can use a chopstick or a pencil to help with this.
Loose Parts
- Problem: The eyes, nose, or other parts are coming loose.
- Solution: Make sure to sew these parts on securely. Use a strong thread and double stitch if necessary. For added security, you can use fabric glue in addition to stitching.
Fabric Fraying
- Problem: The edges of your fabric are fraying.
- Solution: Use pinking shears to cut the fabric. These scissors have a zigzag edge that helps prevent fraying. You can also use a fabric sealant or fray check on the edges.
Misaligned Pieces
- Problem: The pieces of your teddy bear don't line up correctly.
- Solution: Pin the pieces together before you start sewing. This will help keep them in place and ensure they line up correctly. Double-check your pattern pieces to make sure they are cut accurately.
Difficulty Turning Fabric
- Problem: Turning the fabric on the right side out is difficult, especially for small parts.
- Solution: Use a turning tool or a blunt object like a chopstick to help turn the fabric. Be gentle to avoid tearing the fabric.
Visible Seams
- Problem: The seams are visible on the outside of the teddy bear.
- Solution: Use a ladder stitch or invisible stitch to close the seams. This type of stitch is hidden and gives a neat finish.
Uneven Limbs
- Problem: The arms or legs are uneven in length or placement.
- Solution: Measure and mark the placement of the limbs before sewing them on. Make sure to sew them on each side of the body at the same point.
Overstuffed or Understuffed
- Problem: The teddy bear is either too firm or too floppy.
- Solution: Aim for a balanced amount of stuffing. The bear should be firm enough to hold its shape but soft enough to be cuddly. Adjust the stuffing as needed to achieve the desired feel.
By addressing these common issues, you can ensure your DIY teddy bear turns out just the way you want it.
FAQs About DIY Teddy Bear
Find answers to common questions about DIY teddy bear projects, from materials needed to step-by-step instructions and more.
1. Can I wash my DIY teddy bear?
Yes, you can wash your teddy bear, but it's best to hand wash it to avoid damaging the fabric or seams. Use mild detergent and cold water, then let it air dry completely.
2. How long does it take to make a teddy bear?
The time it takes to make a teddy bear depends on your skill level and the complexity of the pattern. For beginners, it might take a few hours to a couple of days. More experienced crafters can complete a simple bear in a few hours.
3. What type of stuffing is best for a teddy bear?
Polyester fiberfill is the most common stuffing for teddy bears because it is soft, washable, and hypoallergenic. You can also use wool, cotton, or recycled fabric scraps.
4. Can I personalize my teddy bear?
Absolutely! You can personalize your teddy bear by choosing unique fabrics, adding embroidered names or initials, and accessorizing with clothes or hats. This makes your bear one-of-a-kind.
5. Can I use recycled materials to make a teddy bear?
Yes, you can use recycled materials like old clothes, blankets, or towels to make a teddy bear. This is a great way to repurpose fabric and make a sentimental keepsake.
Final Touches and Enjoy!
And there you have it – a handmade teddy bear! Whether you make it for yourself, a loved one, or as a gift, it's sure to bring joy. Making a bear allows you to play with fabric, experiment with stitching, and get creative with the final touches. Don't worry if it doesn't turn out perfectly – the charm of handmade items lies in their uniqueness!
If you want, you can even sew clothes or accessories for your bear to add extra personality. When I finished my bear, I loved the result, and seeing it in my daughter's hands was priceless.
Enjoy sewing your own teddy bear, and don't hesitate to make it your own by adding personal flair!