CSRF Protection in Spring Security (original) (raw)
Last Updated : 4 May, 2026
CSRF (Cross-Site Request Forgery) protection in Spring Security prevents unauthorized actions performed on behalf of authenticated users. It ensures that every state-changing request is verified as coming from a trusted source. This mechanism strengthens application security by validating user intent.
- Prevents unauthorized requests by validating a CSRF token in each state-changing operation.
- Uses secure token mechanism (generation, storage, and validation) to verify request authenticity.
- Enabled by default in Spring Security, especially for web applications handling form submissions
**Example: We can implement the CSRF Token generation from the server side and it can be embedded into the client-side form to validate the CSRF tokens can access the server. In Implementation, we can prevent the authenticated attackers from the unknown domains.
**CSRF Token Generation:
Java `
// Security filter chain configuration for HTTP security
public SecurityFilterChain securityFilterChain(HttpSecurity http) throws Exception {
    // Configure CSRF token repository
    http.csrf()
        .csrfTokenRepository(csrfTokenRepository())
        .and()
        .authorizeRequests()
        // Permit all requests to /public/**, /signup, and /login without authentication
        .requestMatchers("/public/**", "/signup", "/login").permitAll()
        // Require authentication for any other requests
        .anyRequest().authenticated()
        .and()
        .formLogin()
        // Specify the login page and permit all access to it
        .loginPage("/login").permitAll()
        // Configure the success handler for successful logins
        .successHandler(successHandler())
        .and()
        .logout()
        // Specify the logout request matcher and permit all access to it
        .logoutRequestMatcher(new AntPathRequestMatcher("/logout")).permitAll()
        // Specify the logout success handler
        .logoutSuccessHandler(new HttpStatusReturningLogoutSuccessHandler());

    // Build and return the security filter chain
    return http.build();
}

// Configure the CSRF token repository
private CsrfTokenRepository csrfTokenRepository() {
    // Create a new HttpSessionCsrfTokenRepository
    HttpSessionCsrfTokenRepository repository = new HttpSessionCsrfTokenRepository();
    // Set the session attribute name for the CSRF token
    repository.setSessionAttributeName("_csrf");
    // Return the repository
    return repository;
}
`
**Embedded with Client-side forms:
HTML `
Login
`
Core Concepts of CSRF Protection
- **CSRF Attack : An attacker tricks an authenticated user into sending unwanted requests to a web application.
- **CSRF Token : A unique secret value added to each request to verify it originates from a trusted source.
- **CSRF Token Repository : Stores and manages CSRF tokens on the server side (e.g., session or cookies).
- **CSRF Token Generation : Creates a secure, random token for each user session or request.
- **CSRF Token Validation : Verifies the token in incoming requests before allowing the operation.
Step by Step Implementation of CSRF Protection in Spring Security
Below are the steps to implement a simple user login management system and we will add CSRF protection into the application.
Step 1: Create Project
Create the spring project using Spring Initializer on creating the project add the below dependencies into the project.
**Dependencies
- Spring Web
- Spring Security
- Spring data for mongodb
- Thymeleaf
- Lombok
- Spring Dev Tools
Once created the project, then the file structure looks like the below image.
**File Structure: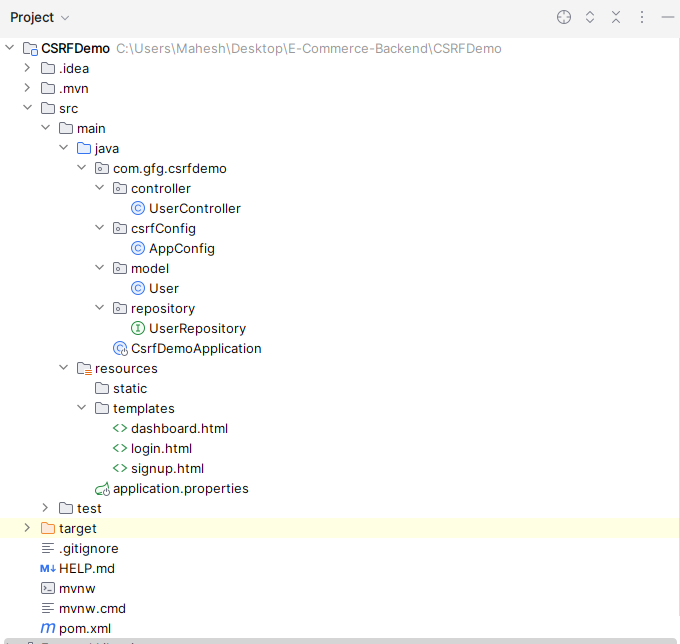
Step 2: Provide Configuration
Open the application.properties file, it will be located in resource folder then the put the below code for the mongodb database configuration and server assigning to the server.
server.port=8081
spring.data.mongodb.uri=mongodb://localhost:27017/user-data
Step 3: Create Model Class
Create the new package and it named as model and create the new Java class in that package named as User.
- Go to src -> csrfdemo -> model -> User and put the below code. Java `
package com.gfg.csrfdemo.model;
import lombok.AllArgsConstructor; import lombok.Data; import lombok.NoArgsConstructor; import org.springframework.data.mongodb.core.mapping.Document;
// Lombok annotations for generating getters, setters, constructors, and toString method @Data @AllArgsConstructor @NoArgsConstructor @Document public class User { private String id; // Unique identifier for the user private String username; // Username of the user private String password; // Password of the user }
`
Step 4: Create Repository
Create the new package and it named as repository and create the new java interface in that package named as UserRepository.
- Go to src -> csrfdemo -> repository -> UserRepository and put the below code. Java `
package com.gfg.csrfdemo.repository;
import com.gfg.csrfdemo.model.User; import org.springframework.data.mongodb.repository.MongoRepository; import org.springframework.stereotype.Repository;
// Repository interface extending MongoRepository @Repository public interface UserRepository extends MongoRepository<User, String> { // Custom method to find a user by their username User findByUsername(String username); }
`
Step 5: Create Config Class
Create the new package named as csrfConfig and create the new Java class in that package named as AppConfig.
- Go to src -> csrfdemo -> csrfConfig -> AppConfig and put the below code. Java `
package com.gfg.csrfdemo.csrfConfig;
import org.springframework.context.annotation.Bean; import org.springframework.context.annotation.Configuration; import org.springframework.security.config.annotation.web.builders.HttpSecurity; import org.springframework.security.crypto.bcrypt.BCryptPasswordEncoder; import org.springframework.security.crypto.password.PasswordEncoder; import org.springframework.security.web.SecurityFilterChain; import org.springframework.security.web.authentication.AuthenticationSuccessHandler; import org.springframework.security.web.authentication.SimpleUrlAuthenticationSuccessHandler; import org.springframework.security.web.authentication.logout.HttpStatusReturningLogoutSuccessHandler; import org.springframework.security.web.csrf.CsrfTokenRepository; import org.springframework.security.web.csrf.HttpSessionCsrfTokenRepository; import org.springframework.security.web.util.matcher.AntPathRequestMatcher;
/**
Configuration class for Spring Security. */ @Configuration public class AppConfig {
/**
- Configures the security filter chain.
- @param http HttpSecurity object
- @return SecurityFilterChain object
- @throws Exception If an error occurs during configuration */ @Bean public SecurityFilterChain securityFilterChain(HttpSecurity http) throws Exception { http .csrf() .csrfTokenRepository(csrfTokenRepository()) .and() .authorizeRequests() .requestMatchers("/public/**", "/signup", "/login").permitAll() // Allow access to /signup and /login without authentication .anyRequest().authenticated() .and() .formLogin() .loginPage("/login") .permitAll() .successHandler(successHandler()) .and() .logout() .logoutRequestMatcher(new AntPathRequestMatcher("/logout")) .logoutSuccessHandler(new HttpStatusReturningLogoutSuccessHandler()) .permitAll(); return http.build();
}
/**
- Creates a CsrfTokenRepository instance.
- @return CsrfTokenRepository instance */ private CsrfTokenRepository csrfTokenRepository() { HttpSessionCsrfTokenRepository repository = new HttpSessionCsrfTokenRepository(); repository.setSessionAttributeName("_csrf"); return repository; }
/**
- Creates an AuthenticationSuccessHandler instance.
- @return AuthenticationSuccessHandler instance */ private AuthenticationSuccessHandler successHandler() { SimpleUrlAuthenticationSuccessHandler handler = new SimpleUrlAuthenticationSuccessHandler(); handler.setDefaultTargetUrl("/dashboard"); // Redirect to the dashboard after successful login return handler; }
/**
- Creates a PasswordEncoder instance.
- @return PasswordEncoder instance */ @Bean public PasswordEncoder passwordEncoder() { return new BCryptPasswordEncoder(); }
}
`
Step 6: Create Controller
Create the new package and it named as controller and create the new java class in that package named as UserController.
- Go to src -> csrfdemo -> controller -> UserController and put the below code. Java `
package com.example.demo.controller;
import com.gfg.csrfdemo.model.User; import com.gfg.csrfdemo.repository.UserRepository; import org.springframework.beans.factory.annotation.Autowired; import org.springframework.security.crypto.password.PasswordEncoder; import org.springframework.stereotype.Controller; import org.springframework.web.bind.annotation.GetMapping; import org.springframework.web.bind.annotation.ModelAttribute; import org.springframework.web.bind.annotation.PostMapping;
/**
Controller class for user-related operations. */ @Controller public class UserController {
@Autowired private UserRepository userRepository;
@Autowired private PasswordEncoder passwordEncoder;
/**
- Endpoint to display the signup form.
- @return The name of the signup view */ @GetMapping("/signup") public String signupForm() { return "signup"; }
/**
- Endpoint to handle the form submission for user signup.
- @param user The user object containing signup details
- @return The name of the login view */ @PostMapping("/signup") public String signupSubmit(@ModelAttribute User user) { user.setPassword(passwordEncoder.encode(user.getPassword())); userRepository.save(user); return "redirect:/login"; }
/**
- Endpoint to display the login page.
- @return The name of the login view */ @GetMapping("/login") public String login() { return "login"; }
}
`
Step 7: Create Main Class
Open the main class and put the below code.
**Note: No need any changes into the main class.
Java `
package com.gfg.csrfdemo;
import org.springframework.boot.SpringApplication; import org.springframework.boot.autoconfigure.SpringBootApplication;
/**
Main class to run the application. */ @SpringBootApplication public class CsrfDemoApplication {
/**
- Main method to start the application.
- @param args Command line arguments */ public static void main(String[] args) { SpringApplication.run(CsrfDemoApplication.class, args); }
}
`
Step 8: Create login.html file
Create the html file and named as login.html and it can be saved as the templates folder.
- Go to src -> resources -> templates -> login.html and put the below html code. HTML `