Disable Security for a Profile in Spring Boot (original) (raw)
Last Updated : 23 Jul, 2025
In Spring Boot, **Spring Security is the crucial aspect of protecting the endpoints and resources. But in some cases, we need to **disable security for certain profiles like during development or for specific testing scenarios. **Disabling security for the profile allows us to bypass the security constraints and it can access the endpoints without the authentication and authorization of the Spring application.
Spring Security can be configured in the Spring Boot application using the various configurations and it can include the java configuration, XML configuration, or the annotations. To disable the security for the specific profile, the Spring Boot profile-specific configurations need to enable or disable the security based on the active profiles of the application.
Key Terminologies:
- **UserDetailsService: This interface can be used to retrieve the user details such as username, password, and authorities from the data source and it can typically as the database of the application.
- **SecurityContext: It can represent the security information associated with the current thread of the execution. It can typically contain the authenticated principal and any granted authorities of the application.
- **Security Configuration: Configuration settings that can define the behavior of the Spring Security within the Spring Boot application. It includes specifying the authentication mechanisms, authorization rules and the other security related options.
- **AuthenticationProvider: It is the interface for the authenticating the users based on the provided credentials. It can typically delegates the authentication process to one or more the configured the authentication mechanisms.
- **Filter Chain: The filter chain is the responsible for the enforcing the security constraints and it can performing the authentication and authorization checks of the application.
Steps to Disable Security for a Profile in Spring Boot
We will develop a simple Spring application that demonstrate disable the security of the development profile of the Spring application.
**Step 1: Create a spring project using spring initializer. On creating the project, add the below dependencies into the project.
**Dependencies:
- Spring Web
- Spring Dev Tools
- Lombok
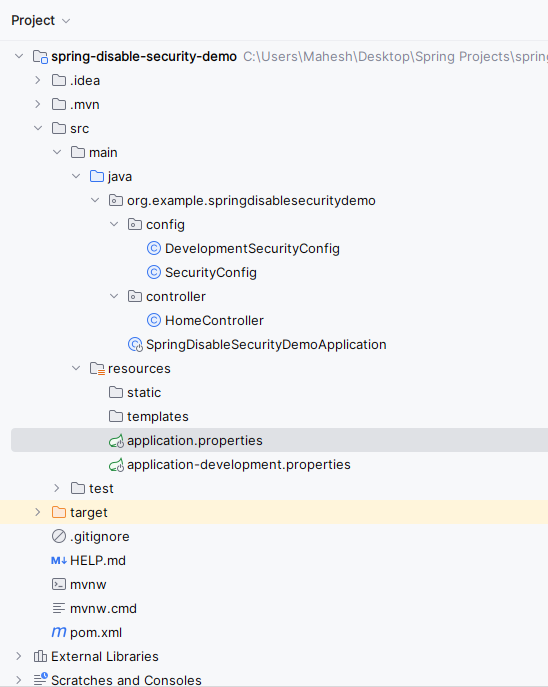
Project Structure:
Below we can see the project folder structure after successfully creation of the project.
**Step 2: Now, open the **application.properties file and put the below code for the server port and spring security credentials configuration to the project.
spring.application.name=spring-disable-security-demo
server.port= 8081
spring.security.user.name=admin
spring.security.user.password=admin
spring.profiles.active=development
**Step 3: Open the **application-development.properties file and put the below code for the server port and spring security credentials configuration to the project.
server.port= 8082
**Step 4: Create a new package named **config, in that package, create a new Java class and it named as **SecurityConfig.
Go to **src > org.example.springdisablesecuritydemo > config > SecurityConfig and put the below code.
Java `
package org.example.springdisablesecuritydemo.config;
import org.springframework.context.annotation.Configuration; import org.springframework.context.annotation.Profile; import org.springframework.security.config.annotation.web.builders.HttpSecurity; import org.springframework.security.config.annotation.web.configuration.EnableWebSecurity;
@Configuration @Profile("!development") @EnableWebSecurity public class SecurityConfig {
protected void configure(HttpSecurity http) throws Exception {
    http
            .authorizeRequests()
            .anyRequest().authenticated()
            .and()
            .formLogin()
            .loginPage("/login")
            .permitAll()
            .and()
            .logout()
            .permitAll();
}
}
`
- This**
SecurityConfig** class is responsible for configuring security settings in a Spring Boot application. - It specifies that security configurations defined within it should only be applied when the active profile is not "development".
- The
configuremethod sets up authorization rules, form-based login, and logout functionality.
**Step 5: Create a new package named **config andin that package, create the new Java class and it named as **DevelopmentSecurityConfig .
Go to **src > org.example.springdisablesecuritydemo > config > DevelopmentSecurityConfig and put the below code.
Java `
package org.example.springdisablesecuritydemo.config;
import org.springframework.context.annotation.Configuration; import org.springframework.context.annotation.Profile; import org.springframework.security.config.annotation.web.builders.HttpSecurity; import org.springframework.security.config.annotation.web.configuration.EnableWebSecurity;
@Configuration @Profile("development") public class DevelopmentSecurityConfig {
protected void configure(HttpSecurity http) throws Exception {
    http.authorizeRequests()
            .anyRequest().permitAll()
            .and().csrf().disable();
}
}
`
- This
DevelopmentSecurityConfigclass is specifically configured for the "development" profile in a Spring Boot application. - It allows unrestricted access to all endpoints by permitting all requests and disabling CSRF protection.
- This is useful during development phases to simplify testing and debugging without security constraints.
**Step 6: Create a new package named **controller, in that package, create a new Java class named **DevelopmentSecurityConfig .
Go to **src > org.example.springdisablesecuritydemo > controller > HomeController and put the below code.
Java `
package org.example.springdisablesecuritydemo.controller;
import org.springframework.web.bind.annotation.GetMapping; import org.springframework.web.bind.annotation.RestController;
@RestController public class HomeController {
@GetMapping("/")
public String hello() {
    return "Hello World";
}
}
`
- This
HomeControllerclass defines a simple REST controller with a single endpoint mapped to the root URL ("/"). - When accessed, it returns the string "Hello World".
- This endpoint can be used to verify the basic functionality of the Spring application.
**Step 7: Open the main class file and write the below code.
Java `
package org.example.springdisablesecuritydemo;
import org.springframework.boot.SpringApplication; import org.springframework.boot.autoconfigure.SpringBootApplication;
@SpringBootApplication public class SpringDisableSecurityDemoApplication {
public static void main(String[] args) {
    SpringApplication.run(SpringDisableSecurityDemoApplication.class, args);
}
}
`
**pom.xml:
XML `
4.0.0 org.springframework.boot spring-boot-starter-parent 3.2.4 org.example spring-disable-security-demo 0.0.1-SNAPSHOT spring-disable-security-demo spring-disable-security-demo <java.version>17</java.version> org.springframework.boot spring-boot-starter-security org.springframework.boot spring-boot-starter-web
    <dependency>
        <groupId>org.springframework.boot</groupId>
        <artifactId>spring-boot-devtools</artifactId>
        <scope>runtime</scope>
        <optional>true</optional>
    </dependency>
    <dependency>
        <groupId>org.projectlombok</groupId>
        <artifactId>lombok</artifactId>
        <optional>true</optional>
    </dependency>
    <dependency>
        <groupId>org.springframework.boot</groupId>
        <artifactId>spring-boot-starter-test</artifactId>
        <scope>test</scope>
    </dependency>
    <dependency>
        <groupId>org.springframework.security</groupId>
        <artifactId>spring-security-test</artifactId>
        <scope>test</scope>
    </dependency>
</dependencies>

<build>
    <plugins>
        <plugin>
            <groupId>org.springframework.boot</groupId>
            <artifactId>spring-boot-maven-plugin</artifactId>
            <configuration>
                <excludes>
                    <exclude>
                        <groupId>org.projectlombok</groupId>
                        <artifactId>lombok</artifactId>
                    </exclude>
                </excludes>
            </configuration>
        </plugin>
    </plugins>
</build>
`
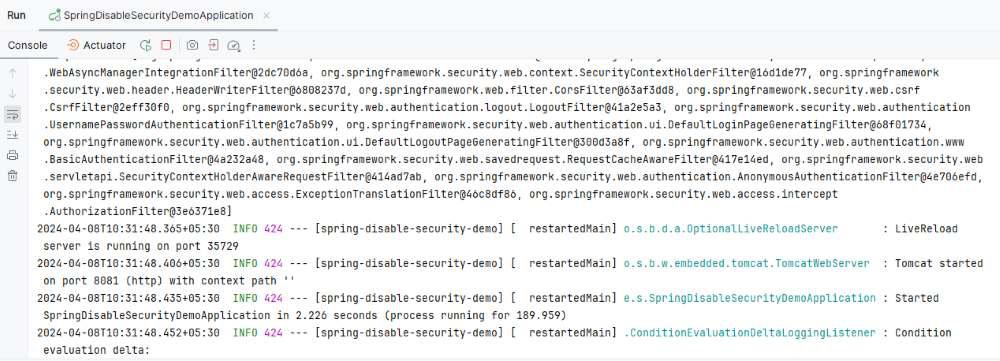
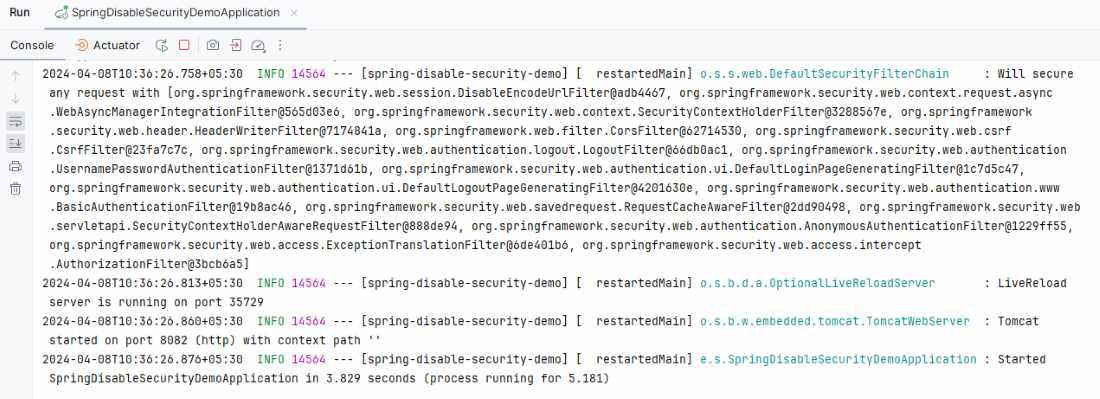
**Step 8: After successfully completion of the spring project, run it as spring application and once it runs successfully, it starts at port 8081.
**Endpoint API:
**GET http:localhost:8081/
**Output:
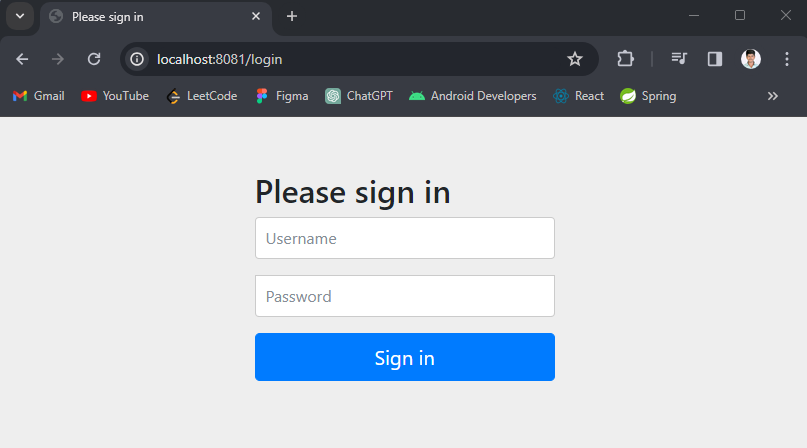
Once sign in done, then the output will be like below image:
**Step 9: Set the profile to development.
spring.application.name=spring-disable-security-demo
server.port= 8081
spring.security.user.name=admin
spring.security.user.password=admin
spring.profiles.active=development
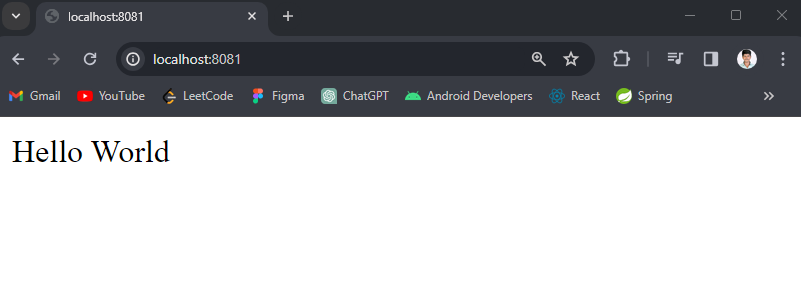
**Step 10: Once change the profile the re-run as spring application once it runs successful then it starts at port 8082.
**API Endpoint:
**Output:
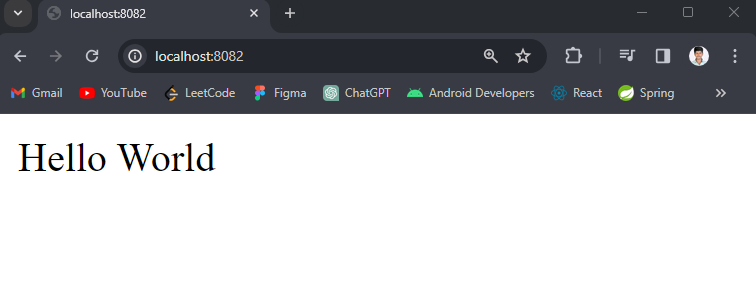
If we follow the above steps, then we can successfully demonstrate that how to Disable Security for a Profile in Spring Boot of the Spring application.