Spring Security Securing Endpoints Using antMatchers() (original) (raw)
Last Updated : 22 May, 2026
Spring Security provides security features for Java web applications by handling authentication and authorization. One of the commonly used methods in Spring Security 5 is antMatchers(), which helps secure endpoints based on roles, authorities, or authentication status.
- Used to secure endpoints based on roles and authentication.
- Supports wildcard URL pattern matching.
- In Spring Security 6 and Spring Boot 3, antMatchers() has been removed and replaced with requestMatchers()
How antMatchers() Works
The mapping rules in antMatchers() support special characters for flexible matching
- ****? :** matches one character
- *** : matches zero or more characters
- **** : matches zero or more directories in a path
**Examples:
- org/g?g -> matches org/gfg, org/geg, etc.
- org/*.jsp -> matches all .jsp files in the org directory
- org/**/test.jsp -> matches all test.jsp files under the org path
Methods applied on antmatchers()
- **hasAnyRole(): Checks whether the authenticated user has a specific role to access the endpoint.
- **hasRole(): Allows access if the user has any one of the specified roles.
- **hasAuthority(): Checks whether the user has a specific authority or permission.
- **hasAnyAuthority(): Allows access if the user has any one of the specified authorities
- **authenticated(): Allows access only to authenticated (logged-in) users.
- **anonymous(): Allows access only to users who are not authenticated or logged in.
Implementation of Securing Endpoints Using antMatchers()
Step 1: Create Spring MVC Project and Configure Tomcat
- Create a Dynamic Web Project in STS or Eclipse.
- Configure the Apache Tomcat Server.
Before moving to the project let’s have a look at the complete project structure for our Spring MVC application.
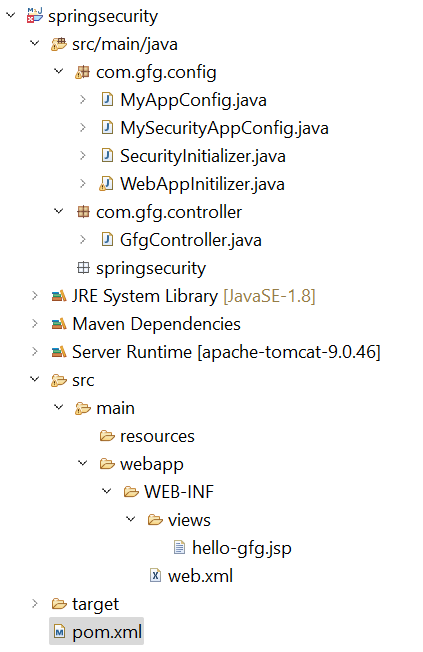
Folder Structure
Step 2: Add Dependencies to pom.xml File
Add the following dependencies to your pom.xml file
- Spring Web MVC
- Java Servlet API
- Spring Security Config
- Spring Security Web
**pom.xml:
XML `
4.0.0
com.gfg.springsecurity springsecurity 0.0.1-SNAPSHOT war
springsecurity Maven Webapp http://www.gfg.com
UTF-8 1.7 1.7<!-- https://mvnrepository.com/artifact/org.springframework/spring-webmvc -->
<dependency>
<groupId>org.springframework</groupId>
<artifactId>spring-webmvc</artifactId>
<version>5.3.24</version>
</dependency>
<!-- https://mvnrepository.com/artifact/javax.servlet/javax.servlet-api -->
<dependency>
<groupId>javax.servlet</groupId>
<artifactId>javax.servlet-api</artifactId>
<version>4.0.1</version>
<scope>provided</scope>
</dependency>
<!-- https://mvnrepository.com/artifact/org.springframework.security/spring-security-config -->
<dependency>
<groupId>org.springframework.security</groupId>
<artifactId>spring-security-config</artifactId>
<version>5.7.3</version>
</dependency>
<!-- https://mvnrepository.com/artifact/org.springframework.security/spring-security-web -->
<dependency>
<groupId>org.springframework.security</groupId>
<artifactId>spring-security-web</artifactId>
<version>5.7.3</version>
</dependency>`
Step 3: Configuring Dispatcher Servlet
Go to the src > main > java and create a class WebAppInitilizer.
- Dispatcher Servlet handles incoming HTTP requests.
- AbstractAnnotationConfigDispatcherServletInitializer replaces web.xml.
**WebAppInitilizer.java
Java `
package com.gfg.config;
import org.springframework.web.servlet.support.AbstractAnnotationConfigDispatcherServletInitializer;
public class WebAppInitilizer extends AbstractAnnotationConfigDispatcherServletInitializer {
@Override
protected Class<?>[] getRootConfigClasses() {
    // TODO Auto-generated method stub
    return null;
}

@Override
protected Class<?>[] getServletConfigClasses() {
    Class[] configFiles = {MyAppConfig.class};
    return configFiles;
}

@Override
protected String[] getServletMappings() {
    String[] mappings = {"/"};
    return mappings;
}
}
`
Step 4: Configure Spring MVC
Create another class in the same location (src > main > java) and name it MyAppConfig.
- @EnableWebMvc enables Spring MVC features.
- InternalResourceViewResolver resolves JSP view files.
**MyAppConfig.java
Java `
package com.gfg.config;
import org.springframework.context.annotation.Bean; import org.springframework.context.annotation.ComponentScan; import org.springframework.context.annotation.Configuration; import org.springframework.web.servlet.config.annotation.EnableWebMvc; import org.springframework.web.servlet.view.InternalResourceViewResolver;
@Configuration @EnableWebMvc @ComponentScan("com") public class MyAppConfig {
@Bean
InternalResourceViewResolver viewResolver() {
    InternalResourceViewResolver resolver = new InternalResourceViewResolver();
    resolver.setPrefix("/WEB-INF/views/");
    resolver.setSuffix(".jsp");
    return resolver;
}
}
`
Step 5: Create Spring MVC Controller
Go to the src > main > java and create a class GfgController.
- /gfg endpoint will be secured.
- @ResponseBody returns plain text response.
**GfgController.java
Java `
package com.gfg.controller;
import org.springframework.stereotype.Controller; import org.springframework.web.bind.annotation.GetMapping; import org.springframework.web.bind.annotation.ResponseBody;
@Controller public class GfgController {
// Secure this one
@GetMapping("/gfg")
public String helloGfg() {
    return "hello-gfg";
}

// Don't secure this
@GetMapping("/gfg/welcome")
@ResponseBody
public String welcomeGfg() {
    return "Welcome to GeeksforGeeks";
}
}
`
Step 6: Create View
Go to the src > main > webapp > WEB-INF > right-click > New > Folder and name the folder as views. Then views > right-click > New > JSP File.
- JSP files are used as view pages.
- WEB-INF prevents direct browser access to JSP files. HTML `
Hello GeeksforGeeks!
`
Step 7: Setup Spring Security
Go to the src > main > java and create a class SecurityInitializer.
- Registers Spring Security filter chain.
- Enables Spring Security integration in the application.
**SecurityInitializer.java
Java `
package com.gfg.config;
import org.springframework.security.web.context.AbstractSecurityWebApplicationInitializer;
// This class will help to register spring security filter chain with our application public class SecurityInitializer extends AbstractSecurityWebApplicationInitializer {
}
`
Step 8: Configure Spring Security Using antMatchers()
Configure spring security: Go to the src > main > java and create a class MySecurityAppConfig.
- /gfg endpoint requires authentication.
- In-memory authentication is used for testing.
**MyAppConfig.java
Java `
package com.gfg.config;
import org.springframework.beans.factory.annotation.Autowired; import org.springframework.security.config.annotation.authentication.builders.AuthenticationManagerBuilder; import org.springframework.security.config.annotation.web.builders.HttpSecurity; import org.springframework.security.config.annotation.web.configuration.EnableWebSecurity; import org.springframework.security.config.annotation.web.configuration.WebSecurityConfigurerAdapter; import org.springframework.security.crypto.password.PasswordEncoder;
@SuppressWarnings("deprecation") @EnableWebSecurity public class MySecurityAppConfig extends WebSecurityConfigurerAdapter {
@Autowired
private PasswordEncoder passwordEncoder;

@Override
protected void configure(AuthenticationManagerBuilder auth) throws Exception {
    auth.inMemoryAuthentication()
        .withUser("gfg")
        .password(passwordEncoder.encode("gfg123"))
        .roles("admin");
}

@Override
protected void configure(HttpSecurity http) throws Exception {
    http
        .authorizeHttpRequests()
        .antMatchers("/gfg").authenticated()
        .antMatchers("/gfg/welcome").permitAll()
        .and()
        .formLogin().loginPage("/customLogin")
        .and()
        .httpBasic();
}
}
`
Step 9: Run the Application
To run our Spring MVC Application right-click on your project > Run As > Run on Server. After that use the following URL to run your controller.
And it will ask for authentication to use the endpoint and a pop-up screen will be shown like this.

Now sign in with the following credentials
- **Username: gfg
- **Password: gfg123
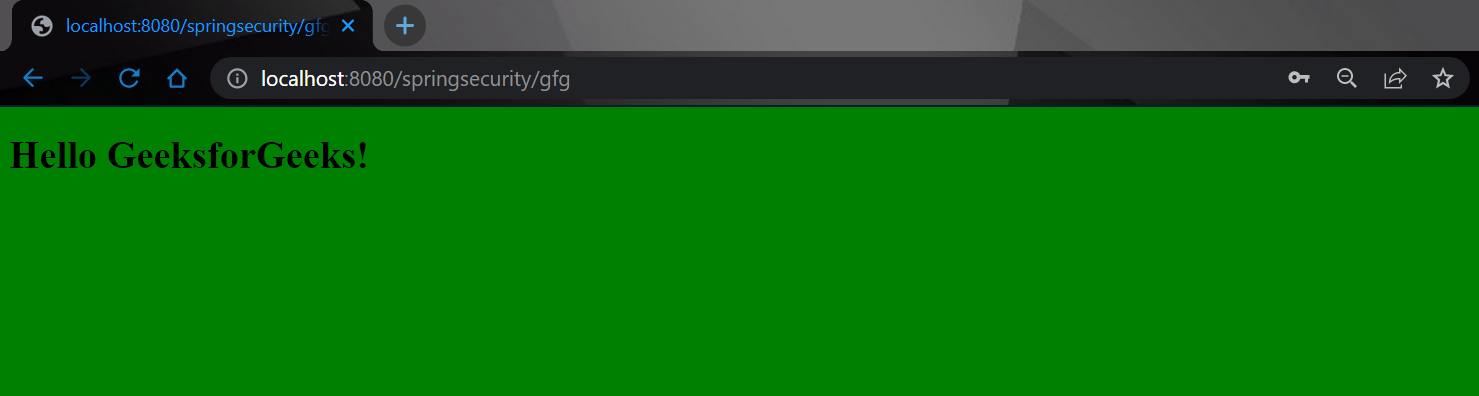
And now you can access your endpoint. You will get the output like this.
But when you hit the following endpoint you can access it without any authentication.
You will get the output like this.
