Working With the TextView in Android (original) (raw)
Last Updated : 23 Jul, 2025
TextView in Android is one of the basic and important UI elements. This plays a very important role in the UI experience and depends on how the information is displayed to the user. This TextView widget in Android can be dynamized in various contexts. For example, if the important part of the information is to be highlighted then the substring that contains, it is to be italicized or it has to be made bold, one more scenario is where if the information in TextView contains a hyperlink that directs to a particular web URL then it has to be spanned with hyperlink and has to be underlined.
Operations Performed in TextView on Android
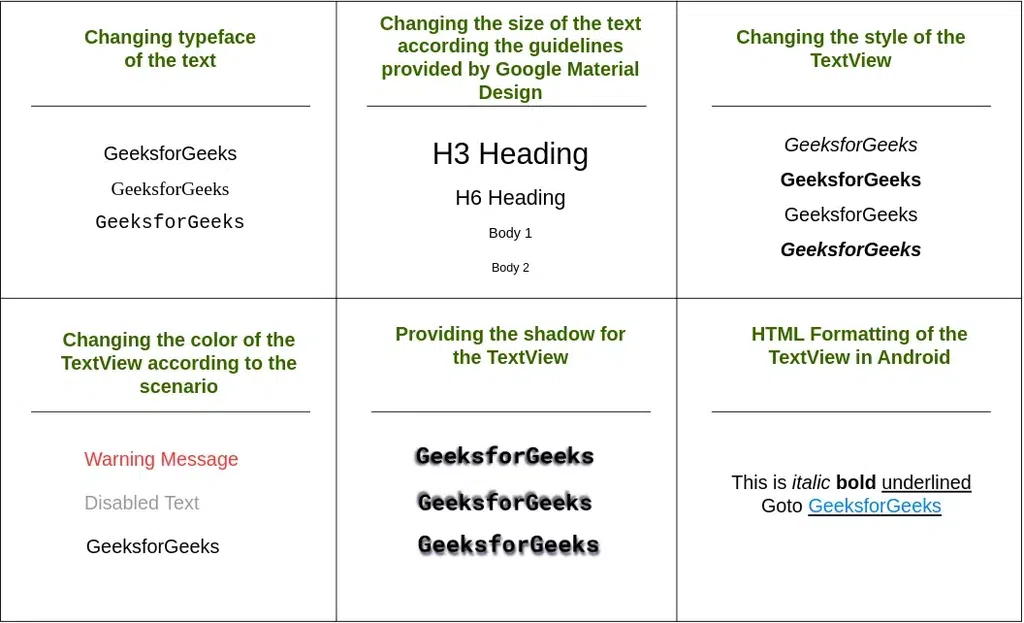
Have a look at the following list and image to get an idea of the overall discussion.
Table of Content
**HTML Formatting of the TextView
Step by Step Implementation
**Step 1: Create an Empty Activity Project
- Create an empty activity Android Studio Project. Refer to Android | How to Create/Start a New Project in Android Studio? to know how To Create an empty activity Android Studio project.
**Step 2: Working with the activity_main.xml file
- The main layout and one, which includes only a TextView and as varied as we go on discuss the various contexts.
**To implement the UI of the activity invoke the following code inside the activity_main.xml file.
XML `
<androidx.constraintlayout.widget.ConstraintLayout xmlns:android="http://schemas.android.com/apk/res/android" xmlns:app="http://schemas.android.com/apk/res-auto" xmlns:tools="http://schemas.android.com/tools" android:layout_width="match_parent" android:layout_height="match_parent" tools:context=".MainActivity" tools:ignore="HardcodedText">
<TextView
    android:layout_width="wrap_content"
    android:layout_height="wrap_content"
    android:text="GeeksforGeeks"
    app:layout_constraintBottom_toBottomOf="parent"
    app:layout_constraintLeft_toLeftOf="parent"
    app:layout_constraintRight_toRightOf="parent"
    app:layout_constraintTop_toTopOf="parent" />
</androidx.constraintlayout.widget.ConstraintLayout>
`
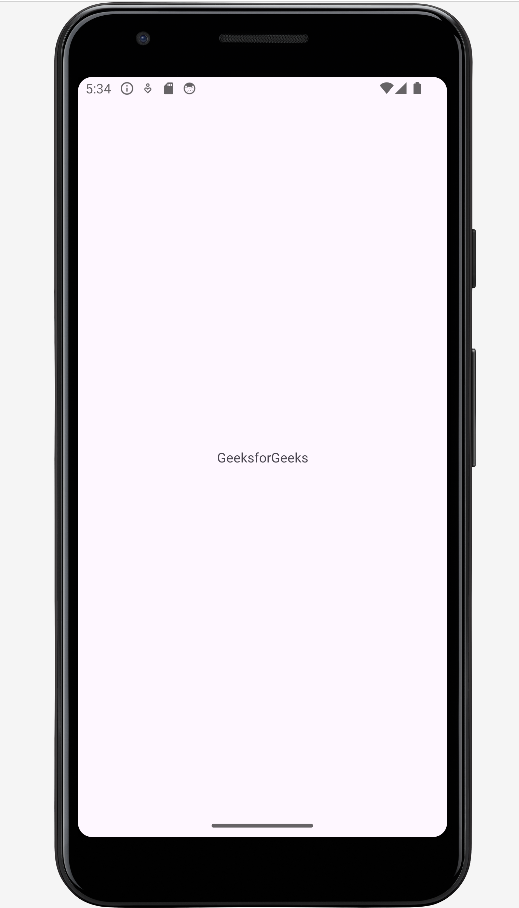
**Output UI:
**1. Formatting the TextView
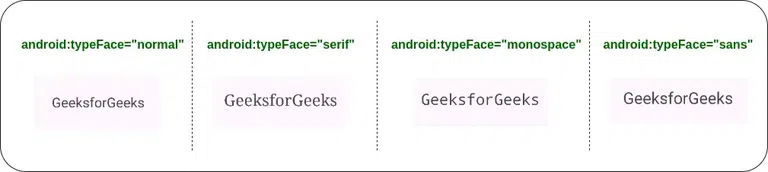
**Android offers mainly 3 types of typefaces
- normal
- sans
- serif
- monospace
The above four types of faces are to be invoked under the "**typeFace" attribute of the TextView in XML.
Invoke the following code and note the "**typeFace" attribute of the TextView.
XML `
<androidx.constraintlayout.widget.ConstraintLayout xmlns:android="http://schemas.android.com/apk/res/android" xmlns:app="http://schemas.android.com/apk/res-auto" xmlns:tools="http://schemas.android.com/tools" android:layout_width="match_parent" android:layout_height="match_parent" tools:context=".MainActivity" tools:ignore="HardcodedText">
<!--the below typeFace attribute has to
     invoked with values mentioned-->
<TextView
    android:layout_width="wrap_content"
    android:layout_height="wrap_content"
    android:text="GeeksforGeeks"
    android:textSize="32sp"

    android:typeface="normal"

    app:layout_constraintBottom_toBottomOf="parent"
    app:layout_constraintLeft_toLeftOf="parent"
    app:layout_constraintRight_toRightOf="parent"
    app:layout_constraintTop_toTopOf="parent" />
</androidx.constraintlayout.widget.ConstraintLayout>
`
**Output:
**2. Size of the TextView
- This feature of the Text view upholds what type of content has to be shown to the user. For example, if there is a Heading, there are 6 types of heading that can be implemented have a look at the following image which contains the guidelines for the size of the text view and style of the text view which is recommended by Google's Material Design.

The attribute which is used to change the size of the Text View in android is ****"textSize".**
Refer to the following code and its output for better understanding.
XML `
<TextView
    android:layout_width="wrap_content"
    android:layout_height="wrap_content"
    android:layout_marginStart="32dp"
    android:layout_marginTop="64dp"

    android:textSize="48sp"

    android:text="H3 Heading" />

<TextView
    android:layout_width="wrap_content"
    android:layout_height="wrap_content"
    android:layout_marginStart="32dp"
    android:layout_marginTop="32dp"

    android:textSize="32sp"

    android:text="H6 Heading" />

<TextView
    android:layout_width="wrap_content"
    android:layout_height="wrap_content"
    android:layout_marginStart="32dp"
    android:layout_marginTop="32dp"

    android:textSize="16sp"

    android:text="Body 1" />

<TextView
    android:layout_width="wrap_content"
    android:layout_height="wrap_content"
    android:layout_marginStart="32dp"
    android:layout_marginTop="32dp"

    android:textSize="14sp"

    android:text="Body 2" />
`
**Output:

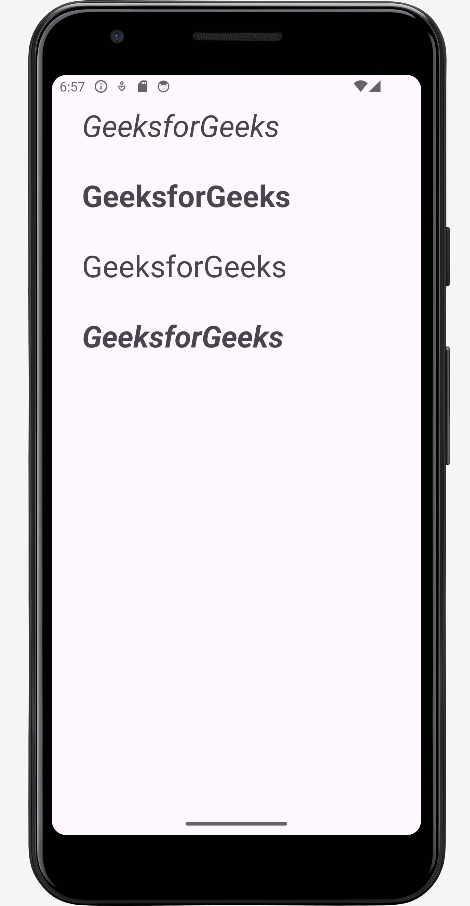
**3. Changing Text Style
**In Android there are basically three text styles:
- Bold
- Italic
- Normal
- The text style of the text in android can be implemented using the attribute ****"textStyle".**
- Multiple text styles can also be implemented using the pipeline operator. Example ****"android:textStyle="bold|italic".**
To implement the various text styles refer to the following code and its output.
XML `
<LinearLayout
    android:layout_width="match_parent"
    android:layout_height="wrap_content"
    android:layout_marginStart="32dp"
    android:layout_marginTop="32dp"
    android:orientation="vertical">

    <!--the below textStyle attribute has to
        invoked with values mentioned-->
    <TextView
        android:layout_width="wrap_content"
        android:layout_height="wrap_content"
        android:text="GeeksforGeeks"

        android:textStyle="italic"

        android:textSize="32sp" />

    <TextView
        android:layout_width="wrap_content"
        android:layout_height="wrap_content"
        android:layout_marginTop="32dp"
        android:text="GeeksforGeeks"

        android:textStyle="bold"

        android:textSize="32sp" />

    <TextView
        android:layout_width="wrap_content"
        android:layout_height="wrap_content"
        android:layout_marginTop="32dp"
        android:text="GeeksforGeeks"

        android:textStyle="normal"

        android:textSize="32sp" />

    <TextView
        android:layout_width="wrap_content"
        android:layout_height="wrap_content"
        android:layout_marginTop="32dp"
        android:text="GeeksforGeeks"

        android:textStyle="bold|italic"

        android:textSize="32sp" />

</LinearLayout>
`
**Output:
**4. Changing the Text Color
- The color of the text should also change according to the change in the context of the information displayed to the user.
- For example, if there is warning text it must be in the red color and for disabled text, the opacity or the text color should be grayish. To change the color of the text, the attribute ****"textColor"** is used.
- Android also offers the predefined text colors, which can be implemented using ****"@android:color/yourColor"** as value for the ****"textColor"**. Here the value may be hex code or the predefined colors offered by the android.
Refer to the following code and its output for better understanding.
XML `
<!--the value predefined by android-->
<TextView
    android:id="@+id/text"
    android:layout_width="wrap_content"
    android:layout_height="wrap_content"
    android:layout_marginStart="32dp"
    android:layout_marginTop="64dp"
    android:text="Warning Message"
    android:textColor="#B00020"
    android:textSize="32sp" />

<!--the value predefined by android-->
<TextView
    android:layout_width="wrap_content"
    android:layout_height="wrap_content"
    android:layout_marginStart="32dp"
    android:layout_marginTop="16dp"
    android:text="Disabled Text"

    android:textColor="@android:color/darker_gray"

    android:textSize="32sp" />

<!--the value is hex code-->
<TextView
    android:layout_width="wrap_content"
    android:layout_height="wrap_content"
    android:layout_marginStart="32dp"
    android:layout_marginTop="16dp"
    android:text="GeeksforGeeks"

    android:textColor="#000000"

    android:textSize="32sp" />
`
**Output:

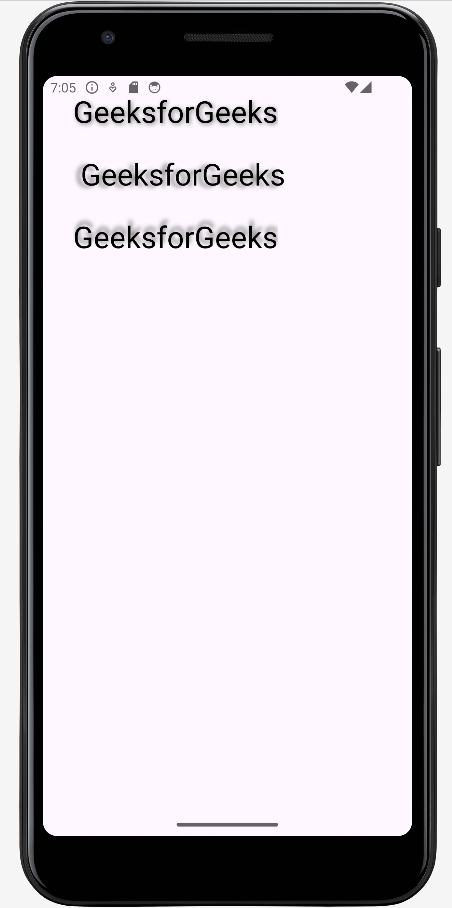
**5. Text Shadow
- Shadow for the text can also be given in Android. The attributes required for the shadowed text view are:
**android:shadowDx="integer_value" -> which decides the distance of text from its shadow with respect to x axis, if the integer_value is positive the shadow is on positive of the x axis and vice versa.
**android:shadowDy="integer_value" -> which decides the distance of text from its shadow with respect to y axis, if the integer_value is positive the shadow is on negative of the y axis and vice versa.
**android:shadowRadius="integer_value" -> which decides the amount of the shadow to be given for the text view.
Refer to the following code and its output for better understanding.
XML `
<TextView
    android:layout_width="wrap_content"
    android:layout_height="wrap_content"
    android:layout_marginStart="32dp"
    android:layout_marginTop="16dp"
    android:shadowColor="@color/grey"
    android:shadowDx="4"
    android:shadowDy="4"
    android:shadowRadius="10"
    android:text="GeeksforGeeks"
    android:textColor="#000000"
    android:textSize="32sp"
    tools:targetApi="ice_cream_sandwich" />

<TextView
    android:layout_width="wrap_content"
    android:layout_height="wrap_content"
    android:layout_marginStart="32dp"
    android:layout_marginTop="16dp"
    android:padding="8dp"
    android:shadowColor="@color/grey"
    android:shadowDx="-15"
    android:shadowDy="4"
    android:shadowRadius="10"
    android:text="GeeksforGeeks"
    android:textColor="#000000"
    android:textSize="32sp"
    tools:targetApi="ice_cream_sandwich" />

<TextView
    android:layout_width="wrap_content"
    android:layout_height="wrap_content"
    android:layout_marginStart="32dp"
    android:layout_marginTop="16dp"
    android:shadowColor="@color/grey"
    android:shadowDx="4"
    android:shadowDy="-15"
    android:shadowRadius="10"
    android:text="GeeksforGeeks"
    android:textColor="#000000"
    android:textSize="32sp"
    tools:targetApi="ice_cream_sandwich" />
`
**Output:
**6. Letter Spacing and All Caps
- Letter spacing and capital letters are some of the important properties of the text View in android.
- For the text of buttons and tab layouts, the text should be in uppercase letters recommended by Google Material Design.
- The letter spacing also should be maintained according to the scenario.
**android:letterSpacing="floatingTypeValue" -> This attribute is used to give the space between each of the letters.
**android:textAllCaps="trueOrfalse" -> This attribute decides, all the letters should be in uppercase or not.
Refer to the following code and its output for better understanding.
XML `
<TextView
    android:layout_width="wrap_content"
    android:layout_height="wrap_content"
    android:layout_marginStart="32dp"
    android:layout_marginTop="64dp"
    android:letterSpacing="0.15"
    android:text="GeeksforGeeks"
    android:textColor="@android:color/black"
    android:textSize="32sp" />

<TextView
    android:layout_width="wrap_content"
    android:layout_height="wrap_content"
    android:layout_marginStart="32dp"
    android:layout_marginTop="64dp"
    android:text="GeeksforGeeks"
    android:textAllCaps="true"
    android:textColor="@android:color/black"
    android:textSize="32sp" />
`
**Output:

**7. Adding Icons for TextView
- Android also allows adding drawable with the text views.
- There are three positions to add the icons for the TextView. They are a start, end, top, and bottom.
- Refer to the following code and its output, to know how to add the drawable icons to the Text View. XML `
<TextView
    android:layout_width="wrap_content"
    android:layout_height="wrap_content"
    android:layout_marginStart="32dp"
    android:layout_marginTop="64dp"
    android:drawableStart="@drawable/ic_lappy"
    android:padding="4dp"
    android:text="GeeksforGeeks"
    android:textColor="@android:color/black"
    android:textSize="32sp" />

<TextView
    android:layout_width="wrap_content"
    android:layout_height="wrap_content"
    android:layout_marginStart="32dp"
    android:layout_marginTop="64dp"
    android:drawableEnd="@drawable/ic_lappy"
    android:padding="4dp"
    android:text="GeeksforGeeks"
    android:textColor="@android:color/black"
    android:textSize="32sp" />
`
**Output:
![]()
**8. HTML Formatting of the TextView
- In this article we are going to cover how to format and add different styles to a TextView in android by the help of HTML.
**activity_main.xml :
XML `
<androidx.constraintlayout.widget.ConstraintLayout xmlns:android="http://schemas.android.com/apk/res/android" xmlns:app="http://schemas.android.com/apk/res-auto" xmlns:tools="http://schemas.android.com/tools" android:id="@+id/main" android:layout_width="match_parent" android:layout_height="match_parent" tools:context=".MainActivity">
<TextView
    android:layout_margin="10dp"
    android:layout_width="wrap_content"
    android:layout_height="wrap_content"
    android:text="GFG"
    android:id="@+id/tv_gfg"
    app:layout_constraintBottom_toBottomOf="parent"
    app:layout_constraintEnd_toEndOf="parent"
    app:layout_constraintStart_toStartOf="parent"
    app:layout_constraintTop_toTopOf="parent" />
</androidx.constraintlayout.widget.ConstraintLayout>
`
MainActivity Program to add functionality to the Layout:
MainAcivity.kt `
package com.example.gfg
import android.os.Bundle import android.text.Html import android.widget.TextView import androidx.activity.enableEdgeToEdge import androidx.appcompat.app.AppCompatActivity import androidx.core.view.ViewCompat import androidx.core.view.WindowInsetsCompat
class MainActivity : AppCompatActivity() { override fun onCreate(savedInstanceState: Bundle?) { super.onCreate(savedInstanceState) enableEdgeToEdge() setContentView(R.layout.activity_main)
    val textView: TextView = findViewById(R.id.tv_gfg)

    val htmlText = """
        <h2>Welcome to GFG TextView Tutorial</h2>
        <p>This is an GFG Tutorial about TextView <b>bold</b>, <i>italic</i>, and <u>underlined</u> text in a TextView using HTML formatting.</p>
        <p>You can also include <a href="https://www.geeksforgeeks.org/">links</a> and other HTML elements.</p>
    """

    textView.text = Html.fromHtml(htmlText, Html.FROM_HTML_MODE_COMPACT)

}
}
`
Output:
-660.jpg)
Click Here to Learn more to Create Your Own Android Kotlin App