How to find and Use API Key of OpenAI (original) (raw)
Last Updated : 2 May, 2026
OpenAI provides its API to interact with their language models. To make use of these models, you need to have an API key which serves as your authentication method. This key enables your application to securely communicate with OpenAI’s servers and access their services.
Steps to get OpenAI API Key
Step 1: Sign Up / Login
To start using OpenAI’s API, you need to have an account. Follow these steps:
- Visit OpenAI's platform website. Click on Log in and then on API Platform.
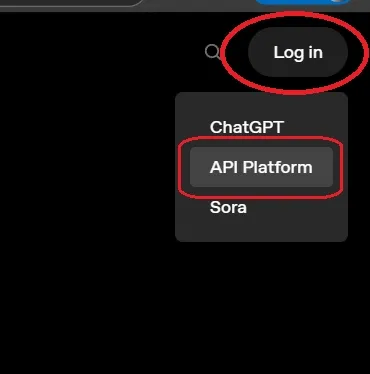
OpenAI Platform
- If you have an account enter your credential and login. And if you don't have an account, then you can create one by clicking on sign up.
Step 2: Obtain the API Key
- Navigate to the API section of the platform.
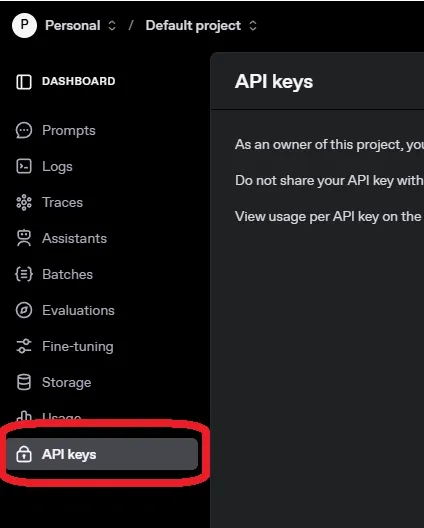
Locating the API Section
- Under the API Keys tab, you will find an option to "Create new secret key."
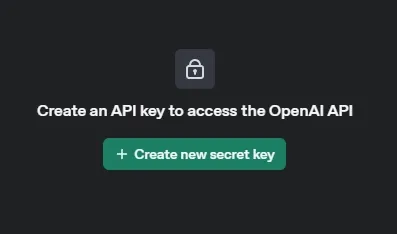
Creating new API Key
- Click this button and fill name and project name. With this new API key will be generated for you.
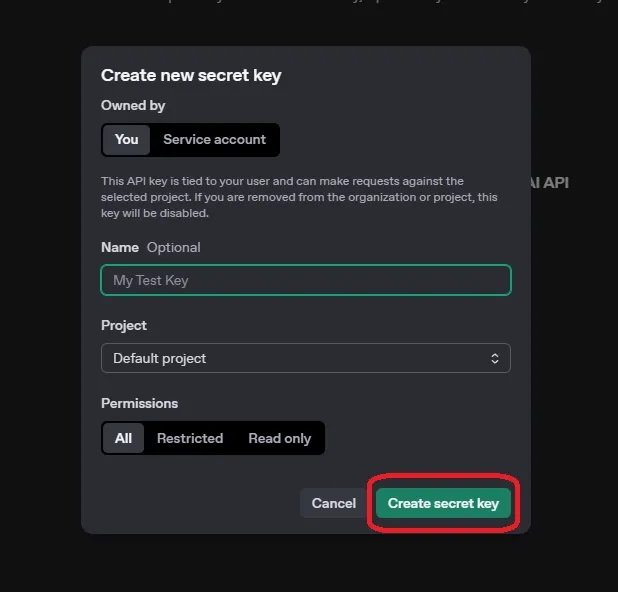
Creating API Key
- Copy the key as you will need it in your application.
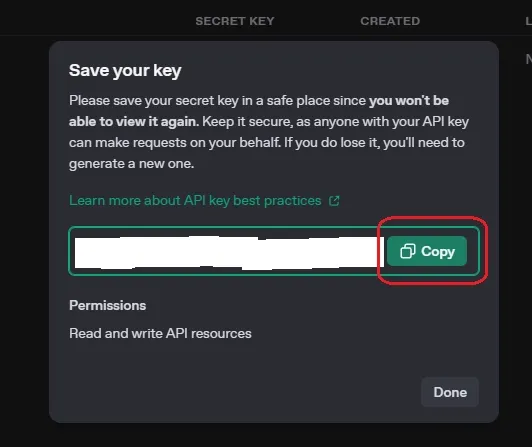
API Key
**Note: Keep your API key secure. Do not share it publicly like publishing it in version control systems like GitHub.
Project with OpenAI API Key
Lets see an example to understand the working and integration of OpenAI API key in projects and applications.
**Step 1: Install Required Libraries
To interact with the OpenAI API in Python, we need to install the OpenAI library.
Python `
pip install openai
`
Step 2: Setting Up Your API Key
The openai.api_key is where you input your personal API key. It’s crucial for authenticating and making requests to OpenAI's API.
Python `
import openai
openai.api_key = 'your-api-key-here'
`
Step 3: Create the Chatbot Function
- The**
openai.Completion.create** function sends the user input to the GPT model which generates a response. - The
temperatureparameter controls the creativity of the output. Python `
from openai import OpenAI client = OpenAI()
def chatbot_conversation(): print("Hello! I'm your Personal chatbot. Type 'exit' to end the conversation.")
while True:
    user_input = input("You: ")

    if user_input.lower() == 'exit':
        print("Goodbye!")
        break

    response = client.chat.completions.create(
        model="gpt-4o-mini",
        messages=[
            {"role": "user", "content": user_input}
        ],
        max_tokens=150,
        temperature=0.7
    )

    chatbot_response = response.choices[0].message.content.strip()

    print("Chatbot: " + chatbot_response)
`
Step 4: Running the Chatbot
Python `
if name == "main": chatbot_conversation()
`
**Output:

Output
Applications
- **Chatbots and Virtual Assistants: Build intelligent chat systems for customer support.
- **Text Generation: Generate content, summaries and creative writing.
- **Sentiment Analysis: Analyze user-generated content for emotional tone.
- **Automated Customer Support: Automate responses to common queries.
- **Code Assistance: Generate code snippets and offer debugging help.
- **Language Translation: Translate text in real-time.
- **Content Moderation: Detect harmful content on platforms.
- **Creative Writing: Assist in story generation and idea creation.
- **Text Summarization: Summarize lengthy content for quick insights.
- **Personalized Recommendations: Provide tailored suggestions based on user behavior.