Flask SQLAlchemy Tutorial for Database (original) (raw)
Last Updated : 21 Mar, 2025
Flask doesn’t have a built-in way to handle databases, so it relies on SQLAlchemy, a powerful library that makes working with databases easier. SQLAlchemy provides an Object Relational Mapper (ORM), allowing developers to interact with databases using Python code instead of raw SQL.
This brings several advantages:
- Simplifies database management.
- Improves security.
- Supports multiple database systems like SQLite, MySQL and PostgreSQL.
- Easily integrates with Flask using the Flask – SQLAlchemy extension.
Table of Content
- Installing Flask
- Creating app.py
- Setting Up SQLAlchemy
- Creating Models
- Creating the database
- Making Migrations in database
- Creating the Index Page Of the Application
- Creating HTML page for form
- Function to add data using the form to the database
- Display data on Index Page
- Deleting data from our database
In this article, we’ll build a Flask app where users submit a form, view the data on another page, and delete it if needed. The focus will be on the backend, not the front end.
Installation
Create the project folder and open the command line in the directory. Create a python virtual environment using the command below.
python -m venv venv
After creating virtual environment, activate it by using the following command-
For windows:
venv\scripts\activate
For Mac/Linux:
source venv/bin/activate
Now, install Flask and Flask-SQLAlchemy in it using command:
pip install flask flask-sqlalchemy
File Structure
Below is the snapshot of the file structure of the project after its completed.
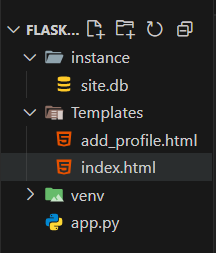
File structure after completion
Creating app.py
Once the installation is complete, we can create our main Flask application file, app.py. To verify that everything is installed and running correctly, paste the basic app code below and start the application by running python app.py in the terminal (this code will be updated later).
Python `
from flask import Flask app = Flask(name)
'''If everything works fine you will get a message that Flask is working on the first page of the application '''
@app.route('/') def check(): return 'Flask is working'
if name == 'main': app.run()
`
**Output:

Setting Up SQLAlchemy
To create a database we need to import **SQLAlchemy in **app.py, set up SQLite configuration, and create a database instance as shown below.
Python `
from flask import Flask, render_template, request, redirect from flask_sqlalchemy import SQLAlchemy
app = Flask(name)
Configure SQLite database
app.config['SQLALCHEMY_DATABASE_URI'] = 'sqlite:///site.db' app.config['SQLALCHEMY_TRACK_MODIFICATIONS'] = False # Avoids a warning
Create SQLAlchemy instance
db = SQLAlchemy(app)
Run the app and create database
if name == 'main': with app.app_context(): # Needed for DB operations db.create_all() # Creates the database and tables app.run(debug=True)
`
We set up Flask, connect it to a **SQLite database (site.db), and use **db.create_all() to create the database when the app runs. The **app_context() ensures SQLAlchemy works properly.
Creating Model
In sqlalchemy we use classes to create our database structure. In our application, we will create a Profile table that will be responsible for holding the user’s id, first name, last name, and age.
Python `
class Profile(db.Model): id = db.Column(db.Integer, primary_key=True) first_name = db.Column(db.String(20), unique=False, nullable=False) last_name = db.Column(db.String(20), unique=False, nullable=False) age = db.Column(db.Integer, nullable=False)
# repr method represents how one object of this datatable
# will look like
def __repr__(self):
    return f"Name : {self.first_name}, Age: {self.age}"
`
The table below explains some of the keywords used in the model class.
| **Column | used to create a new column in the database table |
|---|---|
| **Integer | An integer data field |
| **primary_key | If set to True for a field ensures that the field can be used to uniquely identify objects of the data table. |
| **String | An string data field. String() |
| **unique | If set to True it ensures that every data in that field in unique. |
| **nullable | If set to False it ensures that the data in the field cannot be null. |
| **__repr__ | Function used to represent objects of the data table. |
Display data on Index Page
Create an “**index.html” file int the Templates folder. This will be our root page, it will display all the saved profiles in the database. Jinja templating will dynamically render the data in the HTML file. The delete function will be added later.
HTML `
Index PageProfiles
ADD| Id | First Name | Last Name | Age | # | {% for data in profiles %}{{data.id}} | {{data.first_name}} | {{data.last_name}} | {{data.age}} | Delete | {% endfor%}
|---|
`
We loop through every object in profiles that we pass down to our template in our index function and print all its data in a tabular form. The index function in our **app.py is updated as follows.
Python `
@app.route('/add_data') def add_data(): return render_template('add_profile.html')
`
Creating add_profile.html
In the templates folder, create file “add_profile.html“, it will erender the form that taes user input for the profile details and the form will be linked to a “**/add**” route.
HTML `
Add ProfileProfile form
First Name Last Name Age Add`
Creating “/add” route in app.py
This route will receive the form data, create a user object and add it to the databse.
Python `
@app.route('/add', methods=["POST"]) def profile(): first_name = request.form.get("first_name") last_name = request.form.get("last_name") age = request.form.get("age")
if first_name != '' and last_name != '' and age is not None:
    p = Profile(first_name=first_name, last_name=last_name, age=age)
    db.session.add(p)
    db.session.commit()
    return redirect('/')
else:
    return redirect('/')
`
To check whether the code is working fine or not, we can run the following command to start the local server.
python app.py
Now, visit **http://localhost:5000/add\_data and you will be able to see the form.
**Output:

Function to add data to the database
Create a “****/add**” route in app.py. In this route will use request objects to get form data inside the function then create an object of the **Profile class and store it in our database using database sessions.
Python `
function to add profiles
@app.route('/add', methods=["POST"]) def profile(): first_name = request.form.get("first_name") last_name = request.form.get("last_name") age = request.form.get("age")
if first_name != '' and last_name != '' and age is not None:
    p = Profile(first_name=first_name, last_name=last_name, age=age)
    db.session.add(p)
    db.session.commit()
    return redirect('/')
else:
    return redirect('/')
`
Once the function is executed it redirects us back to the index page of the application.
Deleting data from our database
To delete data we have already used an anchor tag in our table and now we will just be associating a function with it.
Python `
@app.route('/delete/int:id') def erase(id): # Deletes the data on the basis of unique id and # redirects to home page data = Profile.query.get(id) db.session.delete(data) db.session.commit() return redirect('/')
`
The function queries data on the basis of id and then deletes it from our database.
Complete Final Code
The entire code for **app.py, **index.html, and **add-profile.html is given below.
app.py
Python `
from flask import Flask, request, redirect from flask.templating import render_template from flask_sqlalchemy import SQLAlchemy
app = Flask(name) app.debug = True app.config['SQLALCHEMY_DATABASE_URI'] = 'sqlite:///site.db' app.config['SQLALCHEMY_TRACK_MODIFICATIONS'] = False # Avoids a warning
db = SQLAlchemy(app)
Model
class Profile(db.Model): id = db.Column(db.Integer, primary_key=True) first_name = db.Column(db.String(20), unique=False, nullable=False) last_name = db.Column(db.String(20), unique=False, nullable=False) age = db.Column(db.Integer, nullable=False)
# repr method represents how one object of this datatable
# will look like
def __repr__(self):
    return f"Name : {self.first_name}, Age: {self.age}"
from flask import Flask, request, redirect from flask.templating import render_template from flask_sqlalchemy import SQLAlchemy
app = Flask(name) app.debug = True
adding configuration for using a sqlite database
app.config['SQLALCHEMY_DATABASE_URI'] = 'sqlite:///site.db'
Creating an SQLAlchemy instance
db = SQLAlchemy(app)
Models
class Profile(db.Model): id = db.Column(db.Integer, primary_key=True) first_name = db.Column(db.String(20), unique=False, nullable=False) last_name = db.Column(db.String(20), unique=False, nullable=False) age = db.Column(db.Integer, nullable=False)
def __repr__(self):
    return f"Name : {self.first_name}, Age: {self.age}"
function to render index page
@app.route('/') def index(): profiles = Profile.query.all() return render_template('index.html', profiles=profiles)
@app.route('/add_data') def add_data(): return render_template('add_profile.html')
function to add profiles
@app.route('/add', methods=["POST"]) def profile(): first_name = request.form.get("first_name") last_name = request.form.get("last_name") age = request.form.get("age")
if first_name != '' and last_name != '' and age is not None:
    p = Profile(first_name=first_name, last_name=last_name, age=age)
    db.session.add(p)
    db.session.commit()
    return redirect('/')
else:
return redirect('/')@app.route('/delete/int:id') def erase(id): data = Profile.query.get(id) db.session.delete(data) db.session.commit() return redirect('/')
if name == 'main': with app.app_context(): # Needed for DB operations outside a request db.create_all() # Creates the database and tables app.run(debug=True)
`
index.html
HTML `
Index PageProfiles
ADD| Id | First Name | Last Name | Age | # | {% for data in profiles %}{{data.id}} | {{data.first_name}} | {{data.last_name}} | {{data.age}} | Delete | {% endfor%}
|---|
`
add_profile.html
HTML `
Add ProfileProfile form
First Name Last Name Age Add`
**Output:
