Creating a Simple Application in Flutter (original) (raw)
Last Updated : 13 Mar, 2025
**Flutter is an open-source cross-platform mobile application development SDK created by Google. It is highly user-friendly and builds high-quality mobile applications. The intention behind this article is to guide readers through the process of building an application through Flutter by creating a **simple Flutter App on **Android Studio. To start creating a Flutter application, we have to first create a flutter project and many other things. To do so, follow the steps mentioned below:
There are two ways to create a new flutter project based on IDE you using. Select according to your IDE.
Table of Content
- Create a New Flutter Project Using Android Studio
- Create a New Flutter Project Using Visual Studio Code
Create a New Flutter Project Using Android Studio
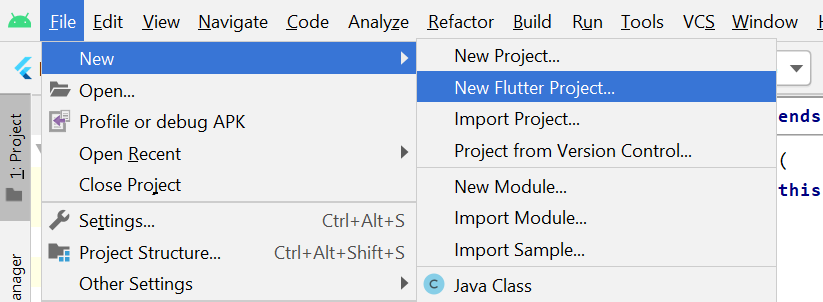
**Step 1: Open the **Android Studio IDE and select Start a new **Flutter project.
**Note: if you like to create a flutter project using terminal use the below command and jump right into **step 6.
$ **flutter create flutter_app
_replace the ' flutter_app ' _with your project name
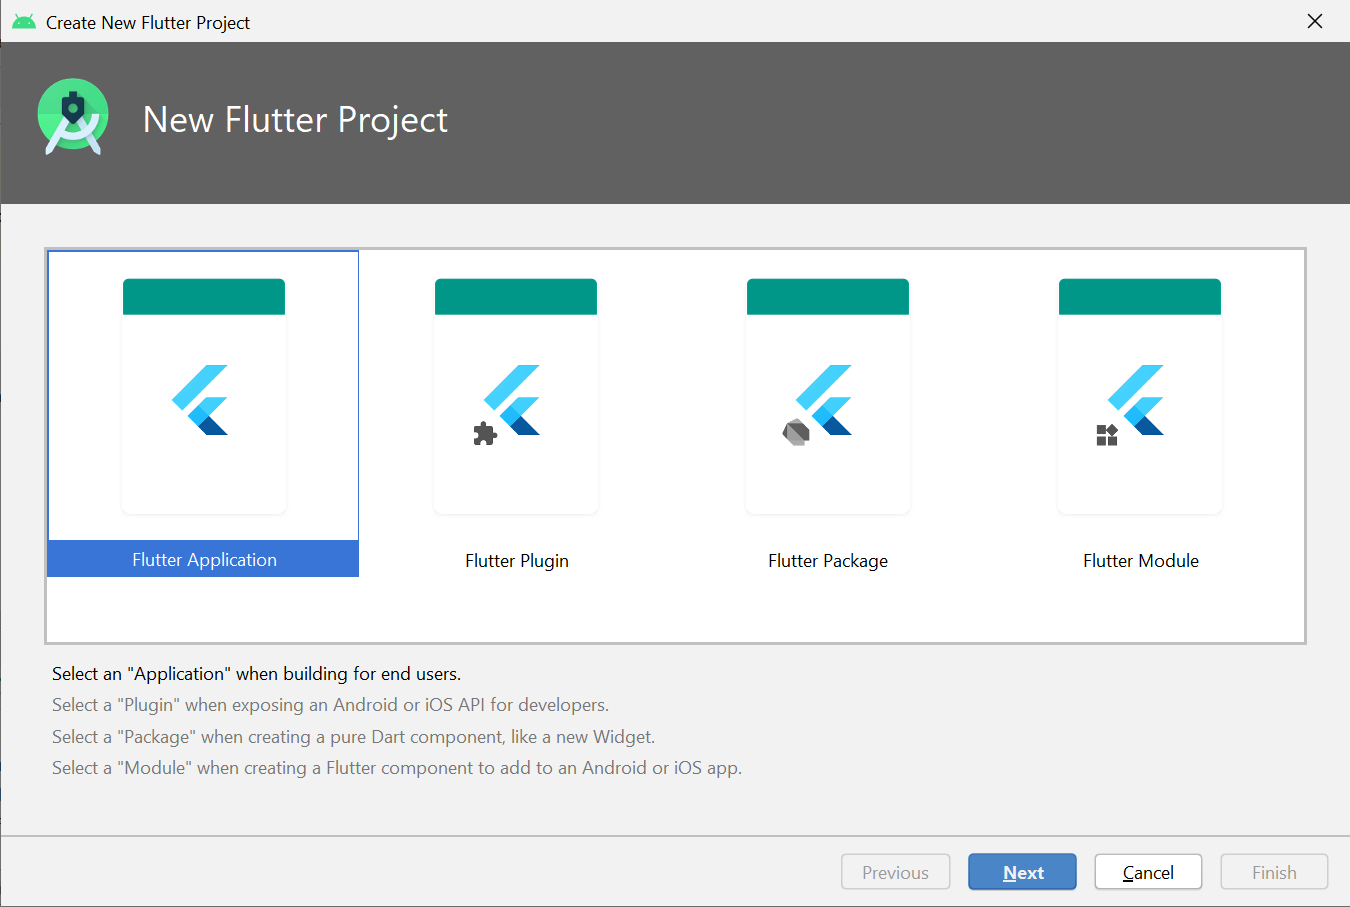
**Step 2: Selecting Type of Application
Select the **Flutter Application as the project type. Then click Next.
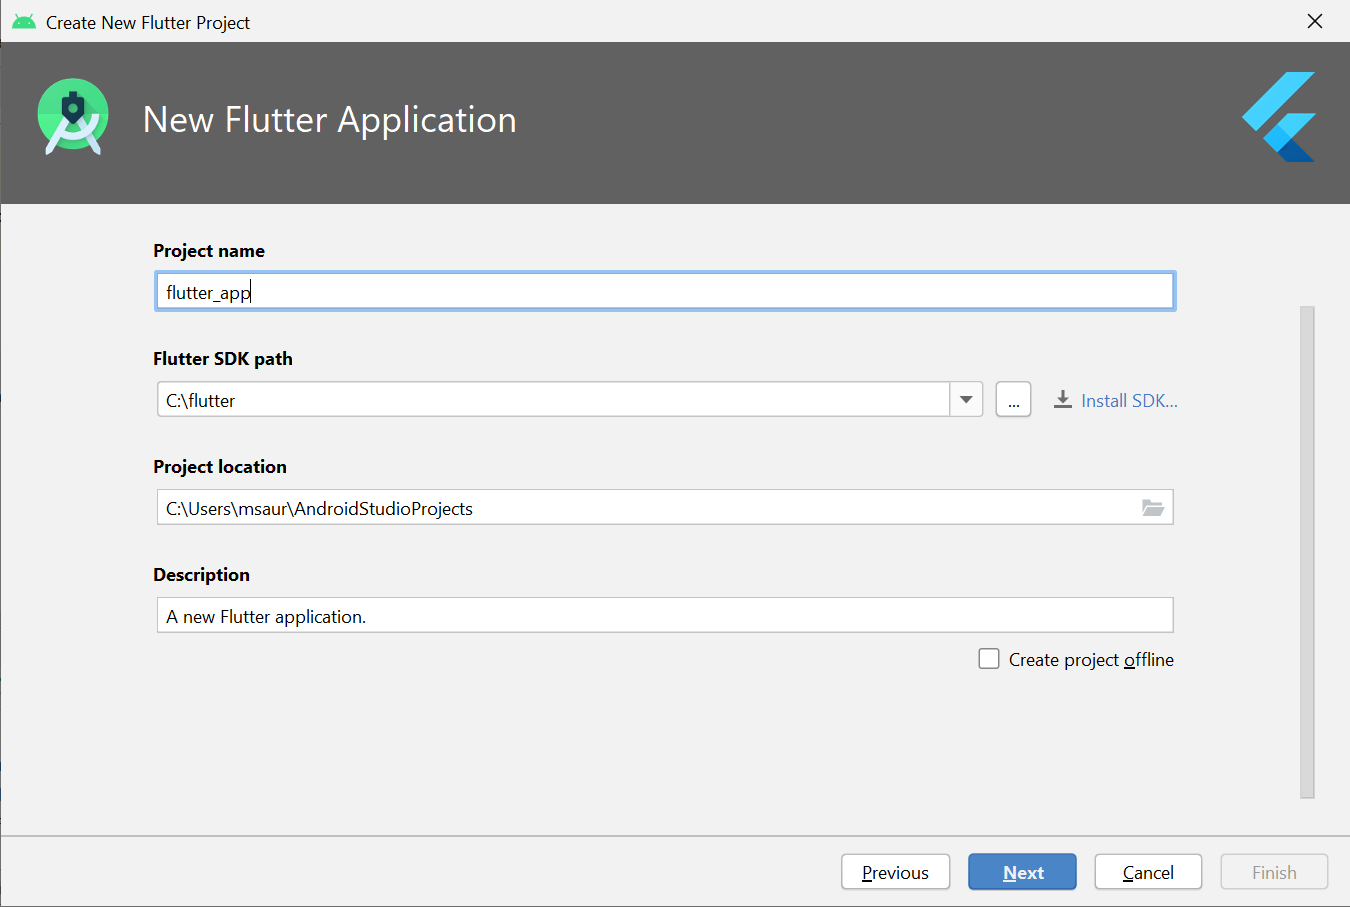
**Step 3: Verify the Flutter SDK Path
Verify the **Flutter SDK path specifies the SDK’s location (**select Install SDK… if the text field is blank).
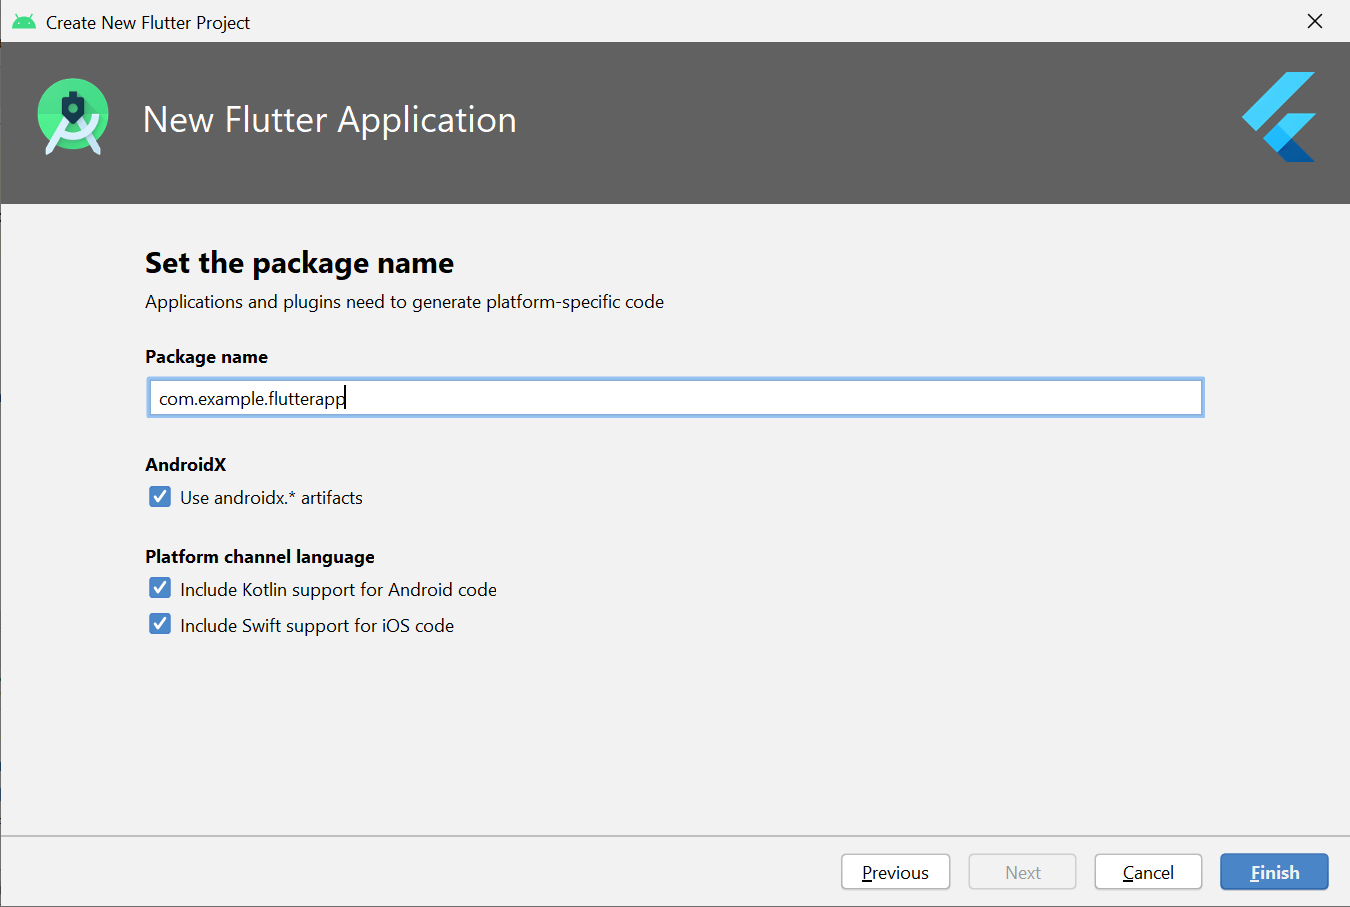
**Step 4: Enter Project Details
Enter a project name (for example, myapp). Then click Next.
**Note:
****- Project name:** flutter_app
****- Flutter SDK Path:**
****- Project Location:**
****- Description:** Flutter based simple application
**Step 5: Click **Finish and wait till Android Studio Creates the Project
**Step 6: Edit the code
After successfully creating a file, we can edit the code of the application to show the output we want. Android Studio creates a fully working flutter application with minimal functionality. Let us check the structure of the application and then, change the code to do our task.
**The structure of the application and its purpose are as follows?

We have to edit the code in **main.dart as mentioned in the above image. We can see that Android Studio has automatically generated most of the files for our flutter app. Replace the dart code in the **lib/main.dartfile with the below code:
**main.dart:
Dart `
// Importing important packages require to connect // Flutter and Dart import 'package:flutter/material.dart';
// Main Function void main() {
// Giving command to runApp() to run the app. runApp(const MyApp()); }
// Widget is used to create UI in flutter framework.
class MyApp extends StatelessWidget { const MyApp({Key? key}) : super(key: key);
// This widget is the root of your application. @override Widget build(BuildContext context) { return MaterialApp(
  // title of the application
  title: 'Hello World Demo Application',

  // theme of the widget
  theme: ThemeData(
    primarySwatch: Colors.lightGreen,
  ),

  // Inner UI of the application
  home: const MyHomePage(title: 'Home page'),
);
} }
// This class is similar to MyApp instead it // returns Scaffold Widget class MyHomePage extends StatelessWidget { const MyHomePage({Key? key, required this.title}) : super(key: key); final String title;
@override Widget build(BuildContext context) { return Scaffold( appBar: AppBar( title: Text(title), backgroundColor: Colors.green, foregroundColor: Colors.white, ),
  // Sets the content to the
  // center of the application page
  body: const Center(

      // Sets the content of the Application
      child: Text(
    'Welcome to Android Studio!',
  )),
);
} }
`
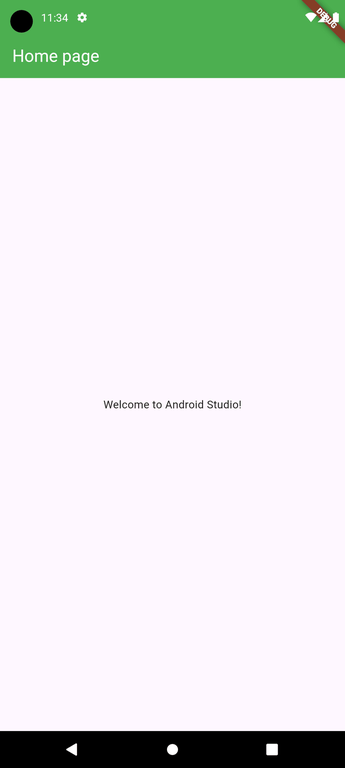
**Output:
Create a New Flutter Project Using Visual Studio Code
**Step 1 : Open the **Visual Studio Code IDE
**Note: if you like to create a flutter project using terminal use the below command and jump right into **step 7.
$ **flutter create flutter_app
_replace the ' flutter_app ' _with your project name
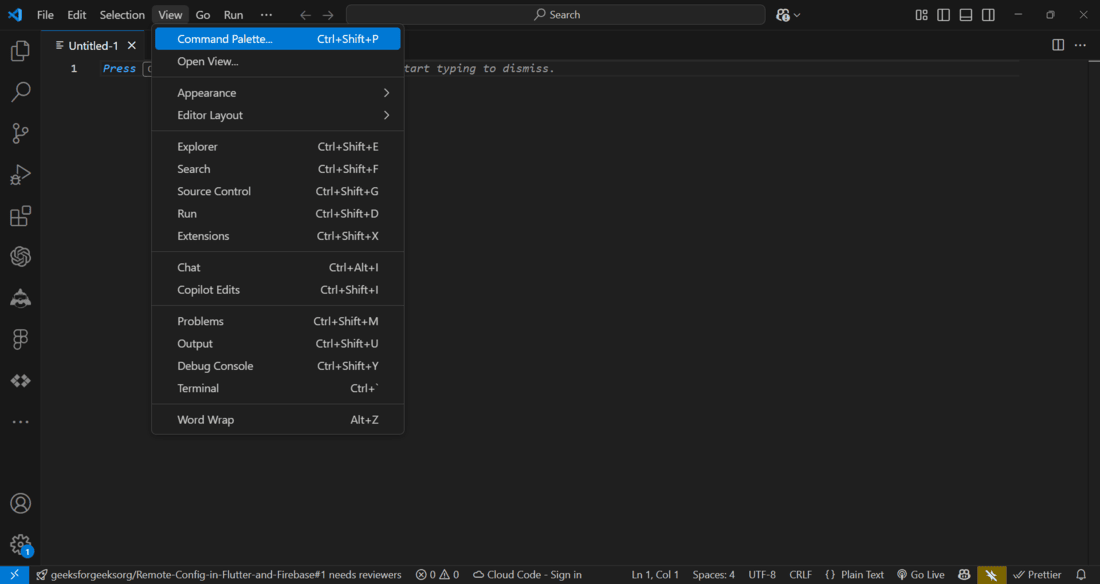
Go to **View->Command Palette Or press **Ctrl+Shift+P. it will automatically open Command Palette.
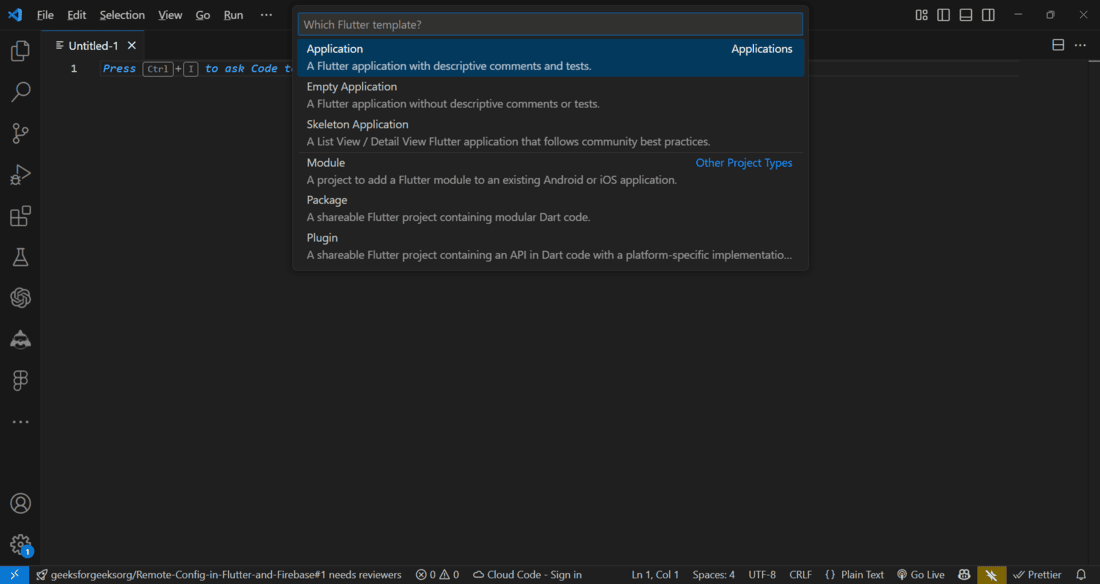
Step 2 : Search for "**Flutter: New Project"
Select Flutter: New Project.

Step 3 : Select the **Flutter Application as the project type.
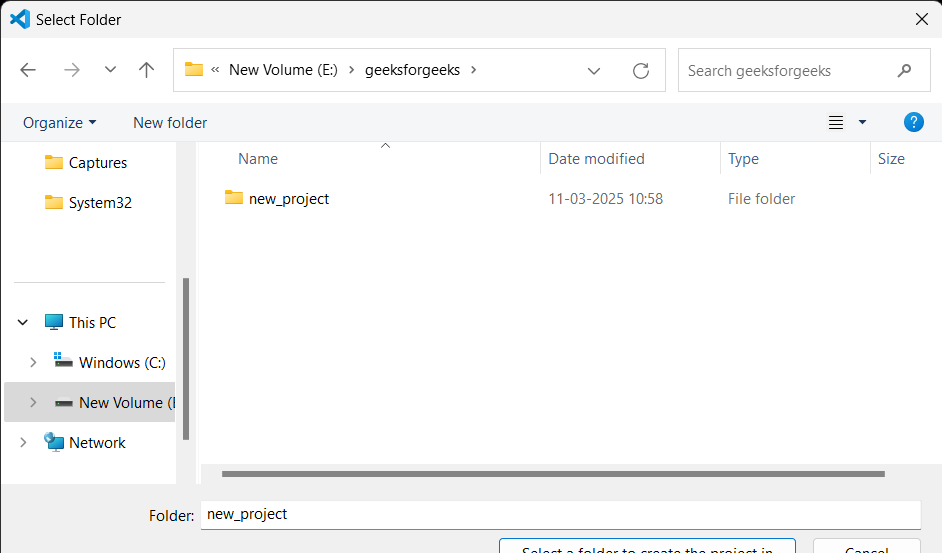
Step 4 : Select folder
After selecting type of application, it will ask you to select folder to generate the code in that folder, select an empty folder if you already have, otherwise create a new one and select.
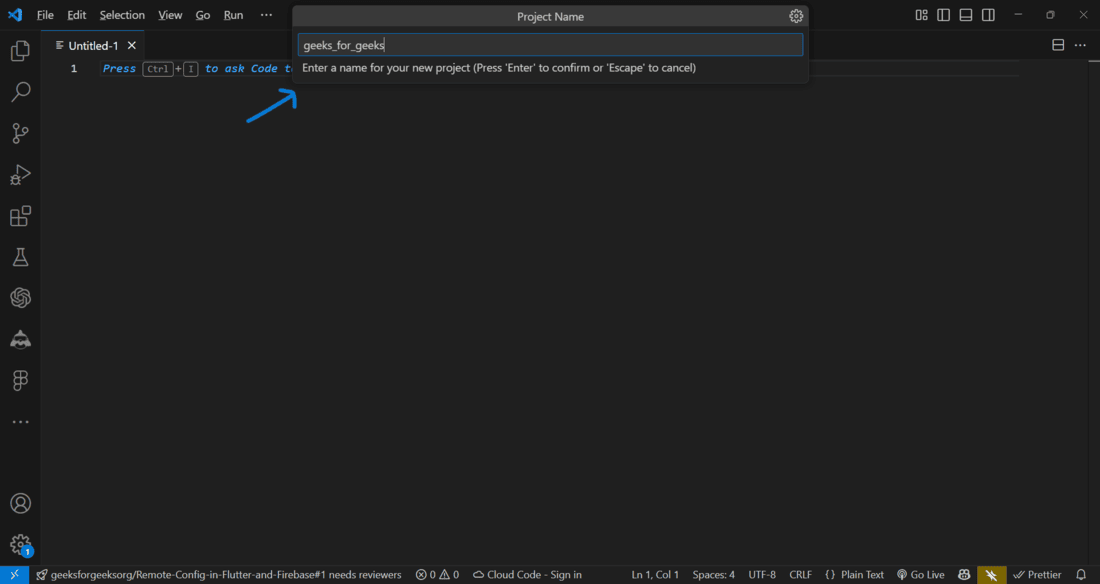
Step 5 : Enter the Name of the project and click on **Enter.
Step 6 : Folder Structure
It will generate all required files and folders. Now open **main.dart which is in geeksforgeeks->new_project->geeks_for_geeks->lib->main.dart
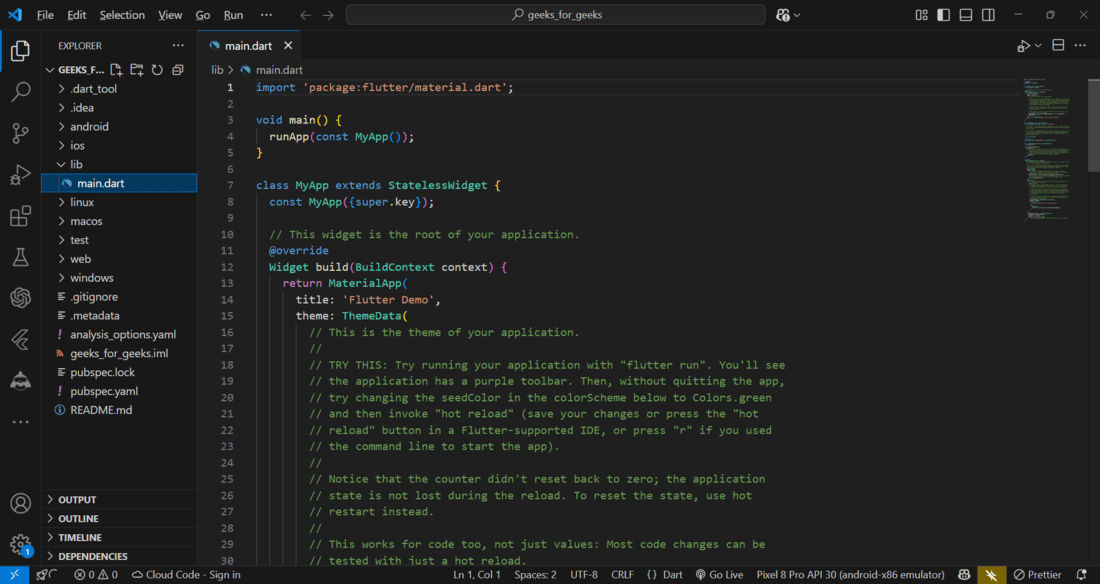
Step 7 : Edit Code
We have to edit the code in **main.dart as mentioned in the above image. We can see that Android Studio has automatically generated most of the files for our flutter app.
Replace the dart code in the _**lib/main.dart_file with the below code:
**main.dart:
Dart `
// Importing important packages require to connect // Flutter and Dart import 'package:flutter/material.dart';
// Main Function void main() { // Giving command to runApp() to run the app.
// The purpose of the runApp() function is to attach // the given widget to the screen. runApp(const MyApp()); }
// MyApp extends StatelessWidget and overrides its // build method. class MyApp extends StatelessWidget { const MyApp({Key? key}) : super(key: key);
// This widget is the root of your application. @override Widget build(BuildContext context) { return MaterialApp(
  // title of the application
  title: 'Hello World Demo Application',

  // theme of the widget
  theme: ThemeData(
    primarySwatch: Colors.lightGreen,
  ),

  // Inner UI of the application
  home: const MyHomePage(title: 'Home page'),
);
} }
// This class is similar to MyApp instead it // returns Scaffold Widget class MyHomePage extends StatelessWidget { const MyHomePage({Key? key, required this.title}) : super(key: key); final String title;
@override Widget build(BuildContext context) { return Scaffold( appBar: AppBar( title: Text(title), backgroundColor: Colors.green, foregroundColor: Colors.white, ),
  // Sets the content to the
  // center of the application page
  body: const Center(

      // Sets the content of the Application
      child: Text(
    'Welcome to Visual Studio Code!',
  )),
);
} }
`
**Output:
