How To Use Kubernetes Taints and Tolerations? (original) (raw)
Last Updated : 28 Apr, 2026
In a Kubernetes cluster, the scheduler's primary goal is to place Pods onto healthy Nodes where they can run.
- **Node Restrictions (Taints): Applied to Nodes to repel Pods; they consist of a key, a value, and an effect (like NoSchedule), essentially marking the Node as "off-limits" by default.
- **Pod Exceptions (Tolerations): Defined in the Pod specification to allow—but not force—the Pod to be scheduled on a Node with a matching Taint.
- **Selective Admission: This "lock and key" system ensures that sensitive or specialized Nodes (e.g., those with GPUs or high-security data) only host Pods that explicitly authorize the connection.
- **Flexible Enforcement: Effects like NoExecute go beyond scheduling, allowing Kubernetes to automatically evict running Pods if a Taint is added to their Node after they have already started.
Understanding Taints and Their Effects
A Taint is a label applied to a Node that instructs the scheduler to repel certain Pods. The Taint itself consists of three parts: a key, a value, and an effect.
key=value:Effect
The Effect is the most important part, as it defines what happens to Pods that do not tolerate the taint. There are three types of effects.
1. NoSchedule
- This is the most common effect. It tells the scheduler: "Do not place any new Pods on this Node unless they have a matching toleration."
- This effect only applies to new Pods during the scheduling phase. It does not affect any Pods that are already running on the Node.
2. PreferNoSchedule
- This is a "soft" or advisory version of NoSchedule. The scheduler will try to avoid placing a Pod without a matching toleration on the tainted Node.
- It's a preference, not a requirement. If the cluster is under pressure and there are no other available Nodes for the Pod, the scheduler may still place the Pod on the tainted Node.
3. NoExecute
- This is the most powerful and immediate effect. It not only prevents new Pods from being scheduled but also evicts any Pods that are already running on the Node if they do not tolerate the taint.
- This is often used for draining a Node for maintenance or in response to node-level problems (like the disk being full). You can also specify a tolerationSeconds field on a Pod's toleration, which gives it a grace period to continue running on the Node before it is evicted.
Use Cases
- **Dedicated Nodes: Tainting a set of nodes with powerful hardware (like GPUs or fast SSDs) ensures that only workloads that specifically tolerate those taints can run there, preventing them from being used by general-purpose applications.
- **Graceful Node Maintenance: Before performing maintenance on a node, an administrator can apply a NoExecute taint. This will safely drain all the Pods from the node (respecting their termination grace periods), and NoSchedule will prevent any new Pods from landing there while the work is being done.
- **Automatic Node Condition Tainting: Kubernetes itself uses this system. When a node becomes unreachable or its disk is full, the system automatically adds a NoExecute taint. This triggers the eviction of Pods from the unhealthy node after a default grace period.
Setup multi-node kind cluster
1. Create a multi-node-cluster.yaml manifest file
three nodes (two workers) cluster config
apiVersion: kind.x-k8s.io/v1alpha4
kind: Cluster
nodes:
- role: control-plane
- role: worker
- role: worker
$ kind create cluster --config=multi-nodes-cluster.yaml

2. Set k as an alias to kubectl so that we've to type less (Optional)
$ alias k="kubectl"
3. Check details of our cluster
$ k get no
(k is an alias to kubectl and no is shorthand for nodes)
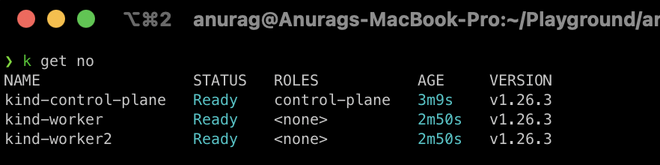
As we can see above our cluster is ready
Taints and Tolerations
Let's dig deep into our control-plane details,
$ k describe no kind-control-plane | grep -i taints

As we can see that the control-plane node has a single taint with the effect of NoSchedule. This taint prevents pods from being scheduled on this node unless those pod(s) can tolerate this taint.
Now let's check taint on other worker nodes,
$ k describe no kind-worker | grep -i taints

The worker node has no taint which means any pod can schedule on it.
Adding custom taints to a node
Let's consider our first worker node as the production node so that only production deployment pods can schedule it. To do so we need to add a taint with key node-type, value production, and with NoSchedule effect.
$ k taint no kind-worker node-type=production:NoSchedule

check the node's taint
$ k describe no kind-worker | grep -i taints

As we can see above our first node has been tainted with the NoSchedule effect which means only pods that can tolerate this taint can schedule on it.
Let's deploy a regular deployment with 5 replicas and see what will happen
$ k create deploy webserver --image=nginx:1.23-alpine --replicas=5

let's check where the pods get scheduled
$ k get po -o wide

We can see all the pods are scheduled on the worker2 node because of taint on the production node. Now let's see how we can deploy production pods on production nodes.
Adding Tolerations to Pods
To deploy production pods to production nodes they need to tolerate the production nodes' taint. Let's create a production deployment webserver-prod.yaml manifest file.
apiVersion: apps/v1
kind: Deployment
metadata:
name: webserver-prod
labels:
env: prod
spec:
replicas: 5
selector:
matchLabels:
env: prod
template:
metadata:
labels:
env: prod
spec:
containers:
- name: nginx
image: nginx:1.23-alpine
imagePullPolicy: IfNotPresent
tolerations:
- key: "node-type"
value: "production"
operator: "Equal"
effect: "NoSchedule"
We add the toleration so that these production pods are scheduled on the production nodes. Let's create this workload,
$ k create -f webserver-prod.yaml

let's again check where the pods get scheduled
$ k get po -o wide | grep webserver-prod

As we can see that these production pods get scheduled to regular nodes as well. To make sure production pods are only scheduled to production nodes we've to taint the regular nodes to reject the production pods by adding key node-type, value non-production, and with NoSchedule effect.
$ k taint no kind-worker2 node-type=non-production:NoSchedule

again deploy our production deployment, before deploying Delete previous deployments
$ k delete deploy --all

$ k create -f webserver-prod.yaml

check where the pods get scheduled
$ k get po -o wide

this time all of our production pods are scheduled only on production workloads that are on a first worker node.
Remove Taints from Nodes
To remove the taint from a node we just need to append - (dash) with the effect and the taint will be removed from that node, but removing the taint from a node will not affect any running workloads it will affect only new workloads after that.
$ k taint no kind-worker node-type=production:NoSchedule-

again check the taint on the node.
$ k describe no kind-worker | grep -i taints

As we can see above the taint is removed from the node.