Download and Install Java Development Kit (JDK) on Windows, Mac, and Linux (original) (raw)
**Java Development Kit (JDK) is one of the most important tools for developers who use it to build, compile, and run Java applications. It does not matter if you are a beginner or an experienced programmer; installing JDK is the first step towards working with Java development. We can download JDK to create and run Java applications on our system. Also, the JDK is used to create Android application source files as well, using the Java or Kotlin programming language. There are multiple benefits of installing a JDK.
**Key Features of JDK:
- **Compiler (javac): Converts Java code into bytecode for JVM execution.
- **JRE + JVM: Includes runtime environment to execute Java programs.
- **Rich Libraries: Pre-built classes for I/O, networking, databases, and more.
- **Debugging Tools: JDK provides JDB (Java Debugger) for troubleshooting code.
- **Multi-Platform Support: JDK supports write-once, run anywhere (Windows, Linux, macOS).
The system will execute the code using a set of Libraries and Compilers. JDK, JRE, and JVM should not be confused with one another.
Refer to this article to learn more: Differences between JDK, JRE, and JVM.
Why Install JDK?
- To develop and run Java applications
- Compile Java source code (javac)
- Includes JRE (Java Runtime Environment) and JVM (Java Virtual Machine)
- Required for Android app development (Java/Kotlin)
This article describes the step-by-step process for installing and configuring the JDK on Windows, Mac, and Linux.
Java JDK Download
**The JDK can be installed on the following Platforms:
- Microsoft Windows
- Linux
- macOS
Download JDK (Java Development Kit)
We need to download the JDK first, find the steps below to get started:
Step 1: Visit the Official Website
Go to the Official JDK website to download the file.
Oracle Official Website
Since JDK is an open-source, so you can get it from OpenJDK in a few clicks.
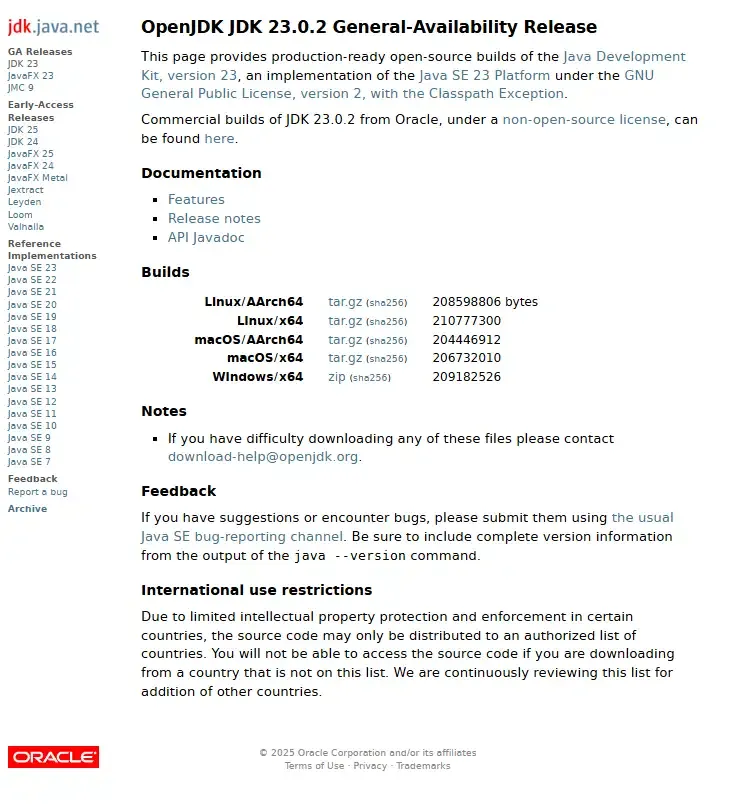
OpenJDK
Step 2: Select the Appropriate Version
As of 2025, the latest stable versions are **JDK 23 (SE) and **JDK 21 (LTS). Select the compatible version as per your operating system (Windows, Mac or Linux)
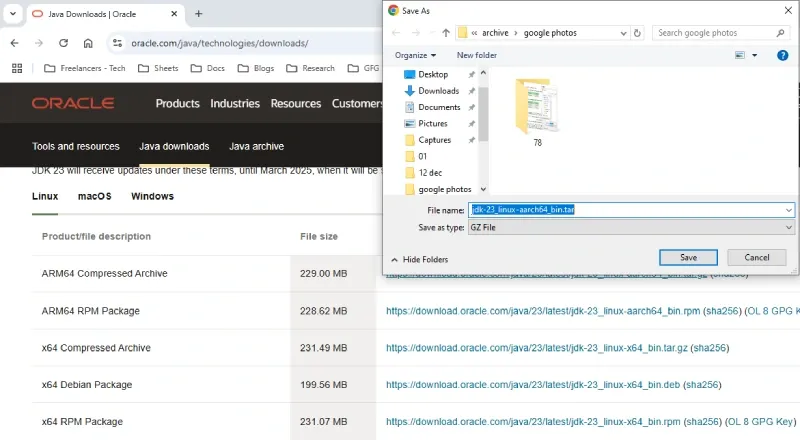
JDK Latest Version - Download
Step 3: License and Agreement
Go through all the License and Agreement before downloading (from Oracle website), it will not ask if you'll download it from OpenJDK website.
Install JDK on Windows
Follow the below steps to install JDK on Windows environment _i.e.**Windows 7, Windows 8, Windows 8.1, Windows 10, and **Windows 11.
**Step 1: Run the Java Development Kit (JDK) Installer
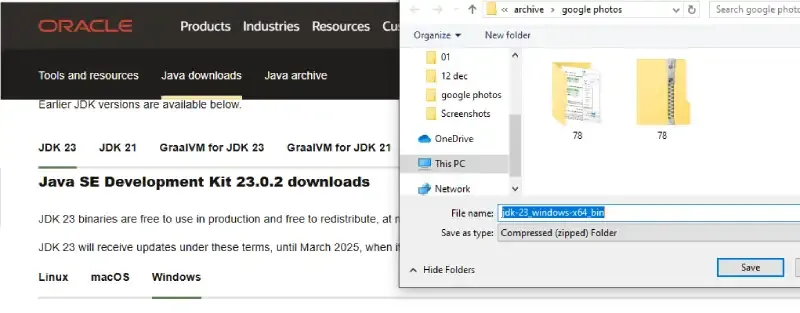
Locate the downloaded .exe file ****(e.g. jdk-23-windows-x64_bin.exe)** and make the double click to begin the Installation process. Follow the installation wizard prompts to complete the installation process.

JDK Installer for Windows
**Step 2: Setup the Environment Variables
Once the installation gets completed, you need to configure environment variables to notify the system about the directory in which the **JDK files are located.
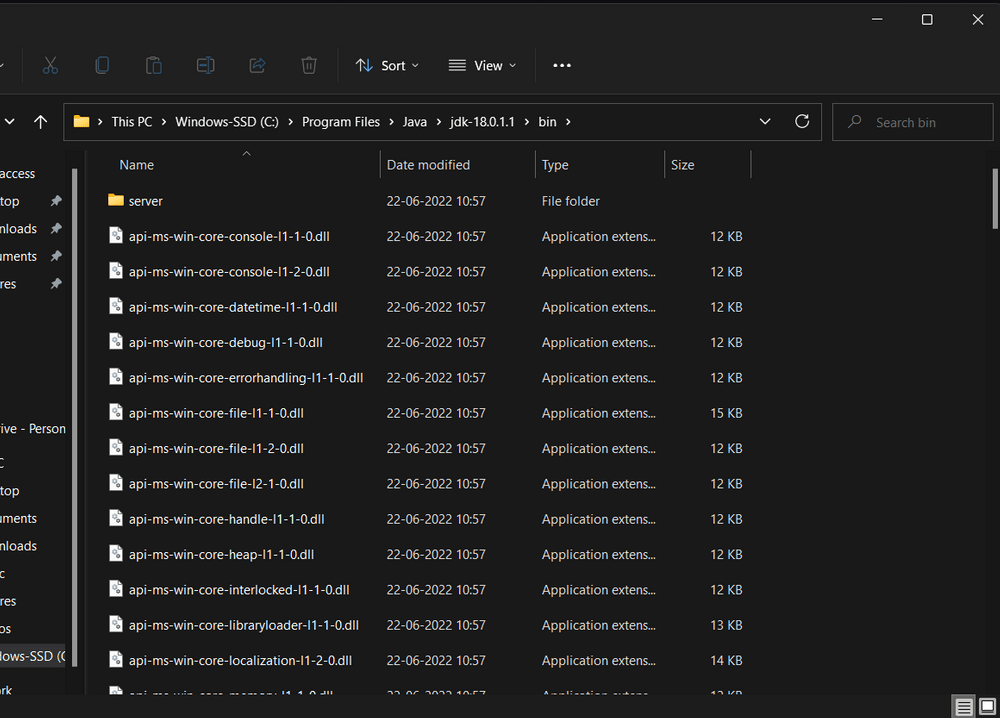
Proceed to **C:\Program Files\Java\jdk-{YOUR_JDK_VERSION}**\bin (replace {-} with your JDK version)
Program Files
**Step 2.1: To set the Environment Variables, you need to search Environment Variables in the Task Bar and click on **“Edit the system environment variables”.

System Properties
**Step 2.2: Under the **Advanced section, Click on ****"Environment Variables"**.
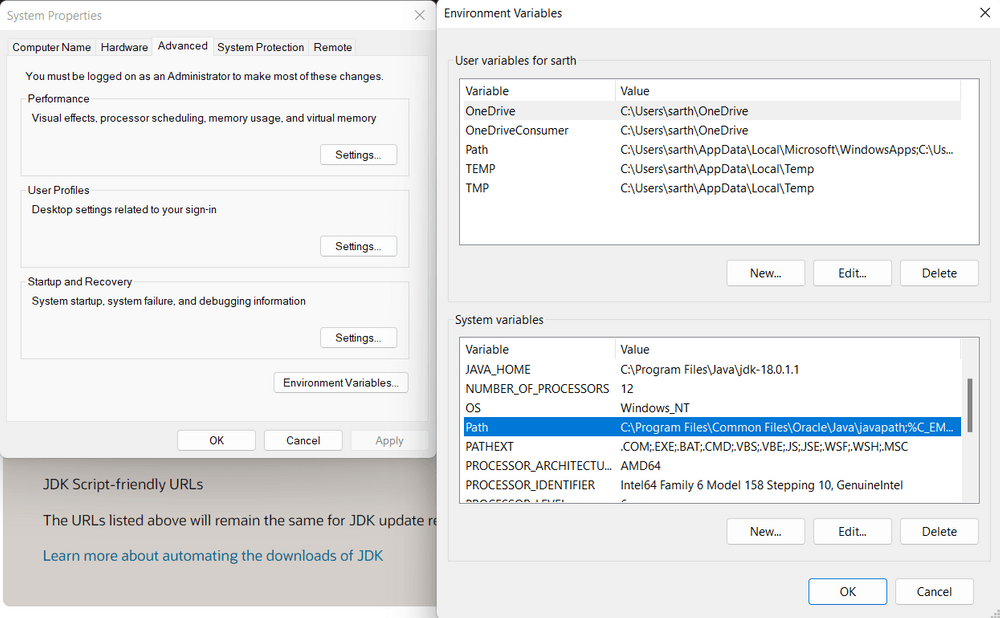
Environment Variables
**Step 2.3: Under **System variables, select the ****"Path"** variable and click on ****"Edit"**. Click on ****"New"** then paste the Path Address i.e. **C:\Program Files\Java\jdk-{YOUR_JDK_VERSION}**\bin. Click on ****"OK"**.
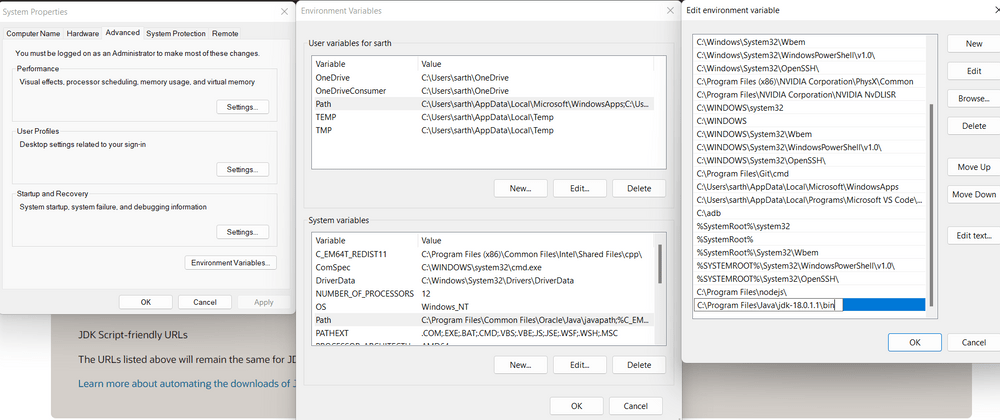
Path
**Step 2.4: Now, in the **Environment Variables dialogue, under **System variables, click on ****"New"** and then under **Variable name: JAVA_HOME and **Variable value: paste address i.e.
**C:\Program Files\Java\jdk-{YOUR_JDK_VERSION}. Click on **OK => OK => OK.
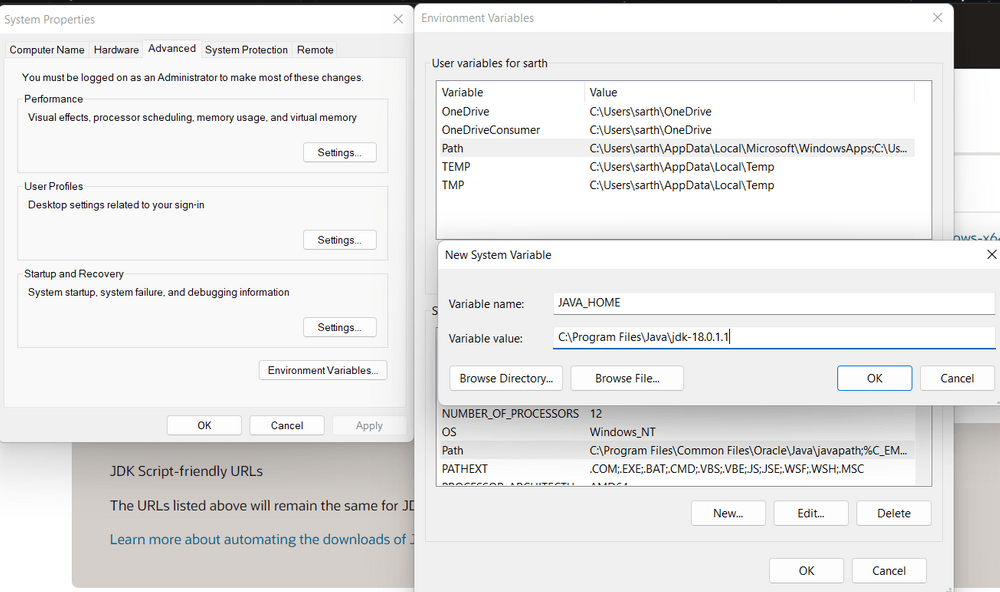
System Properties
**Step 3: Check the Java Version
Open Command Prompt and enter the following commands:
java -version
javac -version
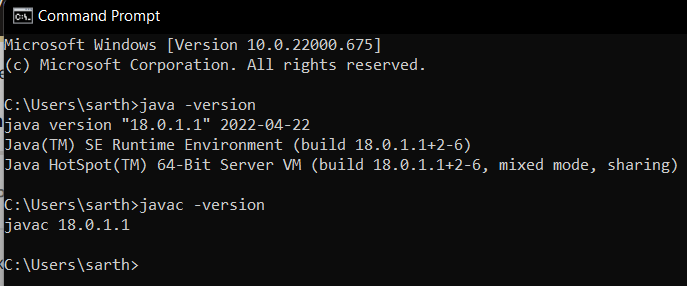
Command Prompt
Install JDK on Linux
Follow the steps below to install the Java software Development Kit on a Linux environment. These instructions are applicable to various Linux distributions such as **Ubuntu, **Fedora, and **CentOS.
**Note: We have used Kali Linux distributions here.
Step 1: Install Oracle Java Development Kit (JDK)
To install the downloaded JDK File using terminal, Open terminal and change your directory to downloads by using the command:
$ cd downloads
To list files and packages present in the directory, Type
$ ls
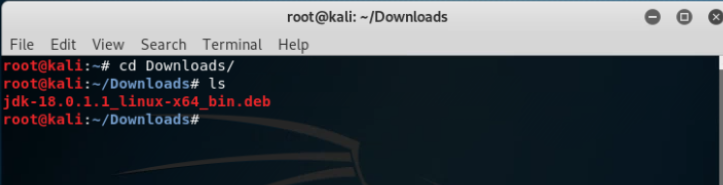
Root Kali
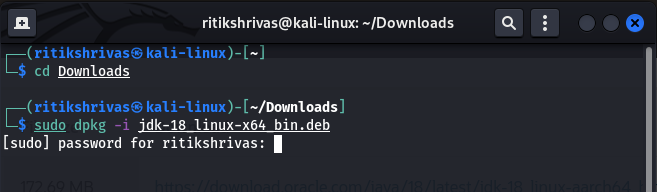
**Step 1.1: Now we use **Debian Package Manager to configure our downloaded file for installation by typing
$ sudo dpkg -i jdk-{YOUR_JDK_VERSION} (replace {-} with your version)
Enter your password as we have run an elevated prompt, i.e. the **sudo or **superuser do command, which is a quick way to grant specific users permission to perform specific system commands at the system's root (most powerful) level.
Kali Linux
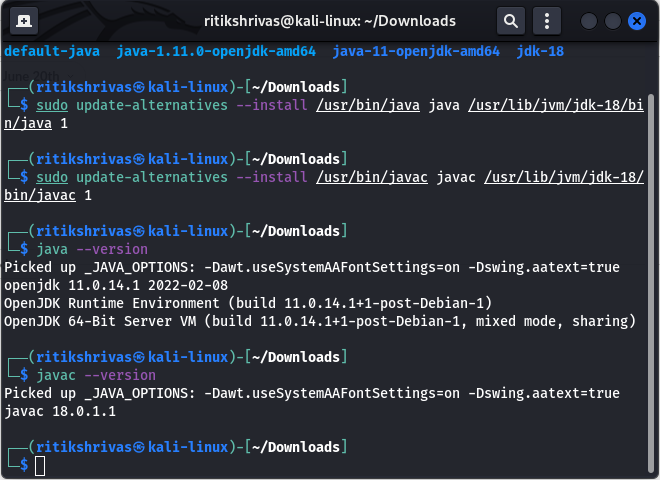
**Step 1.2: Now, Type the following commands to proceed with the installation
$ sudo update-alternatives --install /usr/bin/java java /usr/lib/jvm/jdk-{YOUR_JDK_VERSION}/bin/java 1
$ sudo update-alternatives --install /usr/bin/javac javac /usr/lib/jvm/jdk-{YOUR_JDK_VERSION}/bin/javac 1
**Step 2: Check the Java Version
Open the **terminal and enter the following commands
$ java --version
$ javac --version
sudo
**Step 3: Configure JAVA_HOME Environment Variable
After the installation is complete, we have to configure environment variables to notify the system about the directory in which jdk files are located. To find the Location of the JDK Files, run this command and copy the File Location.
$ sudo update-alternatives --config java
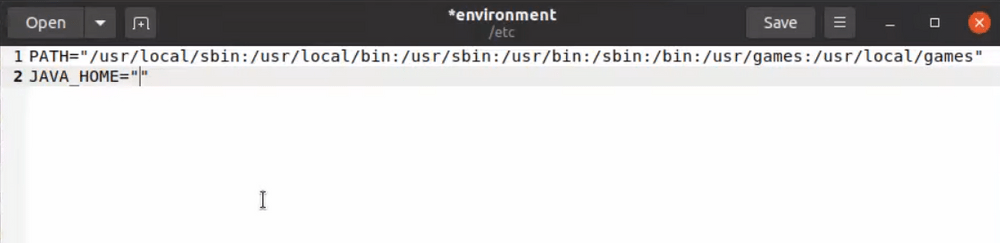
In order to set the environment variable, you need to edit the environment file using the following command:
$ sudo gedit /etc/environment
**Step 3.1: Proceed to add **JAVA_HOME=” /usr/lib/jvm/jdk-{YOUR_JDK_VERSION}**”
Proceed to save and close the file.
environment
**Step 3.2: Now we have to refresh the environment file by using this command:
$ SOURCE /etc/environment
And echo the JAVA_HOME Path
$ echo $JAVA_HOME
Install JDK on macOS
Follow the steps below to install the Java Development Kit (JDK) on macOS. These instructions are compatible with various versions of macOS, including **Mojave, **Catalina, **Big Sur, **Monterey, Ventura, Sonoma the latest macOS **Sequoia.
**Step 1: Install Oracle Java Development Kit (JDK)
Proceed to Install the JDK kit by following the bootstrapped steps:
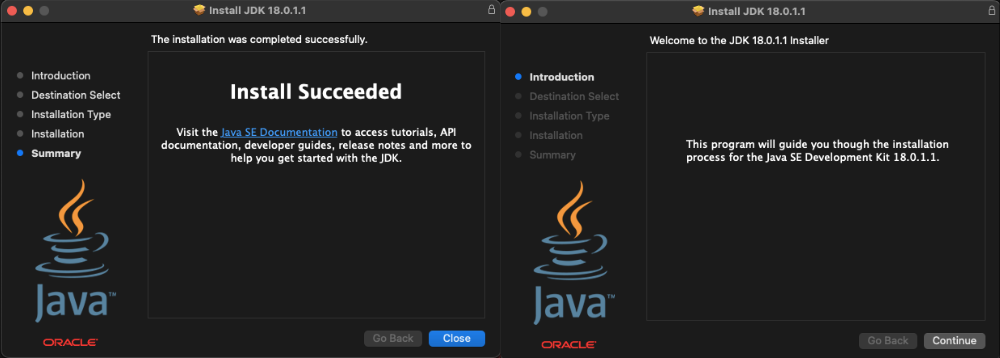
Installation
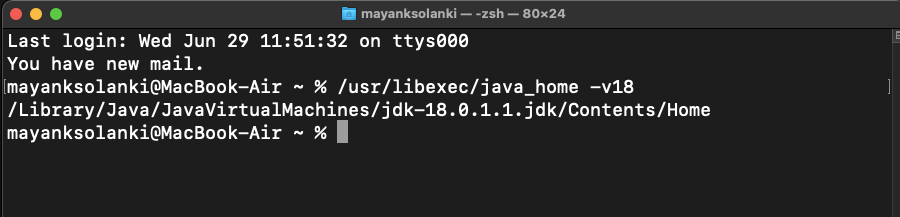
**Step 2: Configure Environment Variables
Open the terminal and pass the following commands. To find the Location of the JAVA_HOME, run this command:
$ /usr/libexec/java_home -v{YOUR_VERSION}
Configure
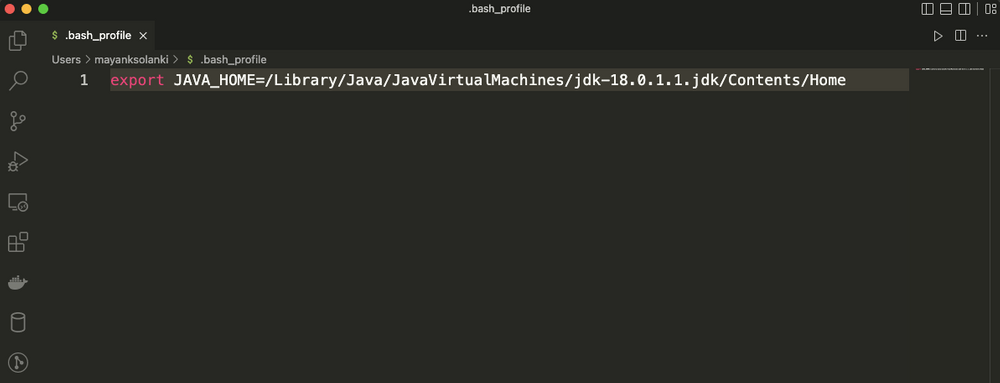
**Step 2.1: We have to set this output as our JAVA_HOME Environment Variable. You can use any command or code editor to edit the file, here we are using VS Code
$ code ~/. bash_profile

Terminal
**Step 2.2: At the very bottom, we have to export the path we obtained earlier i.e.
$ export JAVA_HOME=/Library/Java/JavaVirtualMachines/jdk-{YOUR_VERSION}.jdk/Contents/Home
bash
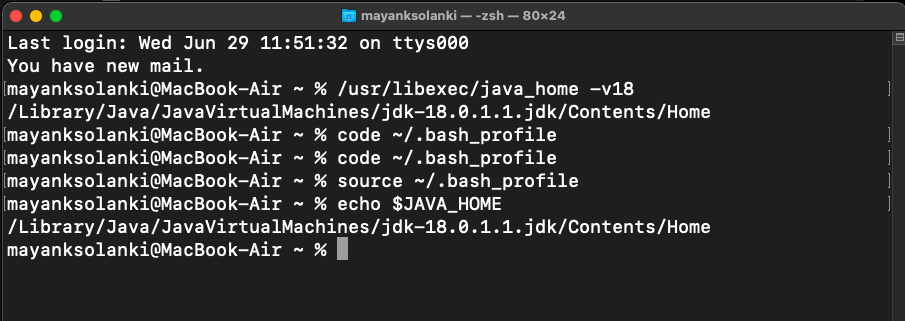
**Step 2.3: Now we have to refresh the environment file by using this command:
$ source ~/.bash_profile
And echo the JAVA_HOME variable
$ echo $JAVA_HOME
Java HOME
**Step 3: Verify the Java Version
In the **terminal, enter the following commands
$ java -version
$ javac -version
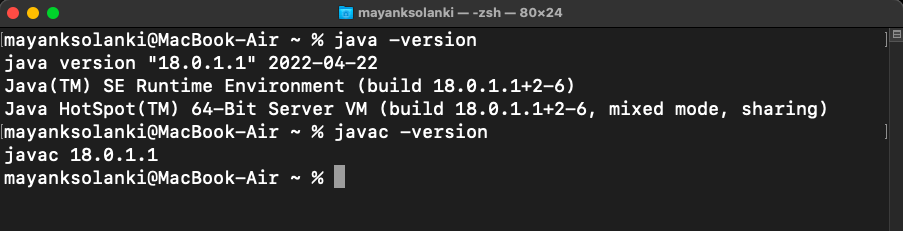
javac
Advanatages of JDK
The Advanatages of JDK are listed below:
- **Complete Development Kit: It Includes compiler (javac), JRE, JVM, and debugging tools.
- **Platform Independence: It write once, run anywhere (WORA) using JVM.
- **Rich Libraries & APIs: JDK has built-in support for networking, I/O, databases, and more.
- **Performance Optimization: Just-In-Time (JIT) compiler boosts execution speed.
- **Backward Compatibility: Older Java apps still run on newer JDK versions.
Disadvantages of JDK
The disadvantages of JDK are listed below:
- **Large Memory Usage: JDK consumes more RAM compared to some lightweight languages.
- **Complex Setup: Requires manual environment variable configuration.
- **Slower Startup Time: JVM initialization can delay execution.
- **License Restrictions: Oracle JDK requires a commercial license for business use.
Conclusion
Installing the latest JDK version is a simple process, whether you're on Windows, macOS or Linux. By following this guide, you can setup JDK and start developing Java applications in just a few steps. You can easily **download the latest jdk 23 in your system and start with Java development today.