Getting Started with CrossPlatform Mobile Application using Flutter (original) (raw)
Last Updated : 13 Mar, 2025
**Flutter is an **open-source mobile application development SDK created by **Google to develop **cross-platform mobile applications. Flutter makes it extremely easy and fast for even **novice programmers (computer programmers who are not experienced in any programming languages) to build high-quality and responsive native mobile apps. No prior app development experience is required! .This article will show you how to build a simple **Hello Flutter application and then run it on your own Android device!
Why use Flutter over native Java development?
Flutter has some unique features compared to native Java and other SDKs, such as:
- **Fast Development: Flutter makes use of customizable Widgets that can be nested together to create the app interface, similar to how HTML is structured. One can refer to this for details: Flutter for Web Devs.
- **Hot Reload: Instantly see changes made in code without recompiling.
- **It's Native in the end: Under the hood, the codebase is compiled into Java, ensuring the same performance as that offered by native apps.
- **Light on system resources: Flutter can be comfortably run on a lower resources system.
Setting Up Flutter
**Step 1: Set up the Flutter SDK
- Download the latest SDK here: Flutter SDK Archive
- Extract the zip file and place the contained '**flutter' folder in the desired directory.
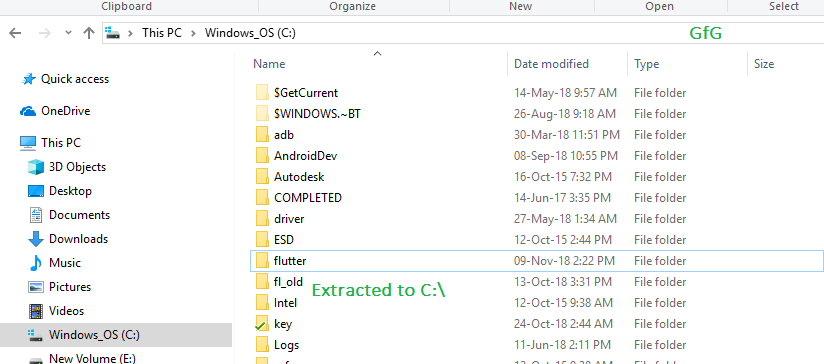
Here it is extracted the folder to the C:\ drive
Note: It is recommended to not install Flutter in a directory that, may require admin privileges, like 'C:\Program Files\'
**Step 2: Add Flutter to PATH: Though not required, it is recommended to set the **PATH variable to make Flutter easily accessible from anywhere on the system.
- Go to **Edit environment variables for your account in Control Panel. You can search for this setting in your search bar.
- Under **User variables, check if there is an entry called PATH:
- If it exists, add a new path to 'flutter\bin'.
- If the entry does not exist, create a new entry named **Path, and then add the full location to 'flutter\bin'.
- Reboot Windows after setting the PATH variable for it to work.
**Step 3: Set up Android Studio: Android Studio automatically downloads the development tools required for Flutter to work with Android.
- Download Android Studio here: Android Studio
- Start Android Studio and follow the SDK Manager wizard to download all the required build tools.
**Step 4: Set up Visual Studio Code: Visual Studio Code (or VS Code) is a light code editor that can be used in Flutter development. In this article, VS is used instead of Android Studio as it is lighter and has the minimal required features.
- Download and install VS Code: VS Code Download.
- To help in development, two VS Code extensions are recommended. Install the Flutter and Dart plugins from VS Code's Extension Tab. You can refer to it.**Setting Up VS Code Extensions for Flutter
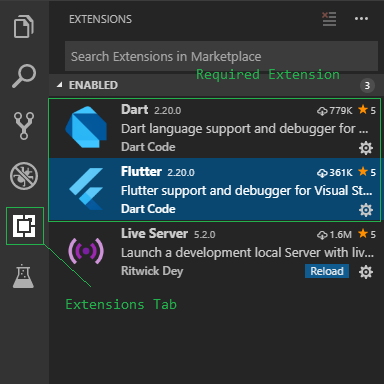
The VS Code Extensions to be installed
- Install Git Bash: Optional, but a recommended command prompt. Git Bash provides many common UnixFlutter commands that are useful for some quick tasks. Download Git Bash for Windows here: Git Downloads
- Run Flutter Doctor: Flutter doctor is an inbuilt tool by Flutterright-clicking that can be used to check the status of the Flutter installation. After setting up the **PATH variable, you can open up the Command Prompt and execute:
flutter doctor
- This will check everything required for Flutter to run and give a detailed report of any error it encounters.
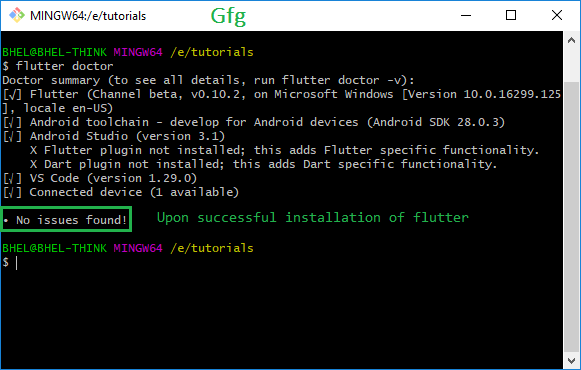
Upon successful setup, flutter doctor would show no errors
Creating an empty template project
- Navigate to the place where you want your project to be created. Open a command prompt (you can also use the context 'Git Bash here' by right-clicking,, to open Git Bash in this location) and type in the command for creating a new project:
flutter create project_name
For example, **the for a project named ****'helloflutter'** executing
flutter create helloflutter
- It will create a new Flutter project with the **the name **helloflutter.
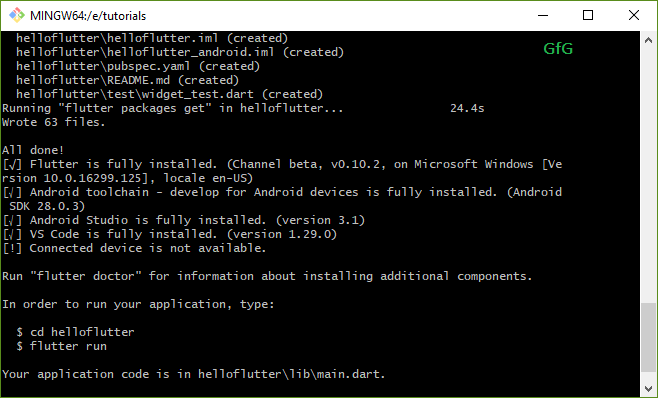
The new project named helloflutter is created
- Open this folder in VS Code. You can right-click and use the context menu to open directly into VS Code, or start VS Code first and then open this folder as a project.
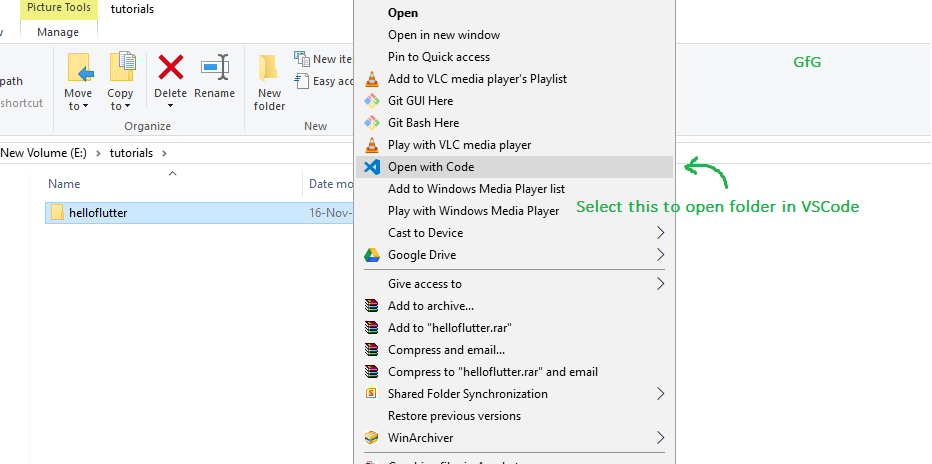
Context menu to open folder in VS Code
- The large panel on the left that displays all the files and folders is known as the **Explorer Panel. Navigate to the ****lib'**lib folder and select the ****'main.dart'** file. This file is the entry point from where the app starts its execution.
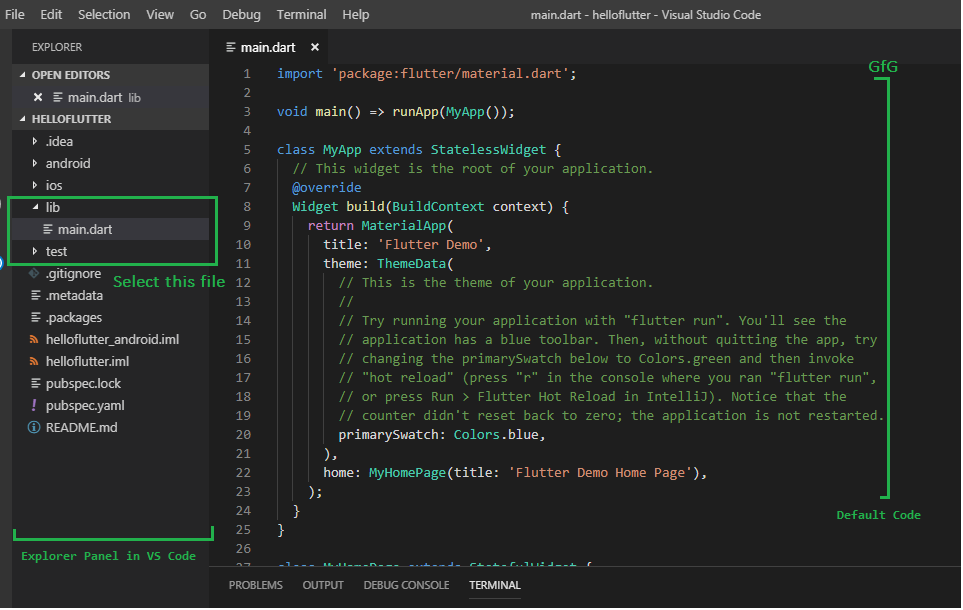
Locating the main.dart file in the lib folder
- The code that opens up is that of the template application. Try running this simple app right away!
Saying Hello Flutter!
- Delete the MyHomePage Widget.
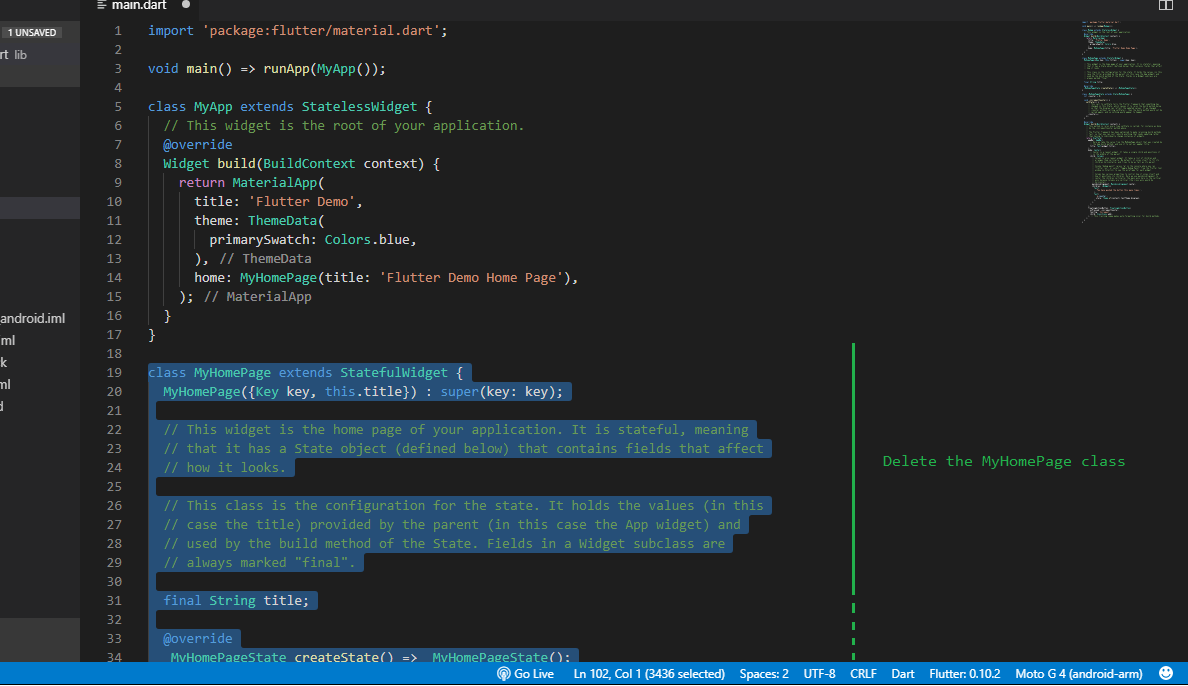
Delete the MyHomePage Widget
- Create a new **Stateless Widget and name it **HelloFlutter. Stateless Widgets are used to define Widgets that don't have to deal with changes to its internal state. They are mostly used to build components that, once drawn, are not required to be updated. Dart `
class HelloFlutter extends StatelessWidget { const HelloFlutter({Key? key}) : super(key: key);
@override Widget build(BuildContext context) { return Container(
);} }
`
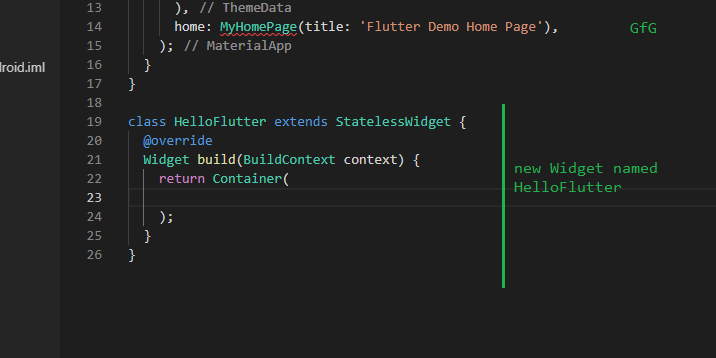
Added the new Stateless Widget HelloFlutter
- Replace the **Container widget with a **Scaffold widget: A Scaffold implements basic material design visual layout structure. This Widget provides APIs for showing drawers, appbars, and the body of the app. The **body property of the Scaffold will be used here to display the contents of the app. Dart `
class HelloFlutter extends StatelessWidget { const HelloFlutter({Key? key}) : super(key: key);
@override Widget build(BuildContext context) { return const Scaffold(
);} }
`
- Declare a **Container Widget in the body of the Scaffold.
A Container Widget is a useful widget that combines common painting, positioning, and sizing widgets. You can wrap any widget with a Container and control the above-mentioned properties. Dart `
class HelloFlutter extends StatelessWidget { const HelloFlutter({Key? key}) : super(key: key);
@override Widget build(BuildContext context) { return Scaffold( body: Container(
  ),
);
} }
`
- The Container widget has an **alignment property that will help to position the Widget to the center of the screen. Set the alignment with the Alignment class:
alignment: Alignment.center
- In the **child property of the Container Widget, declare a **Text Widget: The Text Widget deals with displaying and handling text. After creating the Text Widget, put in ****'Hello Flutter'** between the parentheses in quotes. Whatever is put in between the single quotes is displayed by the Text Widget. Dart `
class HelloFlutter extends StatelessWidget { const HelloFlutter({Key? key}) : super(key: key);
@override Widget build(BuildContext context) { return Scaffold( body: Container( alignment: Alignment.center, child: const Text('Hello Flutter!'), ), ); } }
`
- Finally, in the **home property of the main My App class above, change it from MyHomePage(...) to HelloFlutter(). This allows the main MyApp class to refer to the Hello Flutter just created.
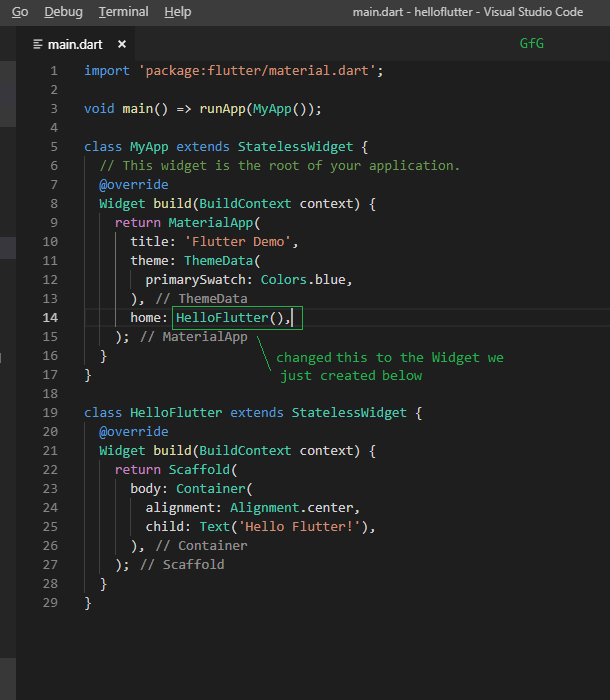
Changing the home property to call the Widget we made
- Now run the app using the '**flutter run' command.
Running the App
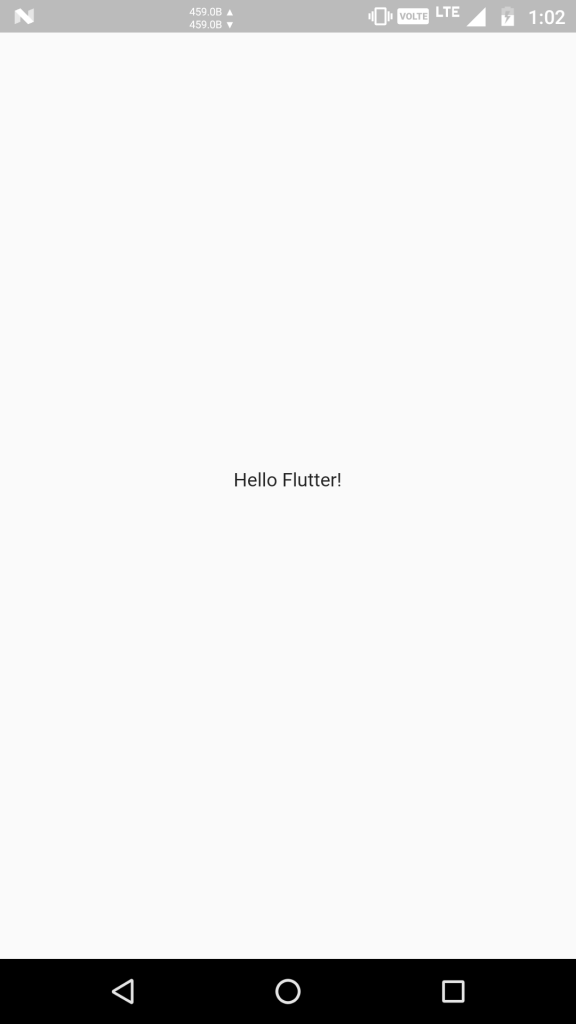
- A text 'Hello Flutter!' will appear written in the middle of the screen.
Running the HelloFlutter App
- Connect a physical device to the PC and enable Developer Mode. If the device is successfully recognized by the PC, the device name will appear in the lower-right corner of VS Code.
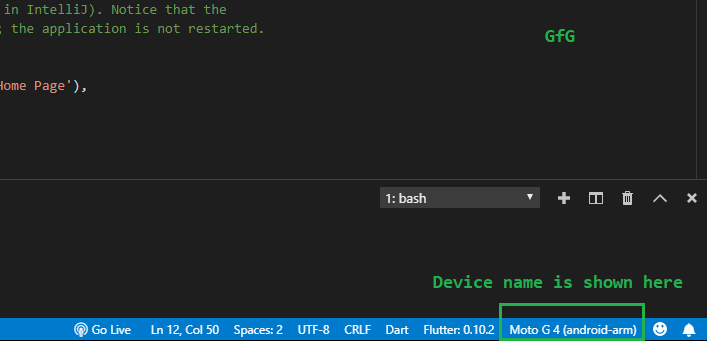
The device name will be shown here
- If you would like to set up an emulator instead, see: Set up the Android emulator. The emulated device would also show up here similarly.
- Open the integrated **terminal by pressing the key combination **[CTRL + `] (Control key + backtick).
- Run the command:
flutter run
- Wait for a few minutes. As this is the first run, some downloads and installation related to gradle take place in the background related to gradle. Subsequent compilations would be a lot faster.
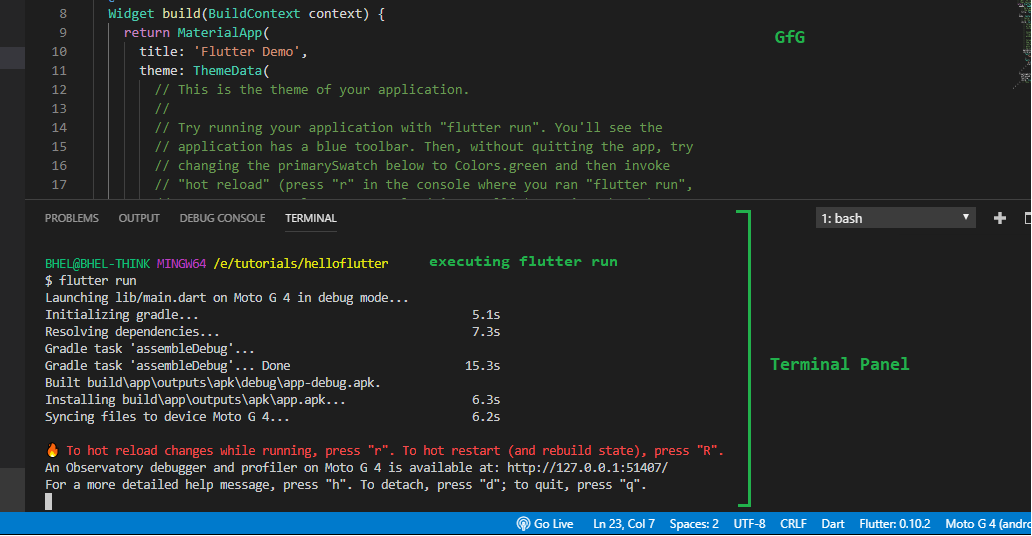
Executing 'flutter run' and compilation of the default app
- After compilation, the app will get installed and run on the connected device or emulator automatically.
Running the App
- Stop the app by pressing 'd' in the terminal. This is what the compilation and running of any app will be like.