Git Push (original) (raw)
Last Updated : 9 May, 2026
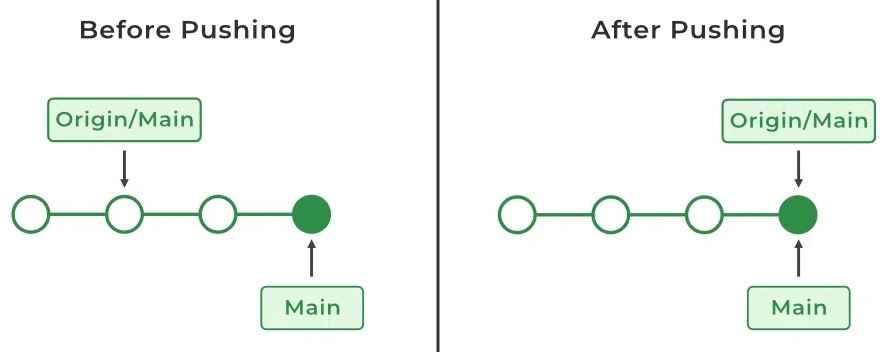
git push uploads commits from the local repository to a remote repository so that changes become available to other collaborators.
- Sends local commits to a remote repository such as GitHub or GitLab.
- Allows other developers to access and pull the latest updates.
- Requires changes to be committed locally before pushing.
- Used to publish local branch updates to the central repository.
**Syntax:
git push
- ****:** Alias of the remote repository (e.g., origin)
- ****:** The branch to push (e.g., main, develop)
**Example:
git push origin main
This command pushes the commits from the local main branch to the main branch of the remote repository origin.
Setting Up a Remote Repository
If no remote is linked, add one using:
git remote add
**Example:
git remote add origin https://github.com/username/repo.git
Now you can push your changes:
git push -u origin main
-u sets origin main as the default upstream branch for future pushes.
Useful Variations of Git Push
**1. Push all branches
git push --all
**2. Force push (use with caution)
git push --force
Overwrites remote history with your local history. Use only in special cases (e.g., rewriting commits).
**3. Force push with safety
git push --force-with-lease
Safer than --force because it prevents overwriting changes you don’t know about.
**4. Set Upstream Branch
git push -u origin master
Git Push and Synchronization
When multiple developers are working:
**1. Commit changes locally
git commit -m "message"
**2. Push changes to remote
git push origin branch-name
**3. Pull latest changes before pushing again
git pull
**4. Resolve conflicts if needed
Merge conflicts may occur if multiple people edited the same files.
**5. Re-push after resolving conflicts
git push
Pushing To Bare Repositories
A bare repository contains only Git metadata and objects, without a working directory. It’s commonly used as a central repository. Following are the steps to push into the bare repository:
**Step 1: Create a bare repository.
git init --bare
**Step 2: Clone the repository.
Clone the bare repository to the local machine. By using the following command.
git clone
**Step 3: Make changes and Commit the changes.
git commit -m "Commit message"
**Step 4: Push the changes.
After committing the changes to your local machine. Now it is time to push them to the bare repository by using the following command.
git push
By pushing the local repository to the central repository you are making it available for other developers who need to work on it.
Amended Force Push
If you want to change your last commit and update it on the remote:
**Step 1: Amend commit.
git commit --amend -m "New commit message"
**Step 2: Push with lease.
git push --force-with-lease
using "--force-with-lease" will force push only if the remote branch's current commit matches the expected commit. It will prevent accidental overwriting of others' changes.
Git Push Usage
After developing a feature and committing it locally, you can upload the changes to a remote repository so others can access them.
git push
Handling Missing Remote Error
If you see an error such as “origin does not appear to be a git repository”, it means no remote repository is configured.
Add a remote using:
git remote add origin
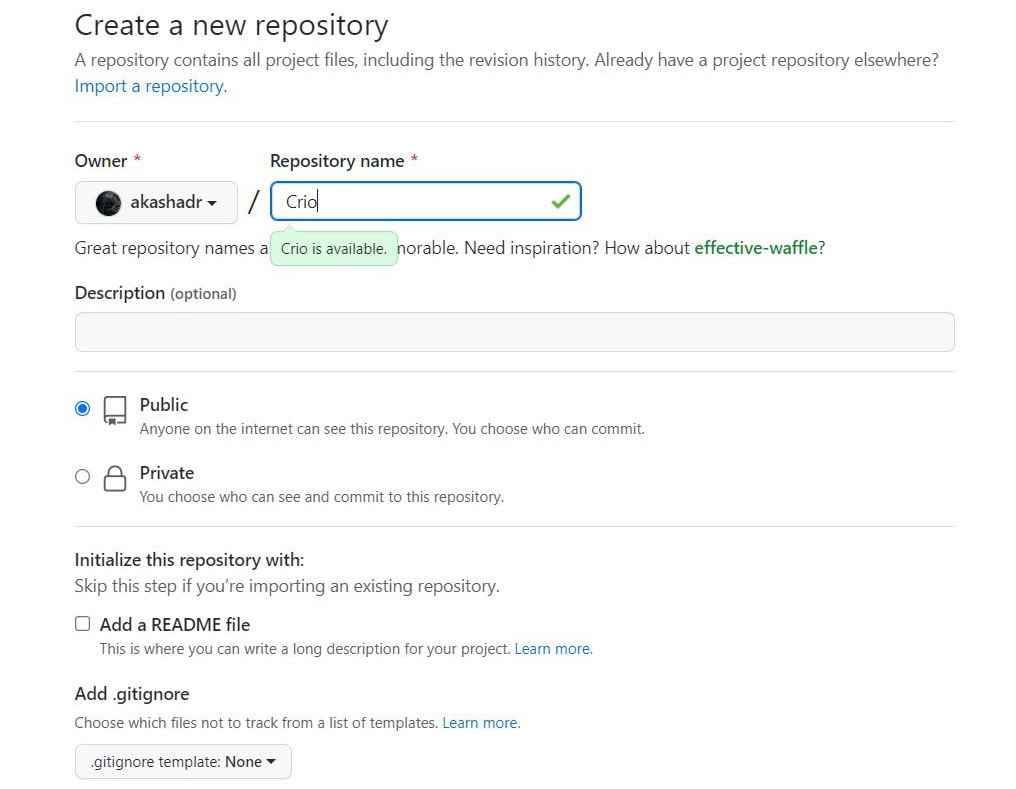
Adding a Remote Repository
To link your local repository to a GitHub repository, use the git remote add command in the project directory.
git remote add
This command takes two arguments:
**1. Remote name : A name used to reference the remote repository (commonly origin).
**2. Remote URL : The URL of the remote repository (e.g., the GitHub repository link).

Now you can run the git remote add command and git push command to push your code work to your repository.

Here, crio is used as the remote name instead of origin because a remote alias must be unique; once a name like origin is assigned to a repository, it cannot be reused for another remote.

Now, the code is successfully pushed to the repository.