Hibernate Web Application (original) (raw)
Last Updated : 06 Jan, 2023
A web application with hibernate is easier. A JSP page is the best way to get user inputs. Those inputs are passed to the servlet and finally, it is inserted into the database by using hibernate. Here JSP page is used for the presentation logic. Servlet class is meant for the controller layer. DAO class is meant for database access codes.
Tools and Technologies used in this project:
- JDK 1.6+ onwards
- Hibernate 3.6.3.Final or next versions
- Eclipse
- MySQL 5.5. or next versions
- Tomcat
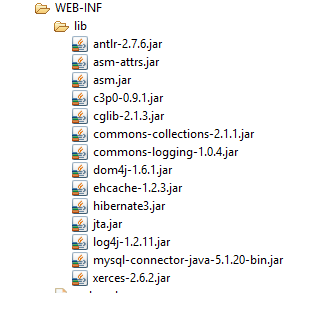
As Hibernate - Web Application is going to get prepared, the project is going to get prepared as a dynamic web project. Following jars need to be placed in the WEB-INF/lib folder
Front-end JSP page that gets input from user
register.jsp
HTML `
<%@page contentType="text/html"%> <%@page pageEncoding="UTF-8"%>
Registration FormGeekUser Registration Form
| User Name : | |
| Password : |
`
Output of this page:

Creating Java class namely a POJO class, a controller class, DAO class
Controller class > GeekUserControllerServlet.java
Java `
import com.gfg.hibernate.dao.GeekUserDAO;
public class GeekUserControllerServlet extends HttpServlet {
private static final long serialVersionUID = 1L;

protected void doPost(HttpServletRequest request,
        HttpServletResponse response) throws ServletException, IOException {

    // From register.jsp, the controls
    // are passed to this controller servlet
    String userName = request.getParameter("userName");
    String password = request.getParameter("password1");
    String email = request.getParameter("email");
    String phone = request.getParameter("phone");
    String city = request.getParameter("city");
    HttpSession session = request.getSession(true);
    try {
        GeekUserDAO userDAO = new GeekUserDAO();
        // Via DAO class addGeekUser method,
        // the data is inserted into the table
        userDAO.addGeekUser(userName, password, email, phone, city);
        // After that it is redirected to the success page
        response.sendRedirect("Success");
    } catch (Exception e) {
        e.printStackTrace();
    }
}
}
`
Let us see DAO class > GeekUserDAO.java
Java `
import org.hibernate.HibernateException;
import org.hibernate.Session;
import org.hibernate.SessionFactory;
import org.hibernate.Transaction;
import org.hibernate.cfg.Configuration;
import com.gfg.hibernate.bean.GeekUser;
public class GeekUserDAO {
// Method to insert GeekUser in the database
public Integer addGeekUser(String userName,
String password,
String email,
String phone,
String city) {
SessionFactory sessionFactory;
try {
sessionFactory = new Configuration().configure().buildSessionFactory();
} catch (Throwable ex) {
System.err.println("Failed to create sessionFactory object." + ex);
throw new ExceptionInInitializerError(ex);
}
Session session = sessionFactory.openSession();
Transaction tx = null;
Integer employeeID = null;
try {
tx = session.beginTransaction();
GeekUser geekUser = new GeekUser(userName, password, email,phone,city);
employeeID = (Integer) session.save(geekUser);
tx.commit();
} catch (HibernateException e) {
if (tx != null)
tx.rollback();
e.printStackTrace();
} finally {
session.close();
}
return employeeID;
}
}
`
Via DAO method, the details are getting inserted into the database. We see that via GeekUser bean class, the data is sent. Let us see the POJO class
POJO class > GeekUser.java
Java `
public class GeekUser {
// each and every attribute should have
// the respective column in the database
private int id;
private String geekUserName;
private String password;
private String geekEmail;
private String phone;
private String city;
public GeekUser() {
}
// parameterized constructors are
// necessary to carry the details
public GeekUser(String userName,
 String password,
 String email,
 String phone,
 String city) {
    this.geekUserName = userName;
    this.password = password;
    this.geekEmail = email;
    this.phone = phone;
    this.city = city;
}

public int getId() {
    return id;
}

public void setId(int id) {
    this.id = id;
}

public String getGeekUserName() {
    return geekUserName;
}

public void setGeekUserName(String userName) {
    this.geekUserName = userName;
}

public String getPassword() {
    return password;
}

public void setPassword(String password1) {
    this.password = password1;
}

public String getGeekEmail() {
    return geekEmail;
}

public void setGeekEmail(String email) {
    this.geekEmail = email;
}

public String getPhone() {
    return phone;
}

public void setPhone(String phone) {
    this.phone = phone;
}

public String getCity() {
    return city;
}

public void setCity(String city) {
    this.city = city;
}
}
`
Once the details are added successfully, it is redirected to SuccessPage.java
Java `
import java.io.IOException; import java.io.PrintWriter;
import javax.servlet.ServletException; import javax.servlet.http.HttpServlet; import javax.servlet.http.HttpServletRequest; import javax.servlet.http.HttpServletResponse;
public class SuccessPage extends HttpServlet {
protected void doGet(HttpServletRequest request,
        HttpServletResponse response) throws ServletException, IOException {
    PrintWriter writer = response.getWriter();

    writer.println("<html>" + "<body bgcolor='#006400'>" + "<center><h3><font color='white'>"
            + "GeekUser details are added successfully via Hibernate. " + "</font></h3></center>" + "</body>"
            + "</html>");
}
}
`
Let us see the output of the flow:


Let us check the table data also parallelly

Hibernate makes the process very easier.
A bean class(Here it is GeekUser.java) is required. Each and every attribute of a bean class has to be mapped in a hbm(hibernate mapping file) file. It is an XML file where each and every attribute are mapped perfectly to the table in the database.
geekuser.hbm.xml (Mapping file which maps bean (POJO) class attributes to corresponding table)
XML `
`
Main hibernate configuration file > hibernate.cfg.xml
XML `
com.mysql.jdbc.Driver jdbc:mysql://localhost:3306/geeksforgeeks root XXXX org.hibernate.dialect.MySQLDialect true true create`
As this is the web application, let us see web.xml as well which will help for the flow of data from jsp to servlet.
XML `
HibernateWebApp User User com.gfg.hibernate.controller.GeekUserControllerServlet Success Success com.gfg.hibernate.controller.SuccessPage User /register Success /Success register.jsp
`
Video file for the project:
Conclusion
In this tutorial, we have seen that by using the very nice feature of hibernate, data are getting inserted into the database table in an easier way. One more important thing is like for any kind of database, this works. If we are changing a different database, we need to change hibernate.cfg.xml to support it
XML `
org.hibernate.dialect.SQLServerDialect com.microsoft.jdbc.Driver jdbc.Microsoft://localhost/ root **** oracle.jdbc.OracleDriver jdbc:oracle:thin:@localhost:1521:dbname user *** org.hibernate.dialect.Oracle8iDialect true