How to Create a DropDown List in Excel: 2 Easy Methods (original) (raw)
How to Build Drop Down Menu in Excel: Quick Steps
- Open **MS Excel Spreadsheet >> **Enter List Items
- Select **Cell >> Go to Data Validation
- Choose List Option
- **Set the Source >>Click **OK
Have you ever typed the same data repeatedly in Excel, only to make typos or inconsistencies? A **drop-down list can save you time and ensure accuracy by letting you choose from predefined options. Whether you’re managing inventory, tracking projects, or creating surveys, knowing **how to create a drop-down list in Excel is a skill that can make your spreadsheets more efficient and user-friendly.
In this **Excel drop-down list tutorial, we’ll walk you through **2 easy methods to set up drop-down lists. First, you’ll learn how to **create a drop-down list from existing data, perfect for when you already have a list of items. Second, we’ll show you how to **create a drop-down list manually, ideal for custom options or smaller datasets. By the end, you’ll know how to simplify data entry and keep your sheets clean and professional. Let’s get started!

What is a Drop-Down List in Excel
A **drop-down list in Excel is a feature that lets you choose an option from a list instead of typing it manually. When you click on a cell with a drop-down list, a small arrow appears, and clicking it shows a list of choices you can select from.
Drop-Down Lists in Simple Terms
Think of a **drop-down list like a **menu at a restaurant—you just pick what you want from the list instead of writing it down yourself. This makes it easier to enter data and avoids mistakes like typos.
Why Use Drop-Down Lists
**Drop-down lists in Excel are super helpful for making your work easier and more accurate. Here are the key benefits:
- **Ensures Data Accuracy: Drop-down lists limit the choices to specific options, so you’re less likely to enter wrong or inconsistent information. Everyone uses the same terms, keeping the data clean and organized.
- **Speeds Up Data Entry: Instead of typing everything out, you can quickly pick from a list. This saves time, especially when working with large spreadsheets.
- **Reduces Errors from Manual Typing: No more worrying about **typos or **misspellings! Drop-down lists prevent mistakes that often happen when typing manually.
Using **data validation in Excel to create drop-down lists helps keep your spreadsheets accurate, consistent, and error-free.
Method 1: Creating a Drop-Down List From Existing Data
This method allows you to create a drop-down list by using data already in your spreadsheet, like a list of product names or categories. It's ideal when you have a column of data that you want to use as options for your list. It’s especially helpful if you want your Excel pull-down list to update automatically when you add or remove data from your source list. Suppose you have a column of cells as displayed below:
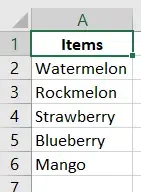
Sample Data
Step 1: Select the Target Cells
Click on the cell where you want the drop-down list to appear. This is where users will select their options.
**Step 2: Go to the Data Tab and Click Data Validation
- Go to the **Data tab at the top of Excel.
- In the **Data Tools group, click on **Data Validation. This will open the Data Validation dialog box.
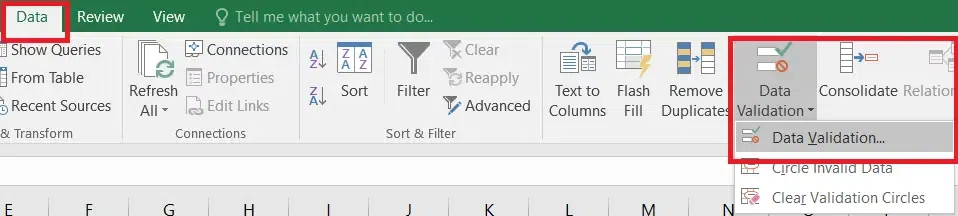
Excel Toolbar
**Step 3: Choose "List" as the Validation Criteria
- In the **Data Validation dialog box, under the **Settings tab, click the **Allow box and select **List. This tells Excel to create a drop-down list in the selected cell.
.webp)
Select List as Validation Model
**Step 4: Enter the Source Range
In the **Source field, you can either:
- **Type the range manually: For example, **type
=$A$2:$A$6if your list is in cells **A2 to A6.
.webp)
- **Select the range with your mouse: Click the small icon next to the Source field, then highlight the cells you want to include (e.g., A2:A6 ).
**Pro Tip: If you select an entire column (e.g., A:A ), any new items you add to that column will automatically appear in the drop-down list without needing to update it manually.
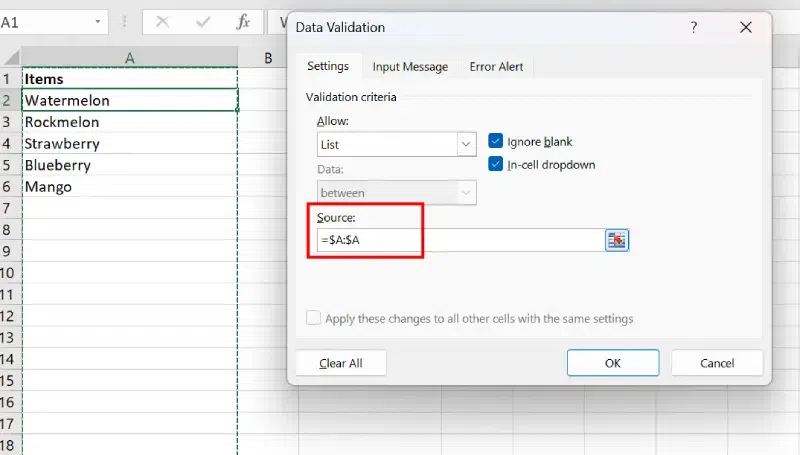
Select the Entire Column
This will then embed a drop-down list.
Step 5: Confirm and Apply the Drop-Down List
- Ensure that the **In-cell dropdown box is checked (it is checked by default). If this option is unchecked, the drop-down arrow won’t appear, but you can still manually enter values from the list.
- Click **OK to embed the drop-down list.

Preview the List
**Step 6: Preview the Drop-Down List in Excel
- Click on the cell where you applied the drop-down to test it.
- The arrow will appear, and you can select from your list of options.
**Note: To copy and paste a drop-down list, select the cell containing the drop-down list, press CTRL + C to copy, then select the target cell and press CTRL + V to paste.
How to Allow Other Values in Excel Drop Down List
To allow users to input values outside the drop-down list follow the given steps:
**Step 1: Open Data Validation and Access the Error Alert Tab
Navigate to the **Data tab in the Excel ribbon, then click on **Data Validation in the **Data Tools group. In the **Data Validation dialog box, click on the **Error Alert tab.
**Step 2: Uncheck the Option
Uncheck the box labeled ****"Show error alert after invalid data is entered." and** Click **OK to save the changes.
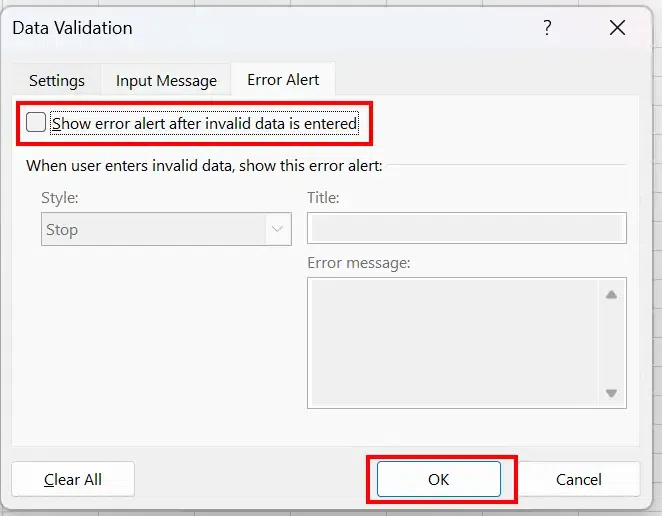
Allow other entries
Now, you can enter values outside of the drop-down list in that cell. For example, if you type ****"Grapes"** (which isn’t in the list), it will be accepted without an error message.
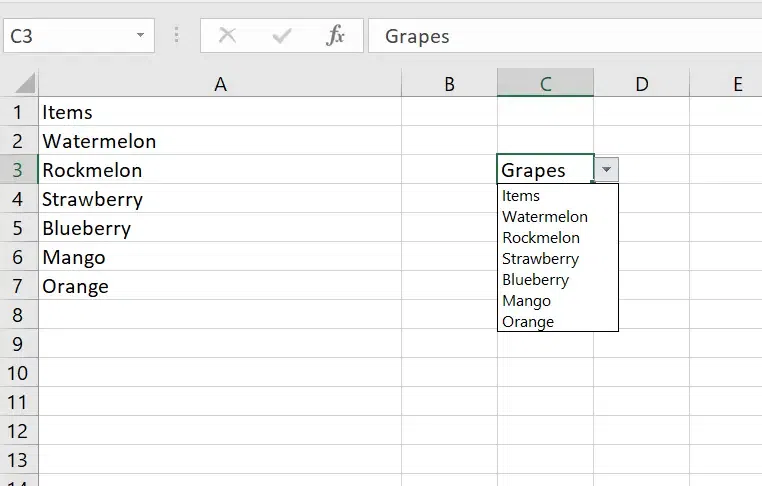
Input a Value
Method 2: Create a Drop-Down List Manually
This method allows you to create a drop-down menu by directly typing the items you want to appear in the list. You don't need any data in your spreadsheet for this, as everything is done inside the Data Validation box. Use this method when you need to create a small, fixed list of choices, such as "**Yes" or "**No" options, or a list of custom categories. This method is perfect for quick custom lists without needing to reference data elsewhere in your workbook.
Here are the following steps to manually create a Drop-Down List :
Step 1: Select the Cell
First, select the cell where you want the drop-down list to appear. For this example, let's assume you're selecting cell **A2.
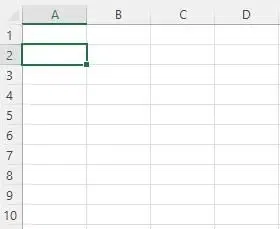
Select a Cell
Step 2: Open the Data Validation Menu
Go to the **Data tab in the Excel ribbon. In the **Data Tools group, click on **Data Validation.
.webp)
Go to Data Validation
Step 3: Choose 'List' as the Validation Criteria
In the **Data Validation dialog box, under the **Settings tab, select **List as the validation criteria. After selecting **List, the **Source field will appear.
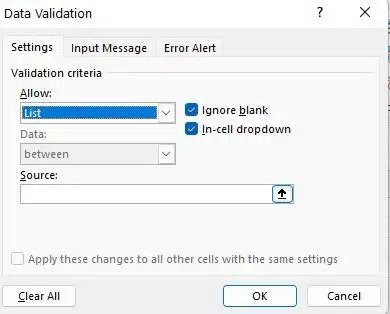
Select List
Step 4: Enter the Items for the Drop-Down List
In the **Source field, manually enter the items for your drop-down list, separated by commas. For example, if you want a list of **Yes and **No options, **type: Yes, No
These items will appear as selectable options in the drop-down menu in the chosen cell.
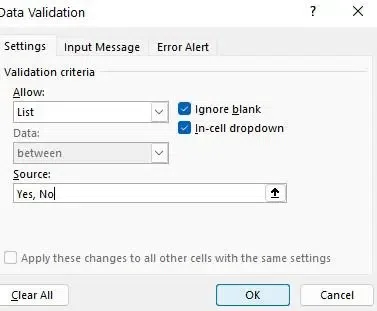
Enter Yes and No
Step 5: Confirm the Drop-Down List Setup
Make sure the **In-cell dropdown box is checked. Click **OK to finalize the drop-down list creation.
Your drop-down list will now appear in the selected cell, with the options **Yes and **No available for selection.
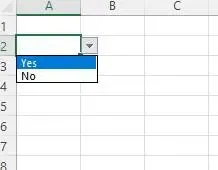
Click OK
This will make a drop-down list in the chosen cell. Every one of the things recorded in the source field, isolated by a comma, is recorded in various lines in the drop-down menu.
**Note: If you need to make drop-down records in different cells at one go, select every one of the cells where you need to make it and afterward follow the above advances.
**Also Read: **Data Validation in Excel
Conclusion
Creating a **drop-down list in Excel is a simple yet powerful way to improve efficiency and reduce errors in your spreadsheets. Whether you’re using the **create a drop-down list from existing data method or the **create a drop-down list manually approach, these **2 easy methods ensure your data stays consistent and easy to manage.
Now that you know **how to create a drop-down list in Excel, it’s time to put this skill to work. Try it out in your next project and see how much time and effort you can save. Ready to take your Excel game to the next level? Start building your drop-down lists today!