How to Create Todo App using Next.js ? (original) (raw)
Last Updated : 05 Aug, 2024
In this article, we will create a to-do application and understand the basics of Next.js. This to-do list can add new tasks we can also delete the tasks by clicking on them.
**Next.js is a widely recognized React framework that enables server-side rendering and enhances the development of interactive user interfaces. With its powerful capabilities for creating performant and SEO-friendly applications, Next.js has become an ideal choice for our ToDo app.
**Prerequisites:
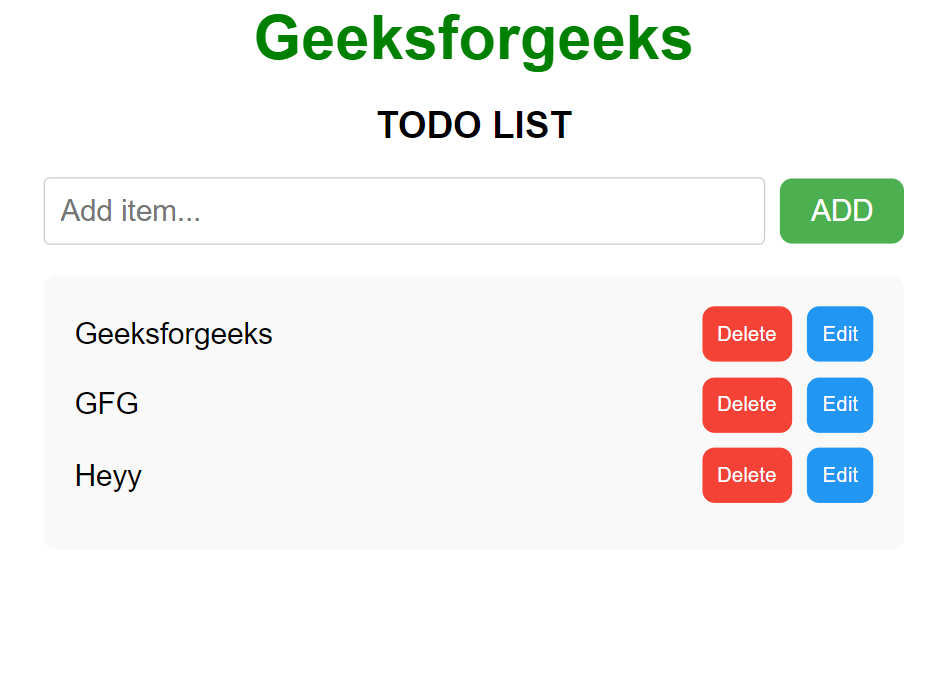
**Let's have a look at what the completed application will look like:
**Steps to create the NextJS Application
**Step 1: Create a new Next.js project using the following command
**NPX: It is a package runner tool that comes with npm 5.2+, npx is easy to use CLI tool. The npx is used for executing Node packages.
npx create-next-app todo-app
**Step 2: Change to the project directory:
cd todo-app
**Project Structure:

**Approach
The functions updateInput, addItem, deleteItem, and editItem are responsible for managing the state based on user actions. Specifically, the updateInput function updates the userInput state whenever the user types in the input field. On the other hand, the addItem function adds a new ToDo item to the list state if there's content in the input field. If the user clicks on the "Delete" button, it triggers the deleteItem function which removes a ToDo item from the list state. Lastly, by utilizing a prompt display, the editItem function enables users to modify existing ToDo items.
**Example: In this example, we will see the ToDo App using Next.js
- **index.js JavaScript `
'use client'; import React, { useState } from 'react';
const App = () => { const [userInput, setUserInput] = useState(''); const [list, setList] = useState([]); const [editIndex, setEditIndex] = useState(null); // Track index of item to edit
// Set a user input value
const updateInput = (value) => {
    setUserInput(value);
};

// Add or edit item
const handleAction = () => {
    if (userInput.trim() === '') return; // Avoid adding empty items

    if (editIndex !== null) {
        // Edit existing item
        const updatedList = list.map((item, index) =>
            index === editIndex ? { ...item, value: userInput } : item
        );
        setList(updatedList);
        setEditIndex(null); // Reset edit mode
    } else {
        // Add new item
        const newItem = {
            id: Math.random(), // Consider using a more reliable ID generator
            value: userInput,
        };
        setList([...list, newItem]);
    }

    setUserInput(''); // Clear input field
};

// Function to delete item from list using id to delete
const deleteItem = (id) => {
    const updatedList = list.filter((item) => item.id !== id);
    setList(updatedList);
};

// Function to enable editing mode
const startEdit = (index) => {
    setUserInput(list[index].value);
    setEditIndex(index); // Set the index of the item to be edited
};

return (
    <div
        style={{
            fontFamily: 'Arial, sans-serif',
            maxWidth: '600px',
            margin: '0 auto',
            padding: '20px',
        }}
    >
        <div
            style={{
                textAlign: 'center',
                fontSize: '2.5rem',
                fontWeight: 'bold',
                marginBottom: '20px',
                color: 'green',
            }}
        >
            Geeksforgeeks
        </div>
        <div
            style={{
                textAlign: 'center',
                fontSize: '1.5rem',
                fontWeight: 'bold',
                marginBottom: '20px',
            }}
        >
            TODO LIST
        </div>
        <div
            style={{ display: 'flex', alignItems: 'center', marginBottom: '20px' }}
        >
            <input
                style={{
                    fontSize: '1.2rem',
                    padding: '10px',
                    marginRight: '10px',
                    flexGrow: '1',
                    borderRadius: '4px',
                    border: '1px solid #ccc',
                }}
                placeholder={editIndex !== null ? "Edit item..." : "Add item..."}
                value={userInput}
                onChange={(e) => updateInput(e.target.value)}
            />
            <button
                style={{
                    fontSize: '1.2rem',
                    padding: '10px 20px',
                    backgroundColor: '#4caf50',
                    color: 'white',
                    border: 'none',
                    borderRadius: '8px',
                    cursor: 'pointer',
                }}
                onClick={handleAction}
            >
                {editIndex !== null ? 'Update' : 'ADD'}
            </button>
        </div>
        <div
            style={{ background: '#f9f9f9', padding: '20px', borderRadius: '8px' }}
        >
            {list.length > 0 ? (
                list.map((item, index) => (
                    <div
                        key={item.id} // Use the unique id as the key
                        style={{
                            display: 'flex',
                            justifyContent: 'space-between',
                            alignItems: 'center',
                            marginBottom: '10px',
                        }}
                    >
                        <span style={{ fontSize: '1.2rem', flexGrow: '1' }}>
                            {item.value}
                        </span>
                        <span>
                            <button
                                style={{
                                    padding: '10px',
                                    backgroundColor: '#f44336',
                                    color: 'white',
                                    border: 'none',
                                    borderRadius: '8px',
                                    marginRight: '10px',
                                    cursor: 'pointer',
                                }}
                                onClick={() => deleteItem(item.id)}
                            >
                                Delete
                            </button>
                            <button
                                style={{
                                    padding: '10px',
                                    backgroundColor: '#2196f3',
                                    color: 'white',
                                    border: 'none',
                                    borderRadius: '8px',
                                    cursor: 'pointer',
                                }}
                                onClick={() => startEdit(index)}
                            >
                                Edit
                            </button>
                        </span>
                    </div>
                ))
            ) : (
                <div
                    style={{ textAlign: 'center', fontSize: '1.2rem', color: '#777' }}
                >
                    No items in the list
                </div>
            )}
        </div>
    </div>
);
};
export default App;
`
**Step 4: To run the next.js application use the following command and then go to this URL _http://localhost:3000
npm run dev
**Output:
