How to Deploy Flask App on Kubernetes? (original) (raw)
Last Updated : 10 Oct, 2024
A lightweight Python framework providing simplicity and flexibility in development, Flask can be utilized to create web applications. In contrast, Kubernetes is an effective framework for container orchestration that facilitates the deployment, scaling, and management of containerized applications. While Kubernetes makes sure these apps function perfectly by managing resources and processing traffic efficiently, Flask allows you to construct web pages and handle requests. When taken together, they provide an effective combination that streamlines and improves reliability for developing, launching, and managing web applications at scale. By referring to this blog you will get clear knowledge about deploying the flask app in Kubernetes.
Step by step to Deploy Flask App on Kubernetes
**Step 1: Create the repository and push the code into the repository.
**Step 2: Here is my GitHub python-flask repository.
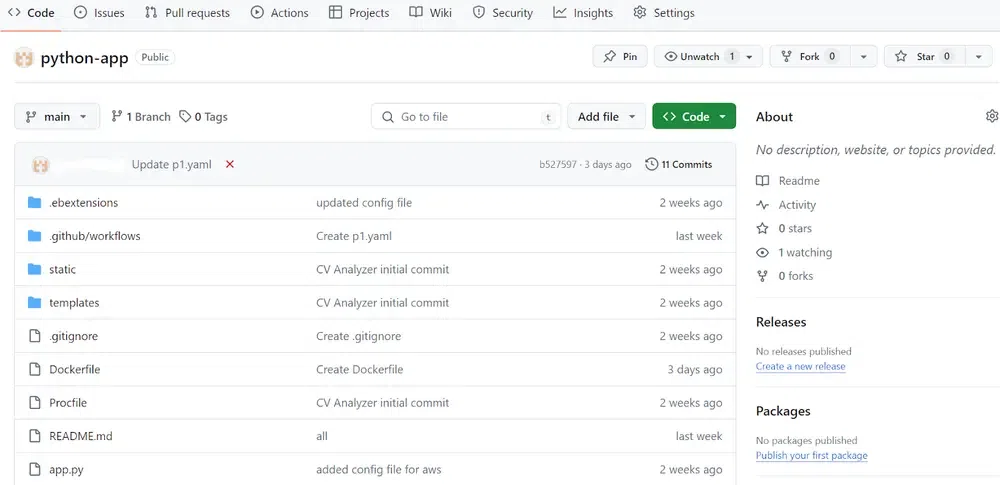
**Step 3: Clone the repository into vm and list the files. Here are the my files in the repository.

Build a container image with Docker
**Step 4: Here is the Dockerfile in the repository. You can write your own Dockerfile as per your requirements.

FROM python:3.9-slim
WORKDIR /usr/src/app
COPY . .
RUN pip install --no-cache-dir -r requirements.txt
EXPOSE 5000
ENV FLASK_APP=app.py
CMD ["flask", "run", "--host=0.0.0.0"]
FROM python:3.9-slim: The basis image to be used for the instructions that follow is specified in this line. Here, the official Python Docker image with the 3.9-slim tag is being used. The image is smaller and just includes the minimum required to run Python applications, as indicated by the slim tag.WORKDIR /usr/src/app: This line changes the container's working directory to /usr/src/app. Subsequent orders will be carried out here.COPY . .: This line copies the current directory, which includes other files and the Dockerfile, into the container's working directory. The working directory that was established in the previous step is represented by the second. in the container, and the source directory on the host computer is represented by the first.RUN pip install --no-cache-dir -r requirements.txt: Using pip, the Python dependencies listed in the requirements.txt file are installed in this line. Pip may be made to stop caching the downloaded packages by using the --no-cache-dir flag. This guarantees that no superfluous cache files are included and that the Docker image stays consistent.EXPOSE 5000: This line tells Docker that the container is running and will listen on port 5000. It does not, however, truly publish the port. To specify which ports are meant to be exposed is more of a documentation mechanism.ENV FLASK_APP=app.py: This line assigns the value app.py to the environment variable FLASK_APP. The Python web framework Flask uses this environment variable to identify which Python file contains the Flask application.CMD ["flask", "run", "--host=0.0.0.0"]: The default command to be executed when the container starts is specified in this line. It starts the Flask development server (flask run), binds it to every network interface that is accessible (--host=0.0.0.0), and opens the server to outside access.
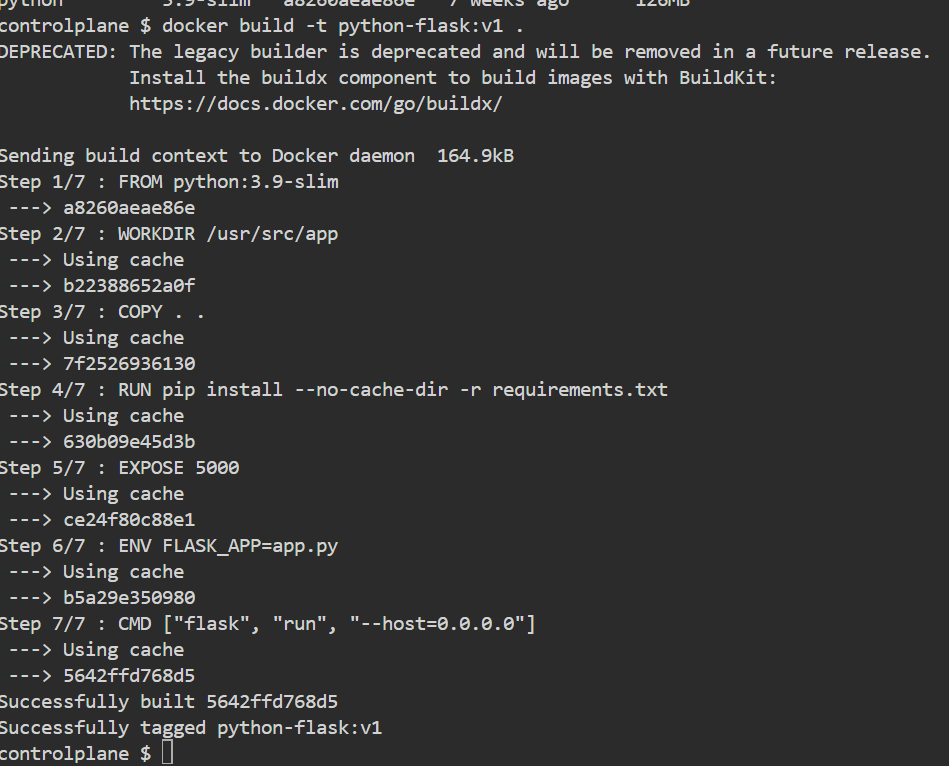
**Step 5: We need to build the docker image by using the below command. For your reference refer the below image.
docker build -t : .
**Step 6: After successfully build the image list the docker images by using the below command. For your reference refer the below image. Here i have pushed the docker image into docker hub.
docker images

Create the Deployment and Service
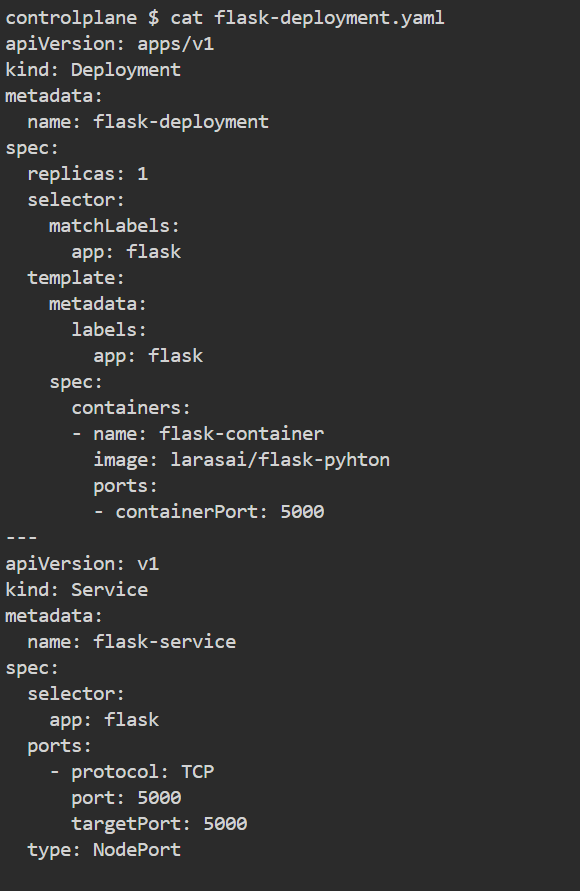
**Step 7: Create the deployment file here is the my deployment file you can can write your own deployment file as per the your requirements.
apiVersion: apps/v1
kind: Deployment
metadata:
name: flask-deployment
spec:
replicas: 1
selector:
matchLabels:
app: flask
template:
metadata:
labels:
app: flask
spec:
containers:
- name: flask-container
image: larasai/flask-pyhton
ports:
- containerPort: 5000
apiVersion: v1
kind: Service
metadata:
name: flask-service
spec:
selector:
app: flask
ports:
- protocol: TCP
port: 5000
targetPort: 5000
type: NodePort
- **Deployment:
apiVersion: Specifies the Kubernetes API version being used. In this case, it'sapps/v1, indicating the apps API group and version 1.kind: Specifies the type of Kubernetes resource, which is a Deployment in this case.metadata: Contains metadata about the deployment, such as its name.spec: Defines the desired state for the deployment, including the number of replicas and the pod template.
*replicas: Specifies the desired number of pod replicas to create. In this case, it's set to 1.
*selector: Defines how Kubernetes identifies which pods are managed by this deployment.
*matchLabels: Specifies that pods with labels matching the given labels should be managed by this deployment.
*template: Describes the pod template used to create new pods.
*metadata: Contains labels to apply to the pods.
*spec: Specifies the pod's specification.
*containers: Describes the containers running in the pod.
*name: Specifies the name of the container.
*image: Specifies the Docker image used for the container.
*ports: Specifies the ports the container exposes.
*containerPort: Specifies the port on which the container listens for traffic. In this case, it's set to 5000.
- **Service:
apiVersion: Specifies the Kubernetes API version being used. In this case, it'sv1, indicating the core API group and version 1.kind: Specifies the type of Kubernetes resource, which is a Service in this case.metadata: Contains metadata about the service, such as its name.spec: Defines the desired state for the service.
*selector: Specifies how the service selects which pods to target.
*app: flask: Indicates that pods with the labelappset toflaskshould be targeted.
*ports: Specifies the ports that the service exposes.
*protocol: Specifies the protocol used for the port.
*port: Specifies the port number on the service.
*targetPort: Specifies the port on the pods to which the service forwards traffic.
*type: Specifies the type of service. In this case, it'sNodePort, which exposes the service on each node's IP at a static port. This allows the service to be accessible from outside the Kubernetes cluster.
**Step 8: Create the deployment file by using the below command the deployment and service created successfully in the Kubernetes cluster. For your reference refer the below image.
kubectl apply -f <deployment-file-name.yaml>

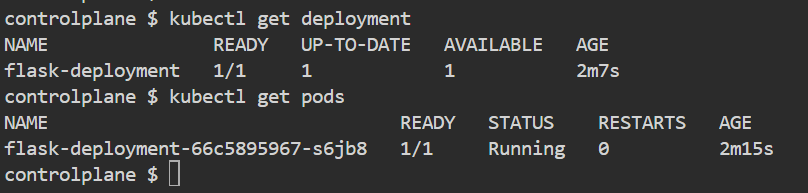
**Step 9: List the deployments and services of the flask application. For your reference refer the below image.
kubectl get deployment
kubectl get pods
List the service of the flask deployment by using the below command.
kubectl get svc

**Step 10: Access the application by using the nodeport. Refer the below image for your reference the flask application successfully deployed and accessed successfully.
