Installation of Apache Maven on Windows and MAC (original) (raw)
Last Updated : 30 Mar, 2026
Apache Maven is a build automation tool written in Java, developed by the Apache Software Foundation. It helps manage project builds and dependencies using a standardized approach.
- Uses a plugin-based architecture for flexible build management
- Automatically downloads required dependencies
- Simplifies project build, testing, and packaging
- Widely used for Java projects in enterprise development
Follow the steps below to install Apache Maven on Windows and MacOS:
Installing Apache Maven on Windows
**Step 1: Download Maven Zip File and Extract

**1. Click on the Download button.

**2. Click on the **apache-maven-3.8.4-bin.zip button.

**3. Now check for the executable file in downloads in your system

**4. Now right-click on the file and click on extract here to extract the file.

**5. After extracting, you get the extracted folder.

**6. Now copy the extracted folder.

**7. Now paste the copy folder in your windows drive in the Program files folder.

**8. Now the Permission Windows appears to paste the folder in program files then click on “Continue”.

**9. Now open the folder apache maven.

**10. Now after opening the folder then copy the address of the folder in program files.

Step 2: Add MAVEN_HOME System Variable
**1. Now click on Start Menu and search “Edit the system environment variables” and open it.

**2. After opening System, Variable New window appears, and click on “Environment Variables…”

**3. Now click on New under user variable.

**4. Now you can write any variable name and then paste the address we copy from program files in the variable value and then click on OK.

Step 3: Add MAVEN_HOME Directory in PATH Variable
**1. Now go to the “System variables” Path option and double click on Path or Click on the Edit button.

**2. Now click on New Button.

**3. After New Paste the address we copy from program files to new.

**4. After pasting the address add the \bin in the last and then click on OK.

**5. Now click on the OK button.

**6. Click on the OK button.

Step 4: Verify Maven Installation
1. Now your **Apache Maven is installed on your computer. You may check by going to the “Start” menu typing Command Prompt. Open it.

**2. When the Command Prompt opens, type **mvn -version and click the enter button on the keyboard.

**3. Now command prompt shows the version of **Apache Maven installed on your windows.

You have successfully installed **Apache Maven on your Windows system.
Installing Apache Maven on MacOS
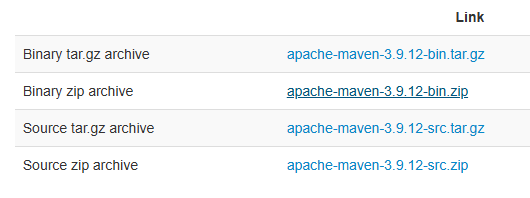
Step 1: Download Maven
- File to download: **apache-maven-3.9.12-bin.zip (or the latest available version)
- Extract the ZIP file inside the **Users directory. Example path after extraction:
/Users/{userName}/apache-maven-3.9.12
Step 3: Configure Environment Variables
- Edit the
.zshrcfile in your Mac. If.zshrcdoes not exist, create it:
touch ~/.zshrc
- Open the file:
nano ~/.zshrc
**Add the following content .zshrc file:
**# Java Home
export JAVA_HOME="/Library/Java/JavaVirtualMachines/jdk-17.jdk/Contents/Home"
export PATH="${JAVA_HOME}/bin:${PATH}"
**# Maven Home
export M2_HOME="/Users/{userName}/apache-maven-3.9.12"
export PATH="${M2_HOME}/bin:${PATH}"
Step 4. Handle MacOS Security Prompt
If MacOS blocks the Maven execution:
- Try running
mvnfrom Terminal - Go to **System Settings → Privacy & Security
- Click **Open Anyway for Maven
Step 5. Restart Terminal
- Quit the Terminal completely
- Ensure
.zshrcis saved
Step 6. Final Verification
Open a new Terminal session and run:
mvn -v
You should now see the Maven **3.9.12 version details along with Java information.