How to Create a Gradle Project in IntelliJ IDEA? (original) (raw)
Last Updated : 19 Jul, 2025
Gradle is an excellent open-source construction tool that is capable of the development of any kind of software. It is an automation tool that is based on Apache Ant and Apache Maven. This tool is capable of developing applications with industry standards and supports a variety of languages including Groovy, C++, Java, Scala, and C. Gradle also is capable of controlling the development tasks from compilation and packaging to testing, deployment, and publishing.
In this article, we are going to explain how to create a Gradle project in IntelliJ IDEA. IntelliJ is an integrated development environment(IDE) written in Java.
**Prerequisite: Download and install IntelliJ.
Step By Step Implementation
**Step 1: Open your IntelliJ IDE, and go to the **File > New > Project as shown in the below image.
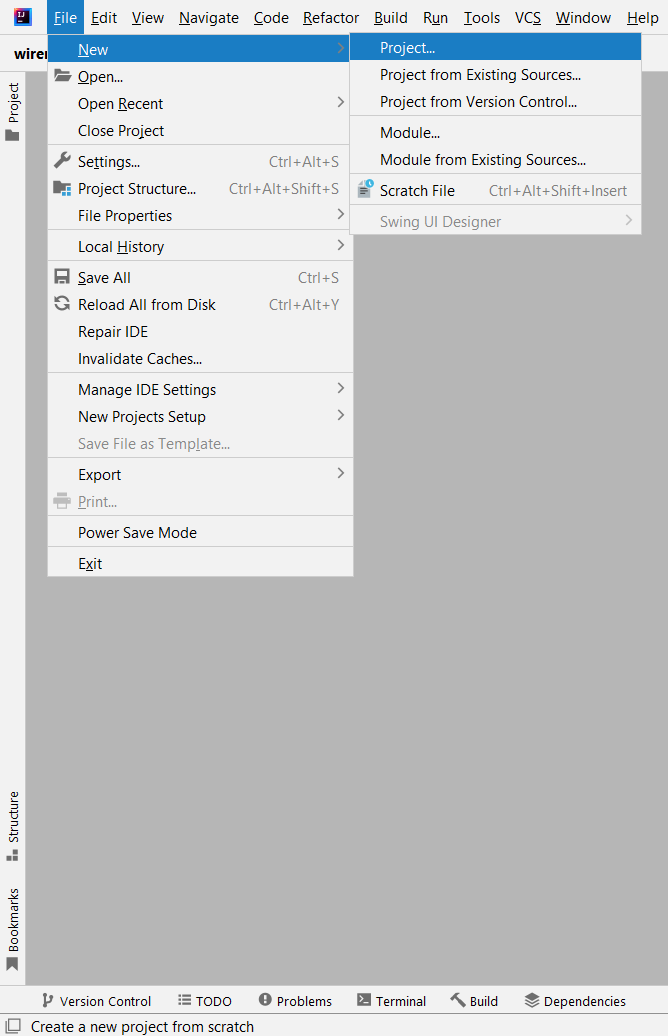
Snapshot of new project creation
**Step 2: Next Step fill the details according to your project.
- Name: Provide a suitable name as per your requirement
- Location: Choose the location you want to store your project
- Language: Choose the programming language as per your requirement
- Build System: Here you have to choose **Gradle
- Gradle DSL: Simply, it stands for 'Domain-Specific Language'. In the Gradle context, DSL gives you a Gradle-specific way to form your build scripts. Here you can choose Groovy or Kotlin as per your requirement.
- JDK: Choose the JDK you want to use
- **GroupId: a unique base name of the company or group that created the project
- **ArtifactId: a unique name of the project
And finally, click on the **Create button. And you are done.
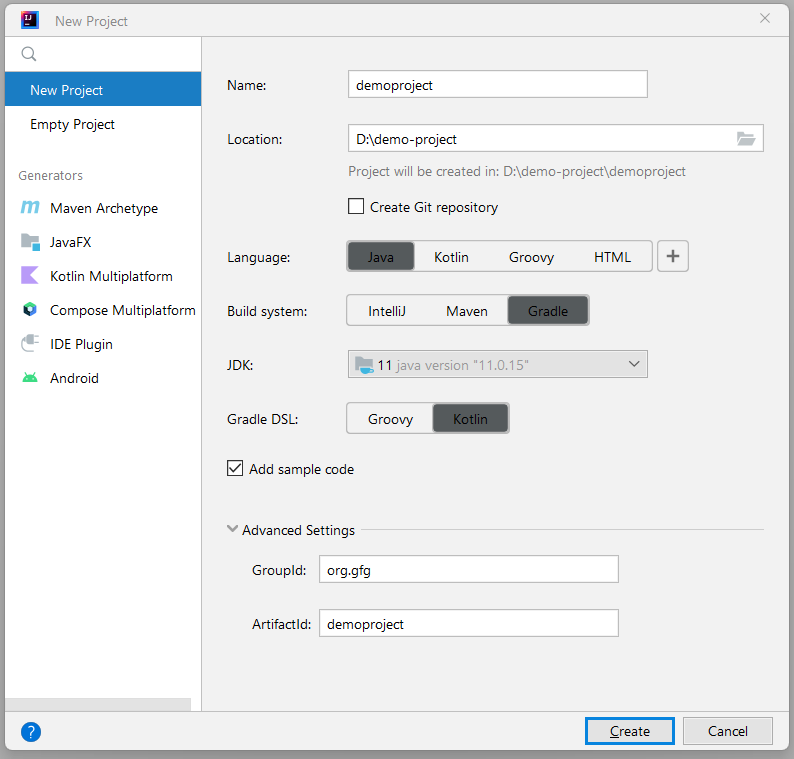
Snapshot of new project creation
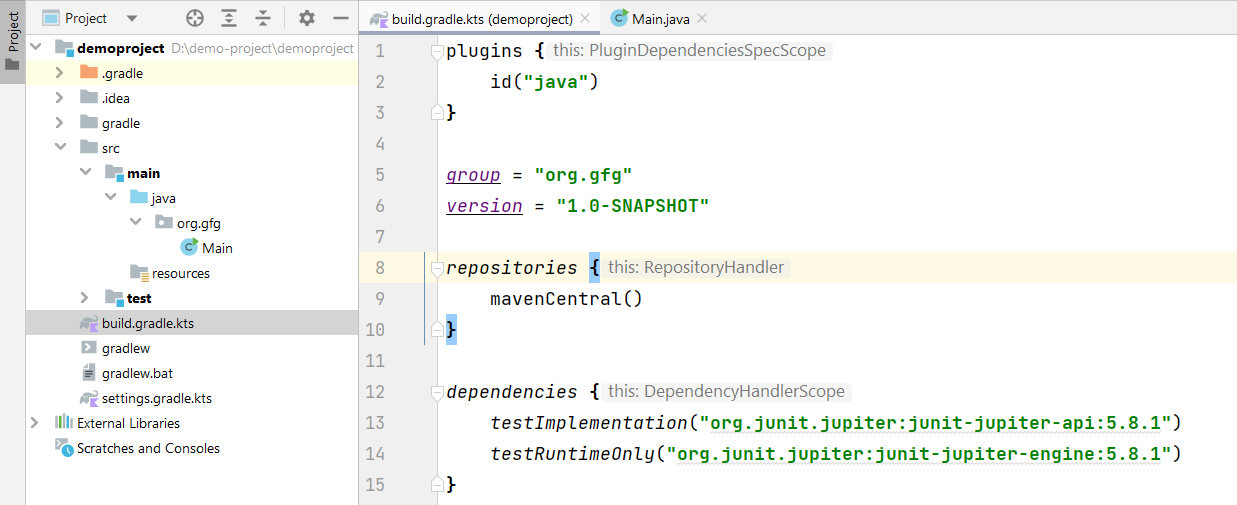
After successfully creating the project you can see there are two default files have been created.
**build.gradle file:
plugins { id("java") } group = "org.gfg" version = "1.0-SNAPSHOT" repositories { mavenCentral() } dependencies { testImplementation("org.junit.jupiter:junit-jupiter-api:5.8.1") testRuntimeOnly("org.junit.jupiter:junit-jupiter-engine:5.8.1") } tasks.getByName("test") { useJUnitPlatform() }
**Main.java class:
Java `
package org.gfg;
public class Main { public static void main(String[] args) { System.out.println("Hello world!"); } }
`
Refer to the below image.
Read more about Gradle from here: Introduction to Gradle.