Spring MVC Form Checkbox (original) (raw)
Spring MVC provides built-in support for creating and processing checkboxes in JSP pages through the Spring Form Tag Library. Using the form:checkbox and form:checkboxes tags, developers can easily bind checkbox values to Java objects without manually handling request parameters. This simplifies form development and improves code maintainability.
- form:checkbox is used to create a single checkbox and bind it to a model property.
- form:checkboxes is used to create multiple checkboxes from a collection of values.
- Supports automatic data binding between form fields and Spring MVC model attributes, reducing manual coding.
Spring Form Tag Library
The Spring Form Tag Library (spring-form.tld) is a collection of JSP tags provided by Spring MVC for creating and processing web forms. It helps developers build forms more easily by supporting automatic data binding between form fields and model objects.
- Provides form-related tags such as form:form, form:input, form:password, form:checkbox, form:radiobutton, and form:select.
- Supports automatic data binding using the path attribute.
- Integrates with Spring MVC validation and error handling.
**To use tag we have to import the tag library First
<%@ taglib prefix="form" uri="http://www.springframework.org/tags/form" %>
Spring MVC form:checkbox Tag
The form:checkbox tag is used to create a single checkbox and bind it to a property of a model object.
- Accepting terms and conditions.
- Selecting a single option (true/false).
**Syntax:
<form:checkbox path="propertyName" value="value" />
- **path: Model property to bind the checkbox value
- **value: Value submitted when checkbox is selected
Spring MVC form:checkboxes Tag
The form:checkboxes tag is used to generate multiple checkboxes from a collection of values.
- Selecting multiple values
- Selecting multiple interests.
**Syntax:
<form:checkboxes path="courses" items="${courseList}" />
- **path: Collection property in model object
- **items: Collection of checkbox values
Steps to Implement Spring MVC Form Checkbox
Follow these steps to create a Spring MVC application using form:checkbox and form:checkboxes tags.
Step 1: Create a Maven Project
- Open STS IDE.
- Click File -> New -> Maven Project.
- Select Create a simple project (Select archetype ) and click Next.

Then Enter the following details:
- **Group Id: com.gfg
- **Artifact Id: simpleproject
- **Packaging: war
Click Finish.
Step 2: Add Required Dependencies
Add the required Spring MVC dependencies in the pom.xml file.
XML `
<!-- Spring MVC -->
<dependency>
    <groupId>org.springframework</groupId>
    <artifactId>spring-webmvc</artifactId>
    <version>5.3.18</version>
</dependency>

<!-- Servlet API -->
<dependency>
    <groupId>javax.servlet</groupId>
    <artifactId>javax.servlet-api</artifactId>
    <version>4.0.1</version>
    <scope>provided</scope>
</dependency>
`
Step 3: Create Bean Class (Home.java)
Create a Java Bean class named Home containing name, duration, and framework properties along with getter and setter methods. Spring uses this bean to bind form data automatically.
Java `
package com.geek.app;
import java.util.List;
public class Home {
private String name;
private String duration;
private List<String> framework;

public String getName() {
    return name;
}

public void setName(String name) {
    this.name = name;
}

public String getDuration() {
    return duration;
}

public void setDuration(String duration) {
    this.duration = duration;
}

public List<String> getFramework() {
    return framework;
}

public void setFramework(List<String> framework) {
    this.framework = framework;
}
}
`
Step 4: Create JSP Form Page (home.jsp)
Create home.jsp using Spring Form Tags. This page displays a text field, checkbox options for course duration, and multiple framework checkboxes.
HTML `
<%@ page language="java" contentType="text/html; charset=ISO-8859-1" pageEncoding="ISO-8859-1"%> <%@taglib uri="http://www.springframework.org/tags/form" prefix="form"%>
Home page<h1>Welcome to GeeksforGeeks!</h1>
<form:form action="submit" method="post" modelAttribute="home">
<table>
<tr>
<td><form:label path="name">Enter your name: </form:label></td>
<td><form:input path="name" /></td>
</tr>
<tr>
<td><form:label path="duration">Select duration of course: </form:label></td>
<td><form:checkbox path="duration" value="3 months" label="3 Months"/>
<form:checkbox path="duration" value="6 months" label="6 Months" disabled="true"/></td>
</tr>
<tr>
<td><form:label path="framework">Java Frameworks: </form:label></td>
<td><form:checkboxes path="framework" items="${javaFramworks}" delimiter="|"/></td>
</tr>
<tr>
<td><form:button>Submit</form:button></td>
</tr>
</table>
</form:form>`
Step 5: Create Controller Class (HomeController.java)
Create a controller class to handle requests. It loads the form page, provides framework data for checkboxes, and processes the submitted form data.
Java `
// Java Program to Illustrate HomeController Class
package com.geek.app;
// importing required classes import java.util.Arrays; import java.util.List; import org.springframework.stereotype.Controller; import org.springframework.ui.Model; import org.springframework.web.bind.annotation.ModelAttribute; import org.springframework.web.bind.annotation.RequestMapping; import org.springframework.web.bind.annotation.RequestMethod;
// Annotation @Controller
// Class public class HomeController {
// Annotation
@RequestMapping(value = "/")

public String viewHome(Model model)
{

    // Creating an instance of Home class
    // inside this method
    Home home = new Home();
    model.addAttribute("home", home);

    return "home";
}

// Annotation
@ModelAttribute("javaFramworks")

// Method
public List<String> javaFramworksList()
{
    List<String> framework = Arrays.asList(
        "Apache Struts", "Spring", "Hibernate",
        "Grails", "Java Server Faces");

    return framework;
}

// Annotation
@RequestMapping(value = "/submit",
                method = RequestMethod.POST)

// Method
public String
submit(@ModelAttribute("home") Home home)
{

    return "summary";
}
}
`
Step 6: Create Result Page (summary.jsp)
Create summary.jsp to display the values submitted by the user. It shows the name, selected course duration, and selected framework(s).
HTML `
<%@ page language="java" contentType="text/html; charset=ISO-8859-1" pageEncoding="ISO-8859-1"%>
Summary page<h3>Hello ${home.name}!!</h3>
<span>Course Duration: </span>
<span>${home.duration}</span>
<br>
<span>Frameworks Selected: </span>
<span>${home.framework}</span>`
Step 7: Run Your Application
- Right-click the project.
- Select Run As -> Run on Server.
- Choose Apache Tomcat Server.
- Click Finish.
**Output:
After that use the following URL to run your controller
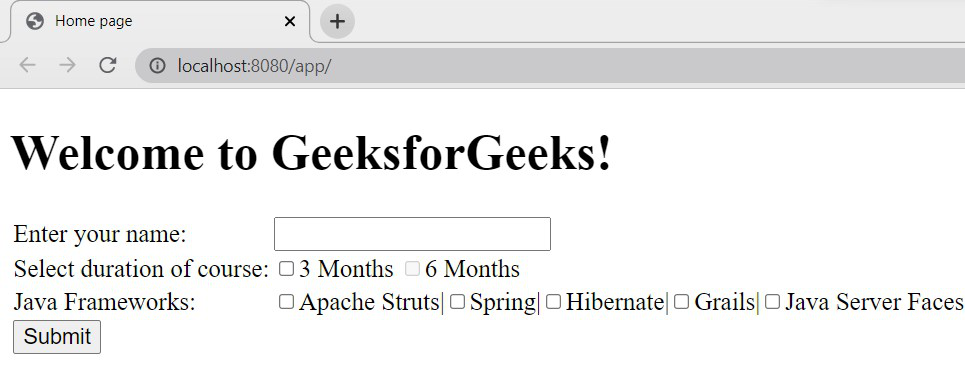
Spring MVC - Checkbox Example
Now, select the checkbox and enter values and click on submit button.
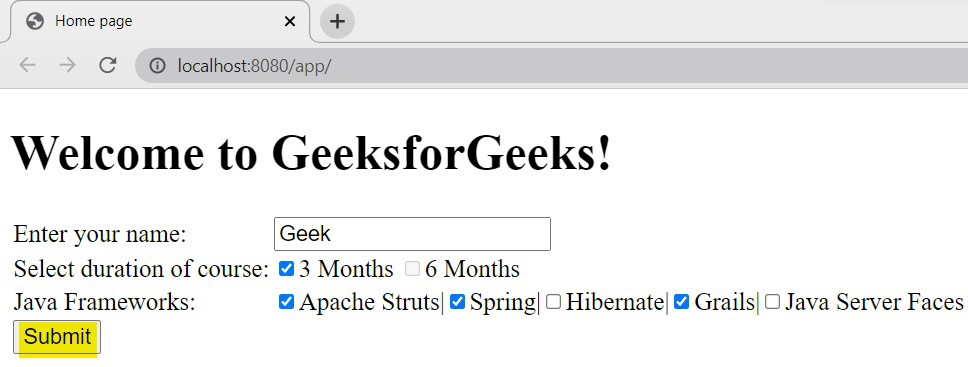
Selection of the input
Once the page is submitted, we will get the below output with the details we have selected.
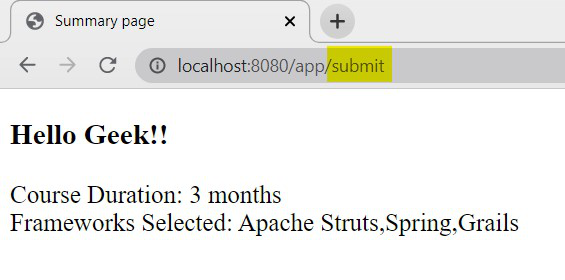
Output - summary.jsp
**Explanation: When the user opens /, the viewHome() method creates a Home object and sends it to home.jsp. The framework list is displayed using the form:checkboxes tag. When the user submits the form to /submit (POST), Spring binds the form data to the Home object using @ModelAttribute and returns summary.jsp to display the submitted values.