Spring MVC Text Box (original) (raw)
Spring MVC provides the form:input tag to create text input fields in web forms. It simplifies capturing user input and automatically binds the entered values to Java bean properties through Spring MVC's form handling mechanism.
- Used to collect single-line text input from users.
- Automatically binds form data to model objects.
- Reduces manual request parameter handling in controller classes.
Syntax
<form:input path="firstName"/>
- **path: Specifies the model property to which the input value will be bound.
- **id (optional): Defines a unique identifier for the text field.
To use Spring Form Tags in a JSP page, import the Spring Form Tag Library using the following directive:
<%@ taglib prefix="form" uri="http://www.springframework.org/tags/form" %>
- **prefix="form": Specifies the prefix used for Spring Form Tags.
- **uri: Identifies the Spring Form Tag Library provided by Spring MVC.
Attributes in form:input Tag
The form:input tag provides various attributes to control the appearance, behavior, validation, and data binding of a text field in a Spring MVC form.
1. HTML Standard Attributes
These are global attributes that can be used with all HTML elements.
| Attribute Name | Description |
|---|---|
| accesskey | Specifies a shortcut key to focus the element. |
| id | Specifies a unique ID for the element. |
| lang | Specifies the language of the content. |
| tabindex | Specifies tab order of the element. |
| title | Specifies additional information about the element. |
| dir | Specifies the text direction. |
2. HTML Event Attributes
These attributes execute JavaScript functions when specific events occur.
| Attribute Name | Description |
|---|---|
| onblur | Triggered when the field loses focus. |
| onchange | Triggered when field value changes. |
| onclick | Triggered when the field is clicked. |
| ondblclick | Triggered when the field is double-clicked. |
| onfocus | Triggered when the field receives focus. |
| onkeydown | Triggered when a key is pressed. |
| onkeypress | Triggered when a key is pressed and released. |
| onkeyup | Triggered when a key is released. |
3. HTML Optional Attributes
These attributes modify the behavior and appearance of the text field.
| Attribute Name | Description |
|---|---|
| cssClass | Specifies CSS class for styling. |
| cssStyle | Applies inline CSS styles. |
| cssErrorClass | Applied when validation errors occur. |
| disabled | Disables the input field. |
| readonly | Makes the field read-only. |
| maxlength | Specifies maximum allowed characters. |
| size | Specifies visible width of the field. |
4. Other Attributes
These attributes are used for data binding and rendering.
| Attribute Name | Description |
|---|---|
| path | Binds the field to a model property. |
| htmlEscape | Enables or disables HTML escaping. |
Step by Step Implementation of Text Box in Spring MVC Application
Follow these steps to build a Spring MVC application using the form:input tag for collecting and displaying user information.
Step 1: Create a Maven Project
- Open STS IDE.
- Click File - New - Maven Project.
- Select Create a simple project (Select archetype ) and click Next.

Then Enter the following details:
- **Group Id: com.gfg
- **Artifact Id: SpringMVCTextField
- **Packaging: war
Click Finish.
Step 2: Add Required Dependencies
Add the following maven dependencies and plugin to your pom.xml file.
XML `
4.0.0 com.javatpoint SpringMVC war 0.0.1-SNAPSHOT SpringMVC Maven Webapp http://maven.apache.org junit junit 3.8.1 test
<!-- https://mvnrepository.com/artifact/org.springframework/spring-webmvc -->
<dependency>
    <groupId>org.springframework</groupId>
    <artifactId>spring-webmvc</artifactId>
    <version>5.1.1.RELEASE</version>
</dependency>

<!-- https://mvnrepository.com/artifact/javax.servlet/javax.servlet-api -->
<dependency>
    <groupId>javax.servlet</groupId>
    <artifactId>servlet-api</artifactId>
    <version>3.0-alpha-1</version>
</dependency>

<!-- https://mvnrepository.com/artifact/javax.servlet/jstl -->
<dependency>
    <groupId>javax.servlet</groupId>
    <artifactId>jstl</artifactId>
    <version>1.2</version>
</dependency>

<!-- https://mvnrepository.com/artifact/org.apache.tomcat/tomcat-jasper -->
<dependency>
    <groupId>org.apache.tomcat</groupId>
    <artifactId>tomcat-jasper</artifactId>
    <version>9.0.12</version>
</dependency>`
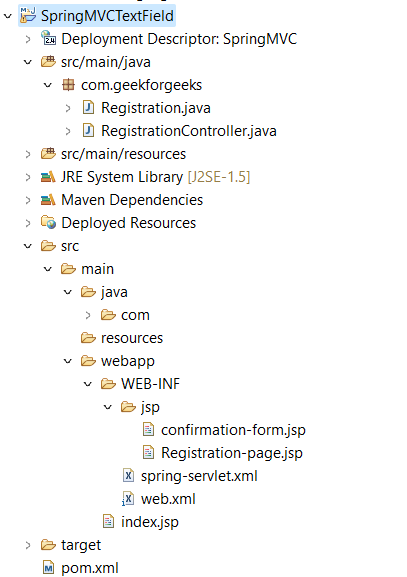
Below is the final project structure of the Spring MVC project after creating *.java and *.jsp files also.
Step 3: Create Model Class (Registration.java)
This bean class stores the user-entered first name and last name. Spring MVC automatically binds the form values to this model object using getter and setter methods.
Java `
package com.geekforgeeks; public class Registration { private String firstName; private String lastName;
public Registration()
{
}
public String getFirstName()
{
    return firstName;
}
public void setFirstName(String firstName)
{
    this.firstName = firstName;
}
public String getLastName()
{
    return lastName;
}
public void setLastName(String lastName)
{
    this.lastName = lastName;
}
}
`
Step 4: Create Controller Class (RegistrationController.java)
This controller handles incoming requests, creates the model object, and processes form submissions. It controls navigation between JSP pages.
Java `
package com.geekforgeeks; import org.springframework.stereotype.Controller; import org.springframework.ui.Model; import org.springframework.web.bind.annotation.ModelAttribute; import org.springframework.web.bind.annotation.RequestMapping;
@RequestMapping("/Registration") @Controller public class RegistrationController {
@RequestMapping("/bookingForm") public String bookingForm(Model model) { Registration res=new Registration(); model.addAttribute("Registration", res); return "Registration-page"; }
@RequestMapping("/submitForm") public String submitForm(@ModelAttribute("Registration") Registration res) { return "confirmation-form"; } }
`
Step 5: Configure Dispatcher Servlet (web.xml)
The web.xml file registers the Spring DispatcherServlet and maps all incoming requests to the Spring MVC framework for processing.
XML `
SpringMVC spring org.springframework.web.servlet.DispatcherServlet 1 spring /`
Step 6: Configure Spring MVC (spring-servlet.xml)
This configuration file enables component scanning, annotation support, and view resolution. It allows Spring MVC to locate controllers and JSP pages.
XML `
  <!-- Provide support for component scanning -->
<context:component-scan base-package="com.geekforgeeks" />

  <!--Provide support for conversion, formatting and validation -->
<mvc:annotation-driven/>

  <!-- Define Spring MVC view resolver -->
 <bean id="viewResolver" class="org.springframework.web.servlet.view.InternalResourceViewResolver">
    <property name="prefix" value="/WEB-INF/jsp/"></property>
    <property name="suffix" value=".jsp"></property>
 </bean>
`
Step 7: Create Entry Page (index.jsp)
This page serves as the starting point of the application. It provides a link that redirects the user to the registration form.
HTML `
Student Registration Form Click here for registration.`
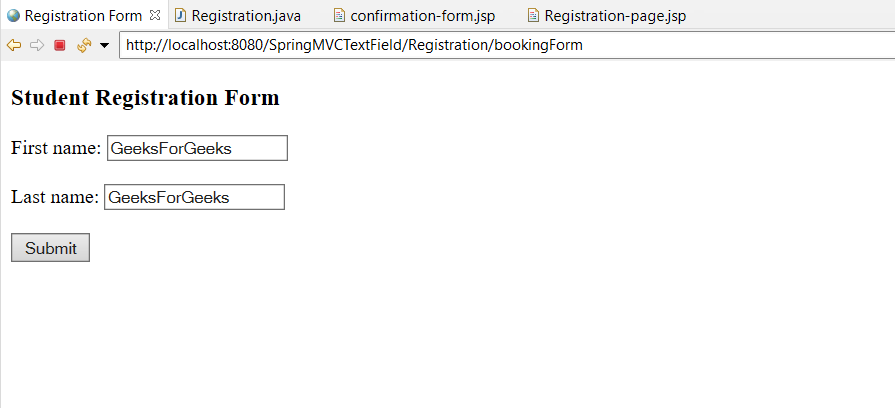
Step 8: Create Input Page (Registration-page.jsp)
This JSP page uses the form:input tag to collect the user's first name and last name. The entered values are bound to the Registration model object.
HTML `
<%@ taglib prefix="form" uri="http://www.springframework.org/tags/form" %>
Registration FormStudent Registration Form
First name:Last name:
`
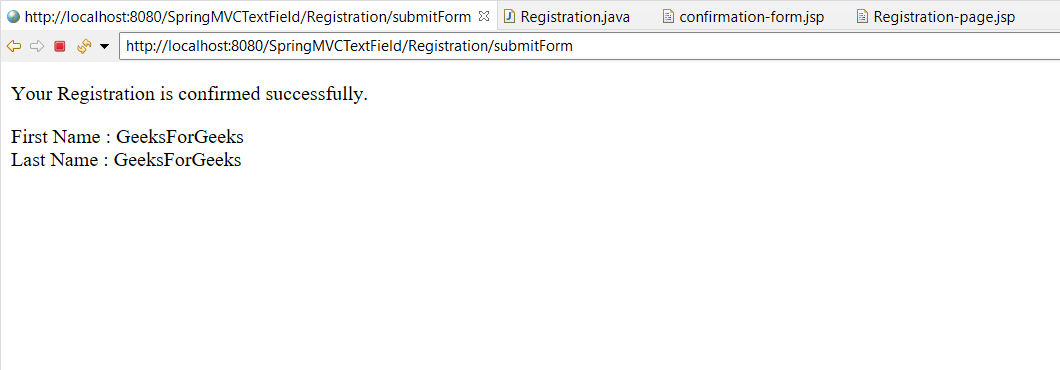
Step 9: Create Output Page (confirmation-page.jsp)
This JSP page displays the submitted values after successful form processing. The data is retrieved from the model using Expression Language (EL).
HTML `
Your Registration is confirmed successfully.
First Name : ${Registration.firstName}
Last Name : ${Registration.lastName}
`
Step 10: Run Your Application
- Right-click the project.
- Select Run As - Run on Server.
- Choose Apache Tomcat Server.
- Click Finish.
Open the following URL in the browser:
**Output:
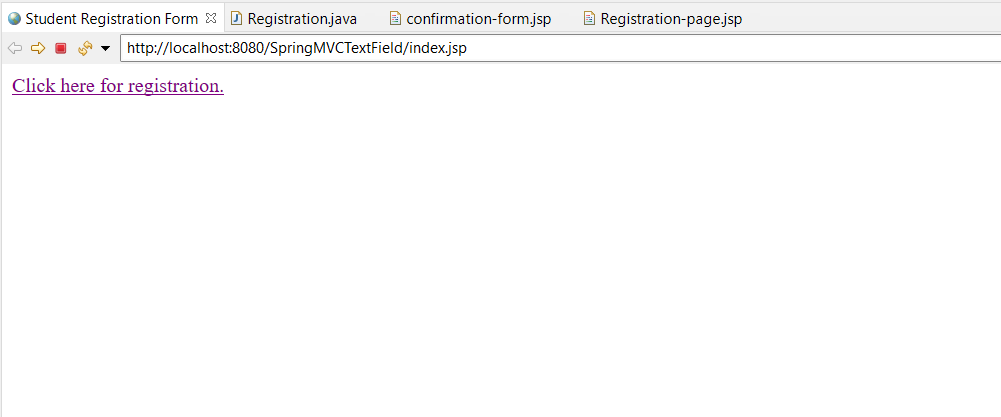
After clicking the "Click here for registration" link following page will be shown
Once we submit the form, the entered details will be displayed on the screen
**Explanation: This Spring MVC application demonstrates the use of the form:input tag for collecting single-line user input. The entered values are automatically bound to the Registration model object, processed by the controller, and displayed on the confirmation page using Spring MVC data binding.
Advantages
- Simplifies binding form data to model objects.
- Reduces manual request parameter handling.
- Supports validation and error handling integration.
Limitations
- Suitable only for single-line text input.
- Requires proper Spring MVC configuration.
- Does not provide validation by default.