Spring MVC Validation (original) (raw)
Spring MVC Validation is a mechanism used to verify user input before it is processed by the application. It helps ensure that submitted data meets predefined rules and constraints, improving data accuracy and application reliability. Spring supports validation through the Bean Validation API and its popular implementation, Hibernate Validator.
- Validates user input using declarative annotations such as @NotNull, @Size, and @Email.
- Reduces manual validation code by applying constraints directly to model classes.
- Improves data integrity and user experience by providing meaningful validation error messages.
Why Use Validation?
Validation provides several benefits in our java applications.
- Ensures data integrity and consistency.
- Prevents invalid data from reaching the business layer.
- Improves application security.
- Reduces manual validation code.
- Provides meaningful error messages to users.
How Validation Works in Spring MVC
The validation process typically follows these steps:
- Define validation rules using annotations in the model class.
- Apply the @Valid annotation to the controller method parameter.
- Use BindingResult to capture validation errors.
- Display validation messages to the user if validation fails.
Validation annotations
Spring MVC Validation annotations can be grouped into different categories based on the type of validation they perform.
Numeric Validation Annotations
These annotations are used to validate numeric values and ensure they fall within a specific range or satisfy certain conditions.
- ****@Min :** Checks whether the annotated value is greater than or equal to the specified minimum value
- ****@Max :** Checks whether the annotated value is less than or equal to the specified maximum value.
- ****@Positive :** Checks whether the annotated value is strictly greater than 0.
- ****@PositiveOrZero :** Checks whether the annotated value is greater than or equal to 0.
- ****@Negative :** Checks whether the annotated value is strictly less than 0.
- ****@NegativeOrZero :** Checks whether the annotated value is less than or equal to 0.
Null and Empty Validation Annotations
These annotations are used to ensure that required fields contain valid values and are not left empty.
- ****@NotNull :** Checks that the annotated value is not null.
- ****@NotBlank** : Checks that the annotated character sequence/string is not null and the trimmed length is greater than 0.
- ****@NotEmpty :** Checks that the annotated element is not null and not empty.
- ****@Null :** Checks that the annotated value is null.
String Validation Annotations
These annotations are commonly used to validate text-based input such as email addresses, passwords, and descriptions.
- ****@Email :** Checks whether the specified character sequence/string is a valid email address.
- ****@Pattern(regex=, flags=) :** Checks that the annotated string matches the specified regular expression.
- ****@Size :** Checks whether the size of the annotated element is within the specified range.
Boolean Validation Annotations
These annotations are used when a boolean field must have a specific value.
- ****@AssertFalse :** Checks that the annotated element is false.
- ****@AssertTrue** : Checks that the annotated element is true.
Steps to Implements Spring MVC Validation Annotations
Step 1: Create a Maven Project
- Open Eclipse IDE.
- Click File -> New -> Maven Project.
- Select Create a simple project (skip archetype selection).
- Click Next.
Step 2: Configure Maven Project
Enter the project details:
- **Group Id: com.example
- **Artifact Id: validation
- **Packaging: war
Click Finish.
Step 3: Add Required Dependencies
Open pom.xml and add the following dependencies:
XML `
<dependency>
    <groupId>org.springframework</groupId>
    <artifactId>spring-webmvc</artifactId>
    <version>6.2.12</version>
</dependency>

<dependency>
    <groupId>org.thymeleaf</groupId>
    <artifactId>thymeleaf-spring6</artifactId>
    <version>3.1.3.RELEASE</version>
</dependency>

<dependency>
    <groupId>jakarta.validation</groupId>
    <artifactId>jakarta.validation-api</artifactId>
    <version>3.1.1</version>
</dependency>

<dependency>
    <groupId>org.hibernate.validator</groupId>
    <artifactId>hibernate-validator</artifactId>
    <version>9.0.1.Final</version>
</dependency>

<dependency>
    <groupId>jakarta.servlet</groupId>
    <artifactId>jakarta.servlet-api</artifactId>
    <version>6.1.0</version>
    <scope>provided</scope>
</dependency>
`
Step 4: Configure DispatcherServlet and Thymeleaf
This configuration enables Spring MVC, component scanning, and Bean Validation support.
Java `
package com.example.validation.config;
import jakarta.validation.Validator; import org.springframework.context.ApplicationContext; import org.springframework.context.annotation.Bean; import org.springframework.context.annotation.ComponentScan; import org.springframework.context.annotation.Configuration; import org.springframework.validation.beanvalidation.LocalValidatorFactoryBean; import org.springframework.web.servlet.ViewResolver; import org.springframework.web.servlet.config.annotation.EnableWebMvc; import org.springframework.web.servlet.config.annotation.WebMvcConfigurer; import org.thymeleaf.spring6.SpringTemplateEngine; import org.thymeleaf.spring6.templateresolver.SpringResourceTemplateResolver; import org.thymeleaf.spring6.view.ThymeleafViewResolver;
@Configuration @EnableWebMvc @ComponentScan(basePackages = "com.example.validation") public class WebConfig implements WebMvcConfigurer {
private final ApplicationContext applicationContext;

public WebConfig(ApplicationContext applicationContext)
{
    this.applicationContext = applicationContext;
}

@Bean
public SpringResourceTemplateResolver templateResolver()
{

    SpringResourceTemplateResolver resolver
        = new SpringResourceTemplateResolver();

    resolver.setApplicationContext(applicationContext);
    resolver.setPrefix("/WEB-INF/views/");
    resolver.setSuffix(".html");
    resolver.setCharacterEncoding("UTF-8");

    return resolver;
}

@Bean public SpringTemplateEngine templateEngine()
{

    SpringTemplateEngine engine
        = new SpringTemplateEngine();

    engine.setTemplateResolver(templateResolver());

    return engine;
}

@Bean public ViewResolver viewResolver()
{

    ThymeleafViewResolver resolver
        = new ThymeleafViewResolver();

    resolver.setTemplateEngine(templateEngine());

    return resolver;
}

@Override public Validator getValidator()
{

    return new LocalValidatorFactoryBean();
}
}
`
Step 5: Configure Servlet Initializer
This class registers the DispatcherServlet and replaces the traditional web.xml configuration.
Java `
package com.example.validation.config;
import org.springframework.web.servlet.support.AbstractAnnotationConfigDispatcherServletInitializer;
public class MyWebAppInitializer extends AbstractAnnotationConfigDispatcherServletInitializer {
@Override protected Class<?>[] getRootConfigClasses()
{
    return null;
}

@Override protected Class<?>[] getServletConfigClasses()
{
    return new Class[] { WebConfig.class };
}

@Override protected String[] getServletMappings()
{
    return new String[] { "/" };
}
}
`
Step 6: Create Model Class(User)
The model class represents the form data submitted by the user. Validation annotations are applied to enforce input constraints before processing the request.
Java `
package com.example.validation.model;
import jakarta.validation.constraints.Email; import jakarta.validation.constraints.Min; import jakarta.validation.constraints.NotBlank; import jakarta.validation.constraints.Size;
public class User {
@NotBlank(message = "Name cannot be empty")
private String name;

@Email(message = "Enter valid email")
private String email;

@Size(min = 6, message = "Password must be at least 6 characters")
private String password;

@Min(value = 18, message = "Age must be 18 or above")
private int age;

public User() {
}

public String getName() {
    return name;
}

public void setName(String name) {
    this.name = name;
}

public String getEmail() {
    return email;
}

public void setEmail(String email) {
    this.email = email;
}

public String getPassword() {
    return password;
}

public void setPassword(String password) {
    this.password = password;
}

public int getAge() {
    return age;
}

public void setAge(int age) {
    this.age = age;
}
}
`
Step 7: Create Controller(UserController)
The controller handles incoming HTTP requests and coordinates between the view and model. It also triggers validation and processes form submissions.
Java `
package com.example.validation.controller;
import com.example.validation.model.User; import jakarta.validation.Valid; import org.springframework.stereotype.Controller; import org.springframework.ui.Model; import org.springframework.validation.BindingResult; import org.springframework.web.bind.annotation.GetMapping; import org.springframework.web.bind.annotation.PostMapping;
@Controller public class UserController {
@GetMapping("/register")
public String showForm(Model model) {

    model.addAttribute("user", new User());

    return "register";
}

@PostMapping("/save")
public String saveUser(@Valid User user,
                       BindingResult result) {

    if (result.hasErrors()) {
        return "register";
    }

    return "success";
}
}
`
Step 8: Create Registration Form(register.html)
This page provides a user interface for entering registration details. It also displays validation error messages returned by Spring MVC.
HTML `
Registration FormUser Registration Form
Name:
<input type="text" th:field="*{name}">
<span style="color:red"
      th:errors="*{name}"></span>

<br><br>

Email:
<input type="text" th:field="*{email}">
<span style="color:red"
      th:errors="*{email}"></span>

<br><br>

Password:
<input type="password" th:field="*{password}">
<span style="color:red"
      th:errors="*{password}"></span>

<br><br>

Age:
<input type="number" th:field="*{age}">
<span style="color:red"
      th:errors="*{age}"></span>

<br><br>

<button type="submit">
    Register
</button>
`
Step 9: Create Success Page(success.html)
After successful validation, the user is redirected to this page. It confirms that the submitted data has passed all validation checks.
HTML `
SuccessRegistration Successful
`
Step 10: Run Your Application
- Right-click project.
- Select Run As -> Run on Server.
- Choose Apache Tomcat Server.
- Click Finish.
Open the browser and access:
**Output:
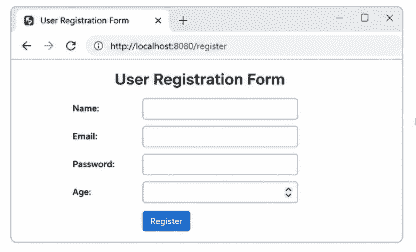
RegisterForm
Fill the registration form with valid details that satisfy all validation constraints and click the Register button.
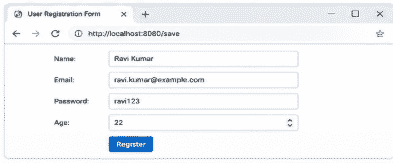
fillledForm
If all validation rules are satisfied, no errors are generated and the request proceeds to the success page.
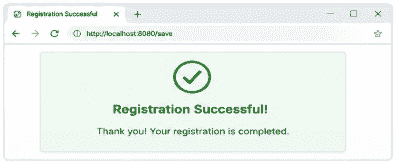
successForm
If any field contains invalid data or violates a validation rule, Spring MVC displays the corresponding error message on the same form page and prevents form submission until all errors are corrected.
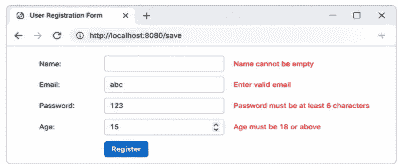
RegisterForm