WebApplicationContext in Spring MVC (original) (raw)
Last Updated : 22 May, 2026
WebApplicationContext is a specialized container in Spring MVC used for web applications. It provides configuration and manages web-related beans while also giving access to the ServletContext. Each DispatcherServlet creates its own WebApplicationContext to handle request processing independently.
- Supports web-specific features like access to ServletContext and servlet parameters.
- Allows multiple DispatcherServlets in the same application with separate configurations.
- Helps manage controllers, view resolvers, and other web-layer beans efficiently.
Types of WebApplicationContext
There are two types of WebApplicationContext commonly used in Spring MVC
1. XmlWebApplicationContext
- Uses XML configuration (spring-servlet.xml)
- Traditional configuration approach
- Suitable for legacy applications
2. AnnotationConfigWebApplicationContext
- Uses Java-based configuration (@Configuration)
- Supports component scanning
- Modern and widely used approach
Step by Step Implementation of WebApplicationContext
Follow these steps to create a WebapplicationContext in Speing Mvc
We are going to use Spring Tool Suite 4 IDE for this project. Please refer to this article to install STS in your local machine.
Step 1: Create Dynamic Web Project
- Open Spring Tool Suite (STS)
- Create a Dynamic Web Project
- Give project name (e.g., myfirst-mvc-project)
Step 2: Add Spring JAR Files
- Download Spring JARs
- Go to -> src -> main -> webapp -> WEB-INF -> lib
- Paste all Spring JAR files here
Step 3: Configure Tomcat Server
Refer to this article Configuration of Apache Tomcat Server and configure the tomcat server with your application. Now we are ready to go.
Step 4: Configure DispatcherServlet (web.xml)
Configuring Dispatcher Servlet: Go to the src > main > webapp > WEB-INF > web.xml file and the complete code for web.xml file is given below:
XML `
myfirst-mvc-project index.html index.jsp index.htm default.html default.jsp default.htm
frontcontroller-dispatcher org.springframework.web.servlet.DispatcherServlet 1 frontcontroller-dispatcher /student.com/*`
Step 5: Create Spring Configuration File
Now go to the src > main > webapp > WEB-INF and create an XML file. Actually, this is a Spring Configuration file like beans.xml file and the name of the file must be in this format -> frontcontroller-dispatcher-servlet.xml.
XML `
`
Step 6: Configure Component Scanning
Add component scan in XML file:
<context:component-scan base-package="com.student.controllers">
Step 7: Create Request Handler Method
@RequestMapping("/hello") maps the URL to a method, and @ResponseBody sends the returned value directly to the browser as output.
@ResponseBody
@RequestMapping("/hello")
public String helloWorld() {
    return "Hello World!";
}
Step 8: Create Controller Class
We create a controller class inside the package com.student.controllers and mark it with the @Controller annotation so that Spring can automatically recognize it as a web controller, create its object inside the container, and use it to handle incoming HTTP requests and return responses in a Spring MVC application.
Java `
package com.student.controllers;
import org.springframework.stereotype.Controller; import org.springframework.web.bind.annotation.RequestMapping; import org.springframework.web.bind.annotation.ResponseBody;
@Controller public class DemoController {
@ResponseBody
@RequestMapping("/hello")
public String helloWorld() {
return "Hello World!";
}}
`
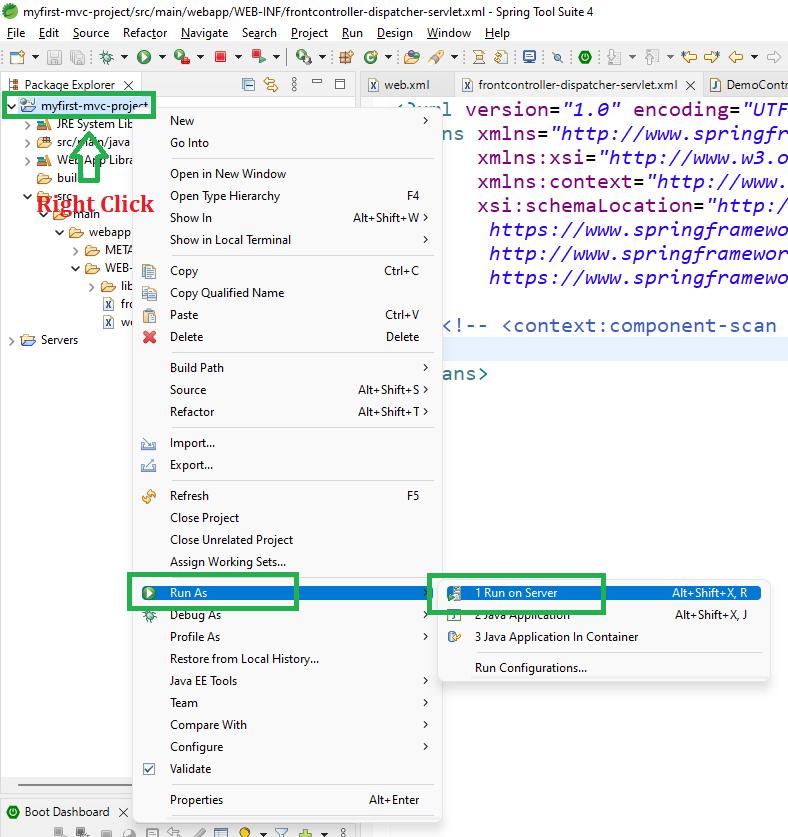
Step 9: Run Your Spring MVC Controller
To run your Spring MVC Application right-click on your project > Run As > Run on Server and run your application as shown in the below image.
After that use the following URL to run your controller as shown in the below image. All other details are mentioned in the image.
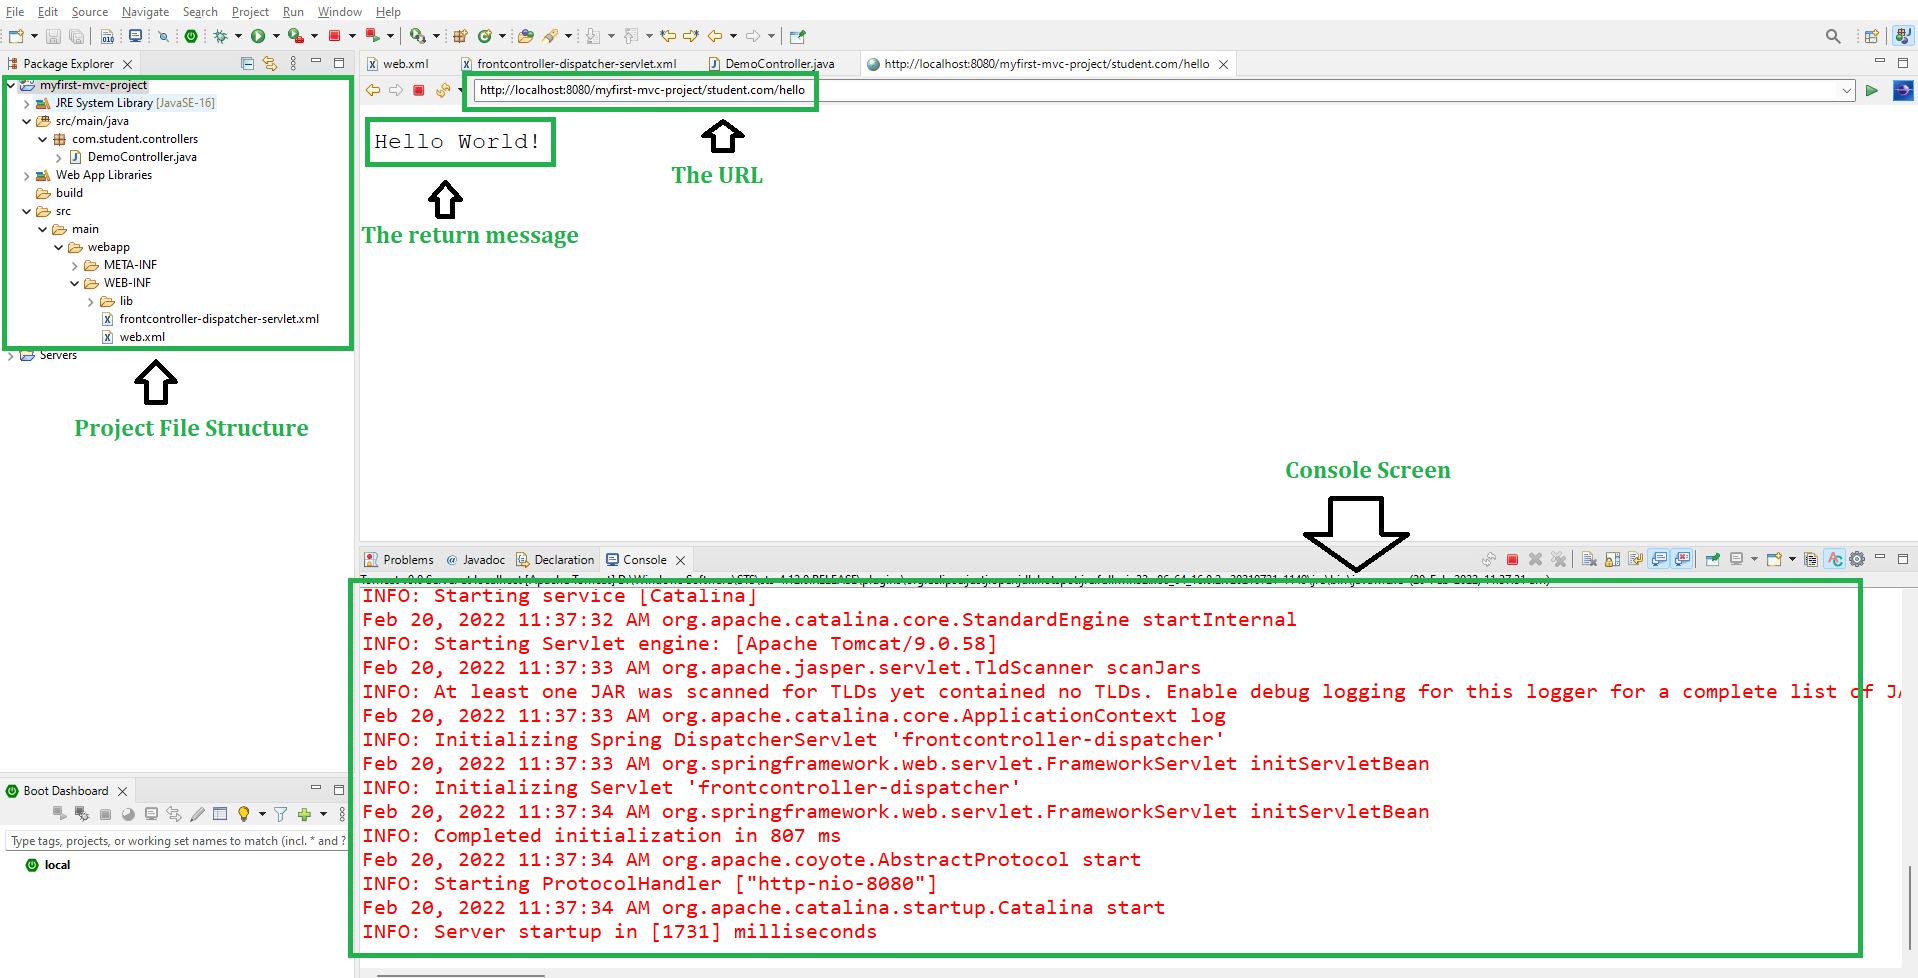
**Explanation: In this example, the request first goes to the DispatcherServlet, which loads the Spring config and scans the controller package. When the user hits /student.com/hello, it maps the request to helloWorld() using @RequestMapping, and @ResponseBody directly returns "Hello World!" to the browser.