How to create Pay Role Management Webpage using HTML CSS JavaScript ? (original) (raw)
Last Updated : 23 Jul, 2025
In this article, we are going to make a Pay Role Management webpage with Javascript. In this project, we are going to learn and clear the concepts of basic javascript.
**Prerequisites: The pre-requisites for this project are-
**Approach: To create our Pay Role Management webpage we are going to take the input bill amount and handle the error cases so that it throws an error if someone uses the negative value of bill amount or more than the given amount. Then we are going to apply our main logic to show the output of the minimum number of notes possible to return to the user as output(table). This webpage will actually count the minimum number of notes that the customer will get as a return in balance. Suppose the bill amount is 500 and you have a 2000 rupee so it calculates what no of minimum notes to be returned to the user.
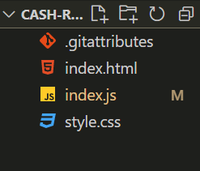
**Basic setup: Open VS Code and open a folder from your drive where you want to create this project and give the name (folderName). After opening creates the following files:
- **index.js
- **index.html
- **style.css
**Project Structure: It should look like this:
**Step 1: First we will create an HTML structure in **index.html. This is the main index page which is connected to the **style.css file for styling and **index.js for the logical operations in the website.
The HTML file contains basically three parts:
- **header
- **input sections
- **table(output)
In the header part we have the heading and in the input sections we have two inputs from the user one is the bill amount another is the amount given by the user. In the last part, we have a table to show the minimum number of notes to be returned to the user.
index.html `
Enter the bill amount and the cash given by the customer and know minimum number of notes to return
    <label for="input-bill">
        <strong>Enter the bill amount</strong>
    </label>
    <input class="input-bill" id="bill" />
    <label for="cash-given">
        <strong> Cash Given</strong>
    </label>
    <input class="cash-given" id="cash" />
    <button class="check-btn" id="btn">Check</button>
    <p id="error">
    </p>

    <table class="table">
        <caption>
            <strong>Return Change</strong>
        </caption>
        <tr class="row">
            <th class="row">No of Notes</th>
            <td class="no-of-notes"></td>
            <td class="no-of-notes"></td>
            <td class="no-of-notes"></td>
            <td class="no-of-notes"></td>
            <td class="no-of-notes"></td>
            <td class="no-of-notes"></td>
            <td class="no-of-notes"></td>
        </tr>
        <tr>
            <th class="row">Notes</th>
            <td class="row">2000</td>
            <td class="row">500</td>
            <td class="row">100</td>
            <td class="row">20</td>
            <td class="row">10</td>
            <td class="row">5</td>
            <td class="row">1</td>
        </tr>
    </table>
</div>
`
**Step 2: Now inside the javaScript file we will take the id of the button and inputs number and outputs number to inner Html. The logical part of the cash remaining is to provide the number of notes as minimum as possible.
- Calculate the remaining value of the i.e entered amount-.bill amount.
- Handle the errors.
- Run a loop in the notes array and calculate the minimum number of notes. trunc() is a function in javascript whichtruncates (cuts off) the dot and the digits to the right of it.
- Finally our output is shown according to the indices of the notes(noOfNotes). index.js `
var inputBill = document.getElementById("bill"); var cashGiven = document.getElementById("cash"); var checkBtn = document.getElementById("btn"); var errMsg = document.getElementById("error"); var noOfNotes = document.querySelectorAll(".no-of-notes"); var notes = [2000, 500, 100, 20, 10, 5, 1];
function errorHandle(error) { errMsg.style.display = "block"; errMsg.innerText = error; }
function hideMessage() { errMsg.style.display = "none"; }
function clickHandler() { hideMessage(); if (inputBill.value < 0) { errorHandle("Please Enter a positive value"); } else { var remaining = cashGiven.value - inputBill.value; if (remaining < 0) { errorHandle("Give me more"); } else { for (var i = 0; i < notes.length; i++) { const paisa = Math.trunc(remaining / notes[i]); remaining %= notes[i]; noOfNotes[i].innerText = paisa;
        }

    }
}
}
checkBtn.addEventListener("click", clickHandler);
`
**Step 3: Now we will style the web page. Here the main container is given padding and display as flex with direction as column and background color blue. We have also bordered the table with solid black, also styled the button.
style.css `
.container { display: flex; flex-direction: column; width: 25vw; margin-left: 500px; padding: 50px; background-color: aqua; }
.table { border: 2px solid black; }
.row { border: 2px solid black; }
.no-of-notes { border: 2px solid black; }
.check-btn { margin-top: 35px; padding: 5px; }
.input-bill { margin-top: 35px; padding: 5px; }
.cash-given { margin-top: 35px; padding: 5px; }
`
**Final Code: After combining the above three sections of codes i.e. HTML, CSS, and JavaScript part, we will get the desired result.
HTML `
Enter the bill amount and the cash given by the customer and know minimum number of notes to return
  <label for="input-bill"><strong>Enter the bill amount</strong></label>
  <input class="input-bill" id="bill" />
  <label for="cash-given"><strong> Cash Given</strong></label>
  <input class="cash-given" id="cash" />
  <button class="check-btn" id="btn">Check</button>
  <p id="error">
  </p>

  <table class="table">
     <caption>
        <strong>Return Change</strong></caption>
     <tr class="row">
        <th class="row">No of Notes</th>
        <td class="no-of-notes"></td>
        <td class="no-of-notes"></td>
        <td class="no-of-notes"></td>
        <td class="no-of-notes"></td>
        <td class="no-of-notes"></td>
        <td class="no-of-notes"></td>
        <td class="no-of-notes"></td>
     </tr>
     <tr>
        <th class="row">Notes</th>
        <td class="row">2000</td>
        <td class="row">500</td>
        <td class="row">100</td>
        <td class="row">20</td>
        <td class="row">10</td>
        <td class="row">5</td>
        <td class="row">1</td>
     </tr>
  </table>
`
**Output: Install live server extension in VS Code. Click on Live Server and our website is ready now.