How to GET Data From API using Retrofit Library in Android? (original) (raw)
Last Updated : 23 Jul, 2025
A GET request is one of the HTTP request methods that can be used to retrieve data from a server. In an API context, a GET request is typically used to retrieve a specific resource or a collection of resources from a server. When a client makes a GET request to a server, it sends a request message that contains the URL of the desired resource along with any optional query parameters. The server then responds with a response message that contains the requested data, typically in the form of a JSON or XML document.
In this article we are going to see how we can GET data from an API using the Retrofit library, for this we have to follow some steps :
- Define a data model that represents the response data you expect to receive from the API endpoint.
- Define an interface that describes the API endpoints you want to access. This interface should include one or more methods that specify the HTTP method (e.g. GET), the endpoint URL, and any query parameters
- Use Retrofit to create an implementation of your API interface. This implementation will handle making HTTP requests and parsing the response data.
- Call the desired method on the implementation to initiate the HTTP request. You can use the enqueue() method to execute the request asynchronously and receive the response data in a callback function.
**Api Link: https://api.chucknorris.io/jokes/random
**About the API: it is a free Jokes API. The Jokes are refreshed in every Call. It is a GET Request API Call.
**Step by Step Implementation:
**Step 1: Create a New Project
To create a new project in Android Studio please refer to How to Create/Start a New Project in Android Studio and select the language as Kotlin
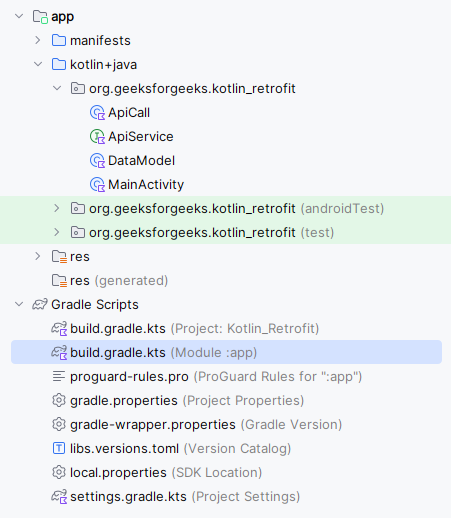
Directory Structure of Application
**Step 2: Add the below dependency in your build.gradle file
Navigate to the **Gradle Scripts > build.gradle(Module:app) and add the below dependency in the dependencies section.
dependencies {
...
implementation ("com.squareup.retrofit2:retrofit:2.9.0")
implementation ("com.squareup.retrofit2:converter-gson:2.9.0")
}
After adding you need to **sync your project.
**Note: The Dependencies added will only work in Kotlin DSL Configuration Language not for Groovy DSL in case of Groovy DSL enclose the dependency in the single quotes(') and remove the round brackets.
**Step 3: Adding permissions to the internet in the AndroidManifest.xml file
Navigate to the **app > AndroidManifest.xml and add the below code to it.
**Step 4: Working with the activity_main.xml file
Navigate to the **app > res > layout > activity_main.xml and add the below code to that file. Below is the code for the activity_main.xml file.
**activity_main.xml:
activity_main.xml `
<!--Button-->
<Button
    android:layout_width="wrap_content"
    android:layout_height="wrap_content"
    android:id="@+id/btn_joke"
    android:text="Get Joke" />

<!--TextView-->
<TextView
    android:layout_marginTop="10dp"
    android:layout_width="wrap_content"
    android:layout_height="wrap_content"
    android:text="Jokes : "
    android:textColor="@color/black"
    android:textStyle="bold"
    android:textSize="16sp"
    app:layout_constraintBottom_toBottomOf="parent"
    app:layout_constraintEnd_toEndOf="parent"
    app:layout_constraintStart_toStartOf="parent"
    app:layout_constraintTop_toTopOf="parent" />

<!--TextView-->
<TextView
    android:layout_margin="10dp"
    android:id="@+id/tv_joke"
    android:layout_width="wrap_content"
    android:layout_height="wrap_content"
    android:padding="24dp"
    android:textColor="@color/black"
    android:textStyle="bold"
    android:textSize="16sp"
    app:layout_constraintBottom_toBottomOf="parent"
    app:layout_constraintEnd_toEndOf="parent"
    app:layout_constraintStart_toStartOf="parent"
    app:layout_constraintTop_toTopOf="parent" />

<!--progress bar for loading -->
<ProgressBar
    android:id="@+id/idLoadingPB"
    android:layout_width="wrap_content"
    android:layout_height="wrap_content"
    android:layout_gravity="center"
    android:visibility="gone" />
`
**Step 5: Creating a Model Class for our jokes
Navigate to the **app > java > your app’s package name > Right-click on it > New > create a data class named as **DataModel and add the below code to it. Comments are added inside the code to understand the code in more detail.
**DataModel.kt:
DataModel.kt `
package org.geeksforgeeks.demo
// Model class for our Jokes data class DataModel( var categoories:ArrayList, var created_at: String, var icon_url:String, var id:String, var updated_at:String, var url:String, var value:String ):java.io.Serializable
`
**Step 6: Creating an Interface class for our API
Navigate to the **app > java > your app’s package name > Right-click on it > New > interface and name the file as **ApiService and add the below code to it. Comments are added inside the code to understand the code in more detail.
**ApiService.kt:
ApiService.kt `
package org.geeksforgeeks.demo
import retrofit2.Call import retrofit2.http.GET
// This interface defines an API // service for getting random jokes. interface ApiService { // This annotation specifies that the HTTP method // is GET and the endpoint URL is "jokes/random". @GET("jokes/random") // This method returns a Call object with a generic // type of DataModel, which represents // the data model for the response. fun getJokes(): Call }
`
**Step 7: Create a class for handling API Calls
Navigate to the **app > java > your app’s package name > Right-click on it > New > class and name the file as **ApiCall and add the below code to it. Comments are added inside the code to understand the code in more detail. In this call, we are going to make a Get request to our API using the Retrofit library.
**ApiCall.kt:
ApiCall.kt `
package org.geeksforgeeks.demo
import android.content.Context import android.widget.Toast import retrofit2.* import retrofit2.converter.gson.GsonConverterFactory
class ApiCall { // This function takes a Context and callback function // as a parameter, which will be called // when the API response is received. fun getJokes(context: Context, callback: (DataModel) -> Unit) {
    // Create a Retrofit instance with the base URL and
    // a GsonConverterFactory for parsing the response.
    val retrofit: Retrofit = Retrofit.Builder().baseUrl("https://api.chucknorris.io/").addConverterFactory(
        GsonConverterFactory.create()).build()

    // Create an ApiService instance from the Retrofit instance.
    val service: ApiService = retrofit.create(ApiService::class.java)

    // Call the getJokes() method of the ApiService
    // to make an API request.
    val call: Call<DataModel> = service.getJokes()

    // Use the enqueue() method of the Call object to
    // make an asynchronous API request.
    call.enqueue(object : Callback<DataModel> {
        // This is an anonymous inner class that implements the Callback interface.
        override fun onResponse(call: Call<DataModel>, response: Response<DataModel>) {
            // This method is called when the API response is received successfully.

            if(response.isSuccessful){
                // If the response is successful, parse the
                // response body to a DataModel object.
                val jokes: DataModel = response.body() as DataModel

                // Call the callback function with the DataModel
                // object as a parameter.
                callback(jokes)
            }
        }

        override fun onFailure(call: Call<DataModel>, t: Throwable) {
            // This method is called when the API request fails.
            Toast.makeText(context, "Request Fail", Toast.LENGTH_SHORT).show()
        }
    })
}
}
`
**Step 8: Working with the MainActivity.kt file
Go to the MainActivity.kt and follow the below code. Below is the code for the MainActivity.kt. Comments are added inside the code to understand the code in more detail. In this mainly we are going to call the **ApiCall class **getJokes() method.
**MainActivity.kt:
MainActivity.kt `
package org.geeksforgeeks.demo
import android.os.Bundle import android.view.View import android.widget.Button import android.widget.ProgressBar import android.widget.TextView import androidx.appcompat.app.AppCompatActivity
class MainActivity : AppCompatActivity() {
private lateinit var button: Button
private lateinit var textView: TextView
private lateinit var progressBar: ProgressBar

override fun onCreate(savedInstanceState: Bundle?) {
    super.onCreate(savedInstanceState)
    setContentView(R.layout.activity_main)

    // Find the button view by its ID and assign it to a variable.
    button = findViewById(R.id.btn_joke)

    // Find the text view by its ID and assign it to a variable.
    textView = findViewById(R.id.tv_joke)

    // Find the progress bar and assign it to the variable.
    progressBar = findViewById(R.id.idLoadingPB)

    // Set an OnClickListener on the button view.
    button.setOnClickListener {
        // show the progress bar
        progressBar.visibility = View.VISIBLE

        // Call the getJokes() method of the ApiCall class,
        // passing a callback function as a parameter.
        ApiCall().getJokes(this) { jokes ->
            // Set the text of the text view to the
            // joke value returned by the API response.
            textView.text = jokes.value
            // hide the progress bar
            progressBar.visibility = View.GONE
        }
    }
}
}
`
**Output:
Check out the github repo to get the entire code: Using Retrofit in the Kotlin Android Application