Deploying and Managing Linux in the Cloud (original) (raw)
Last Updated : 5 May, 2026
Deploying and managing Linux in the cloud involves running Linux-based systems on cloud platforms to build scalable, secure and highly available infrastructure. It combines Linux administration skills with cloud services to efficiently deploy, monitor and maintain applications.
- Linux is the preferred operating system for cloud servers and infrastructure
- Cloud platforms provide on-demand resources and scalability
- Effective management ensures security, performance and reliability
- Automation and monitoring are essential for cloud-based Linux systems
Deploying Linux in the Cloud
Deploying Linux in the cloud means creating and running Linux-based servers on cloud platforms to host applications, services and infrastructure in a scalable and on-demand environment.
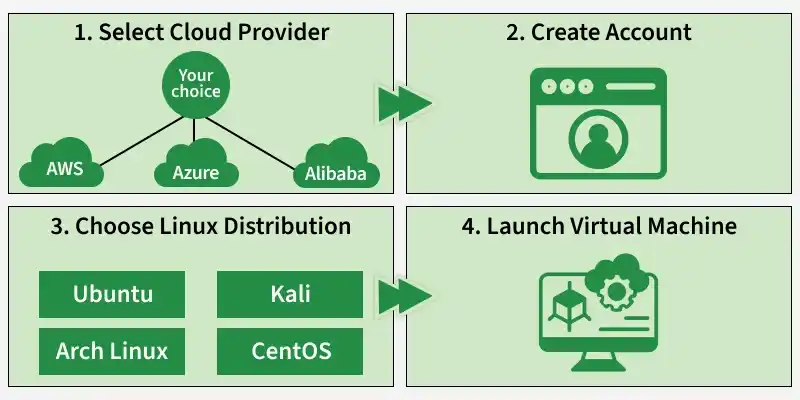
Phase 1: Select a Cloud Provider
Choose a cloud provider based on your requirements, such as cost, geographic presence and available services. The major cloud providers offer Linux support, so you can deploy Linux virtual machines (VMs) easily.
- **Amazon Web Services (AWS): Amazon Web Services (AWS) is a leading cloud provider that offers highly scalable, reliable and secure Linux virtual machines with a wide range of compute, storage and networking services.
- **Microsoft Azure: Microsoft Azure is a global cloud platform that provides strong Linux support with seamless integration into enterprise and hybrid cloud environments.
- **Alibaba cloud: Alibaba Cloud is a major cloud provider, especially popular in Asia, offering cost-effective Linux virtual machines and robust cloud services for large-scale applications.
Phase 2: Create an Account
To deploy Linux in the cloud, a cloud account must be created with the selected provider.
Step 1: Sign Up for an AWS Account
**1. Visit the AWS Website:
- Go to the AWS website at [https://aws.amazon.com/%5D(https://aws.amazon.com/).
**2. Click "Create an AWS Account":
- You'll find this option in the top-right corner of the AWS homepage. Click it to start the registration process.
**3. Enter Your Information:
- Provide your email address and choose a password for your AWS account.
- Click "Next."
**4. Contact Information:
- Enter your contact information, including your name, address and phone number.
- Click "Next."
**5. Payment Information:
- Enter your payment details. AWS requires a valid credit card to verify your identity and for billing purposes. Don't worry; they offer a free tier with limited resources for the first 12 months.
- Click "Verify and Add."
**6. Identity Verification:
- AWS will attempt to verify your identity. You may be asked to enter a phone number for identity verification.
- Follow the instructions provided to complete this step.
**7. Choose a Support Plan (Optional):
- You can choose between a free support plan or a paid support plan depending on your needs. The free plan is typically sufficient for beginners.
- Click "Continue."
**8. Review and Confirm:
- Review your account information, including the terms and conditions.
- Click "Create Account."
**9. Confirmation Email:
- You'll receive a confirmation email from AWS. Follow the link in the email to verify your email address and activate your AWS account.
Step 2: Sign In to Your AWS Account
**1. Once your account is activated, go back to the AWS website:
**2. Click "Sign In to the Console":
- Use the email address and password you provided during the registration process to sign in to the AWS Management Console.
Step 3: Access and Manage Linux Instances
Now that you have an AWS account, you can proceed to deploy and manage Linux instances (virtual machines) in the AWS cloud:
**1. Launch an EC2 Instance:
- In the AWS Management Console, search for "EC2" and select it under "Compute."
**2. Launch an Instance:
- Click the "Launch Instance" button to create a new virtual machine (EC2 instance).
**3. Follow the steps to configure your Linux instance:
- Choose an Amazon Machine Image (AMI).
- Choose an instance type.
- Configure instance details.
- Add storage.
- Configure security groups (firewall rules).
- Review and launch the instance.
**4. Access and manage your Linux instance using SSH:
- Once your instance is running, use an SSH client to connect to it using the public IP address or DNS name provided in the AWS Management Console.
**5. Manage your Linux instance as needed:
- You can install software, configure services and deploy applications on your Linux instance in the AWS cloud.
Phase 3: Choose a Linux Distribution
Decide on the Linux distribution that suits your needs. Popular choices include Ubuntu, CentOS, Debian and Red Hat Enterprise Linux (RHEL). Most cloud providers offer a variety of pre-configured Linux images.
Here are a few popular Linux distributions and their common use cases.
- **Ubuntu: Known for its ease of use and extensive community support, Ubuntu is a popular choice for general-purpose cloud deployments and development environments.
- **Kali: Kali Linux is a security-focused Linux distribution designed for penetration testing, digital forensics and ethical hacking.
- **Arch Linux: Arch Linux is a lightweight and flexible Linux distribution that follows a rolling-release model, allowing users to build and customize their system from the ground up.
- **CentOS (or its successor, AlmaLinux): CentOS is known for its stability and compatibility with Red Hat Enterprise Linux (RHEL). It has been widely used in enterprise environments. After CentOS 8, the community project shifted to CentOS Stream and many users migrated to alternatives like AlmaLinux.
Phase 4: Launch a Virtual Machine
Deploy a virtual machine instance with your chosen Linux distribution. You can typically do this through the cloud provider's web console or command-line tools like AWS CLI, Azure CLI or gcloud.
To launch a virtual machine (VM) when deploying and managing Linux in the cloud, follow these steps:
**1. Sign In:
- Log in to your cloud provider's web console (e.g., AWS, Azure, GCP) with your credentials.
**2. Access Compute Services:
- Navigate to the compute services section (e.g., AWS EC2, Azure Virtual Machines).
**3. Create Instance:
- Click "Launch Instance" or its equivalent.
- Choose a Linux-based virtual machine image (AMI) or template.
**4. Configure Instance:
- Select the instance type (hardware configuration).
- Configure networking, storage and any additional settings.
**5. real time:
- Define security groups or firewall rules to control inbound and outbound traffic.
**6. Review & Launch:
- Review your configuration settings.
- Click "Launch" or similar.
**7. Key Pair (SSH Key):
- Choose an existing SSH key pair or create a new one.
- Save the private key for future SSH access.
**8. Launch Instance:
- Click "Launch Instance" to create the VM.
**9. Access VM:
- Once the VM is running, access it via SSH using the key pair and the public IP/DNS provided.
**10. Manage Your VM:
- Install software, configure services and deploy applications as needed.
**11. Monitor & Secure:
- Monitor the VM's performance, apply security best practices and manage it according to your requirements.
Managing Linux in the Cloud
Managing Linux in the cloud focuses on keeping systems secure, stable and scalable after deployment. Below are four essential sections commonly followed in real-world cloud environments.
1. Monitoring and Performance Management
Monitoring ensures Linux servers are running efficiently and issues are detected early.
- Track CPU, memory, disk and network usage
- Monitor service health and application performance
- Set alerts for failures or resource thresholds
Effective monitoring helps prevent downtime and performance bottlenecks.
2. Security and Access Management
Security is a critical responsibility when managing Linux in the cloud.
- Use SSH key-based authentication instead of passwords
- Apply firewall rules and security groups
- Enforce least-privilege access and audit logs
- Keep systems patched with security updates
Strong security practices protect systems from unauthorized access.
3. Automation and Configuration Management
Automation reduces manual effort and ensures consistency.
- Automate system configuration and deployments
- Use scripts or configuration management tools
- Standardize server setups across environments
Automation improves reliability and minimizes human error.
4. Backup, Scaling and Maintenance
Ongoing maintenance ensures long-term stability and availability.
- Perform regular backups and test recovery
- Scale resources based on workload demand
- Review logs, usage and costs periodically
This ensures Linux systems remain resilient and cost-effective.